
1
CAUTION
Read Rules for Safe Operation and Instructions Carefully.
WARNING
1.
To reduce the risk of fire or electric shock, do not use this fan with any solid state
speed control device.
2.
This appliance has a polarized plug (one blade is wider than the other). To reduce
the risk of electric shock, this plug is intended to fit in a polarized outlet only one
way. If plug does not fit fully in the outlet, reverse plug. If it still does not fit, contact
a qualified electrician. Do not attempt to defeat this safety feature.
3.
Do not leave the fan running unattended.
4.
Do not mix old and new batteries. Do not mix alkaline, standard (carbon-zinc), or
rechargeable (nickel-cadmium) batteries.
5.
To reduce the risk of electric shock and injury to persons, DO NOT use this fan in a
window.
6.
Be sure to unplug or disconnect from the electrical supply before servicing.
RULES FOR SAFE OPERATION
1. Never insert fingers, pencils, or any other object through the housing when tower fan
is running.
2. Disconnect it when moving from one location to another.
3. Disconnect fan when cleaning.
4. Be sure fan is on a stable surface when operating to avoid overturning.
5. Check the power cord of the fan before using. If there’s any visible damage, stop
using it.
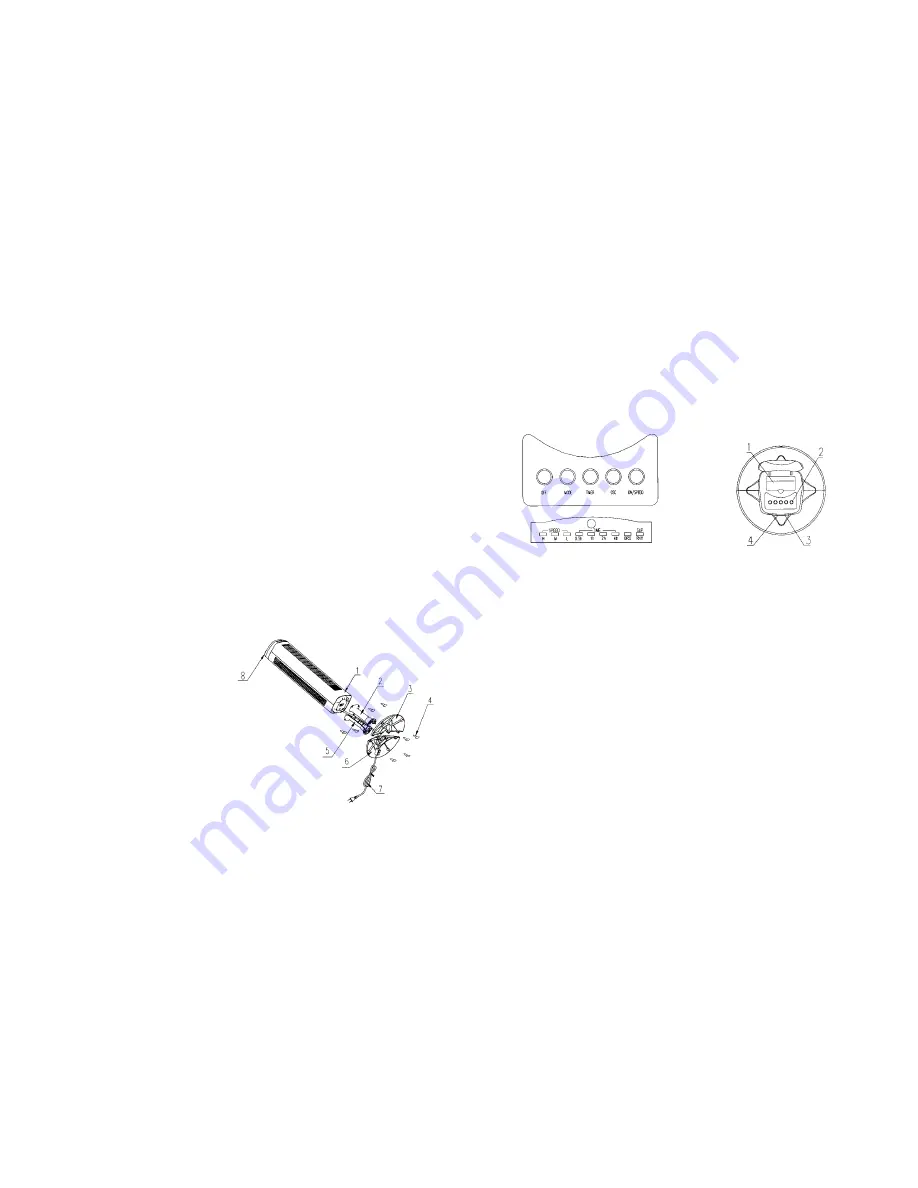
PARTS NAME
1. Body 2. Front column 3. Front
base 4. Screw 5. Rear column
6. Rear base 7. Power cord
8. Transparent cover
PARTS ASSEMBLY
1. Pull power cord out slightly.
2. Put the power cord (7) through
the groove of the front column (2)
and the rear column (5), Make the
two pieces of base snap together.
3. Fix the columns to the bottom of body (1) with four screws (4) as shown in the Parts
Name drawing. The screws are packed in plastic bag
4. sticked to the bottom of the base. The protrusion at the edge of the column should
match the notch on the bottom of the body.
5. Pass power cord through the hole of the rear base (6), Insert the rear base into
the front base (3), then turn four screws tight.
6. Fix transparent cover onto the top of the unit by one side, and then repeat with
the other side.
OPERATING INSTRUCTIONS
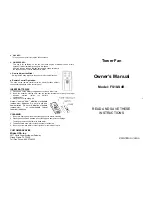
a. Control parts description:
1. Remote Control Box 2. Control Key 3. LED 4. Receptor
b. The Plate with Control:
1.
OFF KEY:
Press this key to switch the fan off.
2. MODE
KEY:
This key is a selector key for wind type, The wind type changes in the sequence
from NORMAL to NATURAL to SLEEP when this key being touched repeatedly
or depressed. The 2 LED lights at the right side display the current setting.
“ORD” is Normal wind type, “RHY” is Natural wind type, and “SLP” is Sleep wind
type. NORMAL will keep the speed you've selected constant. NATURAL will
cycle through a variety of speeds from LOW to HIGH simulating a natural
outdoor breeze. The SLEEP will begin at the speed you've selected and slow
down every half an hour until it reaches the end of " time" you've selected. It will
then remain constant at LOW speed.
The SLP/RHY LED gives out red light when setting is Natural wind type, and
green light when setting is Sleep wind type.
3. TIMER
KEY
This key may be touched repeatedly or depressed. This allows the timer to be
set in half-hour increments up to 7.5 hours.
Do not press the timer key when the fan is required to operate continuously. In
that case all Time LEDs don’t light.


