background image

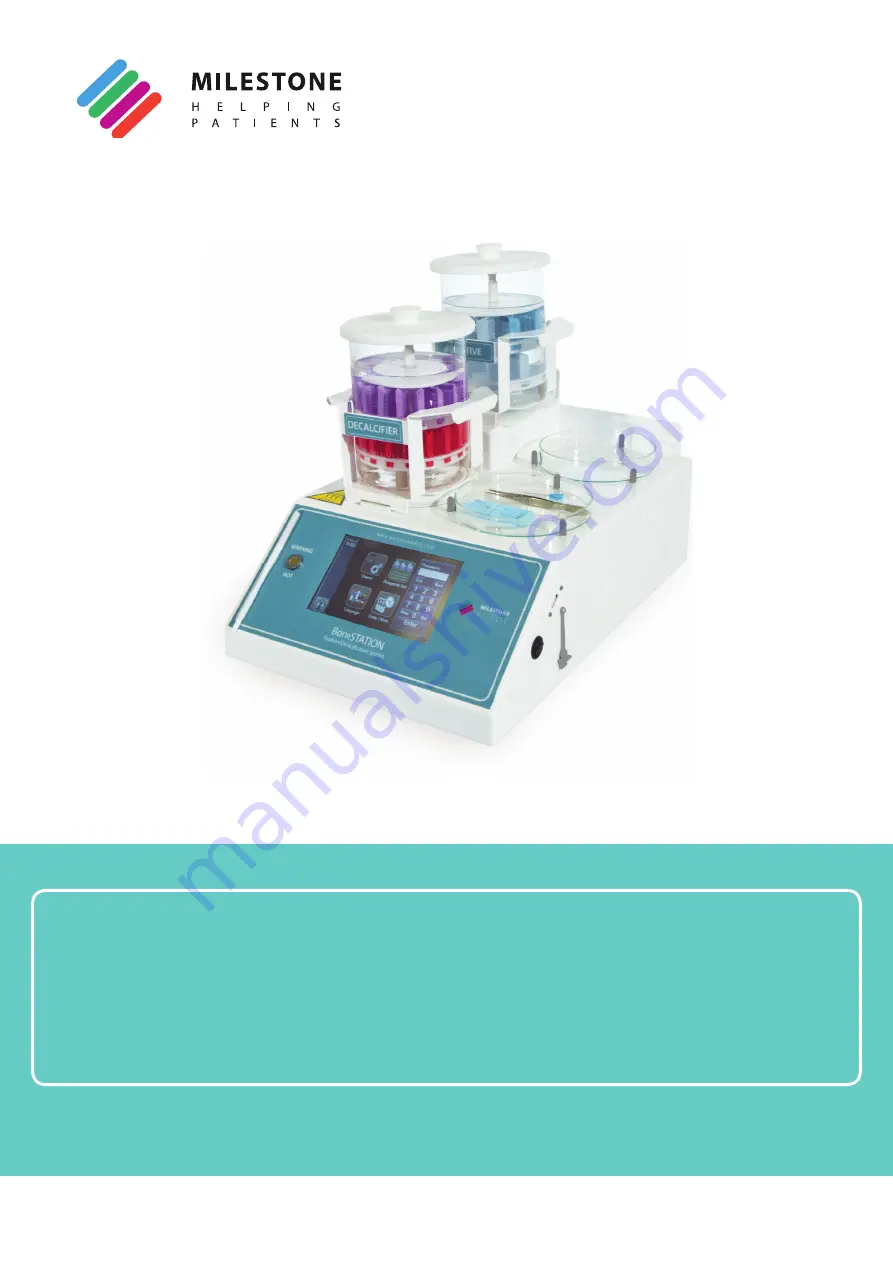
BoneSTATION

Fixation/Decalcifi cation System

Operator Manual - MM093

Summary of Contents for BoneSTATION

Page 1: ...BoneSTATION Fixation Decalcification System OperatorManual MM093 ...

Page 2: ......

Page 3: ...read this operator manual carefully and always keep it within reach for convenient and quick referencing For any clarification or request for assistance please contact our representative in your country Or contact Milestone s r l Via Fatebenefratelli 1 5 24010 Sorisole BG Italy Tel 39 035 412 8264 Fax 39 035 575498 web site www milestonemed com e mail marketing milestonemedsrl com Read this manual...

Page 4: ...ample zone 32 4 REAGENT MANAGEMENT 33 5 SETTINGS 34 5 1 Owner 34 5 2 Reagent list 35 5 3 Date time 35 6 MAINTENANCE 36 6 1 Daily 36 7 GOOD LABORATORY PRACTICE FOR BONE DECALCIFICATION 37 7 1 Guideline for the bone samples fixation 37 7 2 Decalcification guidelines 38 7 2 1 Protocols for decalcification of bone marrow biopsies 1 8mm 39 7 2 2 Protocols for decalcification of bone marrow biopsies 5mm...

Page 5: ...solution REF 51413 56 9 7 Magnetic touch pen CODE 50597 M 56 9 8 Glass containers CODE 67724 56 9 9 Power cord for devices at 230V 50 60Hz Schuko CODE 50036 57 9 10 Power cord for devices at 115V 60Hz NEMA 5 15 CODE 50391 57 A APPENDIX 58 A 1 How to manage an alarm 58 The manufacturer reserves the right to change and or improve specifications without notice and without incurring any obligation ...

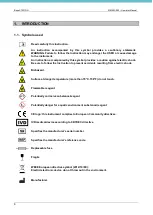
Page 6: ...on to prevent accidents resulting from electric shock Biohazard Surface at danger temperature more than 70 C 158 F do not touch Flammable reagent Potentially corrosive substance reagent Potentially danger for aquatic environment substance reagent CE logo this instrument complies to European Community directives IVD medical device according to 98 79 EC directive Specifies the manufacturer s serial ...

Page 7: ...cal sample preparation procedures The instrument is intended for laboratory use indoor use only BoneSTATION is specifically designed to execute these processes for histopathological applications Fixation Decalcification BoneSTATION must be operated exclusively with the reagents listed in section Compatible reagents chapter 1 7 Any other use of the instrument should be deemed as misuse and voids th...

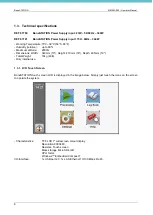
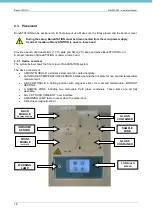
Page 8: ...2000m Dimensions Width 340mm 13 Height 410mm 16 Depth 495mm 19 Total Weight 18kg 40lb Only internal use 1 3 1 LCD Touch Screen BoneSTATION touch screen LCD is displayed in the image below Simply just touch the icons on the screen to operate the system Characteristics TFT LCD 7 widescreen colour display Resolution 800X480 Resistive Touch screen Mass storage MicroSD 4GB CPU 1GHz Windows Embedded Com...

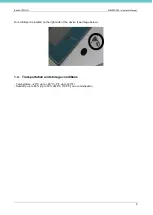
Page 9: ...tor Manual 9 One USB port is located on the right side of the device see image below 1 4 Transportation and storage conditions Temperature 20 C up to 60 C 4 F up to 140 F Humidity up to 80 up to 50 at 40 C 104 F non condensation ...

Page 10: ...ndards for safety and good laboratory practices are applied Always use common sense and the best known practice when operating the instrument Failure to follow the instructions in the documentation might lead to a reduction of device safety The Competent Authority owning the instrument has primary responsibility for accident free operation together with designated personnel who operates SERVICE or...

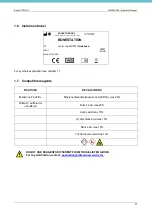
Page 11: ...T MANUFACTURED For symbols explanation see chapter 1 1 1 7 Compatible reagents FIXATIVES DECALCIFIERS Milestone FineFIX Ethylenediaminetetraacetic acid EDTA max 20 Formalin buffered or unbuffered Formic acid max 20 Acetic acid max 10 Hydrochloric acid max 10 Nitric acid max 10 Trichloroacetic acid max 10 DO NOT USE REAGENTS DIFFERENT FROM THOSE LISTED ABOVE For any clarification contact applicatio...

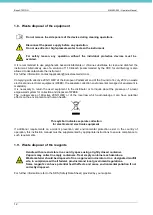
Page 12: ...bol indicates separate collection for electrical and electronic equipment If additional requirements on accident prevention and environmental protection exist in the country of operation this instruction manual must be supplemented by appropriate instructions to ensure compliance to such requirements 1 9 Waste disposal of the reagents For further information refer to the SDS Safety Data Sheet prov...

Page 13: ...ore use and gloves must be worn when using this instrument You must wear gloves when operating the system If the device needs to be returned to Milestone s r l for repairs the device must be cleaned up and disinfected prior to shipment refer to chapter 6 Any devices that have not been disinfected will not be accepted and you will be contacted with regards to disinfection cost In accordance with in...

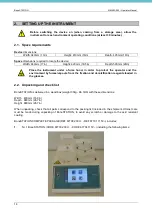
Page 14: ... to protect the operator and the environment by fumes vapours from the fixation and decalcification reagents loaded in the glasses 2 2 Unpacking and check list BoneSTATION is delivered in a wood box weight 30kg 66 14lb with these dimensions Width 430mm 16 9in Depth 680mm 26 7in Height 680mm 26 7in When unpacking check that all parts correspond to the packing list included in the shipment Utmost ca...

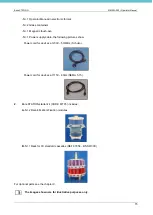
Page 15: ...e the following pictures show Power cord for devices at 230V 50 60Hz Schuko Power cord for devices at 115V 60Hz NEMA 5 15 2 BoneSTATION starter kit CODE 67705 includes A Nr 2 Decalcification Fixation modules B Nr 1 Rack for 30 standard cassettes REF 67854 BNS R30C For optional parts see the chapter 9 The images shown are for illustrative purposes only ...

Page 16: ...w shows the front view of BoneSTATION system The device consists of A FRONT MODULE a stainless steel ceramic coated hot plate An INFRARED TEMPERATURE SENSOR installed behind the hot plate for non contact temperature measurement A BACK MODULE a holding position with magnetic stirrer for a second histomodule WITHOUT HEATING A SAMPLE ZONE including two removable Petri glass containers These items are...

Page 17: ...pply must be protected by a residual current circuit breaker with over current protection interrupt capability equal or more than 6000A nominal current 10A characteristic C curve residual current 30mA Power line must have potential earth connection Before connecting the plug to the laboratory s socket check that the power supply voltage of the device matches the power supply line of the laboratory...

Page 18: ...ION on using the power switch located on the right side of the device front panel BoneSTATION is now ready for use 2 5 Reagents Complete the set up with reagents by providing at least FIXATION REAGENTS 1L Formalin 10 or FineFIX DECALCIFICATION REAGENTS 1L MoL DECALCIFIER or Formic acid 10 ...

Page 19: ...er is auto tuned by a PID controller The operator must only set up the desired parameters Time and Temperature The device will always reproduce the same conditions of temperature in the set times by automatically adjusting the power level The following section shows how to run and modify the program values with BoneSTATION software Use the touch screen to select the desired menu 3 1 Prepare the hi...

Page 20: ...t depends on the number of cassettes used the correct level is approximately 1cm 0 4 inch above the cassettes 1LAYER reagent about 800ml 2LAYERS reagent about 1300ml When the reagent level is adequate to cover all the cassettes position the glass in the metal holder then put the module in the correct position on the BoneSTATION according to your needs either hot plate or holding position ...

Page 21: ...in the DECALCIFIER metallic holder 3 2 Run Fixation and Decalcification programs 3 2 1 Fixation This phase is composed by 1 PRESOAKING carried out in the HOLDING POSITION and with fixative NOT heated but just agitated 2 HEATED FIXATION carried out in the HOT PLATE with fixative heated and agitated It is possible to skip the pre soaking step if samples have already been pre soaked in fixative out o...

Page 22: ... white field Run ID to modify the process name A keyboard will appear insert the Run ID of the process then press Enter to confirm Click on the drop down menu to select the reagent from the list see image below Click on the fields Time to modify the process duration A keyboard will appear insert the process duration hours on the left and minutes on the right then press Enter to confirm Refer to ch...

Page 23: ...s Start to start the cycle The pre soaking phase is now running On completion of the pre soaking step the heated fixation phase can be performed Move the same FIXATIVE metal holder with glass containing fixative from the BACK MODULE to the FRONT MODULE ...

Page 24: ...In this screen user can modify The Run ID of the process RUN ID The Reagent used in this phase REAGENT Time duration of the FIXATION TIME Temperature during the FIXATION TEMPERATURE Each time a white box is clicked a number pad appears enter the number required and press Enter Fill all the white boxes with data Refer to chapter 7 1 for the guideline for the fixation times ...

Page 25: ...ress Start on the main screen to start the cycle FIXATION is now running The software automatically warms up the solution to the desired temperature It is possible to continuously monitor the real temperature of the solution in the field TEMPERATURE The processing time displayed by BoneSTATION includes the heating time necessary to warm up the solution to the selected temperature plus the time ent...

Page 26: ...preset temperature and a red line that represents the real temperature of the reagent During each process it is possible to extend the duration of the process itself by clicking on the button The software will display a screen see image below where the user can set the minutes and the hours to extend the process While the extend screen is displayed the system will automatically pause the process u...

Page 27: ...it is possible to press STOP to abort the program and extract the rack with the cassettes Confirm run cancelation by pressing Abort front run The system will display that the run was successfully aborted Then click Confirm end to return to the home screen ...

Page 28: ... end of the cycle press Confirm End The safety handles on the metal holders prevent possible burning Surfaces identified with this symbol are at a dangerous temperature more than 70 C 158 F The warning light is ON when the temperature of the front plate is more than 70 C 158 F This warning light works independently from the software it remains ON also if the device is OFF disappearing only when te...

Page 29: ...er to DECALCIFIER metal holder with glass containing decalcifier Put the DECALCIFIER metal holder on the FRONT MODULE if heated decalcification is needed On the Touch Screen select NEW RUN from the Front Module screen to set up the Decalcification Time and the Temperature Follow the previous instructions chapter 3 2 on how to set the values for fixation Refer to chapter 7 for the guideline for the...

Page 30: ...to chapter 3 2 1 While running a Heated decalcification protocol it is possible to start a new presoaking phase of other bone samples on the BACK MODULE Simply put the FIXATIVE module on the Back Plate see image below then press NEW RUN from the screen of the Back Module see the circle in the image above On completion of Decalcification an audio alarm sounds the operator can silence it by pressing...

Page 31: ...r on the BACK MODULE if NOT heated decalcification is needed Then follow the instructions of chapter 3 2 2 on how to set program values and start a program 3 4 Run only a fixation program If tissues need only to be fixed it is possible to perform just a FIXATION phase Put the FIXATIVE metal holder with glass containing fixative on the BACK MODULE no heating of fixation is needed PRESOAKING Then fo...

Page 32: ...pours generated by fixation and decalcification reagents loaded in the glass vessels The right side of the BoneSTATION is a sample zone on which are positioned two removable glass petri plates The operator can use this area to place cassettes pliers needles histomodule covers and racks in order to work more comfortably Both glass petri plates are fully washable ...

Page 33: ...ixation and decalcification reagents following routine laboratory practices The correct reagent management depends on the number of cassettes used in each run It is suggested to use the same fixative for 6 full racks It is suggested to use the same decalcifier for 3 full racks ...

Page 34: ... add or remove reagents C Date time To set system date and time D Service only for SERVICE personnel password is required 5 1 Owner Select Owner from the Settings screen The following screen appears as shown in the picture below Select this field to modify the name of the institute and the department where the device is installed User can also enable or disable the run ID by ticking the relative b...

Page 35: ... on the right of the screen Default reagents cannot be deleted Press the icon to go back to the settings and save any modification 5 3 Date time From the Settings screen select Date Time see figure below In the Time setting window it is possible to set the TIME ZONE thus activating the automatic update of time during the year After changing the date time reboot the system switch off then then swit...

Page 36: ...ent the onset of more serious problems The following procedure is recommended to ensure optimum performance of the device 6 1 Daily Make sure BoneSTATION is kept clean after each use Do not use abrasive or sharp tools which can damage the coatings Follow the instruction below to perform a correct cleaning procedure of the Bone Station It is recommended to use polyphenolic based disinfectants or ch...

Page 37: ...SE 1 Pre soaking 1mm 45 minutes 2mm 1 hour 3mm 1 hour 15 minutes 4mm 1 hour 30 minutes 5mm 2 3 hours PHASE 2 Fixation the times depends on the fixation temperature THICKNESS ROOM TEMPERATURE HEATED FIXATION 37 C 50 C 1mm 1 hour 50 minutes 25 minutes 2mm 1 hour 30 minutes 1 hour 30 minutes 3mm 2 hours 2 hours 50 minutes 4mm 4 hours 2 hours 30 minutes 1 hour 5mm 5 hours 4 hours 30 minutes 2 hours Th...

Page 38: ...program at half of the above time so that users can better define optimum protocols for their samples MoL DECALCIFIER recommended solution for optimal morphology IHC and molecular biology Heated decalcification with both MoL DECALCIFIER and Formic acid leads to satisfactory morphology IHC and molecular biology but it s of paramount importance not to over decal tissue hence the checking of the bone...

Page 39: ...0 37 C TOTAL TIME 3 hours 30 minutes PHASE TEMPERATURE TIME PRESOAKING R T 1 hour FIXATION 37 C 1 hour FORMIC ACID 10 37 C 1 hour 30 minutes FORMIC ACID 10 50 C TOTAL TIME 2 hours 30 minutes PHASE TEMPERATURE TIME PRESOAKING R T 1 hour FIXATION 50 C 30 minutes FORMIC ACID 10 50 C 1 hour HYDROCLORIC ACID 10 37 C TOTAL TIME 2 hours 30 minutes PHASE TEMPERATURE TIME PRESOAKING R T 1 hour FIXATION 37 ...

Page 40: ...10 37 C TOTAL TIME 12 hours PHASE TEMPERATURE TIME PRESOAKING R T 3 hours FIXATION 37 C 4 hours 30 minutes FORMIC ACID 10 37 C 4 hours 30 minutes FORMIC ACID 10 50 C TOTAL TIME 7 hours PHASE TEMPERATURE TIME PRESOAKING R T 3 hours FIXATION 50 C 2 hours FORMIC ACID 10 50 C 2 hours HYDROCLORIC ACID 10 37 C TOTAL TIME 9 hours PHASE TEMPERATURE TIME PRESOAKING R T 3 hours FIXATION 37 C 4 hours 30 minu...

Page 41: ...C We strongly advise to checking the specimens every 30 60 minutes In case faster turnaround time is needed it is possible to test at 50 C but in this case we strongly advise checking the specimens every 30 minutes i e routine room temperature decalcification time 8 hours BoneSTATION set time 50 minutes at 50 C 3 If your decalcifying reagent is a STRONG ACID LIKE HYDROCHLORIC ACID 10 NITRIC ACID 7...

Page 42: ...select the date and the hour on which the process to display ended Push the button Open and the system will display the graph of the selected process A process executed on the front plate will be marked with the letter F while a process executed on the back plate with the letter B Choose Delete or Delete All if you want to eliminate one file only or every file saved respectively Before deleting we...

Page 43: ...rmation like the real time and temperature performed by the device and the Events Log Insert the USB memory stick into its slot placed on the right side of the instrument figure below Select Log Book from the main screen and then select Autosaved Programs The following screen appears This allows you to export all the saved processed graphics select the file of interest and press Export or Export A...

Page 44: ... 3 Events Log from the terminal to the USB key Insert the USB memory stick into the slot located on the right side of the terminal Select Log Book button from the MAIN FUNCTIONS screen then Events Log The following screen appears where it is possible to export the Events Log press Export to USB to copy it After exporting plug the USB into the PC and a folder named BoneSTATION_S N is present contai...

Page 45: ...WER The USB key provided with the device contains LogVIEWER folder Double click on the SetupLogViewer exe icon to install the program Press Next in the following screens Then the following screen is opened Select the checkbox Create a desktop icon as shown below Then press Next ...

Page 46: ...by LogVIEWER program when exported Finally press Install to complete the installation LogVIEWER software is now ready to work Microsoft NET Framework 4 0 is a prerequisite to this application the setup will install it if not present on your PC SAP Christal Report Runtime is a prerequisite to this application and the setup will install it if not present on your PC Log Viewer software is now ready t...

Page 47: ...n your desktop Plug the USB key in your PC and Open a process by clicking on the relative icon green circle Select the USB folder with saved processes of interest see the example below Now all the process phases are shown Data available are listed in the following fields PROCESS INFO all details of that process PHASES all details of different phases Click on Show step list for details of the selec...

Page 48: ...ess and device information When the print preview required has been selected click on the Print icon from the bar in the upper left of the preview page green rectangle 8 4 3 Send process to customer support Milestone Click on the icon Send process to customer support green circle to forward an automatic message to Milestone customer support e mail This message opens Press OK and check your e mail ...

Page 49: ...displayed as follows Graph style modify the colour of the X Y axes show hide the grid get axes displayed as dotted Process curves style modify colour and thickness of the Pre set and Real values lines temperature and power Printing options modify pages header 8 4 5 Other functions 1 About Milestone LogVIEWER 2 View help HOW TO 3 Exit Application 1 2 3 ...

Page 50: ...estone The images shown are for illustrative purposes only 9 1 Decalcification Fixation module CODE 67710 CODE 67858 Decalcification Fixation module cover CODE 67857 Glass container diameter 130mm height 170mm for Decalcification Fixation module CODE 67728 Kit with 4 labels for Decalcification Fixation module CODE 67757V Holder for Decalcification Fixation module ...

Page 51: ...he rack is composed by 2 layers each for 8 Mega cassettes The correct reagent level depends on the number of cassettes and is about 1cm above the cassettes 1LAYER about 800ml of reagent 2LAYERS about 1300ml of reagent 1 Central column CODE 67853 2 Rack cover disc CODE 67852 3 8 mega cassettes layer CODE 67851 4 Rack foot CODE 67389 5 Complete stirrer CODE 65594 6 Pin for stirrer CODE 67862 1 6 4 5...

Page 52: ... The rack is composed by 2 layers each for 15 cassettes The correct reagent level depends on the number of cassettes and is about 1cm above the cassettes 1LAYER about 800ml of reagent 2LAYERS about 1300ml of reagent 1 Central column CODE 67853 2 Rack cover disc CODE 67323 3 15 cassette layer CODE 67322 4 Rack foot CODE 67389 5 Complete stirrer CODE 65594 6 Pin for stirrer CODE 67862 ...

Page 53: ...p to 6 Super Mega Cassette measuring 18 x 52 x 75mm The rack is composed by 1 layer The correct reagent level is about 1cm above the cassettes 1LAYER about 1600ml of reagent 1 Central column CODE 67853 2 Rack cover disc CODE 67852 3 6 super mega cassette layer CODE 67856 4 Rack foot CODE 67389 5 Complete stirrer CODE 65594 6 Pin for stirrer CODE 67862 1 5 3 4 2 6 ...

Page 54: ...9 5 Internal Divider BoneSTATION BoneSTATION ONE REF 67860 BNS RIDLS For decalcification of large specimens CODE 67442 Positioning plate CODE 67861 Vertical separator CODE 67440 Rack foot CODE 67862 Pin for stirrer CODE 65594 Complete stirrer ...

Page 55: ...ension 13cmx4cmx4cm Possibility 2 Use with one Vertical Separator inserted into the Positioning plate Max samples number 2 Max samples dimension 13cmx10cmx4cm Possibility 3 Use without Vertical Separators into the Positioning plate Max samples number 1 Max samples dimension 13cmx11cmx4cm or 13cmx8cmx8cm The correct reagent level depends on the sample height and must be about 1cm above the samples ...

Page 56: ...eSTATION MM093 002 Operator Manual 56 9 6 MoL DECALCIFIER Tank 5L Ready to use solution REF 51413 9 7 Magnetic touch pen CODE 50597 M 9 8 Glass containers CODE 67724 The code includes n 2 glass containers ...

Page 57: ...BoneSTATION MM093 002 Operator Manual 57 9 9 Power cord for devices at 230V 50 60Hz Schuko CODE 50036 9 10 Power cord for devices at 115V 60Hz NEMA 5 15 CODE 50391 ...

Page 58: ...ide the alarm 2 Check the presence and rotation of the stirrer 3 Wait at least 10 minutes and then press Clear to continue the program 4 Call your customer service if the issue can t be fixed 22 Temperature too low 1 Press Silent to hide the alarm 2 Check the presence and the correct level of reagent inside the module The reagent level must be above the MINIMUM marker in the module 3 Verify if not...

Page 59: ......

Page 60: ......

Page 61: ......

Page 62: ......

Page 63: ......

Page 64: ...marketing milestonemedsrl com www milestonemed com Via Fatebenefratelli 1 5 24010 Sorisole BG Italy Tel 39 035 4128264 Fax 39 035 575498 Milestone Srl ...

Reviews: