HEAD OFFICE
: MITSUBISHI DENKI BLDG MARUNOUTI TOKYO 100-8310
TELEX : J24532 CABLE MELCO TOKYO
HIMEJI WORKS : 840, CHIYODA CHO, HIMEJI, JAPAN
AL-ASI-BD, AL2-ASI-BD
Hardware manual
Hardware-Handbuch
Manuel du matériel
JY992D81401D
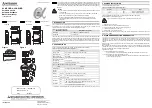
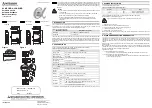
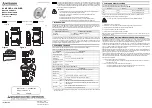
External Dimensions
Abmessungen
Côtes extérieures
AL-ASI-BD
AL2-ASI-BD
Figure 1
Figure 2
ENG
GER
FRE
ASI -
2 6 . 5 ( 1 . 0 4 " )
5 3 . 5 ( 2 . 1 1 " )
90
(3
.5
4"
)
ASI+
ASI -
ASI+
2 4 . 5 ( 0 . 9 6 " )
5 3 . 1 ( 2 . 0 9 " )
90
(3
.5
4"
)
ASI -
ASI+
ASI -
ASI+
mm(inch)
A C 1 0 0 - 2 4 0 V
P O W E R
A C I N P U T
A L - 2 0 M R - A
O K
E S C
R E L A Y O U T P U T
O U T
1
O U T
2
O U T
5
O U T
3 O U T 4
O U T
6
O U T
8
O U T
7
1 2 3 4 5 6 7 8 9 1 0 1 1 1 2
I N
L
N
~
A S I + A S I -
O K
E S C
~
A S I -
A S I +
A C I N P U T
A L - 2 0 M R - A
O K
E S C
R E L A Y O U T P U T
L
N
~
A C 1 0 0 - 2 4 0 V
P O W E R
1 2 3 4 5 6 7 8 9 1 0 1 1 1 2
I N
O U T
1
O U T
2
O U T
5
O U T
3 O U T 4
O U T
6
O U T
8
O U T
7
A C I N P U T
A L - 2 0 M R - A
R E L A Y O U T P U T
L
N
A C 1 0 0 - 2 4 0 V
P O W E R
1 2 3 4 5 6 7 8 9 1 0 1 1 1 2
I N
O U T
1
O U T
2
O U T
5
O U T
3 O U T 4
O U T
6
O U T 8
O U T
7
O K
E S C
A S I + A S I -A S I + A S I -
A C I N P U T
A L - 2 0 M R - A
R E L A Y O U T P U T
L
N
A C 1 0 0 - 2 4 0 V
P O W E R
1 2 3 4 5 6 7 8 9 1 0 1 1 1 2
I N
O U T
1
O U T
2
O U T
5
O U T
3 O U T 4
O U T
6
O U T
8
O U T
7
A
B
A
ASI -
1
2
ASI+
4
3
ASI -
ASI+
This manual contains text, diagrams and explanations which will guide the reader in the
correct instruction and operation of the AL-ASI-BD and AL2-ASI-BD AS-Interface module. It
should be read and understood before attempting to install or use the unit. Further information
can be found in the
α
Hardware or
α
2 Hardware Manual, and
α
or
α
2 Series Programming
Manuals.
Caution
• Persons trained in the local and national electrical standards must replace the AL-ASI-BD
or AL2-ASI-BD.
• Turn off the power supply when you install or remove the AL-ASI-BD or AL2-ASI-BD.
• Replace the cover after removing the AL-ASI-BD or AL2-ASI-BD.
• Under no circumstances will Mitsubishi Electric be liable or responsible for any
consequential damage that may arise as a result of the installation or use of this
equipment.
1. INTRODUCTION
The AL-ASI-BD and AL2-ASI-BD Actuator Sensor Interface board module (Hereafter referred to as the
AL-ASI-BD) is used in conjunction with the following
α
(
α
and
α
2) series controller for data
communication over an Actuator Sensor Interface (AS-interface) network.
The AL-ASI-BD connects onto the main body of the
α
series controller, forming a slave station for an AS-
interface network (Input 4 points, Output 4 points). A maximum of 31 slaves can be connected to form an
AS-interface network. Power for the communication is supplied over the AS-interface bus by the AS-
interface power supply. The communication signal is superimposed over the power supply on the AS-
interface bus.
2. SPECIFICATIONS
For general specifications please refer to the
α
(
α
or
α
2)Series Hardware Manual.
*1 Function to reset input signal (E01 - E04) when AS-interface communication is cut for 70 ms or more.
Table 1. Applicable Controller
Model Name of Interface
Model Name of Controller
AL-ASI-BD
AL-20MR-A, AL-20MR-D, AL-20MT-D
AL2-ASI-BD
All AL2 series
Table 2. Hardware Communication Specifications
Item
Content
Number of I/O
4 Input (in. E01-E04) 4 Output (Out. A01-A04)
I/O Refresh Time
Max. 5ms
Network Distance
Max. 100m
External Power Voltage
Typ. 30.5V DC (AS-interface Power supply)
External Power Current
Consumption
40 mA or less
Complies with
AS-interface Certification, CE
Table 3. Software Communication Specifications
Item
Content
Station Number
Set by Master Station (Factory default 0)
IO Code
7
ID Code
F
Data Bit
D0 - D3
Input Output 01 - 04 (E01 - E04, A01 - A04)
Parameter Bit
P0
Communication monitor (set by default).
*1
P1,P2,P3
Unused
System Bit
M6
“ON” when communication Error of AS-interface occurs
M7
“ON” when communication Error by AS-interface power fail occurs
Control Bit
N1
ON: Connect to AS-interface network
OFF: Unconnected to AS-interface network
ENG
3. WIRING & INSTALLATION
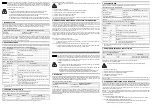
For AS-interface wiring refer to figure 1.
Use the AS-interface flat cable (yellow) for connecting the AL-ASI-BD to the network.
When installing AL-ASI-BD refer to figure 2;
Disconnect all terminals from the power supply before removing the cover.
1) Release screw ‘A’ and keep.
2) Carefully remove the factory fitted expansion port cover.
3) Cut away section ‘B’ from the
α
series controller main unit.
4) Attach the AL-ASI-BD to the main unit.
5) Tighten screw ‘A’ to a torque of 0.4 N·m.
When connecting AS-interface cable to the module, tighten communication connector pin screws to a
torque of 0.5 ~ 0.6N·m.
4. SLAVE ADDRESS SETTING & DIAGNOSTICS
The address of AL-ASI-BD must be set from the AS-interface master module. The setting range of the
slave address is 1 to 31. New modules are preset to 0 before shipping, if a module has been previously
assigned an address other than 0, it must be reset to 0 before it need to add into new AS-interface
network.
Refer to the AS-interface master module's manual for details of how to set station address from the AS-
interface master.
Many modules can be added to a network at one time, all but one of them should be set in their passive
state (set N1=1). Once the network has been powered up the modules can be individually activated (set
N1=0), where the Master station will assign a slave address.
Applicable Error checks
1) If a Communication defect error (M6) occurs;
-
Check connections to the AS-interface master, and that the slave station number is correct.
2) If a Communications power supply error (M7) occurs;
-
Check the connection of the AS-interface Bus cable at each affected unit, also the AS-interface
power supply and its operation.
Table 4. AL-ASI-BD Connector Pin Assignment
Number
Name
Usage
1 & 3
ASi +
For ASi + cable connection
2 & 4
ASi -
For ASi - cable connection
Manual number : JY992D81401
Manual revision : D
Date
: 03/2002
JY992D81401D
Effective Mar. 2002
Specifications are subject to
change with out notice.


