background image

USER MANUAL 


(2014/53/EU art. 10-8) 


(a) Frequency Range: 110-205 kHz 

(b) Wireless Power: 10W Max.


(2014/53/EU art. 10-9 Simplified Declaration of Conformity) 


Hereby, MOB, declares that item MO6665 complies with the essential requirements and 

other relevant conditions of directive 2014/53/EU. The full text of the EU declaration of 
conformity is available at the following internet address: www.momanual.com.   

MOB, PO BOX 644, 6710 BP (NL). 


PO: 41-XXXXX 

Made in China


Summary of Contents for MO6665

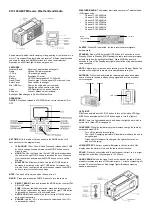
Page 1: ...claration of Conformity Hereby MOB declares that item MO6665 complies with the essential requirements and other relevant conditions of directive 2014 53 EU The full text of the EU declaration of conformity is available at the following internet address www momanual com MOB PO BOX 644 6710 BP NL PO 41 XXXXX Made in China ...

Page 2: ...ion To enter setting mode press the MODE button for 3 seconds until the screen starts to flash Press or to adjust the hour Press MODE button again to change minutes and press or to modify them Press MODE to finish Press button from main menu to change the hour format 12 24hr Wireless charger Operation 1 Connect the Micro USB cable to the Micro USB port on the wireless charger and the other end of ...

Page 3: ...tfeuchtigkeitsbereich 20 95 Nur für Innenräume geeignet 12 24h Batterie CR2032 x 1 Stück enthalten 3V So wechseln Sie die Batterie Öffnen Sie das Batteriefach auf der Rückseite des Produkts und ersetzen Sie sie durch eine neue Batterie Einstellen der Uhr Um in den Einstellmodus zu gelangen halten Sie die MODE Taste 3 Sekunden lang gedrückt bis der Bildschirm zu blinken beginnt Drücken Sie oder um ...

Page 4: ... Metall die auf dem Ladegerät platziert werden können zu Fehlfunktionen des Geräts führen und das Ladegerät beschädigen Betreiben Sie das Gerät nicht auf einem Arbeitstisch oder einer Oberfläche aus Metall FR Station météo et chargeur sans fil Entrée DC 5V A DC 9 0V 1 67A Sortie DC 9V 1 10A max Efficacité 75 Distance de fonctionnement 6 mm Plage de température 0 50 Plage d humidité 20 à 95 Pour us...

Page 5: ... Si votre téléphone est doté d un étui de protection vous devrez peut être le retirer pour une connexion réussie lors de l utilisation du chargeur sans fil 2 Les objets métalliques placés sur les dispositifs de charge peuvent entraîner un dysfonctionnement et endommager le dispositif de charge N utilisez pas l article sur un plan de travail ou une surface en métal ES Estación meteorologisch y carg...

Page 6: ... un dispositivo con un receptor de carga inalámbrica en el cargador inalámbrico asegurándose de que esté boca arriba y colocado en el centro Atención 1 Si su teléfono tiene una funda protectora es posible que tenga que quitársela para que la conexión sea adecuada al utilizar el cargador inalámbrico 2 Los objetos metálicos encima de los dispositivos de carga pueden provocar el mal funcionamiento de...

Page 7: ...il cavo Micro USB alla porta Micro USB sul caricatore wireless e l altra estremità del cavo a un adattatore CA USB 2 Posizionare un dispositivo con un ricevitore di ricarica wireless sul caricabatterie wireless assicurandosi che sia rivolto verso l alto e posizionato centralmente Attenzione 1 Se il telefono dispone di una custodia protettiva potrebbe essere necessario rimuoverla per una connession...

Page 8: ...tooien Druk in het hoofdmenu op de knop om het uurformaat te wijzigen 12 24 uur Draadloze oplader Werking 1 Sluit de micro USB kabel aan op de micro USB poort van de draadloze oplader en het andere uiteinde van de kabel op een USB netspanningsadapter 2 Plaats een apparaat met een ontvanger voor draadloos opladen op de draadloze oplader en zorg ervoor dat deze met de voorkant naar boven en in het m...

Page 9: ... Naciśnij lub aby ustawić godzinę Naciśnij ponownie przycisk MODE aby zmienić minuty i naciśnij lub aby je zmodyfikować Naciśnij MODE aby zakończyć Naciśnij przycisk z menu głównego aby zmienić format godziny 12 24godz Działanie ładowarki bezprzewodowej 1 Podłącz kabel Micro USB do portu Micro USB w ładowarce bezprzewodowej a drugi koniec kabla do zasilacza sieciowego USB 2 Umieść urządzenie z odb...

Page 10: ...e przedmioty umieszczone na urządzeniach ładujących mogą spowodować nieprawidłowe działanie przedmiotu i uszkodzenie urządzenia ładującego Nie używaj urządzenia na żadnym metalowym stole roboczym lub powierzchni ...

Reviews: