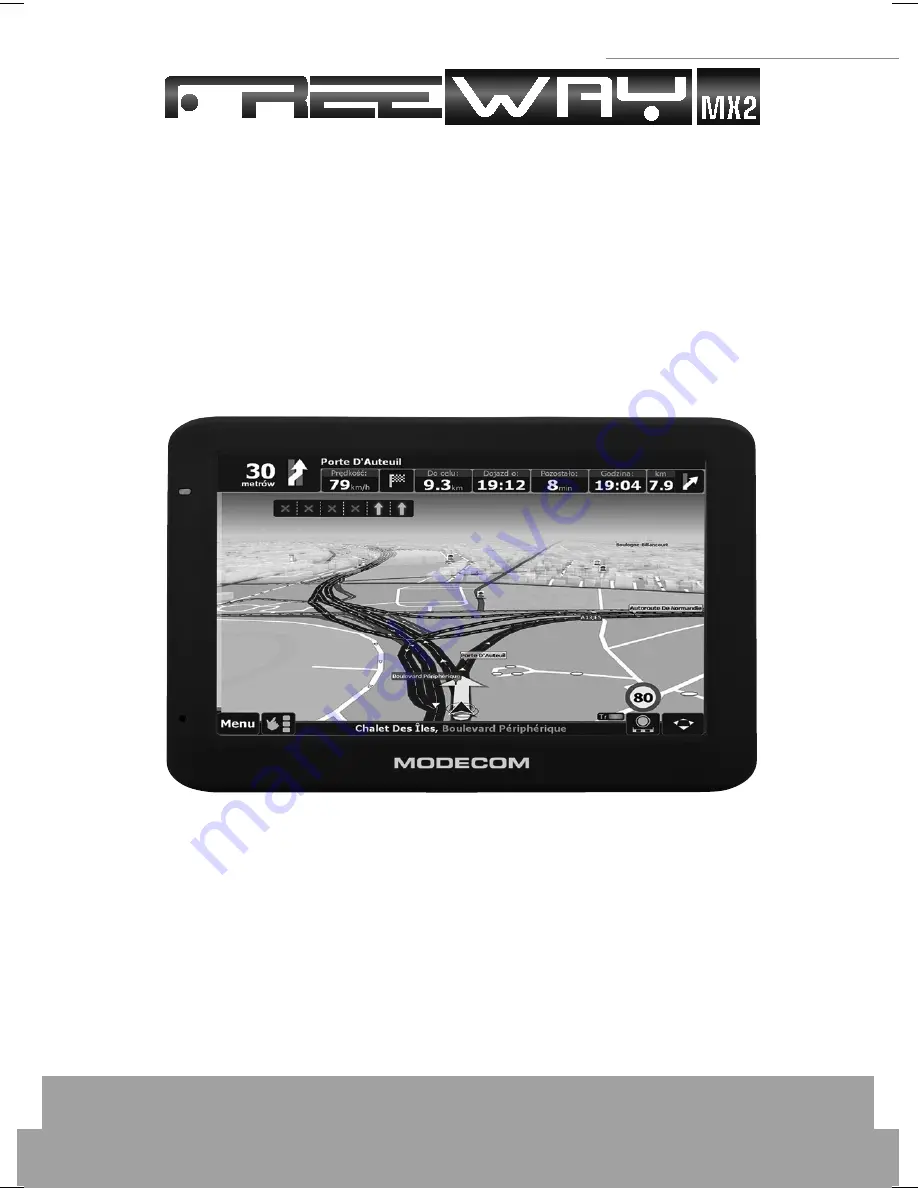
background image

1

5” GPS Navigation

MODECOM

user’s manual

5” GPS Navigation

Summary of Contents for 5 GPS navigation

Page 1: ...1 5 GPS Navigation MODECOM user s manual 5 GPS Navigation ...

Page 2: ...ystem Main Interface and Major Functions 10 Chapter II GPS 11 2 1 Map 12 2 2 Navigation 12 2 3 Reception 12 Chapter III Media 13 3 1 Music Player 13 3 2 Video Player 16 3 3 Photo Browser 18 3 4 E book Reader 20 Chapter IV Bluetooth 24 4 1 Pair 24 4 2 Outgoing call 26 4 3 Incoming Call 29 4 4 Dial Record 30 4 5 Redial 31 4 6 Settings 31 4 7 Paired Device List 32 ...

Page 3: ...iDuiPeng 38 5 3 Russia Block 39 Chapter VI Tools 39 6 1 Calculator 40 6 2 Unit 40 Chapter VII Settings 41 7 1 Summary 41 7 2 Volume 42 7 3 Backlight 43 7 4 Language 44 7 5 Date Time 44 7 6 Calibration 45 7 7 System Info 46 7 8 FM Transmitter 46 7 9 USB 47 Chapter VIII GPS Info 51 Chapter IX Troubleshooting 52 ...

Page 4: ...ODECOM assumes no responsibility Data of navigation electronic maps might be inconsistent with actual traffic signals due to transportation development Please follow traffic regulations and signs and drive according to road situation Operat ing the GPS navigator device while driving might cause serious ac cidents MODECOM S A assumes no responsibility for accidents and loss due to improper use For in...

Page 5: ...ee the following supplemental information in the man ual Note Explanation of relevant subjects Relevant Information Extra information of relevant subjects Attention Precautions or warnings of relevant subjects Please pay attention to this information and follow the instructions to avoid devastating influence on yourself and others Optional function This manual is applicable only to the FreeWAY MX2 ...

Page 6: ...ort Communicating with PC via MINI USB cable or connected to TMC or used as the charging port 9 Light sensor For automatic backlight adjustment 10 Reset key Restart the system 1 2 Power Supply Charging Charge the GPS navigator fully with the charger before first use 1 2 1 Power Supply The FreeWAY MX2 can be powered by the built in battery or ex ternal power supply When the GPS navigator is unconnec...

Page 7: ...e The charging indi cator light is red during charging Do not unplug the AC adapter until the battery is fully charged and the indicator light turns green Please charge the GPS navigator when the battery is low or used up in suc ceeding use 1 2 3 Charging by Car Charger Plug one terminal of the car charger into the USB port on the left side of the GPS navigator and the other to the charging port t...

Page 8: ...nment 1 3 1 2 Powering off Sleep Long press the power key to power off the GPS navigator The following interface will be prompted If is selected the navigator will automatically resume the state before entering sleep mode when powered on again 1 3 2 Restarting the System When the system does not response press the reset key on the back of the GPS navigator to restart the system Relevant Informatio...

Page 9: ...he two screws to adjust the angle and direction of the PND Step 3 Pull the switch to make flat the rubber sheet at the bottom and then place the kit in a proper position in the car and pull the switch back to fix the kit Note Do not place the GPS navigator in positions obstructing the driver s vision Do not place it without fixing or in the place of air bag or the area after the air bag is inflated 1 ...

Page 10: ...e direction while inserting the T FLASH card to avoid damaging the slot or the card 1 4 Accessories Please find in the package the following accessories Car charger 1 pc User manual 1 pc Poly bag 1 pc AV In cable Option 1 pc Stylus 1 pc USB cable 1 pc Cradle 1 pc Bracket 1 pc 1 5 System Main Interface and Major Functions Long press the power key on the top side of the GPS navigator to enter the sys...

Page 11: ...zoom in out and auto play supported E book TXT files reading supporting page selection Bluetooth Enable wireless connection between the GPS navigator and a Bluetooth mobile phone Games Othello DuiDuiPeng and Russia Block included Tools Calculator and Unit Settings Volume Backlight Language Date Time Cali bration FM Transmitter and System Information Chapter II GPS Various navigation mapping applica...

Page 12: ...underground car parks and under viaducts weather change or satellite signals turnoff may influence signal recep tion resulting in positioning failure inaccurate positioning navigation failure or system function abnormity With stereoscopic maps instant animation voice prompt and text prompt of the navigation system you will appreciate its unique charm and enjoy a great trip Different navigation maps...

Page 13: ...layer This section introduces the usage of the music player 3 1 1 Features The music player supports WMA9 and WAW files and selection of play sequence Copy audio files into your memory card before using the player 3 1 2 Interface and Operation Tap in the system main interface to enter the Media interface as shown below Tap to enter the Music Play as shown below ...

Page 14: ... music player and return to the Media interface Play Continue playing the paused stopped music Pause Pause the music playing Stop Stop the music being played Set play sequence Select sequence random or cycle play Previous Play the previous music Next Play the next music Volume Drag it leftward to turn down or right ward to turn up the volume ...

Page 15: ...ter it to select music to play Time Display the run time Equalizer Enter the equalizer Tap in the interface Music Play to enter the Music list shown as below Icon Name Explanation Close Close the Music List Scroll bar Drag it upward downward to view all music Add one Add a piece of music on the left list to the play list on the right ...

Page 16: ...ll the music in the play list 3 2 Video Player This section introduces the usage of the video player 3 2 1 Features The video player supports WMV ASF and AVI files full screen play progress selection and file selection Copy video files to a folder in your memory card before using the player 3 2 2 Interface and Operation Tap in the Media interface to enter the video player interface shown as below Ico...

Page 17: ...he film being played Video folder Enter it to select a film to play Progress Drag the sliding block leftward to play from a previous moment or rightward coming moment Volume Drag it leftward to turn down or rightward to turn up the volume Time Display the play time and the music dura tion Tap in the Video Player interface to enter the video folder shown as below ...

Page 18: ...older Film name format Film name and its format 3 3 Photo Browser This section introduces the usage of the photo browser 3 3 1 Features The photo browser supports JPG GIF BMP and PNG files photo rotation zoom in out and auto play Copy photos to a folder in your memory card before using the browser 3 3 2 Interface and Operation Tap in the Media interface to enter the photo browser interface shown as...

Page 19: ...oom in Scale up current photo Zoom out Scale down current photo Rotate Rotate current photo 90 clockwise Auto play Cycle play all the photos in the folder from current photo Folder Enter the photo folder to select a photo Close Close the browser and return to the Media inter face Tap in the browser interface to enter the photo folder shown as below ...

Page 20: ...oll bar Drag the sliding block to view all the photos 3 4 E book Reader This section introduces the usage of the E book reader 3 4 1 Features The reader supports TXT files page turn and folder selection Copy TXT files into your memory card before using the browser 3 4 2 Interface and Operation Tap in the Media interface to enter the reader interface shown as below ...

Page 21: ...ter the e book folder to select an e book to read Previous Read the previous page Next Read the next page Setting Select a text theme font word size and bold type New bookmark Select partial text and tap the icon to create a bookmark Bookmark list Enter the bookmark list to select or delete a bookmark Page total pages Current page total pages Tap in the e book reader interface to enter the setting...

Page 22: ...ce Save Save the setting Theme Tap to select a theme for the e book Font Tap to select a font for the e book Bold Tap to enable bold type Tap it again to cancel Tap in the e book reader interface to enter the e book folder shown as below Icon Name Explanation Close Close current folder Return Return to the previous folder ...

Page 23: ...e a bookmark locate a page by taping or dragging the scroll bar in the reader interface and drag to select text content Tap when it is on Tap OK to finish Tap to view created bookmarks in the interface of Bookmark List shown as below Drag the scroll bar and select a bookmark on the left list Tap to go to the page with the bookmark or tap to delete the book mark ...

Page 24: ...making and answering calls Before using this function make sure that Bluetooth function of the cell phone has been enabled In the main interface tap to enter the Bluetooth interface as follow At the bottom is the connection status bar Tap to quit the interface 4 1 Pair Tap to enter the following interface to pair with mobile phone mobile phone s Bluetooth function should be enabled beforehand ...

Page 25: ...5 5 GPS Navigation Notice Please keep the Bluetooth mobile phone around the PND while pairing them After successful pairing the message Connected established and the mobile phone name will be shown in the interface as below ...

Page 26: ...modecom eu 26 5 GPS Navigation 4 2 Outgoing call Tap to enter the phone keyboard interface as below Tap on the keyboard to enter a phone number Tap to delete the last number entered Tap to generate a call as shown in the following interface ...

Page 27: ...urn down the volume Volume up Tap it to turn up the volume Hang off Tap to hang off When the called number is put through the interface will be as below Icon Name Explanation Volume down Tap it to turn down the volume Volume up Tap it to turn up the volume Microphone Tap to input voice ...

Page 28: ...www modecom eu 28 5 GPS Navigation Volume switch Switch the voice output to the mobile phone Keypad Tap it to open the keypad as shown in the interface below Hang off Tap to hang off If the call fails the below interface will be prompted ...

Page 29: ...vigation 4 3 Incoming Call When there is incoming call the following interface will be prompted Icon Name Explanation Volume down Reduce the volume Volume up Increase the volume Answer Answer the call Reject Reject the incoming call ...

Page 30: ... records Tap it to view the list of called num bers Incoming call records Tap it to view the list of incoming call numbers Failed call records Tap it t to view the list of failed calls Delete one Select a number in the list and tap this icon to delete it Delete all Select all the numbers in the list and tap this icon to delete it Generate Select a number in the list and tap this icon to generate a...

Page 31: ...ed num ber 4 6 Settings In the Bluetooth interface tap to enter the setting interface as shown below Icon Name Explanation Name The device s display name in the Bluetooth transmission process Pin code Tap to set a pin code for the con nection between the PND and mobile phone Ring Tap to select a ring tone ...

Page 32: ...also choose automatic HFP connection when Bluetooth is started up by ticking in the box 4 7 Paired Device List In the Bluetooth interface tap to enter the Paired Device List interface as shown below Icon Name Explanation Profile list Select a paired device from the list on the left and tap this icon to view the profile list as below Delete one Tap this icon to delete the Disconnect Tap it to disconn...

Page 33: ...t mobile phone 4 7 1 1 HFP Select a service from the Profile List and tap the highlighted icon on the right If the navigator is in connection with the mobile phone tap Hand free service and then to disconnect if the navigator is not connected with the mobile phone tap for connection 4 7 1 2 Dial Up Network Service Select DUN service and then tap to enter the DUN interface as shown below ...

Page 34: ... add modify or delete the information of the selected ser vice provider Connect to network Tap to establish DUN connec tion After connection you may enter the WINCE interface to use Internet Explorer for web browsing and downloading 4 8 Search In the Bluetooth interface tap to enter the following interface and the device will automatically search and display a list of Bluetooth devices ...

Page 35: ...ir the navigator and the mobile phone The default PIN code 8888 Shall be input After connection the Profile List of the device will be displayed Refer to 5 7 Pair Device List Pair device list Tap to enter the Pair device list Refer to 5 7 Pair Device List Select a device from the left list and tap to pair with it If fail the following interface will be displayed ...

Page 36: ...ation www modecom eu 36 5 GPS Navigation You may also tap to enter the interface of Paired Device List as below Please refer to the part of Paired Device List for details 4 9 Phonebook Tap to enter the phonebook interface as below ...

Page 37: ... the phonebook and tap this icon to generate a call Delete Select a number from the phonebook and tap this icon to delete it Chapter V Games This chapter introduces the usage of Games Tap in the system main interface to enter the games interface as shown as below Tap to exit 5 1 Othello Tap in the Games interface to enter the interface as shown below ...

Page 38: ...www modecom eu 38 5 GPS Navigation www modecom eu 38 5 GPS Navigation 5 2 DuiDuiPeng Tap in the Games interface to enter the interface as shown below ...

Page 39: ...on 5 3 Russia Block Tap in the Games interface to enter the interface as shown below Chapter VI Tools The tools include Calculator and Unit conversion Tap in the system main interface to enter the tools interface as shown below Tap to exit ...

Page 40: ...Navigation www modecom eu 40 5 GPS Navigation 6 1 Calculator Tap in the Tools interface to enter the calculator interface as shown below 6 2 Unit Tap in the Tools interface to enter the unit converter interface as shown below ...

Page 41: ...ary This chapter introduces the system settings of the GPS navigator Tap in the system main interface to enter the system interface to set volume backlight language date time calibration factory reset system info USB and navigation path Tap to display the next interface ...

Page 42: ...ng System time zone setting Calibration If deviation occurs while touching the screen calibrate the screen System info Display system information including ROM version soft ware version OEM version platform ID and device ID FM Transmitter Transmit audio signals of the navigator to radio sets USB setting Data transmission mode between the navigator and PC Navigation path Select a document path for ...

Page 43: ...crease the volume by grade Sounds for taps Tap it to enable the function Tap it again to disable the function Power on music Tap or to select power on music or disable it 7 3 Backlight Backlight setting includes backlight brightness adjustment and la tency of backlight off Tap in the system interface to enter the backlight setting inter face as shown below ...

Page 44: ...t Auto Backlight Auto backlight function 7 4 Language Tap to enter in the system interface to enter the language setting interface as shown below Tap or to select a system language and tap to save the selection 7 5 Date Time Tap to enter in the setting interface to enter the language set ting interface as shown below Date Time setting includes system date setting time setting and time zone setting...

Page 45: ...onth day hour and minute Note Time format options are 12 hour and 24 hour 7 5 2 Setting the system time zone In the above interface tap or to select a time zone For ex ample select GMT 08 00 Beijing Chongqing Hong Kong Urumqi for China 7 6 Calibration Tap in the setting interface to prompt the calibration dialog shown as below ...

Page 46: ...ght to finish the calibration and the interface will be closed automatically to go back to the setting interface 7 7 System Info Tap in the setting interface to view the system information in terface 7 8 FM Transmitter FM transmitter realizes transmission of audio signals of the GPS navigator to radio sets Adjust the emission frequency of the GPS navigator the same as that of the receiving frequenc...

Page 47: ... the frequency and leftward or tap to reduce the fre quency The frequency range is 88 00 Mhz 108 00 Mhz 7 9 USB Connect the GPS navigator to PC via the MINI USB port to transmit data or back up data from the navigator data to PC The GPS navigator provides MASS STORAGE and MS STOR AGE modes Select one in the USB setting 7 9 1 MASS STORAGE 1 Have the GPS navigator in operation status and the SD card...

Page 48: ...lect MASS STORAGE and tap to save it 3 Connect the MINI USB terminal of the USB cord to the MINI USB port of the GPS navigator and the standard USB terminal to the USB Host port of PC Then the PC will recognize the navigator and prompt the following interface To disconnect the navigator from PC and enter USB charging mode you may select ...

Page 49: ...e drive selection 3 Connect the MINI USB terminal of the USB cable to the MINI USB port of the GPS navigator and the standard USB terminal to the USB Host port of PC 4 After the PC finds new hardware double click the Mobile Device drive in the selection area to enter the memory of GPS navigator for data transmission 5 After transmission unplug the USB cable Attention For data safety back up the nav...

Page 50: ...ng the system 4 Tap the on close button on the top right 7 10 Navigation Path Insert a T flash card with map data into the GPS navigator and tap to enter the interface shown as below Select a map address and tap to save the setting Icon Function Tap to select a map address Tick in the box to run the set navigation map when the naviga tor is powered on 7 11 Factory Reset Tap in the system interface ...

Page 51: ...PS Navigation Tap OK to restore the default setting or Cancel to return to the set ting interface Chapter VIII GPS Info Tap on the system main interface to view the GPS information as shown below Tap to prompt a dialog as below ...

Page 52: ...bnormal op eration of the GPS navigator For further problems please contact our customer service center Fault Reason Solution Startup failure Low battery Supply external power and charge the battery System down Reset the GPS navigator Sudden power cut Low battery Supply external power and charge the battery No vague display Low backlight Turn up the backlight Backlight off Tap the screen with the ...

Page 53: ...e Communication with PC Poor USB con nection Connect the USB cable GPS signals recep tion failure Poor GPS signal About 3 minutes are needed for low intensity of local GPS satellite signal Loss of map data Accidental dele tion Contact your agent or distributor Input a new password after recov ering the GPS data Note This document is for guidance only and the content is subject to change without no...

Page 54: ...4 2 2 Nawigacja 64 2 3 Odbiór 65 Rozdział III Media 65 3 1 Odtwarzacz muzyki 65 3 2 Odtwarzacz wideo 69 3 3 Przeglądarka zdjęć 71 3 4 Czytnik książek elektronicznych e book 73 Rozdział IV Bluetooth 77 4 1 Parowanie urządzeń 77 4 2 Połączenia wychodzące 79 4 3 Połączenia przychodzące 82 4 4 Rejestr połączeń 82 4 5 Ponowne wybieranie numeru 84 4 6 Ustawienia 84 4 7 Lista sparowanych urządzeń 85 4 8 ...

Page 55: ... 94 Rozdział VII Ustawienia 94 7 1 Streszczenie 94 7 2 Głośność 97 7 3 Podświetlenie ekranu 98 7 4 Język 99 7 5 Data i godzina 99 7 6 Kalibracja 100 7 7 Informacje na temat systemu 101 7 8 Nadajnik FM 101 7 9 USB 103 7 10 Ścieżka dostępu do nawigacji 105 7 11 Przywracanie ustawień fabrycznych 106 Rozdział VIII Informacje na temat GPS 107 Rozdział IX Rozwiązywanie problemów 108 ...

Page 56: ...ra za pomocą portu Mini USB Doskonały odbiór sygnału zapewniający dokładne pozycjonowanie oraz precyzyjne usługi nawigacyjne Rozrywka zapewniana przez funkcje audio wideo oraz inne apli kacje Użytkownik może korzystać z nawigacji GPS w dowolnym czasie i miejscu np podczas jazdy samochodem lub rowerem a także w trakcie wycieczek pieszych Funkcja nawigacyjne i rozrywkowe mają doskonałe zastosowanie ...

Page 57: ...y dokument obejmuje tylko informacje dotyczące modelu MODECOM FreeWAY MX2 Rozdział I Pierwsze kroki Rozdział ten obejmuje informacje na temat wyglądu podzespołów oraz podstawowej obsługi urządzenia MODECOM FreeWAY MX2 1 1 Wygląd Poniższa ilustracja jest odwzorowaniem rzeczywistego przedmiotu materialnego Nr Podzespół Objaśnienie 1 Przycisk zasi lania Włączanie wyłączanie urządzenia oraz aktywacja ...

Page 58: ...enia ekranu 10 Przycisk Reset Ponowne uruchamianie systemu 1 2 Zasilanie i ładowanie urządzenia Przed pierwszym użyciem nawigacji GPS należy ją całkowicie na ładować za pomocą dostarczonej ładowarki 1 2 1 Zasilanie Urządzenie MODECOM FreeWAY MX2 może być zasilane z wbu dowanego akumulatora lub zewnętrznego źródła zasilania Kiedy nawigacja GPS nie jest podłączona do ładowarki jest ona zasilana prze...

Page 59: ...ania aktywna jest czerwona lampka wskaźnika Nie odłączać zasilacza sieciowego aż akumulator nie zo stanie w pełni naładowany a kolor lampki wskaźnika nie zmieni się na zielony Akumulator nawigacji GPS należy ładować gdy jego poziom naładowania jest niski lub został on całkowicie rozładowany podczas eksploatacji 1 2 3 Ładowanie za pomocą ładowarki samochodowej Aby zapewnić zasilanie i naładować aku...

Page 60: ...arcie w urządzeniu Włączyć urządzenie po dostosowaniu go do nowych warunków otoczenia 1 3 1 2 Włączanie urządzenia i tryb wstrzymania pracy Aby wyłączyć urządzenie nacisnąć przycisk aktywacji zasilania i przytrzymać go przez dłuższy czas Na interfejsie urządzenia wy świetlony zostanie poniższy komunikat Po wybraniu i włączeniu nawigacji automatycznie wejdzie ona w tryb wybrany przed wejściem w try...

Page 61: ... GPS za pomocą zestawu montażowe go Zestaw montażowy składa się z ramki i wspornika patrz rysunek poniżej Aby korzystać z nawigacji GPS w samochodzie należy za mocować zestaw montażowy na desce rozdzielczej pod przednią szybą Etap 1 Za pomocą czterech gniazd zamocować ramkę we wsporniku Etap 2 Za pomocą dwóch śrub ustawić kąt i kierunek mocowania zestawu PND Etap 3 Pociągnąć za przełącznik aby ust...

Page 62: ...eszczeniach lub w miejscu wystawio nym na bezpośrednie działanie promieni słonecznych Chronić kartę przed działaniem płynów lub substancji korozyjnych 4 Aby nie uszkodzić karty T FLASH lub jej gniazda należy mon tować ją w odpowiedni sposób ustalić poprawny kierunek wsuwania karty 1 4 Akcesoria Urządzenie jest dostarczane wraz z poniższymi akcesoriami Ładowarka samochodowa 1 szt Instrukcja obsługi...

Page 63: ...y aktywować funkcję nawigacji Odtwarzacz muzyki Obsługuje pliki WMA9 i WAV Tryby odtwarzania odtwarzanie przypadkowe w wybranej kolejności lub cykliczne Odtwarzacz wideo Obsługuje pliki WMV ASF i AVI Regulacja postępu odtwarzania pliku zatrzymy wanie i odtwarzanie w trybie pełnego ekranu Przeglądarka zdjęć Obsługuje pliki JPG GIF BMP i PNG Obrót zdjęcia zbliżanie oddalanie automatyczne odtwarzanie...

Page 64: ...awigacji AutoMapa które ustawia ją nawigację za pomocą odbiornika satelitarnego i wyświetlają jego położenie na mapie Po ustawieniu miejsca docelowego system au tomatycznie oblicza najlepszą trasę umożliwiając w ten sposób bez pieczne i szybkie dotarcie do celu 2 1 Mapa Z powodu stale wprowadzanych zmian w ruchu drogowym po pewnym czasie od zakupu produktu mogą wystąpić różnice pomiędzy zawartymi ...

Page 65: ...nością Rożne mapy do nawigacji można obsługiwać przy zastosowaniu rożnych metod Należy więc stosować się do instrukcji dotyczących danej aplikacji obsługującej mapy Uwaga Przed rozpoczęciem korzystania z nawigacji GPS należy nabyć oraz zainstalować odpowiednie aplikacje obsługujące mapy a także wybrać wymagane ścieżki plików Informacje na ten temat znaj dują się w punkcie 7 10 Ustawianie ścieżek n...

Page 66: ...rozpoczęciem korzystania z odtwarzacza należy skopiować pliki audio na kartę pamięci 3 1 2 Interfejs i obsługa Nacisnąć na głównym interfejsie systemu aby uzyskać dostęp do ekranu Media patrz poniżej Nacisnąć aby uzyskać dostęp do ekranu funkcji Odtwarzanie muzyki patrz poniżej ...

Page 67: ...ujących trybów odtwarzania odtwarzanie przypadkowe w wybranej kolejności lub cykliczne Poprzedni Odtwarza poprzedni plik muzyczny Następny Odtwarza następny plik muzyczny Głośność Przesunąć wskaźnik w lewo aby zmniejszyć natęże nie dźwięku lub w prawo aby je zwiększyć Postęp Przesuwać wskaźnik w lewo lub w prawo aby odtwa rzać plik od poprzedniego lub kolejnego fragmentu Lista utwo rów Umożliwia w...

Page 68: ...y przeglą dać wszystkie pliki muzyczne Dodaj jeden Dodaje jeden utwór z listy po lewej stronie do listy odtwarzania po prawej stronie Dodaj wszystkie Dodaje wszystkie utwory z listy po lewej stronie do listy odtwarzania po prawej stronie Usuń jeden Wybrać jeden utwór na liście odtwarzania i nacisnąć tę ikonę aby go skasować Usuń wszystkie Usuwa wszystkie utwory z listy odtwarzania ...

Page 69: ...k cje jak odtwarzanie w trybie pełnego ekranu wybór postępu odtwa rzania oraz wybór plików Przed rozpoczęciem korzystania z odtwarzacza należy skopiować pliki wideo do foldera na karcie pamięci 3 2 2 Interfejs i obsługa Nacisnąć na interfejsie Media aby uzyskać dostęp do interfej su odtwarzacza wideo patrz poniżej Ikona Nazwa Objaśnienie Zamknij Dezaktywuje odtwarzacz plików wideo Poprzedni film Od...

Page 70: ...r plików wideo Umożliwia wybór odtwarzanych filmów Postęp Przesuwać suwak w lewo aby odtwa rzać plik od poprzedniego fragmentu lub w prawo aby odtwarzać go od następ nego momentu Głośność Przesunąć wskaźnik w lewo aby zmniejszyć natężenie dźwięku lub w prawo aby je zwiększyć Czas Wyświetla czas odtwarzania oraz czas trwania utworu muzycznego Nacisnąć na interfejsie Odtwarzacz wideo aby uzyskać do s...

Page 71: ...rka zdjęć W niniejszym rozdziale opisane są sposoby korzystania z przeglą darki zdjęć 3 3 1 Funkcje Przeglądarka zdjęć obsługuje formaty JPG GIF BMP i PNG a także następujące funkcje obrót zdjęcia zbliżanie oddalanie auto matyczne odtwarzanie Przed rozpoczęciem korzystania z przeglądarki należy skopiować zdjęcia do foldera na karcie pamięci 3 3 2 Interfejs i obsługa Nacisnąć na interfejsie Media a...

Page 72: ...enie Pomniejsza bieżące zdjęcie Obrót Obraca bieżące zdjęcie o 90 w kierunku zgod nym z ruchem wskazówek zegara Automatyczne odtwarzanie Cykliczne odtwarzanie wszystkich zdjęć w folde rze rozpoczynając od bieżącego zdjęcia Folder Umożliwia wejście do folderu w celu wyboru danego zdjęcia Zamknij Zamyka przeglądarkę i powraca do interfejsu Media Nacisnąć na interfejsie przeglądarki aby uzyskać dostę...

Page 73: ...cznych e book W niniejszym rozdziale opisane są sposoby korzystania z czytnika książek elektronicznych e book 3 4 1 Funkcje Czytnik obsługuje pliki TXT oraz następujące funkcje przewraca nie kolejnych stron i wybór folderu Przed rozpoczęciem korzystania z czytnika za pomocą przeglądar ki skopiować pliki TXT na kartę pamięci 3 4 2 Interfejs i obsługa Nacisnąć na interfejsie Media aby uzyskać dostęp...

Page 74: ...ej książki Poprzedni Odczyt poprzedniej strony Następny Odczyt następnej strony Ustawienie Umożliwia wybór tematu tekstu czcionki wielkości słów lub pogrubio nej czcionki Nowa zakładka Należy wybrać fragment tekstu i naci snąć tę ikonę aby stworzyć zakładkę Lista zakładek Umożliwia dostęp do listy zakładek w celu ich wybierania lub kasowania Strona stron Pokazuje numer bieżącej strony i licz bę ws...

Page 75: ...cz nej e book Czcionka Nacisnąć aby wybrać czcionkę książki elektro nicznej e book Pogrubienie Nacisnąć aby wybrać pogrubioną czcionkę Naci snąć ponownie aby anulować pogrubienie Nacisnąć na interfejsie czytnika książek elektronicznych e book aby uzyskać dostęp do foldera książek patrz poniżej Ikona Nazwa Objaśnienie Zamknij Zamyka bieżący folder Powrót Powraca do poprzedniego folderu ...

Page 76: ...dkę należy określić stronę naciskając lub przeciągać pasek przewijania na interfejsie czytnika w celu wybrania danego fragmentu tekstu Po znalezieniu fragmentu naci snąć Nacisnąć OK aby zakończyć Nacisnąć aby przeglądać utworzone zakładki na interfejsie Lista zakładek patrz poniżej Przeciągnąć pasek przewijania i wybrać zakładkę z listy po lewej stronie Nacisnąć aby przejść do strony oznaczonej za...

Page 77: ...tania z tego rozwiązania należy sprawdzić czy funkcja Bluetooth w telefonie została aktywowana Nacisnąć na głównym interfejsie systemu aby uzyskać dostęp do interfejsu Bluetooth patrz poniżej Na dole ekranu znajduje się pasek stanu połączenia Nacisnąć aby wyjść z interfejsu 4 1 Parowanie urządzeń Nacisnąć aby uzyskać dostęp do poniższego interfejsu umoż liwiającego nawiązanie łączności z telefonem...

Page 78: ...ecom eu 78 5 GPS Navigation Uwaga Podczas parowania należy umieścić telefon komórkowy w pobliżu urządzenia PND Po zakończeniu parowania na ekranie wyświetlany jest komuni kat Nawiązano łączność a interfejs pokazuje nazwę telefonu patrz poniżej ...

Page 79: ...łączenia wychodzące Nacisnąć aby wejść na ekran klawiatury telefonu patrz po niżej Naciskać przyciski klawiatury aby wybrać numer telefonu Naci snąć aby skasować ostatnią wpisaną cyfrę Nacisnąć aby wykonać połączenie ukazane na poniższej ilustracji ...

Page 80: ... Nacisnąć aby zwiększyć natężenie dźwięku Zakończenie rozmowy Nacisnąć aby zakończyć rozmowę Podczas łączenia z wybranym numerem na ekranie wyświetlane są następujące informacje Ikona Nazwa Objaśnienie Zmniejszenie poziomu głośności Nacisnąć aby zmniejszyć natężenie dźwięku Zwiększenie poziomu gło śności Nacisnąć aby zwiększyć natę żenie dźwięku Mikrofon Nacisnąć aby nawiązać połą czenie głosowe ...

Page 81: ...ięku Przełącza wyjście dźwięku na telefon komórkowy Klawiatura Nacisnąć aby otworzyć kla wiaturę patrz poniżej Zakończenie rozmowy Nacisnąć aby zakończyć rozmowę W przypadku niepowodzenia przy nawiązywaniu połączenia na ekranie wyświetlone zostaną poniższe informacje ...

Page 82: ...aną poniższe informacje Ikona Nazwa Objaśnienie Zmniejszenie pozio mu głośności Zmniejsza natężenie głosu Zwiększenie pozio mu głośności Zwiększa natężenie głosu Odbierz połączenie Odbiera połączenie Odrzuć połączenie Odrzuca połączenie przychodzące 4 4 Rejestr połączeń Nacisnąć na interfejsie Bluetooth aby uzyskać dostęp do ekranu rejestru połączeń patrz poniżej ...

Page 83: ...en przycisk aby wyświetlić listę przychodzących połączeń Rejestr nieudanych połączeń Nacisnąć ten przycisk aby wyświetlić listę nieudanych połączeń Usuń jeden Wybrać jeden numer na liście i naci snąć tę ikonę aby go usunąć Usuń wszystkie Wybrać wszystkie numery na liście i nacisnąć tę ikonę aby je usunąć Połącz Wybrać jeden numer na liście i naci snąć tę ikonę aby wykonać połącze nie z tym numerem...

Page 84: ...er 4 6 Ustawienia Nacisnąć na interfejsie Bluetooth aby uzyskać dostęp do ekranu ustawień patrz poniżej Ikona Nazwa Objaśnienie Nazwa Nazwa urządzenia wyświetlana podczas transmisji wykonywanej za pomocą funkcji Bluetooth Kod PIN Nacisnąć aby wprowadzić kod PIN umożliwiający połączenie pomiędzy urządzeniem PND i telefonem ko mórkowym Dzwonek Nacisnąć aby wybrać ton dzwonka ...

Page 85: ... HFP przy aktywacji funkcji Bluetooth 4 7 Lista sparowanych urządzeń Nacisnąć na interfejsie Bluetooth aby uzyskać dostęp do ekranu Lista sparowanych urządzeń patrz poniżej Ikona Nazwa Objaśnienie Lista profili Wybrać sparowane urządzenie z listy po lewej stronie i nacisnąć tę ikonę aby przeglądać listę profili patrz poniżej Usuń jeden Nacisnąć tę ikonę aby skasować jeden ele ment Rozłącz Nacisnąć p...

Page 86: ...rkowego 4 7 1 1 HFP profil zestaw głośnomówiący Wybrać usługę z listy profili i nacisnąć podświetloną ikonę po pra wej stronie Jeśli nawigacja jest połączona z telefonem komórkowym nacisnąć Zestaw głośnomówiący a następnie aby przerwać połączenie Jeśli nawigacja nie jest połączona z telefonem nacisnąć aby nawiązać połączenie 4 7 1 2 Dial Up Network Service profil usług modemowych Wybrać usługę DUN i ...

Page 87: ...sługo dawcy Nacisnąć ten przycisk aby dodawać modyfikować lub kasować informacje na temat wybranego usługodawcy Połącz z siecią Nacisnąć aby ustanowić połączenie DUN Po wykonaniu połączenia użyt kownik może wejść na ekran WINCE w celu korzystania z przeglądarki Internet Explorer do przeglądania stron interne towych i pobierania zawartości ...

Page 88: ... Kończy wyszukiwanie urządzeń Bluetooth Parowanie Po wybraniu urządzenia Bluetooth należy nacisnąć tę ikonę aby sparować nawigację z telefonem komórkowym Należy wpisać domyślny kod PIN 8888 Po uzyskaniu połączenia na ekranie wyświetlona zostanie lista profili urządzenia Patrz pkt 5 7 Lista sparowanych urządzeń Lista sparowa nych urządzeń Nacisnąć ten przycisk aby uzyskać dostęp do listy sparowanych...

Page 89: ... sparować je z innym urządzeniem W przypadku wystąpienia błędu na interfejsie urządzenia wyświetlony zostanie poniższy komunikat Można także nacisnąć aby uzyskać dostęp do ekranu Lista sparowanych urządzeń patrz poniżej Szczegółowe informacje na ten temat znajdują się w pkt Lista sparowanych urządzeń ...

Page 90: ...rkowego do pamięci urządzenia PND Wybierz numer Po wybraniu numeru z książki telefonicznej należy nacisnąć tę ikonę aby wykonać połą czenie z tym numerem Usuń Po wybraniu numeru z książki telefonicznej należy nacisnąć tę ikonę aby go skasować Rozdział V Gry W niniejszym rozdziale opisane są sposoby korzystania z dostęp nych gier Nacisnąć na głównym interfejsie systemu aby uzyskać dostęp do ekranu ...

Page 91: ...91 5 GPS Navigation 91 5 GPS Navigation 5 1 Othello Nacisnąć na interfejsie Gry aby uzyskać dostęp do poniższego ekranu ...

Page 92: ... GPS Navigation www modecom eu 92 5 GPS Navigation 5 2 DuiDuiPeng Nacisnąć na interfejsie Gry aby uzyskać dostęp do poniższe go ekranu 5 3 Russia Block Nacisnąć na interfejsie Gry aby uzyskać dostęp do poniższe go ekranu ...

Page 93: ... urządzeniu obejmują kalkulator i konwerter jednostek Nacisnąć na głównym interfejsie systemu aby uzyskać dostęp do ekranu Narzędzia patrz poniżej Nacisnąć aby wyjść z tego ekranu 6 1 Kalkulator Nacisnąć na interfejsie Narzędzia aby uzyskać dostęp do ekra nu kalkulatora patrz poniżej ...

Page 94: ...Rozdział VII Ustawienia 7 1 Streszczenie W niniejszym rozdziale opisane są sposoby wykonywania usta wień systemu nawigacji GPS Nacisnąć na głównym interfejsie systemu aby uzyskać do stęp do następujących funkcji systemowych ustawianie głośności podświetlenie ekranu język data i godzina kalibracja przywrócenie ustawień fabrycznych informacje na temat systemu USB i ścieżki dostępu do nawigacji ...

Page 95: ...95 5 GPS Navigation 95 5 GPS Navigation Nacisnąć aby wyświetlić kolejny interfejs ...

Page 96: ...na Ustawia datę w systemie Ustawia godzinę w systemie Ustawia strefę czasową w systemie Kalibracja Umożliwia kalibrację nieprecyzyjnie działającego ekranu urządzenia Informacje na temat systemu Wyświetla następujące informacje na temat syste mu wersja ROM wersja oprogramowania wersja OEM identyfikator platformy oraz identyfikator urządzenia Nadajnik FM Transmituje sygnały dźwiękowe nawigacji do zest...

Page 97: ...e z interfejsu ustawień głośności Głośność Dostępnych jest 10 ustawień głośności wyciszenie mak symalne natężenie dźwięku Nacisnąć aby stopniowo zwięk szyć natężenie dźwięku Dźwięk przyci sków Nacisnąć aby aktywować tę funkcję Nacisnąć ponownie aby ją anulować Dźwięk przy włączaniu urzą dzenia Nacisnąć lub aby wy brać dźwięk emitowany przy włączaniu urządzenia lub aby dezaktywować tę funkcję ...

Page 98: ...akty wacji podświetlenia Nacisnąć na głównym interfejsie systemu aby uzyskać dostęp do ekranu ustawień podświetlenia ekranu patrz poniżej Ikona Nazwa Objaśnienie Zamknij Wyjście z interfejsu ustawień podświetlenia ekranu Podświetlenie ekranu Przesunąć wskaźnik w lewo aby zmniejszyć natężenie pod świetlenia ekranu lub w prawo aby je zwiększyć Automatyczna janość ekranu Funkcja automatycznego do sto...

Page 99: ... patrz poniżej Nacisnąć lub aby wybrać język systemu i następnie nacisnąć aby zapisać wybrane ustawienie 7 5 Data i godzina Nacisnąć na interfejsie ustawień systemu aby uzyskać dostęp do ekranu ustawień daty i godziny patrz poniżej Dostępne ustawienia daty i godziny to ustawienie daty ustawienie godziny oraz ustawienie strefy czasowej ...

Page 100: ... systemie Na powyższym interfejsie należy nacisnąć lub aby wybrać strefę czasową Przykładowo jeśli urządzenie jest wykorzystywane w Chinach należy wybrać GMT 08 00 Pekin Chongqing Hong Kong Urumczi 7 6 Kalibracja Nacisnąć na interfejsie ustawień aby wyświetlić poniższe okno dialogowe kalibracji Nacisnąć OK aby wykonać kalibrację lub Anuluj aby ją anulować i przejść do interfejsu ustawień Po naciśn...

Page 101: ...systemu Nacisnąć na interfejsie ustawień aby uzyskać dostęp do ekra nu informacji na temat systemu 7 8 Nadajnik FM Nadajnik FM transmituje sygnały dźwiękowe nawigacji do zesta wów radiowych Należy dostosować częstotliwość nadawczą nawiga cji GPS do częstotliwości odbiorczej radia dzięki czemu dźwięki emi towane przez nawigację będą transmitowane przez system wzmac niający zestawu radiowego Nacisną...

Page 102: ...ejsu usta wień nadajnika FM Zapisz Zapisuje bieżące usta wienie Zastosuj nadajnik FM Zaznaczyć to pole aby aktywować funkcję nadaj nika FM Częstotliwość Przeciągnąć suwak w pra wo lub nacisnąć aby zwiększyć częstotliwość lub przeciągnąć suwak w lewo nacisnąć aby ją zmniejszyć Zakres częstotliwości to 88 00 Mhz 108 00 Mhz ...

Page 103: ...ekranie ustawień USB 7 9 1 PAMIĘĆ MASOWA 1 Nawigacja GPS musi być w trybie roboczym z kartą SD umiesz czoną w poprawnym gnieździe 2 Nacisnąć na głównym interfejsie systemu aby uzyskać do stęp do ekranu ustawień Opcja USB patrz poniżej Wybrać PAMIĘĆ MASOWA i nacisnąć aby zapisać ustawie nie 3 Podłączyć końcówkę MINI USB przewodu USB do portu MINI USB nawigacji GPS oraz standardową końcówkę USB do p...

Page 104: ...oniższy ekran Aby odłączyć nawigację od komputera PC i wejść w tryb ładowania USB można nacisnąć 4 Po zakończeniu połączenia odłączyć przewód MINI USB 7 9 2 MS ACTIVESYNC 1 Nacisnąć na głównym interfejsie systemu aby uzyskać do stęp do ekranu ustawień Opcja USB patrz poniżej ...

Page 105: ...ia transmisji danych 5 Po zakończeniu transmisji odłączyć przewód USB Ostrożnie Aby zapewnić bezpieczeństwo danych zapisanych w nawigacji należy regularnie wykonywać ich backup Uwaga Po wybraniu opcji PAMIĘĆ MASOWA gdy nawigacja GPS jest podłączona do komputera PC inne wykonywane działania zostaną zawieszone Ostrożnie Poniższe czynności spowodują zatrzymanie lub zawie szenie komunikacji pomiędzy s...

Page 106: ...ać ustawienie Ikona Funkcja Nacisnąć ten przycisk aby wybrać adres mapy Zaznaczyć to pole aby przy włączeniu systemu aktywować ustawioną mapę nawigacji 7 11 Przywracanie ustawień fabrycznych Nacisnąć na głównym interfejsie systemu aby przywrócić ustawienia fabryczne Wyświetlone zostanie poniższe okno dialogo we ...

Page 107: ...ation Nacisnąć OK aby przywrócić ustawienia fabryczne lub Anuluj aby powrócić do interfejsu ustawień Rozdział VIII Informacje na temat GPS Nacisnąć na głównym interfejsie systemu aby uzyskać dostęp do informacji na temat GPS patrz poniżej ...

Page 108: ...ozwiązywanie problemów W przypadku wykrycia nieprawidłowości w działaniu nawigacji GPS należy wykonać poniższe czynności W przypadku problemów których nie można rozwiązać w ten sposób należy skontaktować się z centrum obsługi klienta Błąd Powód Rozwiązanie Błąd aktywacji systemu Niski poziom na ładowania akumu latora Podłączyć zewnętrzne źródło zasi lania i naładować akumulator Awaria systemu Zres...

Page 109: ...iom gło śności Zwiększyć natężenie dźwięku Błędnie podłączona słuchawka Ponownie podłączyć słuchawkę Komunikacja z komputerem PC Błędne połączenie USB Podłączyć przewód USB Błąd odbioru sygnałów GPS Słaby sygnał GPS W przypadku niskiego natężenia sygnałów wysyłanych przez lokal nego satelitę urządzenie zaczyna odpowiednio pracować po około 3 minutach Utrata danych dotyczących map nawigacji Przypad...

Page 110: ... dyrektyw WE łącznie ze wszystkimi jej zmianami i uzupełnieniami 89 336 EWG Dyrektywa EMC 1999 5 WE Dyrektywa RTTE R TTE 73 23 EWG Dyrektywa LVD i że zastosowano niżej wymienione normy zharmonizowane ETSI EN 301 489 1 V1 8 1 2008 04 ETSI EN 301 489 9 V1 4 1 2007 11 ETSI EN 301 489 17 V1 3 2 2008 04 ETSI EN 301 489 19 V1 2 1 2002 11 EN 60950 1 2006 A11 2009 ETSI EN 300 328 v1 7 1 2006 10 ETSI EN 30...

Page 111: ...the collection Weight of the device 194g Ochrona środowiska Niniejsze urządzenie oznakowane jest zgodnie z dyrektywą Unii Europejskiej 2002 96 UE dotyczącą utylizacji urządzeń elektrycznych i elektronicznych WEEE Zapewniając prawidłowe usuwanie tego produktu zapobiegasz potencjalnym negatywnym konsekwencjom dla środowiska naturalnego i zdrowia ludzkiego które mogą zostać zagrożone z powodu niewłaś...

Page 112: ...Copyright 2010 MODECOM S A All rights reserved MODECOM Logo is a registered trademark of MODECOM S A MODECOM ...

Reviews: