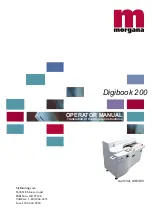
Summary of Contents for DigiBook 200

Page 1: ...Morgana DigiBook 200 Automatic PUR Perfect Binding Machine Instruction Manual ...

Page 2: ...Digibook 200 rev 0 1UL ID01460 OPERATOR MANUAL Translation of the original instructions MyBinding com 5500 NE Moore Court Hillsboro OR 97124 Toll Free 1 800 944 4573 Local 503 640 5920 ...

Page 3: ...v 0 1UL ID1460 REVISIONE DATA MOTIVO 0 0 01 02 2017 Prima edizione 0 1 20 03 2017 Tab fusibili avvertenze indirizzo MyBinding com 5500 NE Moore Court Hillsboro OR 97124 Toll Free 1 800 944 4573 Local 503 640 5920 ...

Page 4: ...cal Specifications 16 5 3 Pneumatic Specifications 16 5 4 PARTS IDENTIFICATION 17 5 4 1 CLAMP UNIT 3 18 5 4 2 MILLING UNIT 2 18 5 4 3 GLUE UNIT 7 18 5 4 4 PRESS UNIT 6 18 5 4 5 Glue Cleaner Tanks 19 5 4 6 WASTE VACUUM 19 5 4 7 CONTROLS AND INDICATORS 20 5 4 8 ACCESSORIES 20 5 5 OPERATOR PANEL 21 5 5 1 MAIN PAGE 21 5 5 2 MACHINE PRE SET ICON 1 22 5 5 3 CARRIAGE PARAMETERS 2 23 5 5 4 GLUE UNIT 3 24 ...

Page 5: ...ADING 45 7 1 3 MEASURING THE BOOK 48 7 2 START PROCESSING 49 7 2 4 GLUE REACTIVATING PROCEDURE 49 7 2 5 COVER POSITIONING 52 7 2 6 LAUNCH 54 8 MACHINE CLEANING 57 8 1 END OF WORK CLEANING 58 8 2 SPINE GLUE EXTRUDER CLEANING PROCEDURE 60 8 3 SIDE GLUE EXTRUDERS CLEANING PROCEDURE 62 8 4 CLEANING DETAILS 64 8 5 GLUE SYSTEM DRAINAGE 66 9 MAINTENANCE 71 9 1 PINS LUBRICATION 71 9 2 DEEP CLEANING OF GLU...

Page 6: ... of the basic operations work This manual was written so as to be easily understandable even to those users who have never used this type of machine To ensure that the machine provides maximum performance read this manual carefully before using it After reading keep this manual in a safe place and consult it as needed MyBinding com 5500 NE Moore Court Hillsboro OR 97124 Toll Free 1 800 944 4573 Lo...

Page 7: ...FACTURE OF MODELLO TIPO MODEL TYPE 200 B DIGIBOOK MATRICOLA SERIAL MB200 XXXX ANNO DI COSTRUZIONE MANUFACTURED IN 2017 CORRISPONDE ALLE SEGUENTI DISPOSIZIONI NELLA VERSIONE ATTUALMENTE VALIDA IS IN AC CORDANCE WITH THE FOLLOWING DIRECTIVES AS IT IS Direttiva CE per Macchine 2006 42 CE Directive 2006 42 CE Direttiva EMC 2014 30 UE EMC Directive 2014 30 UE Direttiva sulla Bassa tensione 2014 35 UE L...

Page 8: ...lt in injury to the operator maintainer installer or the machine CAUTION Sharp blades Cut Risk CAUTION Electrical voltage Risk of electric shock CAUTION Hot surfaces Risk of burns CAUTION Risk from rotating parts Risk of crushing CAUTION Hazardous moving parts do not attempt fingers and other body parts CAUTION Risk from rotating parts Risk of crushing CAUTION Hazardous moving parts do not attempt...

Page 9: ...s and avoid taking personal initiatives It is assumed that the operator has at least the following requirements General culture and specific enough to level each for its expertise to read and understand the contents of the manual in the parts that concern him including the correct interpretation of the drawings and diagrams electrical pneumatic and hydraulic systems Ability to correctly interpret ...

Page 10: ...ctions not authorized by the manufacturer It s forbidden to remove or render inoperative the guards provided for the safety of persons as well as tampering with and or modify even partially the safety devices installed on the machine In case of alarm due to the intervention of the safety the operator must request the immediate intervention of the qualified maintenance personnel It is forbidden to ...

Page 11: ...rent operations to be carried out Tight clothing to avoid that they not remain hooked to protruding parts Long hair should be worn away from the moving machinery or in a net Do not wear watches or jewellery Eye protection against possible splashes of glue or PUR Cleaner high temperature Protective Gloves Respirator mask suitable for the use of removing used glue MyBinding com 5500 NE Moore Court H...

Page 12: ...e protective gloves Glue tank CAUTION Hot surfaces Risk of burns Use protective gloves Milling Area CAUTION The disc cutter contains several types of cutting tools Use protective gloves in case you want to remove the roughening Press Area CAUTION Danger of crushing between the frame and the grip CAUTION Danger of crushing on the press CAUTION Hazardous moving parts do not attempt fingers and other...

Page 13: ...ching of book spines already bound e g bound with glue staples stitched seal point Use of materials other than those specified in the previous paragraph Operations outside of the specifications of the data Sheet The user is solely responsible for damage to persons or property that result from improper use outside of the intended use It is forbidden to use the machine in explosive atmosphere condit...

Page 14: ...long sides the front and rear side IMPORTANT a Tools for clamping and lifting are not provided b The disposal of packaging materials is at the recipient s care and must be performed in accordance with the laws in the country where it will be carried out c Remove dust and external dirt accumulated during the transport phases 3 DISPOSAL If you decide to stop using the machine or some part of it the ...

Page 15: ...icient to perform the operations of lifting and safe transport Location The bearing surface must have a capacity greater than the total mass of the machine Unused for less than 30 days Never open the glue tank otherwise it accelerates deterioration creating serious permanent damage to the glue application This failure to comply will void the warranty of the group glue Unused for more than 30 days ...

Page 16: ...omatic electric Vice Closure Automatic electric Spinw preparation Milling disc Ø 120 mm Roughening roughening devices for processing the spine 1 double Brush for processing and cleaning the spine Yes Excludable cutter Mechanical with position control Milling thickness Variable Woodchip vacuum Inside the machine Glue application system PUR glue tank Hot Melt 3 Kg hermetically sealed PUR extrusion p...

Page 17: ... type with dryer Periodically check the quality of the compressed air supplied to the machine and operating values Supply pressure The pneumatic air supply of the user must ensure to the inlet fitting of the compressed air in the binder the following values 7 bar ensure a consumption of air equal to 160 Nl min Air Quality Class 3 Pneumatic features Air consumption 100 Nl min Gauge input 6 bar Mini...

Page 18: ... 13 14 11 1 Glue tank compartment access 2 Milling unit 3 Clamp unit 4 Table of measurement 5 Front left cover 6 Press unit 7 Glue unit 8 Front right cover 9 Cleaner tank compartment access 10 Fixed empty glue cover 11 Book holder 12 Rear cover 13 Serial plate 14 Pneumatic unit ...

Page 19: ...upport 3b Front book support 3c Moveable clamp 3d Stop glue sensor 5 4 2 MILLING UNIT 2 2a Milling guard 2b Milling tool 2c Notching roughening 5 4 3 GLUE UNIT 7 7a 7b 7a Glue head 7b Waste collector 6a 5 4 4 PRESS UNIT 6 6a Square Adjusters 3a 3b 3c 3d 2c 2a 2b ...

Page 20: ...WASTE VACUUM The extractor is contained in the left side of the binder and is electrically connected to it Upon delivery of the binder the extractor is ready and connected both electrically and mechanically suction tube turns on and off simultaneously with the cutter CAUTION Max power absorbable by the socket 1 2 Kw 16d MyBinding com 5500 NE Moore Court Hillsboro OR 97124 Toll Free 1 800 944 4573 ...

Page 21: ... the extruder if there are persistent residues 1x E Cleaning spatula 2x F Cleaning wire 0 5mm G Allen screw H Extraction screw M6 x 30 mm I Protective gloves J Low book support K High book support L Maintenance oil M Allen key set 5 4 7 CONTROLS AND INDICATORS 17 19 18 20 21 22 17 Control button left 18 Milling height adjuster 19 Control button right 20 Display 21 Emergency stop button 22 Air pres...

Page 22: ...ting of the glue stop values left and right 12 Value to set pressing time 13 Book parameters setting and type of processing button icon 14 Icon button to access the book counter page 15 Displaying disabled press 16 Viewing disabled cutter 17 Displaying that a correction value was applied to the vise 18 Displaying that a correction value was applied to the extruder 19 They indicate the current temp...

Page 23: ...that you need to run a machine pre set In order to carry out the pre set it is necessary to press the icon this will begin to flash press and hold the left safety dual control of the machine until the end of the operation This operation will be complete when all the axes are zeroed If the glue unit is not at the right temperature resetting of this axis will not be carried out The operation will th...

Page 24: ...reset the carraige you need to select the direction a checkmark will appear and press the left dual control of security to the desired position The value 2d indicates the current position of the clamp The preset of the clamp can also be performed from this page by selecting the left hand icon 3 0 999999 50 50 999 99 99 10 130 120 10 FREE 1 30 and press the left dual control security until the end ...

Page 25: ...mended by the adhesive manufacturer The temperature of the pre melting unit to be kept from 5 to 15 less than that of extrusion During the heating phase the indicators appear in red and the machine will highlight the message Temperatures not OK When the measured temperatures correspond to those set indicators appear in green the machine at this point will wait for a timer to stabilize of the tempe...

Page 26: ... into pressure the glue tank I open the valve of the glue until the release of the button This command causes the glue to leak from the coating head 3i Button icon with blue arrow controls the opening of the cleaner until the button is released 3l Glue discharge button icon 3m Previous page icon 3n Corrective value for the coating head 0 5mm 1mm 3o Set automatic glue or manual mode 3p The value in...

Page 27: ...ou do not browse the pages for more than 15 seconds the machine goes back to the STAND BY screen The STAND BY mode can be activated from the glue group page 3 by holding the icon button 3a for more than one second To return to the normal condition hold the display for more than one second after which one must wait until the glue unit reaches the set temperature Upon reaching the set temperature it...

Page 28: ...ppear checkmark and press the left dual control of security to the desired position MANUAL OPERATION OF BACK STOP Select the direction of displacement of the cover stop by selecting the arrow You can run the preset of the bar of the cover also from this page by selecting the preset icon 3 0 999999 50 50 999 99 99 10 130 120 10 FREE 1 30 4a MyBinding com 5500 NE Moore Court Hillsboro OR 97124 Toll ...

Page 29: ... store up to 10 working configurations The field 5a displays the selected recipe To enter a tab you need to select it and press OK 5a 5 5 7 JOB MEMORY 5 MyBinding com 5500 NE Moore Court Hillsboro OR 97124 Toll Free 1 800 944 4573 Local 503 640 5920 ...

Page 30: ...ield for a brief description of the recipe 5p Displays the corrective value of the opening of the vise 5q Displays the corrective value of the opening of the extruder 5r View the pressing time 5s Previous page icon 5t Button icon to save the machine settings on the recipe Currently set On this page the parameters currently set on the machine are displayed on the various configuration pages regardl...

Page 31: ...lows the application of corrective values to the values to be transferred to the creasing machine Press icon 6e INFO SERVICE to access to the following page The column 6j shows if the associated group has been reset GREEN RESET Column 6k shows whether the associated group is in the working position GREEN POSITION Field 6l shows the length of the last book executed By pressing field 6i the inputs o...

Page 32: ...to be transferred to the creasing machine opens 6n 6o 6p 6n Apply a correction value to the rear hit 6o Apply a corrective value to the thickness of the book 6p Set the height value for courtesy creasing of the cover MyBinding com 5500 NE Moore Court Hillsboro OR 97124 Toll Free 1 800 944 4573 Local 503 640 5920 ...

Page 33: ... the left screen is selected while for books between 31 and 50 mm the speed shown on the right screen is selected By pressing on icon 9c you can change the speed of the machine once selected the desired speed press OK You can disable the CAUTION message with the 6c button icon settings page or from the button icon 9a 5 5 10 ALARMS SCREEN 10 Here the machine alarms appear Press ALARM RESET to reset...

Page 34: ...during the return stroke the vise returns to the open vise position in order to load the following book last done 13b In this configuration the machine performs a normal book processing with cover When simultaneously pressing the buttons the machine carries out the following operations Load the glue tank for 10 seconds if empty closes the vise Activates the motor of the cutter and of the suction i...

Page 35: ...cessing of a book with a delicate cover When simultaneously pressing the buttons the machine carries out the following operations Load the glue tank for 10 seconds if empty closes the vise Activates the motor of the cutter and of the suction in the case they are enabled the press rises and presses for the set time once the pressing time expires the vise opens to the open vise extent and simultaneo...

Page 36: ...size of the machine parts and to the selected lifting means by paying attention to the presence of any obstacles other machines walls or such along the path to take 6 2 FLOOR The machine does not require special foundations The availability of industrial flooring must be guaranteed The binder rests on 4 feet diameter of 100 mm and its weight is 250 kg 6 3 LIGHTING Good lighting is required in orde...

Page 37: ...s area to load the glue and or cleaner onto the machine Access area for the service to access the electrical and pneumatic panel Passing area Transit area from the work area to the glue loading area Operator Work Zone Operator s work area during normal use of the machine Left side of the machine It is not necessary to leave a useful space 800 500 1200 800 3050 2850 Zona di carico colla e cleaner L...

Page 38: ...asterbook 200 Rel 0 2 IL PRESENTE DISEGNO E DI PROPRIETA DELLA K G S NON PUO ESSERE RIPRODOTTO NE TRASMESSO A TERZI SENZA APPROVAZIONE SCRITTA THIS DRAWING MUST NOT BE REPRODUCED WITHOUT OUR WRITEN CONSENT Peso MATERIALE K G S Srl 2 1 2 0 8 0 5 0 3 0 2 oltre 2000 a 4000 oltre 1000 a 2000 oltre 400 a 1000 oltre 120 a 400 oltre 30 a 120 oltre 6 a 30 METRIC Foglio Nr di Revisione SolidWorks Sistema C...

Page 39: ...The cable is 3 meters long with sectioned end with the Protective Earth PE It will be the customer care to adjust the cable for connection on site in accordance with the applicable regulations 6 7 1 EARTH CONNECTION The binder is provided with a Protective Earth PE The installer must perform a ground connection according to regulations MyBinding com 5500 NE Moore Court Hillsboro OR 97124 Toll Free...

Page 40: ...ly according to the following procedure Connect the 6 mm hose outer diameter to the quick coupling of the binder Pneumatically feed the machine by moving the cursor to the right MyBinding com 5500 NE Moore Court Hillsboro OR 97124 Toll Free 1 800 944 4573 Local 503 640 5920 ...

Page 41: ...ging and maintenance requirements CAUTION Only glue of the same Type and Brand must be added to the tank A new type of glue is only inserted when the glue unit is completely empty and cleaned with Blu Cleaner CAUTION With Polyurethane glue do not leave the tank open for more than 10 minutes CAUTION Never fill the tank with more than 3kg of glue To access the glue tank 1 you have to open the slidin...

Page 42: ... the tap on pre melter The tap with the lever positioned vertically is open 04 Set the temperature of the glue tank and glue unit from the glue unit page 3 according to the glue in the machine or the amount you want to use 05 Wait for the heating and temperature stabilization phase The timer placed under the stand by icon will start When the timer disappears stabilization is completed and you can ...

Page 43: ... glue reservoir while the cleaner tank remains in pressure at 2 bar 07 Loosen the locking knob turn it anti clockwise 08 Tilt the locking knob until its rest position The lid is thus free to open 09 Lift the lid up to its maximum opening capacity by holding its side knob MyBinding com 5500 NE Moore Court Hillsboro OR 97124 Toll Free 1 800 944 4573 Local 503 640 5920 ...

Page 44: ... the instructions of the manufacturer of the glue Take a pack of glue and check the integrity of the aluminium coloured container also make sure that it has not passed the expiry date written on the packaging 11 Cut the protective film 12 Completely remove the film 13 Insert the cartridge in the tank ...

Page 45: ...ttention to the high temperature of the components Turn the knob clockwise in order to vigorously seal the tank 16 Close the rear sliding door of the machine provided with handle MyBinding com 5500 NE Moore Court Hillsboro OR 97124 Toll Free 1 800 944 4573 Local 503 640 5920 ...

Page 46: ...ut the loading of the cleaner carefully follow the sequence below 01 Turn on the machine by putting the switch to ON 02 Check if the indicated pressure in the inlet pressure gauge is correct MIN 6 BAR 03 Set the temperature of the glue tank and glue unit from the glue unit page 3 according to the glue in the machine or the amount you want to use MyBinding com 5500 NE Moore Court Hillsboro OR 97124...

Page 47: ...proceed to the following phase 05 Open the access compartment cleaner tank 9 provided with a handle 06 Unscrew the cleaner tank knob You will notice an air leak because the machine continues to provide air to fuel the tank 07 Fill the tank up to about 3 4 of its volume with the cleaner by using a small container MyBinding com 5500 NE Moore Court Hillsboro OR 97124 Toll Free 1 800 944 4573 Local 50...

Page 48: ...ng attention to the high temperature of the components Tighten the knob until the noise of the air disappears 09 Close the cleaner tank access compartment 9 provided with a handle MyBinding com 5500 NE Moore Court Hillsboro OR 97124 Toll Free 1 800 944 4573 Local 503 640 5920 ...

Page 49: ...he book block and place the probe in the fully open position 03 If you wish to perform continuous measurements such as inserting or removing parts of the book block once the correct measure is found just press the left button of the dual control to acquire the measurement Note The measurement table does not work as long as the rear hit of the cover is moving If it were necessary to reset the measu...

Page 50: ...ou will need to perform the RESET GLUE procedure 01 From the processing page hold the button 3 0 999999 50 50 999 99 99 10 130 120 10 FREE 1 30 for a few seconds to initiate the RESET GLUE procedure 02 In this phase the head is opened to facilitate the output of the cleaner 03 In this phase the machine starts the pin cleaning cycle if the machine has been switched on recently After cleaning the pi...

Page 51: ...nk by using the green palette Press the icon to release additional glue until the cleaner traces disappear If necessary you can change the excess glue pressure by setting a correction value in the blue field Clean up all the excess leaked material very well using the shovel and paper towels Press OK 05 Wait for the closing and opening of the extruder and press OK ...

Page 52: ...place the grains using the Allen key supplied pay attention to the temperature press OK Caution the grains must protrude max 1 mm Press OK MyBinding com 5500 NE Moore Court Hillsboro OR 97124 Toll Free 1 800 944 4573 Local 503 640 5920 ...

Page 53: ...g position the cover hit by pressing the left dual control security The icon disappears when all axes are in position 03 Manually place the cover as indicated by the arrows both against the eccentrics mentioned on the side and against the log of the cover B see previous picture The standard calibration provides that the sides of the cover form between them 90 corners MyBinding com 5500 NE Moore Co...

Page 54: ... between them 90 corners If the cover has problems caused by improper trimming it is possible by adjusting the position of the eccentric on the operator side to adjust the squaring of the positioning MyBinding com 5500 NE Moore Court Hillsboro OR 97124 Toll Free 1 800 944 4573 Local 503 640 5920 ...

Page 55: ...e Set the press time 02 Select the type of processing 03 Measure the thickness of the book to be bound with the appropriate measuring table 04 According to the thickness detected select the appropriate working speed by pressing the speed icon 05 3 0 999999 50 50 999 99 99 10 130 120 10 FREE 1 30 Perform a pre set if necessary and then position the axes 06 Adjust the pressure of the glue with the r...

Page 56: ...ture 10 Start the process by pressing and holding the safety dual control until the machine reaches the extreme right position The machine closes the vise and it will begin processing the book the cart will start moving passing on the cutter and the glue unit when it comes to position the press will apply the cover if selected If the buttons are released during the forward stroke the cart locks im...

Page 57: ...ok 12 Check the gluing of the book If necessary correct the values of the front stop and rear glue the position of the cover and the pressing time MyBinding com 5500 NE Moore Court Hillsboro OR 97124 Toll Free 1 800 944 4573 Local 503 640 5920 ...

Page 58: ... uniform extrusion of the adhesive The glue unit must be kept clean from deposits of glue PUR glue residues with time cannot be removed and damage the equipment Final cleaning work must be carried out within 120 minutes from the non use of the machine After making the final cleaning work the machine can remain switched off with inside PUR glue for 2 weeks CLEANING PROGRAM EVERYDAY END OF WORK CLEA...

Page 59: ...0 for a few seconds to start the procedure 02 During this stage the glue unit prepares for daily cleaning follow the instructions on the display step by step Replace the grains from the head and remove the excess cleaner Pressthebutton untilthetracesofgluedisappear make use of the calibrated blade in this operation Press OK Use the green spatula provided and drain the glue to the collection tank T...

Page 60: ...01460 03 Once you have finished the cleaning procedure close the rear tap The tap is closed when it is in a horizontal position MyBinding com 5500 NE Moore Court Hillsboro OR 97124 Toll Free 1 800 944 4573 Local 503 640 5920 ...

Page 61: ...utton for manual movements 03 Fully open the extruder by pressing on the green arrow 04 Insert the calibrated blade within the extrusion slit until the bottom is reached and move it along the slot to remove or unlock any possible occlusion MyBinding com 5500 NE Moore Court Hillsboro OR 97124 Toll Free 1 800 944 4573 Local 503 640 5920 ...

Page 62: ...tion value in the blue field Check whether the extrusion of the glue is smooth and continuous Otherwise insert the calibrated blade and repeat the cleaning process The tank pressure will switch off after 10 sec of non use 06 Wipe the blade carefully When the glue is completely crosslinked it will make the blade unusable MyBinding com 5500 NE Moore Court Hillsboro OR 97124 Toll Free 1 800 944 4573 ...

Page 63: ...ully open the extruder by pressing on the green arrow 04 The glue spread on the side of the book is extruded through 3 small channels placed on the plates containing the book 05 For proper lateral extrusion of the glue it is necessary to remove the closing grain and insert in the 3 holes the supplied wire Repeat this operation on both the holding plates of the book ...

Page 64: ...rder to enter into the slit underneath 07 Careful when refitting the grains they must not protrude otherwise a collision with the vice could be caused They may protrude max 1 mm MyBinding com 5500 NE Moore Court Hillsboro OR 97124 Toll Free 1 800 944 4573 Local 503 640 5920 ...

Page 65: ...ing to the glue unit 02 Press the button for manual movements 03 Fully open the extruder by pressing on the green arrow 04 Use the blade to remove all visible traces of glue residues MyBinding com 5500 NE Moore Court Hillsboro OR 97124 Toll Free 1 800 944 4573 Local 503 640 5920 ...

Page 66: ...come unusable thereafter 07 Periodically clean the glue tank pay attention HIGH TEMPERATURE use cloth that do not leave residues in the tank itself use scraping tools that do not damage the inner surface of the pre melting Prevent cross linked parts of glue from remaining within the pre melter itself the latter may occlude the coating head If the pre melter were to be excessively dirty or encruste...

Page 67: ...ified maintenance expert The total emptying of the glue system must be run when you want to completely free up the machine from a certain type of glue The machine must be in temperature and loaded in the glue extruder see par 6 2 6 01 Press the button corresponding to the glue unit 02 Press the button for manual movements 03 Remove the right front carter by pulling it toward you ...

Page 68: ...t 05 Install at the draining tap glue discharge the glue discharge protection by inserting the seats in the special screws partially screwed 06 Place an empty container under the glue discharge protection to collect the material that is coming out 07 Open the glue draining tap placed over the newly installed protection ...

Page 69: ...material flows from the tank When the material is about to end the machine will expel air and material when the machine expels only air release the icon 11 Open the top sliding door 1 of the machine provided with a handle The machine goes into a state of emergency and releases pressure to the glue reservoir while the cleaner tank remains in pressure at 2 bar 12 Loosen the locking knob turn it anti...

Page 70: ...g knob until its rest position 14 Open the glue emptying plate by loosening the two Allen screws 15 Place one of the trays provided under the tap glue MyBinding com 5500 NE Moore Court Hillsboro OR 97124 Toll Free 1 800 944 4573 Local 503 640 5920 ...

Page 71: ...taps wipe off the taps to remove all traces of glue and lubricate valves with high temperature grease this prevents any valve lock 17 Remove the exhaust protection glue attach the two cover plates and place the right front cover MyBinding com 5500 NE Moore Court Hillsboro OR 97124 Toll Free 1 800 944 4573 Local 503 640 5920 ...

Page 72: ...s must be performed by a qualified maintenance technician 9 1 PINS LUBRICATION Every 15 days the machine displays a screen when you try to run the glue load cycle or the cleaner load cycle It is therefore necessary to carry out the lubrication of pins 01 Remove the protective cover by unscrewing the knob that locks it ...

Page 73: ... the guard and tighten the knob that locks it NOTE In order to prolong the life of the valves it is possible to lubricate them at the end of each day To carry out lubrication it is necessary to remove the cover as described in this chapter oil location and move them by pressing the icon 3h repeatedly for less than 1 second 3h After lubrication mount the previously removed carter ...

Page 74: ...he emergency button 02 Remove the two screws indicated by the arrow with an allen key 03 Lift the clamp and remove it 04 Remove the brass runner supporting the clamp 05 Thoroughly clean the clamp in all its points using a cutter calibrated wire and paper Remove the closing grain to thoroughly clean the lateral extrusion channels During assembly of the grain be careful not to extend more than 1 mm ...

Page 75: ...rease and in particular the slide pins of the brass runner Reposition the runner to the clamp 07 Mount the clean clamp by inserting the left side in the runner and lowering it until it makes contact 08 Firmly push the clamp to the right and tighten the two screws with the allen key ...

Page 76: ...achine at operating temperature after having carried out the final cleaning work 01 Press the emergency button 02 Remove the two screws indicated by the arrow with an Allen key 03 Lift the clamp and remove it 04 Loosen the lock nut and the relative screw of the stop clamp 05 Remove the two screws indicated by the arrow with an Allen key and remove the stop clamp ...

Page 77: ...ove the five screws holding the top strip 07 Remove the top strip 08 Press the button until the traces of glue disappear make use of the calibrated blade in this operation Clean the head by pouring the cleaner into the collection tray and clean everything with paper ...

Page 78: ... Torx T9 screws 10 Mount the clean clamp by inserting the left side in the runner and lowering it until it makes contact 11 Firmly push the clamp to the right and tighten the two screws with the Allen key 12 Set the opening of the coating head to 7 7mm pressing on the value Press the left dual control to perform the movement ...

Page 79: ...low we show you the list of fuses with the reference number in the wiring diagram Reference number in the wiring diagram Quantity Model FU01 00 2 KTK 20 Fast 10x38 FU01 01 2 FNQ 10 Delay time 10x38 FU02 03 2 KTK 6 Fast 10x38 FU02 01 1 Glass 4A 5x20 FU02 02 1 Glass 8A 5x20 FU10 01 2 KTK 6 Fast 10x38 FU11 01 2 KTK 6 Fast 10x38 FU13 01 2 FNQ 10 Delay time 10x38 FU18 01 2 KTK 4 Fast 10x38 FU18 02 2 KT...

Page 80: ...e set 10 Vise encoder error Clamp encoder error Check that there is nothing blocking the movement reset the alarm and run pre set 11 Glue head encoder error Glue Head encoder error Check that there is nothing blocking the movement reset the alarm and run pre set 12 Cover encoder error Cover encoder error Check that there is nothing blocking the movement reset the alarm and run pre set 13 Press Mov...

Page 81: ...t the emergency button is disabled Check that all doors are closed Check the air pressure of the machine Check that the cart is in place Is the display on the main page IRREGULAR GLUE START STOP Clean the glue application group Verify that the temperature of the glue unit is consonant with that of the used glue Check the state of the glue The glue must not be inserted in the machine for too long o...

Page 82: ...5 tenths behind with respect to the thread of the vise PRESS Book dented clean the plates with suitable solvents and do not use abrasives The edge is pinched contact technical support The book block is lined laterally make sure you entered the correct thickness of the book Clean the cutter rear contrast MyBinding com 5500 NE Moore Court Hillsboro OR 97124 Toll Free 1 800 944 4573 Local 503 640 592...

Page 83: ...82 MB 200 rev 0 1UL ID1460 note MyBinding com 5500 NE Moore Court Hillsboro OR 97124 Toll Free 1 800 944 4573 Local 503 640 5920 ...

Page 84: ...83 MB 200 rev 0 1UL ID01460 MyBinding com 5500 NE Moore Court Hillsboro OR 97124 Toll Free 1 800 944 4573 Local 503 640 5920 ...

Page 85: ...MyBinding com 5500 NE Moore Court Hillsboro OR 97124 Toll Free 1 800 944 4573 Local 503 640 5920 ...

Reviews: