background image

68015000898-A

*68015000898*

EN

© 2012 Motorola Solutions, Inc. All rights reserved.

May 2012

Mobile Release  10.5

MTP3200
FEATURE USER GUIDE

Summary of Contents for MTP3200

Page 1: ...68015000898 A 68015000898 EN 2012 Motorola Solutions Inc All rights reserved May2012 Mobile Release 10 5 MTP3200 FEATURE USER GUIDE ...

Page 2: ......

Page 3: ... Buttons 2 15 2 10 Holding Your Radio 2 15 2 11 Setting Vertical Flip 2 16 2 12 Entering TMO DMO Mode 2 17 2 13 Transmit Inhibit Mode 2 17 2 14 Selecting a Talkgroup 2 18 2 15 Activating Talkgroup Scanning 2 18 2 16 Dialing through Soft Numeric Keypad 2 19 2 17 Writing Text 2 19 2 17 1 Text Entry Icons 2 20 2 17 2 Keys Usage 2 20 2 18 Broadcast Call 2 21 2 19 Ambience Listening AL Call 2 21 2 20 O...

Page 4: ... 3 6 6 Emergency Alarm 3 12 3 6 7 Hot Microphone 3 13 3 6 8 Alternating Hot Microphone 3 13 3 6 9 Entering Emergency Mode 3 14 3 6 10 Exiting Emergency Mode 3 14 3 6 11 Making an Emergency Group Call 3 14 3 6 12 Receiving an Emergency Group Call 3 14 4 GPS Location Service 4 1 4 1 Enhancing GPS Performance 4 2 4 2 Enabling GPS 4 3 4 3 GPS Icon 4 3 4 4 GPS Different Location Displays 4 3 4 5 Viewin...

Page 5: ...tect 5 20 5 6 1 1 Protecting the Radio with a PIN Code 5 21 5 6 1 2 Unblocking Your Radio 5 21 5 6 1 3 Changing PIN Code 5 22 5 6 2 Keylock Setup 5 22 5 6 2 1 Keypad Lock Notification 5 23 5 6 2 2 Setting Automatic Keylock Delay 5 23 5 6 2 3 Setting Keylock on Startup 5 23 5 6 3 Air Encryption 5 23 5 6 3 1 Viewing Air Encryption State 5 24 5 6 3 2 Air Encryption Key Deletion 5 24 5 6 4 K Validity ...

Page 6: ...D Off 5 38 5 7 8 Time and Date 5 38 5 7 8 1 Setting Time and Date on the Display 5 39 5 7 8 2 Setting Time Format 5 39 5 7 8 3 Setting Time Manually 5 39 5 7 8 4 Setting Date Format 5 40 5 7 8 5 Setting Date Manually 5 40 5 7 8 6 Setting Time Offset 5 40 5 7 8 7 Setting Automatic Update for the Time and Date 5 41 5 7 9 Energy Economy 5 41 5 7 9 1 Enabling Energy Economy 5 42 5 7 9 2 Viewing Energy...

Page 7: ... 5 14 1 Enabling Disabling SIM Card End to End Encryption 5 57 5 14 2 Setting Alarm Tone 5 57 5 14 3 Updating Encryption Keys 5 57 5 14 4 Viewing OPTA 5 58 5 14 5 Setting OPTA Filter 5 58 5 14 6 Crypto Registration 5 59 5 14 7 Audio Settings 5 59 5 14 8 DMO Encryption 5 60 5 14 9 SDS Encryption Keys 5 60 6 Features 6 1 6 1 MS ISDN 6 1 6 2 Dialing through Soft Numeric Keypad 6 1 6 3 Phone PABX Spee...

Page 8: ......

Page 9: ...List of Figures Figure 3 1 Trunked Mode Operation 3 2 Figure 3 2 Direct Mode Operation 3 6 vii ...

Page 10: ......

Page 11: ...tatus Icons 2 12 Table 2 9 Text Entry Screen Icons 2 20 Table 2 10 Keys Usage 2 20 Table 2 11 One Touch Button Features 2 21 Table 2 12 During the Call 2 23 Table 4 1 Different Location Displays 4 3 Table 5 1 Menu Icons 5 2 Table 5 2 Menu Structure 5 2 Table 5 3 Inbox Icons 5 9 Table 5 4 Outbox Icons 5 13 Table 5 5 Contact Types 5 17 Table 6 1 Radios Interactions 6 4 Table A 1 Radio Tones A 1 Tabl...

Page 12: ......

Page 13: ...itten permission of Motorola 2012 Motorola Solutions Inc All Rights Reserved No part of this document may be reproduced transmitted stored in a retrieval system or translated into any language or computer language in any form or by any means without the prior written permission of Motorola Solutions Inc Furthermore the purchase of Motorola products shall not be deemed to grant either directly or b...

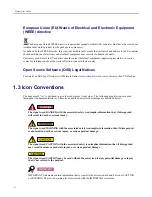
Page 14: ... disc 1 3 Icon Conventions The document s set is designed to give the reader more visual clues The following graphic icons are used throughout the documentation set These icons and their associated meanings are described below The signal word DANGER with the associated safety icon implies information that if disregarded will result in death or serious injury The signal word WARNING with the associ...

Page 15: ...mind the reader how to complete an action when it is not part of the current procedure for instance or tell the reader where something is located on the screen There is no warning level associated with a note SUGGESTION SUGGESTION implies a recommendation or tip from Motorola that does not require to be followed but might be helpful There is no warning level associated with SUGGESTION 1 3 ...

Page 16: ......

Page 17: ...minal Permanent Disable High Low Audio Toggle During the Call This chapter provide you with a basic information on how to use the radio 2 1 Using this Guide This guide describes all available radio features Your service provider may have customized your radio to optimize its use for your individual needs Check with you service provider to find out the differences from this guide Throughout the tex...

Page 18: ...ontinuous Intermittent The communication system determines the radio transmit and receive time operating cycle time During overload or beyond the systems specifications at high ambient temperatures the thermal control cuts down the RF power output which reduces the radio coverage range 2 3 Before Power On Read this section before you power on your radio for the first time 2 3 1 Attaching the Anten...

Page 19: ...d a bright orange o ring at the bottom of the thread Use of other antennas can result in significant range loss due to poor RF performance 2 3 2 Installing the Battery Procedure Steps 1 Remove the battery from its protective clear plastic case 2 Insert the battery top into the compartment as illustrated 3 Carefully press the battery bottom downward until it clicks into place 2 3 ...

Page 20: ...the battery 2 Replace the battery 2 3 4 Inserting the SIM Card Prerequisites Turn off your radio before inserting the SIM card Procedure Steps 1 Remove the battery 2 Open a plastic SIM card cover 3 Slide a SIM card latch towards the bottom of the radio and lift the latch 2 4 ...

Page 21: ... corner 5 Close the SIM card latch and slide it towards the top of the radio 6 Close the plastic SIM card cover 7 Replace the battery 2 3 5 Charging Your Radio Prerequisites Turn off the radio recommended Correctly attach the battery to the radio If the radio connected to the charger has no battery attached it can experience a cyclic on off 2 5 ...

Page 22: ... with USB Cable Prerequisites Download a USB driver from http www motorolasolutions com MTP3000 and install it on your computer Procedure Steps 1 Turn on the radio 2 Connect the radio to the computer with the USB cable When you connect the USB cable to the radio with fully charged battery without turning the radio on first a red LED indication occurs at the top of the radio This can be cleared by ...

Page 23: ...n Battery charged at 90 Solid red Rapid charge Blinking red Faulty or invalid battery Blinking orange Battery is waiting to charge When you charge your radio in a multi unit charger and the battery is at the 90 100 charge level the LED indicators on the radio and on the multi unit charger differ LED on the radio blinking green LED on the multi unit charger solid green For more accurate representat...

Page 24: ...hen your radio is OFF This method is more effective and thus recommended 2 3 9 Repeated Low Battery Indication Periodic alerts indicate low battery when the level is lower than 5 10 or 20 percent of the maximum capacity if configured by your service provider Audible alert is given every 30 seconds 2 8 ...

Page 25: ...2 4 Controls and Indicators 2 4 Controls and Indicators 5 7 8 9 10 6 5 4 1 13 15 7 16 17 14 12 11 3 2 2 9 ...

Page 26: ...e Touch Button feature is set as default to 0 1 second 6 PTT Push To Talk Press and hold to talk in simplex calls or to initiate a group call release it to listen Press to send status and text messages 7 SOFT key Press left or right SOFT key to select the option that appears on the screen directly above the them 8 SEND key Press to initiate or answer duplex calls or send messages 9 BOTTOM MICROPHO...

Page 27: ...s Press to return to the home screen If a message or notification is displayed on the radio and the Screen Saver activates pressing ON OFF END HOME only deactivates the Screen Saver 17 NAVIGATION key Press up down left or right NAVIGATION key for list scrolling while moving around the menu hierarchy or for alphanumeric text editing From the home screen press to activate one of the following down N...

Page 28: ...ormal TMO and DMO Mode Light red Emergency Mode Olive Local Site Trunking Mode Display Setting Time and Date on the Display 2 6 Status Icons Status icons appear when your radio is engaged in certain activities or when you have activated certain features Table 2 8 Status Icons Icon Description Trunked Mode Operation Signal Strength TMO Allows you to check signal strength More bars indicate a strong...

Page 29: ...ronized or during attachment No icon during a radio to radio and repeater call DMO Repeater Communication Mode Displayed when the Repeater or GW Rep option in DMO Mode is selected This icon has the following states Solid while the radio has detected the repeater for example when the radio receives a presence signal Blinking while the radio has not detected the repeater or during attachment No icon...

Page 30: ... have unread messages in your Inbox Keys Locked Indicates that keys are locked Encryption On Indicates that SIM card based End to End Encryption is enabled Encryption Off Indicates that SIM card based End to End Encryption is disabled 2 7 Powering On the Radio Procedure Steps 1 Press and hold ON button 2 Your radio performs a self check and registration routine 3 After successful registration your...

Page 31: ... PUK is an eight digit master code provided by your service provider 3 Enter the new PIN code twice 2 9 Locking Unlocking the Keys Buttons Press MENU key and the left NAVIGATION key The EMERGENCY button is not locked Entering Emergency Mode unlocks all keys Keylock Setup 2 10 Holding Your Radio The radio has two microphones a top microphone for simplex dispatcher private calls and a bottom microph...

Page 32: ...eaker Keep the antenna at least 2 5 centimeters from your head and body Lapel Shoulder Use For Group and Private Calls turn your head towards your shoulder lapel and speak directly into the top microphone Listen through the internal speaker Speakerphone Use Place your radio 30 centimeters to 60 centimeters away from you In a noisy environment you move the radio closer to you for better transmissio...

Page 33: ...ivate the mode in RF sensitive areas for example hospitals airplanes where safety can be jeopardized due to transmission radiation To activate select MENU Networks TXI Mode Activate In this mode the radio does not transmit under any circumstances except for the Emergency Calls All the functions and keys which cause transmission for example registration to the network changing talkgroup or folder s...

Page 34: ...owing conditions TXI Mode is activated Battery is removed Radio is turned off 2 14 Selecting a Talkgroup From the home screen use one of the following methods Press left or right NAVIGATION key Press Select to confirm Select Optns TG by abc Enter a talkgroup name and select the talkgroup name from the list Select Optns TG by Folder Select a folder and then a talkgroup name Rotate TALKGROUP KNOB un...

Page 35: ... Step result Your radio displays dialing number prompt 2 Press up down NAVIGATION key to choose the number then press right NAVIGATION key to go to the next digit You can enter at the end when the Speed Dialing feature is enabled The sign you can enter only when you are editing the first position Both signs are available after digit 9 3 Press PTT 2 17 Writing Text Every time that you see text entr...

Page 36: ...d the message You have a choice to send it to a Private user or a Group Delete Press once to delete the highlighted character Press and hold to clear the entire main text area Up NAVIGATION key Press to scroll through the letters or numbers or symbols Down NAVIGATION key Press to scroll through the letters or numbers or symbols Right NAVIGATION key Press to navigate to the right Press to add a new...

Page 37: ...tiate any voice call switch to Emergency or TXI Mode or send Emergency Alarm 2 20 One Touch Button Feature To use One Touch Button feature press and hold an assigned key to activate one of the following features Table 2 11 One Touch Button Features Feature Description Backlight Switches backlight settings Backlight Intensity Toggle Regulates backlight intensity TMO Talkgroup Scan Turns on off the ...

Page 38: ...e provider can enable it again over the air After your radio is enabled you may resume normal operation 2 22 Terminal Permanent Disable Your radio is provided with a feature that allows your service provider to disable it permanently in case it is stolen or lost When your radio is disabled permanently it becomes inoperable After a Permanent Disable your service provider cannot enable your radio It...

Page 39: ...x Private calls Procedure Steps 1 Hold your radio as you would a telephone 2 Speak into the bottom microphone and listen through the earpiece Keep the antenna at least 2 5 centimeters from your head and body 2 24 During the Call During the call label of the right SOFT key indicates the next possible change Accessory default setup is Table 2 12 During the Call Soft Key Label Audio Setting Spkr Audi...

Page 40: ......

Page 41: ... Steps 1 From the home screen press MENU key 2 Select Networks 3 Select one of the following Trunked Mode Direct Mode TXI Mode Result Your radio switches to the selected mode 3 2 Trunked Mode Operation Trunked Mode Operation requires the switching and management infrastructure This operation mode enables various voice and data communication types for example group calls short data service messages...

Page 42: ...en use one of the following methods Press left or right NAVIGATION key Press Select to confirm Select Optns TG by abc Enter a talkgroup name and select the talkgroup name from the list Select Optns TG by Folder Select a folder and then a talkgroup name Rotate TALKGROUP KNOB until the required talkgroup name is displayed Your radio can have an access up to three levels of the folder structure 3 2 ...

Page 43: ...le in active Group Call your radio receives a Group Call with a higher priority One of the following occurs Your radio is forced to end the current group call and automatically join the incoming one Your radio displays incoming group call screen with options Join ends current Group Call and starts the incoming one End cancels the incoming Group Call 3 2 6 Dynamic Group Number Assignment DGNA DGNA ...

Page 44: ...also called point to point or individual call enables calling between two individuals No other radio can hear the conversation This call type can be carried out in two ways Duplex call if the system allows in TMO Mode Both parties can speak at the same time Simplex call in TMO or DMO Mode Only one party can speak at a time When a DMO Private Call takes place radios not involved in this call receiv...

Page 45: ...gistration Attachment Group Call Emergency Call Emergency Alarm Your service provider can turn on off all the visual and audio indications when you enter Local Site Trunking Mode 3 3 2 Exiting Local Site Trunking When the link with the central network controller is reestablished your radio exits Local Site Trunking and the following occurs Your radio plays an Exiting Local Site Trunking tone Any c...

Page 46: ... Talkgroup From the home screen use one of the following methods Press left or right NAVIGATION key Press Select to confirm Select Optns TG by abc Enter a talkgroup name and select the talkgroup name from the list Select Optns TG by Folder Select a folder and then a talkgroup name Rotate TALKGROUP KNOB until the required talkgroup name is displayed Your radio can have an access up to three levels ...

Page 47: ...Call The Private Call also called point to point or individual call enables calling between two individuals No other radio can hear the conversation This call type can be carried out in two ways Duplex call if the system allows in TMO Mode Both parties can speak at the same time Simplex call in TMO or DMO Mode Only one party can speak at a time When a DMO Private Call takes place radios not involv...

Page 48: ...nd the TETRA network so that the DMO radios can communicate with the TMO radios Your radio can communicate with the trunking system when the Gateway option is enabled DMO TMO TMO 3 4 8 Selecting DMO Group Call Options When and where to use Helps to communicate with other radio users on the same talkgroup through the Gateway or Repeater 3 8 ...

Page 49: ... Gateway and the Repeater cannot be communicated even though a talkgroup to use them is configured the radio attempts the direct MS MS communication Result When your radio detects the appropriate Gateway and or the Repeater the Gateway and or Repeater icons turns solid respectively 3 5 Transmit Inhibit Mode The Transmit Inhibit Mode is a mode in which the radio sends no radio transmissions It is r...

Page 50: ... an ATG is the selected group the radio monitors the sub groups associated with the ATG On entering the Emergency Mode any ongoing voice call is aborted or cleared down Any packet data transfer in progress is aborted However the session is kept open The radio remains in the Emergency Mode until you or the originator ends the Emergency Group Call Pressing the EMERGENCY button or entering Emergency ...

Page 51: ...the actual state Once in TMO Mode the radio sends Silent Emergency Alarm If the radio is in a private or group call the radio waits until the call ends and then enters the Silent Emergency Mode The radio keeps re sending the alarm until successful sending is confirmed After the alarm is successfully delivered the radio stays in Silent Emergency Mode and waits for the Ambience Listening On pressing...

Page 52: ...e provider settings In DMO Emergency Group Calls through a gateway are supported 3 6 4 Emergency Private Call The Emergency Private Calls are Simplex or Duplex Private Calls with emergency priority On pressing the EMERGENCY button the radio initiates a Private Call with emergency call priority to the provisioned address No Emergency Alarm is sent and your radio does not enter the Emergency Mode Th...

Page 53: ... talk permit again 3 6 8 Alternating Hot Microphone The Alternating Hot Microphone is an enhancement of the Hot Microphone feature It allows you to have the Hot Microphone switched on and off alternately If this feature is enabled you can initiate the Alternating Hot Microphone by pressing the EMERGENCY button The Alternating Hot Microphone terminates when one of the following conditions is met Th...

Page 54: ... radio remains in Emergency Mode until you exit it 3 6 10 Exiting Emergency Mode Prerequisites Make sure that your radio is in Emergency Mode Procedure Steps 1 If your radio screen displays Emgcy Mic On press End 2 Press and hold Exit Result Your radio exits the Emergency Mode 3 6 11 Making an Emergency Group Call Prerequisites Make sure that your radio is in Emergency Mode Procedure Steps 1 Press...

Page 55: ... area of open sky for example when your GPS antenna is covered or facing the ground Such situations include being In underground locations Inside buildings trains or other covered vehicles Under any other metal or concrete roof or structure Near a powerful radio or television tower In extreme temperature outside the operating limits of your radio Even if your location information can be calculated...

Page 56: ...ds received over the air are checked to confirm they have come from a trusted source Only ISSIs in a specified range may send location commands Ensure that the radio and application receiving location messages from the radio has been configured with the same protocol ID Otherwise the radio reports a failure when requested to send an Immediate Location Report This is a selling feature Location 4 1 ...

Page 57: ...able 4 1 Different Location Displays Latitude Longitude UK Coordinates Irish Coordinates Time Time Time Latitude 2 Letter Code 1 Letter Code Longitude Easting and Northing Coordinate Easting and Northing Coordinate Altitude Altitude Altitude Satellites Satellites Satellites Time indicates when the last time the location was calculated The time is provided in Universal Time Coordinated Letter Code ...

Page 58: ...ers to the eastward measured distance expressed in meters Northing refers to the northward measured distance expressed in meters Skipping each digit of easting and northing coordinates decreases the accuracy by the factor of 10 4 4 ...

Page 59: ... the following Medium default Power consumption optimization is combined with less position accuracy High Better position accuracy is combined with less power consumption optimization If connected to an external charging device the radio automatically enters the High mode 4 7 GPS Things to Keep in Mind Where adequate signals from multiple satellites are not available the GPS feature of your radio ...

Page 60: ...ven where location information can be calculated in such situations it may take longer to do so Therefore in any emergency situation confirm your location with your dispatcher Furthermore please note that even where adequate signals from multiple satellites are available your GPS feature provides only an approximate location often within 20 100 meters from your actual location 4 6 ...

Page 61: ...n enter the menu items during a call If you are viewing a menu when a new call starts the radio exits the menu 5 1 Scrolling through the Menu Procedure Steps 1 From the home screen press MENU key 2 Scroll to the required item by pressing NAVIGATION keys Press the SOFT key assigned as Select or right NAVIGATION key to select If the menu item contains a further set of menu items repeat step 2 5 2 Me...

Page 62: ... list Security Lets you turn on off and verify security features and change passwords Setup Allows you to customize your radio Group setup Contains additional menu items for Scanning Talkgroups features My Info Displays information about your radio and its numbers Recent calls Contains a list of recent calls Networks Allows you to select a network Location Displays location of your radio Packet Da...

Page 63: ...art Locked AirEncrypt K Validity TMSCK Validity DMSCK Validity DMO SCK On Covert Mode Off Security Remote Control Duplex Ring Style Simplex Speaker Set Volume Earpiece Language Voice Only Data Only Data Setup Voice Data Audio Profile Howling Suppr Always Loud Audio Toggle Spkr Cntrl Individual Audio Volume Adj Mode Common Keypad Tone All Tones Tones Setup 5 3 ...

Page 64: ...lert Period D PTT Mode Single Double D PTT Tones Tone Style Triple Flip Display 1 Font Level 2 Auto Screen Saver Disabled Auto Disabled Semi Auto Backlight Manual Brightness Wallpaper Display LCD Off Time Date Time Only Date Only Display Off Format Time Format Format Date Set Time Time Offset Set Set Date Off Time Only Time Date System Update 5 4 ...

Page 65: ...ock Disable Lock None Lock Volume Lock Scroll In Keypad Lock Lock Both Wrap Around Stay In Range Scroll Range Scroll To Next Confirm TG Sel Volume Adjust Rotary Knob Function Keys OTB Feature On Off Scanning Select List Active List Scan Scan Lists Group Setup My Groups New Folder My Private Num My Phone Num My Info Radio Info Dialed Received Recent Calls Missed 5 5 ...

Page 66: ... Funct Encryption Off AlarmTone On Clear CallTone AlarmTone Off Upd Encr Keys Upd Group Key Show OPTA OPTA Filter Crypto Reg Start Registr Encr Audio On Audio Settings Encr Audio Off DMO 1 DMO EncrMode DMO 2 Global Key Individual SDS Group Key Global Key Crypto Menu SDS Encr Mode Group SDS Group Key 5 4 Messages This feature allows you to send and receive text messages A message can contain up to ...

Page 67: ...sage 5 4 1 New Message This menu item allows you to create a new message While editing a text Status Icons change their appearance and only four of them are displayed Tower Signal Strength Emergency and Battery 5 7 ...

Page 68: ... number or press abc to choose it from your contacts 6 Press Send or SEND key or the PTT button 5 4 1 2 Sending a Message to Group Procedure Steps 1 From the home screen press MENU key 2 Select Messages New Message 3 Type your message and press Send 4 If needed select Group 5 Select a group to send the message 5 4 1 3 Sending a Store and Forward Message Prerequisites Your service provider enables ...

Page 69: ...vider can enable to send a Store and Forward message to a talkgroup 6 Press Send Select SEND key or the PTT button 5 4 2 Inbox It contains up to 100 new or old incoming messages Table 5 3 Inbox Icons Icon Description Unread New Message Read Old Message Sender Information in Message View name or number Time and Date Stamp in Message View arrival time and date Delivery Status Received delivery statu...

Page 70: ...as a template Change the default template name and press Ok Delete Deletes the selected message Press Yes to confirm Delete All Deletes all the messages in the Inbox Outbox Press Yes to confirm Reply only for Inbox Invokes the edit screen with the old message as default text and the message originator as a recipient After editing press Send the PTT button or the SEND key to send Resend only for Ou...

Page 71: ...s Inbox 3 Highlight the required message and select Read 4 Press the PTT button 5 Radio displays a list of the numbers including the senders number 6 Highlight the required number and press Store 7 Highlight required contact and press View To store a number for a new contact select New Contact and fill out the required fields Press Done to save it 8 Select Edit 9 Choose the Type of the new number ...

Page 72: ...isites Embedded Number feature is enabled by your service provider When and where to use You can start a group call with the message originator talkgroup Procedure Steps 1 From the home screen press MENU key 2 Select Messages Inbox 3 Highlight the required message and press the PTT button 5 4 2 8 Immediate Message When the new immediate message is received radio plays the New Mail Received tone an...

Page 73: ...er of the messages If the indication is for example 2 it means that two messages are in the Outbox 5 4 4 Templates This feature is used to store up to 100 predefined and your message templates Each of the Inbox and Outbox message can be stored as a template to save time in typing the same text Each template name and text can be edited afterwards 5 13 ...

Page 74: ...and press MENU 4 Select one of the following View Displays template text Delete Deletes the template Edit Text Opens edit screen with the template text Edit the text and press MENU Select Save Changes to save edited template or Store to save the edited template as a new one Edit Name Opens edit screen with the template name Press Ok to save the template 5 4 5 Predefined Templates Predefined messag...

Page 75: ...nd press Send the PTT button or the SEND key You can edit the predefined template before you send it Press MENU and select Edit Edit screen opens with the template text You are only allowed to replace the existing text 5 4 6 Send Status 5 4 6 1 Viewing a Status Message Number Procedure Steps 1 From the home screen press MENU key 2 Select Messages Send Status 3 Press MENU and select View 5 4 6 2 Se...

Page 76: ...isable to send a status message to a private number that is not in the Contacts 5 4 6 4 Sending a Targeted Status Message Procedure Steps 1 From the home screen press MENU key 2 Select Messages Send Status 3 Do one of the following Highlight the required status message and press Select the PTT button or the SEND key Enter 5 digit status message number and press Send If the radio displays Status li...

Page 77: ...act this entry is required Type each contact must be assigned to one of the following types Table 5 5 Contact Types Contact Icon Description Private Cannot have a speed dial number Mobile Home Work PABX Other Pickers Indicate more than one number in a contact number each contacts entry must contain a number Speed accept the default Speed Dial number or change it 5 17 ...

Page 78: ... screen 5 Highlight number and press Change Enter the number of your contact and press Ok 6 If needed highlight Speed and press Change Enter the speed dial number 1 1000 of your contact and press Ok If the entered number exist the radio displays Overwrite message Press Yes to confirm or No to enter the speed dial number again 7 Press Done Result You have create a contact with one number To add add...

Page 79: ...cs 2 Select a contact you want to edit 3 Use left or right NAVIGATION keys to choose the required number 4 Press MENU 5 Select Delete number If an entry contains only one number deleting the number deletes the entry 6 Press Yes 5 5 4 Deleting a Contact Procedure Steps 1 From the home screen select Contcs 2 Highlight a contact you want to delete 3 Press MENU 4 Select Delete contact 5 Select Yes 5 1...

Page 80: ...ing up to 12 characters of the contact name 3 If the contact has more than one number use left and right NAVIGATION keys to select the required number 4 Press the PTT button to initiate a simplex call with a Private number Otherwise use the SEND key to initiate a duplex call 5 6 Security This sub menu stores all your security settings 5 6 1 PIN Protect This feature allows you to enable PIN code au...

Page 81: ...re Steps 1 From the home screen press MENU Security PIN Protect 2 Select On 3 Enter 4 digit PIN code SUGGESTION Default PIN code is 0000 Post requisites Each time you turn on the terminal PIN code is required 5 6 1 2 Unblocking Your Radio Prerequisites You blocked your radio by entering incorrect PIN code for three times by default 5 21 ...

Page 82: ...y used 4 digit security code default setting is 0000 4 If the entered code matches the old code radio prompts for the new code twice Result Your radio displays Code Accepted Unlocking Your Radio PIN Protect 5 6 2 Keylock Setup The keypad lock feature allows locking the keypad to prevent accidental pressing of keys The keypad lock unlock can be invoked using the menu By default press MENU and then ...

Page 83: ...ock Delay Procedure Steps 1 From the home screen press MENU key 2 Select Security Keylock Setup Delay 3 Use up and down NAVIGATION keys to change the minutes and press Done 5 6 2 3 Setting Keylock on Startup Procedure Steps 1 From the home screen press MENU key 2 Select Security Keylock Setup Start Locked 3 Select On Off 5 6 3 Air Encryption This feature provides service confidentiality between yo...

Page 84: ...erface encryption keys from the radio by entering the following sequence 00 It takes a minute for this feature to delete all the encryption keys from the radio During this time do not remove the battery Deletion is performed in idle TMO DMO or Emergency Operation Using this feature will disable the radio and your service provider will need to reenable the radio 5 6 4 K Validity K Key is a secret k...

Page 85: ...ses to encrypt call and data in TMO Mode Air interface encryption provides service confidentiality between your radio and the system Your radio is provided with a set of SCKs 5 6 5 1 Verifying TMSCK Validity Procedure Steps 1 From the home screen press MENU key 2 Select Security TMSCK Validity 3 Your radio displays TMSCK is Valid your radio can work encrypted in TMO Mode TMSCK is Invalid your radi...

Page 86: ...ode and another radio or a group of radios operating in Direct Mode This feature allows you to enhance security This feature needs to be enabled by your service provider 5 6 7 1 Changing DMO SCK Procedure Steps 1 From the home screen press MENU key 2 Select Security DMO SCK 3 Press Next 4 Radio displays Change to version 5 Select one of the following Yes to change the key Your radio displays Key v...

Page 87: ...turning off Thus if the Covert Mode was set before turning off the radio turns on in the Covert Mode When the Covert Mode is turned off all the changed settings are reverted to the previous state This feature can be used as the One Touch Button 5 6 8 1 Activating Covert Mode Procedure Steps 1 From the home screen press MENU key 2 Select Security Covert Mode 3 Select one of the following On all ton...

Page 88: ...le to all duplex calls Simplex To set the new ring style to all simplex calls Upon entry into this sub menu the display shows the current ring style used 4 Scroll to the desired style and press Select New ring style is played immediately for a few seconds If necessary adjust the volume level 5 7 2 Set Volume This menu item allows you to adjust the Speaker and Earpiece tone volumes 5 28 ...

Page 89: ...simplex ringtones Keypad Vol sets the volume level for keypad tones Tones Vol sets the volume level for alert tones Call Out Vol sets the volume level for Call Out tones if enabled If the display shows only one option Volume you can adjust all of the above settings at once You have the option to change the settings individually when the Volume Adj Mode is set to Individual 5 Press right or left NA...

Page 90: ...nly in TMO Mode Data services are blocked in TXI Mode When set to Voice Only the built in data modem is disabled to conserve battery power 5 7 4 1 Setting Data Function Procedure Steps 1 From the home screen press MENU key 2 Select Setup Data Setup 3 Select one of the following Voice Only Your radio receives and transmits voice calls only Data Only Your radio acts as a modem It rejects incoming an...

Page 91: ...s 1 From the home screen press MENU key 2 Select Setup Audio Audio Profile 3 Select required profile 5 7 5 3 Howling Suppression Howling Suppression is a mode of the operation that eliminates howling effect 5 7 5 4 Setting Howling Suppression Procedure Steps 1 From the home screen press MENU key 2 Select Setup Audio Howling Suppr 3 Select required setting On powering on the Howling Suppression is ...

Page 92: ...e volume level for Voice Duplex Simplex Keypad Tones and Call Out can be set per user preferences When set to Common the audio have one setting for all items Set Volume 5 7 5 8 Setting Volume Adjustment Mode Procedure Steps 1 From the home screen press MENU key 2 Select Setup Audio Volume Adj Mode 3 Select one of the following Individual You can set Duplex Simplex Earpiece Speaker and Keypad per y...

Page 93: ...n press MENU key 2 Select Setup Tones Keypad Tone 3 Select one of the following On Activates keypad tone Off Deactivate keypad tone 5 7 6 3 All Tones You can activate deactivate all tones 5 7 6 4 Setting All Tones Procedure Steps 1 From the home screen press MENU key 2 Select Setup Tones All Tones 3 Select one of the following a On Activates all the tones b Off Deactivates all the tones 5 7 6 5 Ta...

Page 94: ...io that the receiving radio is ready to accept the transmission 5 7 6 8 Setting Clear to Send Procedure Steps 1 From the home screen press MENU key 2 Select Setup Tones Clear to send 3 Select one of the following Tone On Activate clear to send tone Tone Off Deactivates clear to send tone 5 7 6 9 Periodic Alert You can activate deactivate periodic tone indication for the missed calls the unread mes...

Page 95: ... the D PTT tone is played the user can press and hold the PTT button once again to get the permission to talk Otherwise if the user presses the PTT button while the D PTT tone is played it is ignored After the D PTT tone is sent keeping the PTT button pressed it results in permission to talk The D PTT tone is not audible on a sending radio This feature needs to be enabled by your service provider ...

Page 96: ... at the same time wishes to read the display upside down Procedure Steps 1 From the home screen press MENU key 2 Select Setup Display Flip Display 3 Select one of the following On To activate this feature Off To deactivate this feature 5 7 7 2 Setting Font Level When and where to use This feature enlarge the text on the display so you can see the interface in the environment with the low visibilit...

Page 97: ...e to use To save the battery power Procedure Steps 1 From the home screen press MENU key 2 Select Setup Display Backlight 3 Select one of the following Auto Backlight is triggered by turning on the radio by pressing any key on device or on the accessory that is connected to it Also charging or getting signal from the services like DGNA and TX timeout during priority call are going to turn on the b...

Page 98: ...tup Display Wallpaper 3 Select one of the following On To activate this feature Off To deactivate this feature 5 7 7 7 Setting LCD Off When and where to use This feature sets the time so the display automatically turns off after a period of time Procedure Steps 1 From the home screen press MENU key 2 Select Setup Display LCD Off 3 Select one of the following Disabled your radio display never goes ...

Page 99: ...Date sub menu is disabled Date Only Your radio displays date only Format Time sub menu is disabled Off Your radio does not display time nor date Format menu is disabled Display Display 5 7 8 2 Setting Time Format Prerequisites If MENU Setup Time Date Display is set to Time Date or Time Only Procedure Steps 1 From the home screen press MENU key 2 Select Setup Time Date Format Format Time 3 Select o...

Page 100: ...m the home screen press MENU key 2 Select Setup Time Date Format Format Date 3 Select D day M month Y year DD MM YY MM DD YY DD MON YY YY MM DD 5 7 8 5 Setting Date Manually When and where to use If the time cannot update automatically through the infrastructure Procedure Steps 1 From the home screen press MENU key 2 Select Setup Time Date Set Set Date 3 Enter current time using NAVIGATION keys 4 ...

Page 101: ...date 3 Select one of the following Off All the infrastructure informations are ignored The radio uses internal time and offset Time Only Time displayed is calculated from the offset programmed by your service provider added or subtracted from the infrastructure time Time Offset Time and offset are updated after receiving from the infrastructure 5 7 9 Energy Economy Energy Economy EE is a mode of o...

Page 102: ...creen press MENU key 2 Select Setup Energy Economy EE Status 3 The Energy Economy status is displayed as Energy Economy Is Currently Supported By System Energy Economy Is Currently Not Supported By System 5 7 10 Transmission Power Class Transmission Power feature enables your radio to choose whether to transmit with Class 3L or Class 4 The signal strength icon indicates when the radio uses this fe...

Page 103: ...ows you to set all the related functionality of the VOLUME KNOB and TALKGROUP KNOB 5 7 11 1 Setting Rotary Lock Procedure Steps 1 From the home screen press MENU key 2 Select Setup Rotary Knob Rotary Lock 3 Select one of the following Locked Locks VOLUME KNOB and or TALKGROUP KNOB Unlocked Unlocks the VOLUME KNOB and TALKGROUP KNOB Disabled Locking function is unavailable Your VOLUME KNOB and TALK...

Page 104: ...der Off Scrolling through the talkgroup list is looped or is moved to the next folder Only when Wrap Around is set to On and the Scroll Range is set to Scroll To Next you are able to scroll through all the talkgroups and folders 5 7 11 4 Setting Rotary Knob Scroll Range Procedure Steps 1 From the home screen press MENU key 2 Select Setup Rotary Knob Scroll Range 3 Select one of the following Stay ...

Page 105: ...e of the following Volume Adjust Sets the SIDE buttons to adjust volume level OTB Feature Sets the SIDE buttons to the predefined One Touch Button features 5 8 Group Setup This sub menu allows you to set the scanning and my groups folder 5 8 1 Scan This menu item allows you to activate deactivate scanning view the active scan list and edit the scan lists This feature is available only for the TMO ...

Page 106: ...n and where to use If you want to edit talkgroups in the active scan list Procedure Steps 1 From the home screen press MENU key 2 Select Group Setup Scan Active List If Scanning is Off is displayed go to Group Setup Scan Scanning On to enable scanning 3 Select View and highlight the required talkgroup 4 Press MENU 5 Select one of the following Delete Erases this group from the active scan list Pri...

Page 107: ...es the priority of the required talkgroup or deletes it 5 8 1 4 Editing Scan Lists Procedure Steps 1 From the home screen press MENU Group Setup Scan Scan Lists 2 Highlight a required scan list name 3 Select one of the following Rename Renames the talkgroup Capacity Checks the number of the talkgroups Clear Removes all talkgroups from that list Add Group Adds new talkgroup Edit Changes the priorit...

Page 108: ...phabetic search 5 8 2 3 Editing My Folder List Procedure Steps 1 From the home screen press MENU key 2 Select Group Setup My Groups 3 Highlight required favorite folder 4 Press MENU 5 Select one of the following Rename Folder Edits the name of the folder Enter new folder name and press Ok Delete Folder Deletes selected folder Press Yes You cannot delete the last favorite folder 5 8 2 4 Deleting a ...

Page 109: ...s 1 From the home screen press MENU key 2 Select My Info 3 Select one of the following My Private Num displays your radio private number My Phone Num displays your radio phone number To modify the displayed phone number select Edit Type the number and press Ok Radio Info displays radio information manufacturer product type ISSI TEI Serial Number and OPTA OPTA information is optional 5 10 Recent Ca...

Page 110: ... Calls 3 Select one of the following Dialed Received Missed 4 Select View on the required call SUGGESTION Press down NAVIGATION key to bypass first two steps Call time information is only available if the time and date are set in the radio Call duration is not available in the missed calls list 5 10 2 Calling from Recent Calls Procedure Steps 1 From the home screen press MENU key 2 Select Recent C...

Page 111: ...re If Store is not assigned to the left SOFT key the number is already stored in your contact list 5 To store the number as a new entry select New Contact Or to store the number to an existing entry select the entry and press View then select Edit 6 With the contact type field highlighted scroll left or right to display the contact type you want to assign the number 7 Select Done 5 10 4 Deleting R...

Page 112: ...tworks Networks Sel Home Only 3 Your radio registers to the first network on the allowed network list 5 11 2 Using the Select Net Registration When and where to use Use this feature to migrate to another predefined network when you are out of the range of your network and your radio displays the No Service message Procedure Steps 1 From the home screen press MENU key 2 Select Networks Networks Sel...

Page 113: ...lowing Trunked Mode Switches to the mode using infrastructure Direct Mode Switches to the mode without using infrastructure TXI Mode Select Activate to stop sending any radio transmission If the radio is in TXI Mode it is not possible to switch from Direct Mode to Trunked Mode Networks Entering TMO DMO Mode 5 12 Location See the GPS Location Service for more information 5 53 ...

Page 114: ...esh 5 12 2 Changing GPS Accuracy Procedure Steps 1 From the home screen press MENU key 2 Select Location Accuracy 3 Select one of the following Medium default Power consumption optimization is combined with less position accuracy High Better position accuracy is combined with less power consumption optimization If connected to an external charging device the radio automatically enters the High mod...

Page 115: ...onnect the computer via the PMKN4129 data cable with your radio Your service provider has to setup additional applications on your computer If set up by your service provider it is possible to accelerate the transmission by using the Multi Slot Packet Data MSPD Service 5 55 ...

Page 116: ...ta activation is displayed Bandwidth active data session percentage is shown Failed Transfer the percentage of failed sent received packets N A standby packet data session 5 13 2 Viewing Encryption Status Procedure Steps 1 From the home screen press MENU key 2 Select Packet Data Encryption 3 The encryption state of the ingoing packet data session is displayed Packet Data Channel Clear Packet Data ...

Page 117: ...g SIM Card End to End Encryption Procedure Steps 1 From the home screen press MENU key 2 Select Crypto Menu Crypto Funct 3 Select Encryption On to enable or Encryption Off to disable the End to End Encryption 5 14 2 Setting Alarm Tone When and where to use Use this menu item to turn on off the Alarm Tone notifying about any clear transmission Procedure Steps 1 From the home screen press MENU key 2...

Page 118: ...e radio is in a call or in the DMO Mode 5 14 4 Viewing OPTA When and where to use Use this menu item to view Operational Tactical Address OPTA providing supplementary information about a subscriber s organization and operational role Procedure Steps 1 From the home screen press MENU key 2 Select Crypto Menu Show OPTA 5 14 5 Setting OPTA Filter When and where to use Use this menu item to define whi...

Page 119: ...ayed 4 Press Done to confirm the changes 5 14 6 Crypto Registration Prerequisites Your radio cannot be in a call or the DMO Mode Procedure Steps 1 From the home screen press MENU key 2 Select Crypto Menu Crypto Reg 3 Select Start Registr to start the registration 5 14 7 Audio Settings When and where to use Use this menu item to change the audio output for a Group Call when the call is encrypted bu...

Page 120: ...ure Steps 1 From the home screen press MENU key 2 Select Crypto Menu DMO EncrMode 3 Select DMO 1 or DMO 2 to enable the required mode 5 14 9 SDS Encryption Keys When and where to use Use this menu item to change the encryption keys for Group and Individual messages SDS Procedure Steps 1 From the home screen press MENU key 2 Select Crypto Menu SDS EncrMode 3 Select Individual SDS or Group SDS 4 Sel...

Page 121: ...o End Encryption 6 1 MS ISDN This feature adds to the radio ISDN number You can choose between MS ISDN and ISSI to address the call send the message or pre defined templates It works for both simplex and duplex calls based on the assigned ISDN number 6 2 Dialing through Soft Numeric Keypad Prerequisites Direct Private Number Dialing is assigned to a right NAVIGATION key 6 1 ...

Page 122: ... 3 Phone PABX Speed Dial This feature allows you to dial Phone PABX by a shortened number of up to three digits instead of the full number The Phone PABX Speed number is assigned when the dialed number is added in the contact list This feature is available only in TMO Mode 6 3 1 Using Phone PABX Speed Dial Procedure Steps 1 From the home screen enter the predefined Phone PABX speed dial number and...

Page 123: ... also called point to point or individual call enables calling between two individuals No other radio can hear the conversation This call type can be carried out in two ways Duplex call if the system allows in TMO Mode Both parties can speak at the same time Simplex call in TMO or DMO Mode Only one party can speak at a time When a DMO Private Call takes place radios not involved in this call recei...

Page 124: ... Number Dial This feature allows you to dial part of the full number of the person you wish to call Your radio automatically completes the number Example Your radio number is 4282564 1 Dial 456 instead of 4282456 the full number 2 To place the call press the PTT button or the SEND key 6 7 SIM Card End to End Encryption The table below presents interactions occurring between radios with and without...

Page 125: ...ns cont d Message SIM card No SIM card Delivery failed notification appears and the message is not received Message No SIM card SIM card Message is received To send a message or call a non SIM card radio turn off the SIM card End to End Encryption Crypto Menu 6 5 ...

Page 126: ......

Page 127: ...n invalid number Talk prohibit System Notification Examples The radio changed its status from out of range to in service The radio returned to the home network Toggling between the TMO and DMO modes System Error Examples The radio changed its status from in service to out of range Call disconnected General Notification Examples Entering Local Site Trunking Entering the Transmit Inhibit Mode Positi...

Page 128: ...ed Low Battery The battery charge level is low Over the Air 1 Single D PTT tone Over the Air 2 Double D PTT tone Over the Air 3 Triple D PTT tone Phone Busy The called radio is busy Phone Ring Back Played on the initiating phone when the Phone Call is being setup Private Ring Back Played on the initiating phone when the Private Call is being setup Ringtone 1 Ringtone 2 Ringtone 3 Ringtone 4 Ringto...

Page 129: ...n In service Battery charged at 90 Solid red Out of service Rapid charge Trickle charge Blinking red Connecting to the network Entering DMO Faulty or invalid battery Solid orange Transmit inhibit in service Channel busy in DMO Blinking orange Incoming call Battery is waiting to charge No indication Idle Radio powered down B 1 ...

Page 130: ......

Page 131: ...hone feature Emgcy Mic On The Hot Microphone feature is active and your radio is automatically transmitting hands free emergency audio Empty Entry The speed number you dialed does not exist or the number exists but the group is non selectable Faulty Unit Error Self test failed An operational fault has been detected with your radio Record the error number Turn your radio off and contact service Thi...

Page 132: ...vorite group was removed from the My Groups folder No List The network list is empty No New or Old Messages Indicates there are no new or old messages in the Inbox No Selected Scan List You selected an empty network list No Service Your radio is out of coverage Not Allowed To Initiate Call You are not allowed to dial a number which is not in the address book Not Allowed To Transmit Release the PTT...

Page 133: ...o you cannot delete it from the favorite talkgroup folder Try Again Later The requested service is temporarily unavailable Radio Disabled Check with your service provider Unit is OK Warn Self test error A minor fault has been detected Your radio is still fully operative If this error recur note the error code and contact service Unit Not Attached You radio could not attach to the system The talkgr...

Page 134: ......

Page 135: ...they are fully charged or discharged D 2 Extending Battery Life A battery is an expendable part and may need replacing during the life of the radio To ensure maximum service life of your radio always replace the battery with a genuine Motorola replacement In order to ensure maximum life for your battery Do not charge it unless necessary low battery indication Charge it until full charge indication...

Page 136: ...attery contacts Do not disassemble Do not throw in fire Do not dispose of battery in household waste When the battery is deeply discharged for example after left unattended for months while connected to the radio it cannot be recovered in all types of chargers It is best recovered In the rear pocket of a Dual Unit Charger In a battery only pocket on a Multi Unit Charger By charging the radio with ...

Reviews: