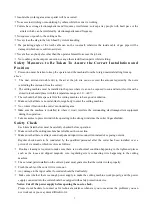
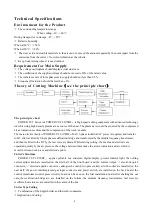
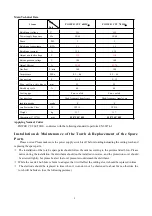
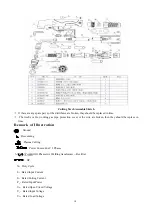
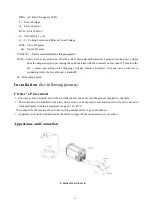
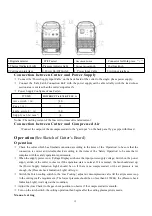
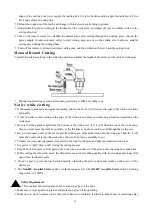
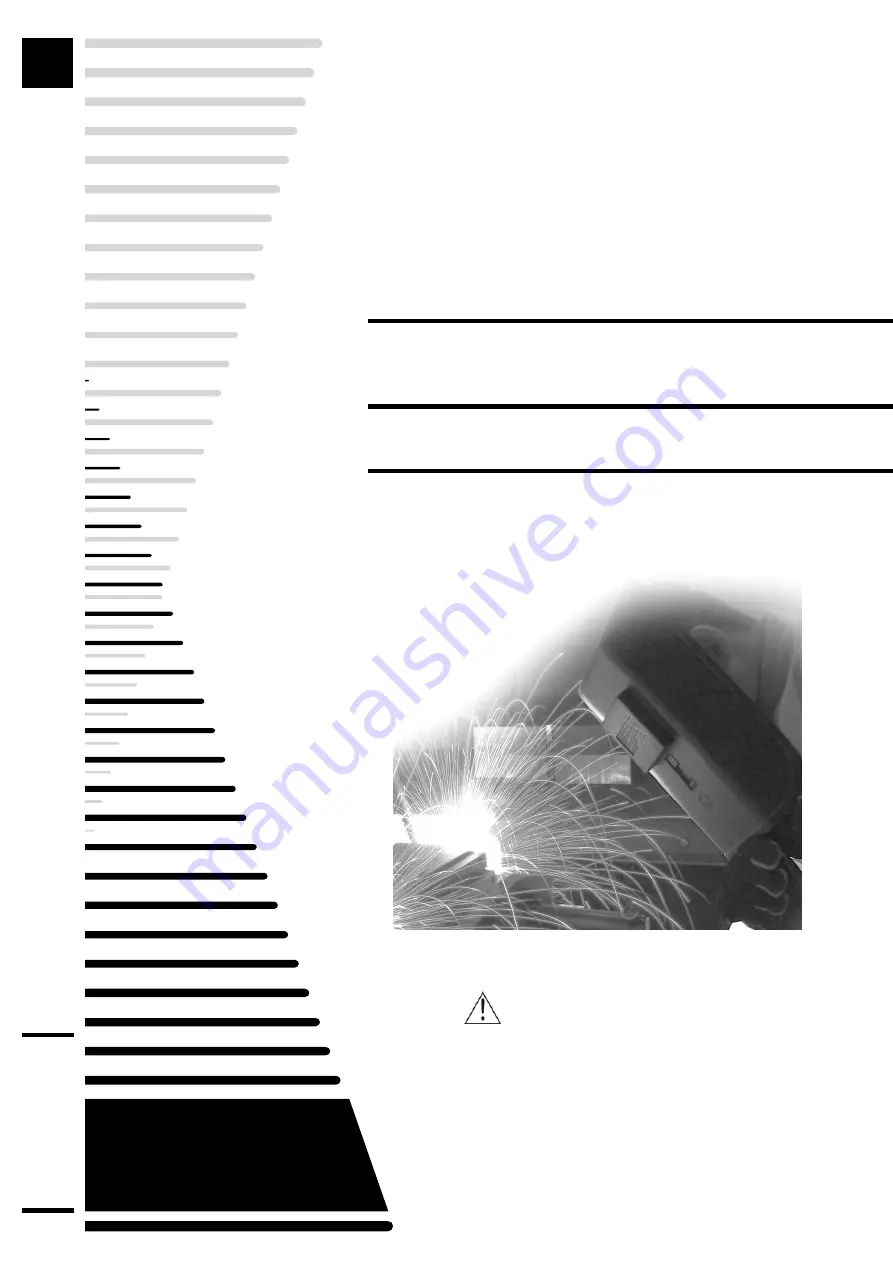
background image

POWER CUT 60/70HF

Ш

WARNING:

Read carefully and understand all

ASSEMBLY

AND OPERATION INSTRUCTIONS

before

operating. Failure to follow the safety rules and
other basic safety precautions may result in
serious personal injury.

OWNER’S MANUAL

WELDING

A

ND
CUTTING

T

OTAL

SOLUT

ION

Summary of Contents for POWER CUT 60HFIII

Page 1: ...efully and understand all ASSEMBLY AND OPERATION INSTRUCTIONS before operating Failure to follow the safety rules and other basic safety precautions may result in serious personal injury OWNER S MANUAL WELDING AND CUTTING TOTAL SOLUTION ...

Page 2: ......

Page 3: ...LOGUE GENERAL SAFETY RULES PRODUCT INTRODUCTION SAFETY OPERATION TECHNICAL SPECIFICATIONS INSTALLATION OPERATION TROUBLE SHOOTING LISTOF SPARE PARTS CIRCUIT CHART COMPLETE SET SPECIFICATION TRANSPORT STORAGE ...

Page 4: ...ding in free from flammable materials Always keep a fire extinguisher accessible to your welding environment Always have a qualified person install and operate this equipment Make sure the area is clean dry and ventilated Do not operate the welder in humid wet or poorly ventilated areas Always have your welder maintained by a qualified technician in accordance with local state and national codes A...

Page 5: ...t and failure 1 4 Specific Areas of Danger Caution or Warning Electrical Shock Electric arc welders can produce a shock that can cause injury or death Touching electrically live parts can cause fatal shocks and severe burns While welding all metal components connected to the wire are electrically hot Poor ground connections are a hazard so secure the ground lead before welding Wear dry protective ...

Page 6: ... or pipes that contain or have had flammable gaseous or liquid combustibles in them Welding creates sparks and heat that can ignite flammable and explosive materials Do not operate any electric arc welder in areas where flammable or explosive materials are present Remove all flammable materials within 35 feet of the welding arc If removal is not possible tightly cover them with fireproof covers Ta...

Page 7: ...ecific application Do not look into the valve when opening it Use protective cylinder cap whenever possible 1 5 Proper Care Maintenance and Repair Always have power disconnected when working on internal components Do not touch or handle PC board without being properly grounded with a wrist strap Put PC board in static proof bag to move or ship Do not put hands or fingers near moving parts such as ...

Page 8: ...cially suitable for decoration Thecutting thickness capacity of machine typewill reach 22mm cutting slot both narrow and glabrous no damage to the work pieces Commendatory thickness attributes to high quality Complete protective function include the protections of overheat Safety Operation Operator s Self Protection Please always follow the rules that conform to safety and hygiene Wear protective ...

Page 9: ...oreign body to enter the cutting machine No violent vibration in the cutter s surrounding area Make sure the machine is installed in where it won t interfere the surrounding electromagnetism equipment during the operation Take measures to prevent wind while operating in the strong wind since the cutter is gas shielded Safety Check Each item listed below must be carefully checked before operation M...

Page 10: ...60 70HFШ 400V 3 phase industrial AC power is required and transfer to DC after rectified by Single phase rectification bridge and transformed by the middle frequency transformer and then rectified to the DC by the fast recovery diode While starting cutting the nozzle and electrode are separated quickly by the air pressure the voltage between them make the air are ionization and arc which is moved ...

Page 11: ... Applying Norm of Cutter POWER CUT 60 70HFШ conforms with the following standard to perform EN 60974 1 Installation Maintenance of the Torch Replacement of the Spare Parts Please notice Please make sure the power supply switch is off before loading unloading the cutting torch and replacing the spare parts The installation of the torch s spare parts should follow the order according to the pictures...

Page 12: ... protection cover or the wire are broken then they should be replace in time Remark of Illustration Ground Descending Plasma Cutting Power Source AC 1 Phases 3Phases Arc Welding transformer Rectifier DC X Duty Cycle I1 Rated Input Current I2 Rated Cutting Current P1 Rated Input Power U0 Rated Open Circuit Voltage U1 Rated Input Voltage U2 Rated Load Voltage 3 ...

Page 13: ...er dropping vertically which is harmless S means water proof test is conducting while the movable part is standstill H H insulation grade Installation See following pictures Cutter s Placement The dust acid and erosible dirt in the air at the job site can not exceed the amount required by the norm The welder must be installed in the place where it can not be exposed to sun and rain Also it must be...

Page 14: ... Sketch of Cutter s Board Operation Check the cutter which has finished connection according to the items of the Operation to be sure that the connection is correct and reliable check according to the items of the Safety Operation to be sure that it complies with the safety operation requirements When the supply power is on Voltage Displayer shows the input power supply voltage Switch on the power...

Page 15: ...rch s rolling wheel nozzle and the work piece plane to 2 4mm See the following picture Turn on the torch switch to ignite the plasma pilot After the work piece is cut thoroughly then move the torch along the cutting direction uniformly The cutting speed should be aimed to cutting thoroughly If the speed is too quick the work piece won t be cut very thoroughly or if too slow the cut quality would b...

Page 16: ... do perforation operation on the work piece Be sure that the splash is spilt from the bottom of the work piece If it is spilt from the top of the work piece then you must move the torch too quickly or the thickness you chose could not cut through the work piece Keep certain space between the nozzle and the work space If press the torch onto the work piece heavily it will make the nozzle stick onto...

Page 17: ...ers during operation will cause negative affect to the heart pace The cutting cable can not be pressed or shocked by any appliance Never clean the slag in the torch head by violent knocking Trouble Shooting Breakdown and Solutions No Breakdown Analysis Solutions 1 Indication Light is off after turning on the power supply The light is broken Replace Fuse is ruined Replace No400V Input Voltage Get t...

Page 18: ... Replace Down lead is broken Examine and repair 8 No response after turning on power supply Lack of phase Examine and repair Power supply switch is broken Replace Fuse is ruined Replace Transformer is broken Replace Main controlling board is ruined Examine and repair or replace 9 Else Please contact with our company The technics breakdown and analysis No Breakdown Analysis Solutions 1 Work piece i...

Page 19: ...ith a suitable nozzle Cutting mouth is not vertical Adjust cutting mouth angle Gas leak from the gas circuit making the true cutting flow is not enough Examine and repair the gas circuit Input power supply is a bit low Adjust the power supply Input or output lead is too thin or pressure is too big Widen down lead 5 Cut is a bit declining Nozzle or electrode is burnt Replace nozzle or electrode The...

Page 20: ...pare Parts No Code Description specifications pcs 1 2 02 17 017 handle CARIMIG 160W 32 14 2 length414 V1 0 1 2 1 1 01 01 1729 cover INVERDELTA 300W ii 1 3 2 07 19 609 HF filter capacitor MKP LS 40uF 5 800V DC 60A 1 ...

Page 21: ...d small plate PPC60 20 14A33 4 6 1 24 1 1 04 03 1364 filter reactor PPC60 20 14A33 4 8 1 25 1 1 04 05 0077 coupling transformer POWER CUT 70K PLUS D8136 1 26 2 05 05 559 plastic front panel frame PMU200 23 12PE12 2 1 1 CC6 405 4 245 107 2 antiflamingA BS V0 V1 0 2 27 2 05 05 556 fan window PMU200 23 12PE12 4 CC6 201 4 155 4 31 7 black ABS antif laming V0 V1 0 1 28 2 07 57 050 central socket A101 1...

Page 22: ...1 G3 E1 E3 G2 G4 E2 E4 1 2 CN12 F FAN1 ZKB V1 0 24 Digital Disp 3 4 1 2 GND GND 5V Signal 2 1 CN10 T2 P3 P4 1 2 3 CN2 1 2 3 CN6 1 2 1 2 3 1 2 3 CN5 TIG 200 KGB CN1 WS 200I DYB Torch switch 1 2 3 4 CN4 1 2 3 4 CN4 QF 220V AC D1 D2 D3 D4 C4 Ⅱ R4 C1 Ⅱ R1 L2 2 6 3 1 4 5 T1 21 18 4 C5 L1 RV2 RV3 C7 Ⅱ R2 CS CS 1 2 3 4 CN8 1 2 3 CN2 RV4 RV5 1 2 CN9 CUR ADJ 1 2 3 3 4 1 2 CN13 CN7 Power 1 2 CN5 Error 15 R6...

Page 23: ...d be firmly fixed during the transportation The machines should be free from rain and snow Keep notice of Attention sign on the packing box The storage ware should keep dry and air circulation free from corrosive gas or dust The tolerable temperature ranges from 25 to 55 and the relative humidity can not be more than 90 After the package has been opened it is suggested to repack the product as per...

Page 24: ......

Reviews: