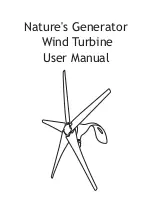
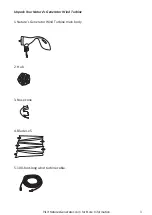
Nature's Generator Wind Turbine, User Manual
Introducing the Nature's Generator Wind Turbine - a reliable and eco-friendly power source for your off-grid adventures. To ensure a hassle-free experience, we provide a comprehensive User Manual that you can easily download for free from our website. Get familiar with your turbine's operation to maximize your renewable energy potential.
Share
Download


Reviews:
No comments
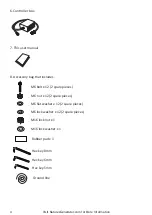
Related manuals for Wind Turbine
KW-BWX
Brand: Vernier Pages: 4

PowerMax+ 600
Brand: A&C GreenEnergy Pages: 11
PowerMax+ 2000GT
Brand: A&C Green Energy Pages: 19
EW1000
Brand: Guang Mang Pages: 15
Hyland 920
Brand: Valen Pages: 14
200
Brand: Chinook Pages: 19
HY-1500
Brand: HYE Pages: 30
Furlmatic FM1803
Brand: Rutland Pages: 28
EZ Tower
Brand: Primus Wind Power Pages: 24
E70PRO
Brand: Enair Pages: 42
24 VDC B
Brand: Bergey Pages: 24
Tilt Tower
Brand: Bergey Pages: 40
BWC EXCEL 10
Brand: Bergey Pages: 37
HB023P
Brand: ESSOM Pages: 64

2KW WIND TURBINE
Brand: EST Pages: 12
3000W 5 Blades Wind Turbine
Brand: Tumo-Int Pages: 22
3000W 5Blades
Brand: Tumo-Int Pages: 28
Powerhouse Wind Turbine
Brand: Nature's Generator Pages: 20


