background image

1

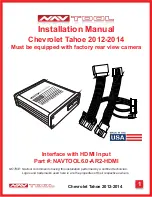
Chevrolet Tahoe 2012-2014

Installation Manual

Chevrolet Tahoe 2012-2014

Must be equipped with factory rear view camera

NOTICE: Navtool recommends having this installation performed by a certified technician. 


     Logos and trademarks used here in are the properties of their respective owners.

Interface with HDMI Input

Part #: NAVTOOL6.0-AR2-HDMI

Summary of Contents for NAVTOOL6.0-AR2-HDMI

Page 1: ... 2014 Must be equipped with factory rear view camera NOTICE Navtool recommends having this installation performed by a certified technician Logos and trademarks used here in are the properties of their respective owners Interface with HDMI Input Part NAVTOOL6 0 AR2 HDMI ...

Page 2: ...nstructions carefully and install the interface as described could cause harm to the vehicle or safety systems on the vehicle Interference with specific safety systems could cause damage to persons as well Open the camera app on your smart phone and point your rear camera at the QR Code to scan it Finally tap the pop up banner to open support website 3 4 5 6 7 8 12 13 14 Installation Instructions ...

Page 3: ...rent to its intended way of operation may result in property damage personal injury or death Set Parking brake Remove the negative battery cable Protect fenders before starting Using protective blankets to cover front seats interior of the vehicle and center console Always install a fuse 6 12 inches away from NavTool interface 5 amp fuse should be used Always secure NavTool interface with Velcro o...

Page 4: ...14 What s In The Box NavTool Interface Part NAVTOOL6 0 AR2 NBT NavTool Interface Harness Part NT WHNT6 Vehicle Specific Plug and Play Harness Part NT GMQUAD1 USB Configuration Cable Part NT USB CNG Push Button Part NT PUSH BTN ...

Page 5: ...LED is not blinking the interface will not operate properly Power LED Normal operation of the interface must have a green LED ON If the green LED is not ON the interface is not receiving power If the green LED is not ON the interface will not work and your vehicle radio may also stay OFF HDMI LED Normal operation of the interface must have a green LED ON If the green LED is not ON the interface HD...

Page 6: ...y changes Left Camera Input Video Input 3 This input is dedicated for an aftermarket left view camera or a video source with an RCA video output Your vehicle factory camera will continue to work as before without any changes Right Camera Input Video Input 4 This input is dedicated for an aftermarket right view camera or a video source with an RCA video output Your vehicle factory camera will conti...

Page 7: ... Camera Input Video Input 2 Rear Camera Input Video Input 1 Click Click AUX Input depends on the type of jack installed in your car from the factory Or Not Used Not Used Not Used Connect Connect Quick Connection Guide NavTool Interface Part NAVTOOL6 0 AR2 HDMI NavTool Interface Harness Part NT WHNT6 Vehicle Specific Plug and Play Harness Part NT GMQUAD1 Back View of Car Navigation ...

Page 8: ...FIG NAVTOOL COM Connect the interface to the computer using supplied USB Configuration Cable Part NT USB CNG Manual Activation Wire as Reverse Trigger should be set to off Refer to the video To see a video of the configuration process Scan QR Code or go to https youtu be dFaDfwXLcrY Remove Vehicle Navigation Radio or Color Screen List of Required Tools 1 Plastic Panel Removal Tool Example of a rem...

Page 9: ... 22 5 25 PM Image ID 1689885 https gsitlc ext gm com gsi showSvg do image 1689885 pubName Avalanche Escalade Suburban Tahoe Yukon VIN C K Service Manual 3088 pubSectionName Driver Information and Entertainment language 2022 General Motors All rights reserved Image ID 1682696 com gsi showSvg do image 1682696 pubName Avalanche Escalade Suburban Tahoe Yukon VIN C K Service Manual 3088 pubSectionName ...

Page 10: ...T GMQUAD1 Back View of Car Navigation Step 2 Reconnect previously removed radio connectors into the back of the radio Connect supplied universal wiring harness Part NT WHNT6 into plug and play harness Part NT GMQUAD1 For complete image see Quick Connection Guide on page 7 Click Click Part NT GMQUAD1 Part NT WHNT6 For complete image see Quick Connection Guide on page 7 Continued on Step 4 STEP 4 ST...

Page 11: ...into the vehicle s AUX input using appropriate cables See quick connection guide on page 7 Connect Push Button wires Connect red wire to white wire and isolate with electrical tape Connect black wire to green wire and isolate with eletrical tape Part NT WHNT6 End view of harness NT GMQUAD1 AUX Input depends on the type of jack installed in your car from the factory For complete image see Quick Con...

Page 12: ...pends on the type of jack installed in your car from the factory Or Not Used NavTool Interface Part NAVTOOL6 0 AR2 HDMI NavTool Interface Harness Part NT WHNT6 Vehicle Specific Plug and Play Harness Part NT GMQUAD1 Back View of Car Navigation The product installation is now complete Do not reassemble the vehicle until testing is fully complete Only after you have tested that everything is working ...

Page 13: ... 22 5 48 PM Image ID 2866045 https gsitlc ext gm com gsi showSvg do image 2866045 pubName Buick Chevrolet GMC InTouch Infotainment System GMNA Localizing U S Canada 9921201 pubSectionName Infotainment System language 1 1 2022 General Motors All rights reserved Testing and Settings STEP 1 Start the car observe NavTool LED lights should be one blinking blue and two steady lit green LED lights Data L...

Page 14: ... the screen If no video source is connected or the connected source is not correctly working you will see this message Test AV inputs by selecting them in the menu of the interface or if you are installing any aftermarket cameras To test aftermarket front camera put the car in reverse then into drive Front camera should display on the screen To test aftermarket left and right cameras use left and ...

Page 15: ...12V power source for accessory or constant power Check to see if any other panels that were removed during installation and now being reassembled have all and any electrical connectors reconnected Turn on parking light and check all dashboard lights operation Check all panels for proper fit make sure no gaps in panels are left behind If all steps above are checked off you will save time money and ...

Page 16: ...16 Chevrolet Tahoe 2012 2014 HDMI Sources 1 in 2 Out HDMI Splitter NavTool Interface HDMI to AV Adaptor Car Monitor How to Connect Rear Screens to Car With AV Input ...

Page 17: ...17 Chevrolet Tahoe 2012 2014 HDMI Sources 1 in 2 Out HDMI Splitter NavTool Interface Car Monitor Car HDMI Input How to Connect Rear Screens to Car With HDMI Input ...

Page 18: ...ermarket Right Camera Not Equipped Fig 1 C1 Press and hold supplied push button for 3 5 seconds The interface will activate on the screen Single press of the push button will cycle through the available video inputs Press the push button until HDMI input is highlighted and you will enter the HDMI mode Video signal from your HDMI source will appear on the screen If no video source is connected or t...

Page 19: ...witch between AM FM or XM if equipped Disc or AUX Auxiliary Must set a radio to auxiliary AUX before activating NavTool to hear audio from car speakers See page 11 step 6 for AUX connection Audio will not play through car speakers if AUX input is not connected or radio is not set to AUX input Set Radio to AUX Audio Input AUX Input ...

Reviews: