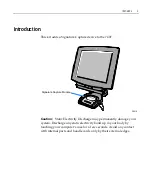
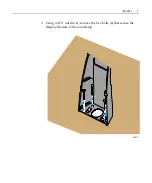
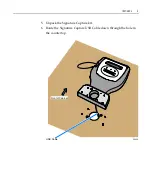
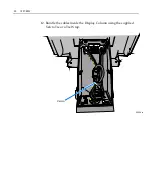
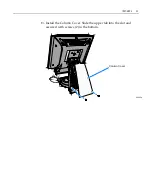
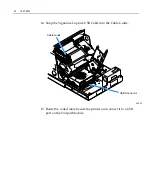
background image

7407

K013


Signature


Capture


Kit


Instructions


Issue


A


Summary of Contents for 7407-K013

Page 1: ...7407 K013 Signature Capture Kit Instructions Issue A ...

Page 2: ...Revision Record Issue Date Remarks A Feb 2008 First issue ...

Page 3: ...Signature Capture Module Caution Static Electricity Discharge may permanently damage your system Discharge any static electricity build up in your body by touching your computer s case for a few seconds Avoid any contact with internal parts and handle cards only by their external edges ...

Page 4: ...2 7407 K013 Installation Procedure 1 Turn Off the power to the system and any connected peripheral devices Unplug the system power cord 2 Remove the Column Cover 2 screws 24895b Column Cover ...

Page 5: ...7407 K013 3 3 Using a 7 16 nut driver remove the hex bolts 4 that secure the Display Module to the countertop 25017 ...

Page 6: ...top 2 screws Note Hold the Bolt Plate underneath the countertop while removing the screws to keep it from falling 24920 Top of Countertop Front of Cabinet Mounting Plate 10 32 x 2 Screws 25422 Bottom of Countertop Front of Cabinet Bolt Plate 10 32 x 2 Screws ...

Page 7: ...7407 K013 5 5 Unpack the Signature Capture kit 6 Route the Signature Capture USB Cable down through the hole in the countertop 25420 Front of Cabinet USB Cable ...

Page 8: ...2 in hex bolts 2 through the inner holes in the Mounting Plate Signature Capture Base and countertop Note If the supplied screws are not long enough then obtain new 10 32 screws that meet your requirements 25423 Mounting Plate 10 32 x 2 Screws ...

Page 9: ...ting Plate to the predrilled holes in the countertop using the appropriate type screws for the two inner holes Note Pre installation cabinet and countertop preparation is discussed in the NCR 7407 XpressPort Hotel Check In Site Preparation Guide B005 0000 1803 25422 Bottom of Countertop Front of Cabinet Bolt Plate 10 32 x 2 Screws ...

Page 10: ...8 7407 K013 9 Remove the foam packing from the Display Module and then install the module onto the Mounting Plate 25421 Display Module Column ...

Page 11: ...to the Bolt Plate 25424 Note If the supplied bolts are not the correct length for your particular countertop obtain four Hex head bolts of sufficient length as long as needed but not so long that they may interfere with the cable routing underneath the countertop 11 Tighten the bolts evenly using a 7 16 nut driver ...

Page 12: ...10 7407 K013 12 Bundle the cables inside the Display Column using the supplied Velcro Tie or a Tie Wrap 25034a Velcro ...

Page 13: ...7407 K013 11 13 Install the Column Cover Slide the upper tab into the slot and secure it with screws 2 in the bottom 24895a Column Cover ...

Page 14: ...12 7407 K013 14 Snap the Signature Capture USB Cable into the Cable Guide 25425 USB Connector Cable Guide 15 Route the coiled cable beside the printer and connect it to a USB port on the Output Module ...

Reviews: