L
C
T
T
L
F
To Door Chime Box 1
Rear view
To Door
Chime Box Relay
21
22
23
24
Misc Block
Holes for
mounting screws
82400
-
5
6
1
2
3
Cross-
Connect
to 66M1-
50 Block
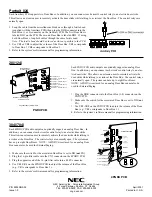
The Door Box (P/N 92245) is a self-contained Intercom unit typically used to monitor an entrance door. A visitor at the door can press
the Door Box call button (like a door bell). The Door Box then sends chime tones to all extensions programmed to receive chimes.
Your Door Box unit could be either of the designs shown at right. For installation, refer to the figure that applies to your Door Box.
Installing a Door Box
1. Locate an available 2-pin connector in a miscellaneous block.
2. For the connector chosen, cross-connect the associated wire pair
from the miscellaneous block to the cross-connect block.
3. Connect leads from the lugs on the Door Box (numbered 1 and 2 on
the figures at right) to the cross-connect block. Be sure to maintain the
proper polarity.
4. Install bridging clips as required.
5. For system connections, refer to the section that applies to your system.
6. Refer to the system’s installation manual for relay connections, if required.
Door Box (P/N 92245) Installation
1
5
6
L
C
T
T
2
3
4
L
F
To Door Chime Box 1
Rear view
To Door
Chime Box 2
21
22
23
24
* typical installation
RED-BRN
BRN-RED
RED-SLT
SLT-RED
*
*
Misc Block
Holes for
mounting screws
920
-
159A
Design A
L
C
T
T
L
F
To Door Chime Box 1
Rear view
To Door
Chime Box Relay
21
22
23
24
Misc Block
Holes for
mounting screws
82400
-
5
6
1
2
3
Cross-
Connect
to 66M1-
50 Block
Design B
Misc.
Block
- over -
cable to system
connection (DDK
connector on PCB for
Portrait 824 and 28i/124i,
48FU connector for
384i/704i systems)


