background image

INSTRUCTION BOOK

Summary of Contents for HD22

Page 1: ...INSTRUCTION BOOK...

Page 2: ...3 Never operate this sewing machine if it has a damaged cord or plug if it is not working properly if it has been dropped or damaged or dropped into water Return this sewing machine to the nearest au...

Page 3: ...9 Zigzag Width Dial 20 Pattern Selector Dial 20 Stitch Length Dial 20 SECTION III BASIC SEWING Straight Stitch Sewing 21 Changing the Sewing Directions 22 Zigzag Stitching 22 SECTION IV UTILITY STITCH...

Page 4: ...Thread guide Thread tension dial Face plate Check spring holder Thread cutter Needle plate Extension table Accessory storage box Slide plate t e r q y u w i o 0 1 2 3 4 5 6 7 8 The design and specific...

Page 5: ...3 0 1 2 3 4 5 6 7 8 9 Carrying handle Thread guide Handwheel Stop motion knob Machine socket Belt cover Presser foot lifter Needle clamp screw Free arm Presser foot 0 4 1 3 5 2 7 8 6 9...

Page 6: ...ower switch off Fit the nonreversible plug into the machine socket and plug the machine into the power supply Turn the power switch on Operting instructions The symbol O of a switch indicates the off...

Page 7: ...e control the faster the machine runs Foot Control Sewing Light Turn the power switch off before relamping The sewing light is located behind the face plate A To remove Unscrew To replace Screw B To r...

Page 8: ...removed for free arm sewing Extension Table Accessory Box For free arm sewing Pull the end of the extension table away from the machine as illustrated Sewing accessories are conveniently located unde...

Page 9: ...st position Setting Position The top of button should normally be pushed down to about 3 4 position from its highest position except for the following Set the top of button at 1 4 position from its hi...

Page 10: ...the lever and move it to the direction of arrow as illustrated For dropping the feed dogs press down the lever and move it to the direction of arrow as illustrated The drop feed lever is located in t...

Page 11: ...aise the presser foot To snap on When attaching the presser foot set the pressure regulator button at the depressed position to the bottom Place the presser foot so the pin on the foot lies just under...

Page 12: ...le from the clamp Insert the new needle into the needle clamp with the flat side away from you When inserting the needle into the clamp push it up as far as it will go and tighten the clamp screw firm...

Page 13: ...y prevents skipped stitches When sewing very fine fabrics sew over a piece of paper to prevent yarn distortion Thread and Needle Chart Fabrics Threads Needle Size Crepe de Chine Vile Lawn Organdy Geor...

Page 14: ...n the power switch off Open the hook cover or the slide plate Raise the needle by turning the handwheel toward you Take out the bobbin case by holding the latch When inserting the bobbin case place th...

Page 15: ...ile holding the handwheel with your left hand turn the stop motion knob toward you with the right hand With the free end of the thread held in your hand depress the foot control Stop the machine when...

Page 16: ...bbin into the bobbin case Make sure the thread unwinds in the direction of arrow w Pull thread into bobbin case slot e Draw the thread under the thread tension spring and into the delivery eye Leave a...

Page 17: ...q Pass the thread through the top cover thread guide w Draw the thread around the thread guide and down into the tension e Then down around the check spring holder r Firmly draw the thread from left...

Page 18: ...n the handwheel slowly towards you with your right hand until the needle goes down and continue turning the handwheel until the take up lever is at its highest position Lightly draw up the needle thre...

Page 19: ...desired number of the thread tension dial at setting mark Loosen the needle thread tension by moving the dial to a lower number Tighten the needle thread tension by moving the dial to a higher number...

Page 20: ...ut correct it by turning the dial toward Raise the needle above the fabrics and presser foot when you turn the pattern selector dial and zigzag width dial The higher the number the longer the stitch l...

Page 21: ...he threads toward the back Depress the foot control Gently guide the fabric along the guide line letting the fabric feed naturally BASIC SEWING For fastening the ends of seams press the reverse lever...

Page 22: ...rd you to bring the needle down into the fabrics Raise the presser foot Pivot the fabric around the needle to change sewing direction as desired Lower the presser foot Machine setting Zigzag Stitching...

Page 23: ...revent fabrics from fraying at raw edges It can be used to finish a hem edge UTILITY STITCHING Overedge stitch will be done most successfully when the right side stitches of zigzag fall slightly off t...

Page 24: ...ide of the presser foot Guide the work so the right hand stitches fall at the edge of the fabric The stitch is sewn with two stitches forward and one stitch backward forming a seam that does not rip e...

Page 25: ...ample and mark the top and bottom to determine the buttonhole length Set the zigzag width dial at Slide both threads to the left Lower the needle into the garment where the buttonhole is to start and...

Page 26: ...ite the first stitch on the left hand side and raise the needle Set the zigzag width dial at Sew a few bartacks and raise the needle from the fabric Remove the fabric from the machine and cut the sewi...

Page 27: ...the left hole of the button just below the needle point Lower the foot and turn the pattern selector until the needle point comes just above the right hole of the button Sew about five stitches and ra...

Page 28: ...threads toward the back and lower the foot To sew left side of the zipper guide the edge of the zipper along the zipper teeth and stitch through garment and zipper tape Turn the fabric and sew the oth...

Page 29: ...sure the wall of hem guide is placed in the middle of the toes of the presser foot Turn the power switch on Raise the presser foot and place the fabric under the foot so that the soft fold rests again...

Page 30: ...hemmer foot Sew 3 or 4 stitches while holding the needle and bobbin threads Lower the needle into the fabric and lift the hemmer foot Insert the folded portion of the fabric into the curl of the hemme...

Page 31: ...rest Fold under 1 5 cm 1 2 on each fabric edge and press Pin the two edges to paper 0 3 cm 1 8 apart Sew slowly guiding the fabric so the needle catches the folded edge on each side Machine setting Ma...

Page 32: ...astic under the center of the presser foot and stitch into place making sure the elastic is evenly distributed DECORATIVE STITCHING Machine setting Machine setting Shell Tuck Choose this stitch to att...

Page 33: ...e stitch It can be used to sew spandex undergarments or decoratively hem elastic fabric Another common use for the feather stitch is patchwork quilting When you work with the feather stitch you can se...

Page 34: ...bric Test the stitch on the actual fabric for the best results Machine setting When forward and reverse feeds become unbalanced depending upon the type of fabric correct the balance by turning the sti...

Page 35: ...F YOUR MACHINE Open the hook race ring holders outside and remove the hook race ring Remove the hook Clean the hook race with a brush and a soft dry cloth To assemble hook race Hold the hook by the ce...

Page 36: ...eedle plate setscrew with a screwdriver to take off the needle plate from the machine bed With a brush clean out dust and lint clogged on the feed dog teeth Reset the needle plate NOTE After cleaning...

Page 37: ...ps of fine quality sewing machine oil to the points indicated by the arrows in the figures For a machine in constant use oil two or three times a year In case the machine does not work smoothly due to...

Page 38: ...unt 3 The needle clamp screw is loose 4 The tension of the needle thread is too tight 5 The fabric is not drawn to the back when sewing is finished 6 The needle is too fine for the fabric being sewn 7...

Page 39: ...loose 2 The needle is either too heavy or too fine for the thread 1 The feed dog is packed with lint 2 The presser foot pressure is too weak 3 The stitches are too fine 4 The feed dog is not raised af...

Page 40: ...731 400 447 EN...
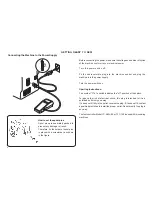
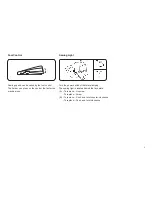
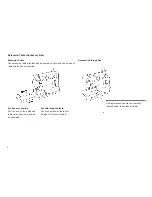
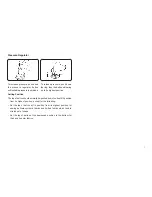
Reviews: