background image


Author : NetisIT R&D 
2013-12-16 
 

NETIS Information & Technology R&D Center 

N9000 Tablet PC


User’s Manual v1.1 (Eng) 

Summary of Contents for n9000

Page 1: ...Author NetisIT R D 2013 12 16 NETIS Information Technology R D Center N9000 Tablet PC User s Manual v1 1 Eng...

Page 2: ...Doc Name N9000 User s Manual Eng Part R D center Doc Ver v1 1 Date 2013 12 16 Author 1 Document History Date Ver History Author 2013 12 13 1 0 First Release 2013 12 16 1 1 Update contents...

Page 3: ...ublication or make changes in the specifications of the product described within it at any time without notice and without obligation to notify any person of such revision Trademarks NetisIT and N9000...

Page 4: ...1 1 Date 2013 12 16 Author 3 Head Quarters Netis Information Technology Co Ltd Address Anyang K Center 1002 1003 1591 9 Gwanyang dong Dongan gu Anyang si Gyeonggi do Korea phone 82 31 387 1988 Fax 82...

Page 5: ...d representatives This warranty shall extend from the time of shipment for the duration published by SmarTerminla for the product at the time of purchase Warranty Period Any defective product must be...

Page 6: ...ogress or in any area in which restrictions on radio transmissions are imposed Switch off the N9000 when in an aircraft The N9000 is not FAA approved for use on aircraft The effect of the use of the N...

Page 7: ...d on or pinched by items placed upon or against them Pay particular attention to cords at plugs and convenience receptacles and at the point where cords exit from the N9000 or its dock Do not overload...

Page 8: ...the front and back of the N9000 Operation while the N9000 may not feel hot to the touch if you maintain physical contact with the N9000 for a long time for example if you rest the N9000 on your lap fo...

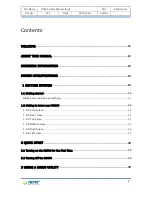
Page 9: ...CIFICATIONS 13 1 GETTING STARTED 14 1 1 Getting started 15 Make sure you have everything 15 1 2 Getting to know your N9000 16 1 2 1 Front view 16 1 2 2 Rear view 20 1 2 3 Top view 21 1 2 4 Bottom view...

Page 10: ...ation Launch 41 External Display 41 Display Rotate 42 Internet Explorer 43 Wi Fi Setup 44 Bluetooth Setup 44 Seeking Bar Brightness and sound control 45 Brightness control 45 Sound Volume Control 45 F...

Page 11: ...OTING GUIDE 68 Troubleshooting for Wireless 69 Troubleshooting for battery 71 Troubleshooting for Bluetooth problem 72 Troubleshooting for Display Problem 73 Troubleshooting for Date Time Problems 74...

Page 12: ...Microsoft Windows XP Vista 7 This unique N9000 offers a special combination of features that make it an ideal partner for a wide range of applications Our products can fulfill most of outdoor N9000 ap...

Page 13: ...contained in this manual are Chapter 1 Getting Started Basic functions of the N9000 Chapter 2 Starting N9000 Utility Using the system management software included with the N9000 Chapter 3 Maintenance...

Page 14: ...g Part R D center Doc Ver v1 1 Date 2013 12 16 Author 13 System Specifications The N9000 meets the following specifications Unless otherwise noted allthe specifications listed below are subject to cha...

Page 15: ...Doc Name N9000 User s Manual Eng Part R D center Doc Ver v1 1 Date 2013 12 16 Author 14 1 Getting Started Chapter 1 Getting Started...

Page 16: ...station 2 Vehicle docking station 3 Without any docking station Make sure you have everything After opening the package carefully inspect the contents If any of the items are missing or appear damaged...

Page 17: ...ter Doc Ver v1 1 Date 2013 12 16 Author 16 1 2 Getting to know your N9000 1 2 1 Front view Key pad Anti Shock Cushions MIC Navigation Key Power Reset button HDD Wi Fi LED indicators Battery LED indica...

Page 18: ...writing to the built in SSD or HDD No light HDD is idle Red Battery is charging Green Battery is fully charged Power Reset Button When clicking power button when you turn on the button stays with red...

Page 19: ...finition function to help memorize functions the drawings under the numbers are actually related each function For example 5 button shows radar wave indicating WiFi On Off Key Map KEYS Function Fn 0 F...

Page 20: ...rpose of placing a keypad lock Fn 3 to a N9000 is to prevent accidental key input You can unlock the keypad via N9000 Utility Navigation Key arrow keys 1 When Fn is disabled serves simply as arrow key...

Page 21: ...amera is located on the back panel of the computer The camera can be used for picture capture as well as streaming video Hot Swappable Battery Refresh your power supply without shutting down With a 30...

Page 22: ...art R D center Doc Ver v1 1 Date 2013 12 16 Author 21 1 2 3 Top view GPS Internal Antenna An internal GPS active antenna is suitable for mobile applications Mobile Antenna Mobile Antenna for GSM GPRS...

Page 23: ...or 22 1 2 4 Bottom view VGA D Sub 15 pin VGA connector for display output Docking connector When seated in a N9000 peripheral the Device is powered the batteries charged and communication occurs via t...

Page 24: ...Colum n 9 Colum n 10 Row 0 VCC VCC LinkLe d 5V USB CD RI BI_DA BI_DA GND GND Row 1 VCC VCC LinkLe d DM RXD CTS BI_DB BI_DB GND GND Row 2 VCC VCC ActLed DP TXD RTS BI_DC BI_DC GND GND Row 3 N3 N2 ActL...

Page 25: ...Eng Part R D center Doc Ver v1 1 Date 2013 12 16 Author 24 DIO Functional Test Connect to DIO Test board to the DIO port of N9000 or own Run N9000DIDO on the desktop You can check and test for DI and...

Page 26: ...use J 45 jack pin RJ 45 LA n to a local n Connector w D 000 User s M v1 1 w gh this jack s the supplied AN port supp network with LED Ind DC IN Manual Eng Date supplies pow d power ada ports a stand...

Page 27: ...se this ja Com1 RS2 me N9 er Serial com ack to conne 232 DB9 ma 000 User s M v1 1 mmunicat ect to your p le connector Manual Eng Date tions jack rinter for ha r 201 k ard copy prin 13 12 16 nting Part...

Page 28: ...er s M v1 1 w Bus USB is a PC USB de k dset or exter jack e in this jack USB Port Manual Eng Date s the latest evices can be rnal speaker k to record a 201 standard for e chained to rs to this jac udi...

Page 29: ...Doc Name N9000 User s Manual Eng Part R D center Doc Ver v1 1 Date 2013 12 16 Author 28 2 Quick Start Chapter 2 Quick Start...

Page 30: ...dready to go To turn on the N9000 1 Connect the AC adapter power cord to the AC adapter 2 Connect the AC adapter power cord to an AC outlet 3 Connect the AC adapter to the DC power port on the left si...

Page 31: ...Doc Name N9000 User s Manual Eng Part R D center Doc Ver v1 1 Date 2013 12 16 Author 30 3 Using a N9000 utility Chapter 3 Using a N9000 utility...

Page 32: ...00 start N9000 Utility will then automatically run start through forwarding process As illustrated below on the bottom right side of Tray Icon you can see the N9000 Utility icon minimized indicated as...

Page 33: ...ce respectively by using N9000 Utility to toggle it as Enable Disable WIFI Enable Disable When clicking Wifi button from the N9000 Utility you can enable disable of N9000 When disabling the Device you...

Page 34: ...e Device Manager Even if you go to Network Property adapter you still won t be able to see nor check it Bluetooth Enable Disable When clicking Bluetooth button at the N9000 Utility you can also enable...

Page 35: ...A Device or GPRS GSM of N9000 When disabling Mobile Device it s impossible to connect or access through 2G For CDMA Model 1 For CDMA model when Mobile button is enabled CDMA 2G As shown below U600 EVD...

Page 36: ...nter Doc Ver v1 1 Date 2013 12 16 Author 35 2 When disabling Mobile button of GPRS GSM model If you see GC864 GPRS USB Modem GPRS GC864 USB to UART Bridge at the Device Manager it means GPRS is disabl...

Page 37: ...D center Doc Ver v1 1 Date 2013 12 16 Author 36 For GPRS GSM Model GoBi3000 for Sierra MC8355 1 For GPRS GSM model when Mobile button is enabled Check if all the 3G related devices are detected from t...

Page 38: ...Wireless DM Port Sierra Wireless NMEA Port GPS Enable Disable When clicking GPS button in N9000 Utility you can also enable disable the function of GPS of N9000 When disabling the Device access or con...

Page 39: ...clicking CAM F button from N9000 Utility you can enable disable the Device of frontal cam of N9000 When disabling the Device you can t use the cam at all the USB Video Device won t be shown as illust...

Page 40: ...desktop background caution When updating USB Video Device Driver the frontal camera might not work properly CAM R Enable Disable When clicking CAM R button from N9000 Utility you can enable disable t...

Page 41: ...Name N9000 User s Manual Eng Part R D center Doc Ver v1 1 Date 2013 12 16 Author 40 In order to see if rear cam is working go to N9000 Camera application N9000 Camera shortcut in the desktop backgrou...

Page 42: ...aunch By using the N9000 Utility you can launch the application related to each function External Display When clicking External Display button from N9000 Utility it will information regarding Display...

Page 43: ...1 Date 2013 12 16 Author 42 Display Rotate When clicking Display Rotate button you can also turn the N9000 screen with 90 degree angle anti clock wise For example it changes 800x600 to 600x800 If you...

Page 44: ...Doc Name N9000 User s Manual Eng Part R D center Doc Ver v1 1 Date 2013 12 16 Author 43 Internet Explorer...

Page 45: ...ireless LAN Driver Configuration Program which is installed in N9000 will run Bluetooth Setup When you click Bluetooth Setup button Bluetooth Driver Setup Program will run You need to install Bluetoot...

Page 46: ...ightness and sound control Brightness control Simply use this flower looking button to move left and right It s located at the bottom of N9000 Utility when it pops up Sound Volume Control It Works sam...

Page 47: ...i monitors flicks and context menu function which launches a context menu by user s long pressing on touchscreen rather than clicking the right mouse button or pressing the application key on the keyb...

Page 48: ...Doc Name N9000 User s Manual Eng Part R D center Doc Ver v1 1 Date 2013 12 16 Author 47 4 Power management Chapter 4 Power management...

Page 49: ...ray while the unit is running on the battery power Battery Power Indicator 4 2 Monitoring Battery Power There are four ways to monitor how much power battery has left 1 Click Start Settings Control Pa...

Page 50: ...center Doc Ver v1 1 Date 2013 12 16 Author 49 3 You can check for battery status by NetisIT Logo LED Color Green LED means that fully charged Red LED means that battery charging Red LED flicker altern...

Page 51: ...Doc Name N9000 User s Manual Eng Part R D center Doc Ver v1 1 Date 2013 12 16 Author 50 4 You can check battery status via N9000 Utility...

Page 52: ...t the internal battery will automatically begin to recharge While the battery is charging the Battery Charge icon on the Indicator panel will be active after 6 12 seconds When the battery is fully cha...

Page 53: ...the lowest comfortable level Shorten the length of time before Windows turn off the display USB devices use power just by being connected If you use a USB mouse you can save powerbydisconnecting the...

Page 54: ...Doc Name N9000 User s Manual Eng Part R D center Doc Ver v1 1 Date 2013 12 16 Author 53 5 Calibration Chapter 5 Calibration...

Page 55: ...button and arrows appear pointing to red Advanced Calibration Command Calibration squares Use your finger or stylus to touch the redsquares in sequence After the fifth red point calibration is complet...

Page 56: ...al Eng Part R D center Doc Ver v1 1 Date 2013 12 16 Author 55 To calibrate your touchscreen 1 Please select a device then click Configure You can also double click the device too 2 Click Standard Cali...

Page 57: ...d Mode calibration points you need for an accuratecalibration Use a stylus for Advanced Calibration forgreater accuracy Do the following for Advanced Calibration 3 Back in Calibrate tab press Advanced...

Page 58: ...g the difference of each touch panel Check this function to have touch panellinearity comparison graph appear whenyou finish Advanced Calibration Theblack lines reflect the ideal linearityassumed by P...

Page 59: ...Doc Name N9000 User s Manual Eng Part R D center Doc Ver v1 1 Date 2013 12 16 Author 58 About This panel displays information about the PenMount controller and driver version...

Page 60: ...Doc Name N9000 User s Manual Eng Part R D center Doc Ver v1 1 Date 2013 12 16 Author 59 6 Cradle Reference Guide Chapter 6 Cradle Reference Guide...

Page 61: ...e a spare N9000 battery in approximately 4 hours The N9000 cradle is not certified for use in Hazardous Locations Key Features Recharges the 1x Spare battery pack Provides a connection for serial comm...

Page 62: ...sing objects Do not place the Charging dock in a closed area withrestricted airflow Dock the N9000 The N9000 is inserted into the docking bay with the keypad facing forward Carefully press the N9000 s...

Page 63: ...mounted to a flat surface NetisIT does not supply the mounting hardware 2 If required connect the AC DC power supply to the cradle The LED indicator on the front of the powered cradle will illuminate...

Page 64: ...Use Only Before using this cradle please read all instructions and cautionary notations on the cradle and on the N9000 To reduce risk of injury only use authorized battery products in the N9000 Other...

Page 65: ...secured in the vehicle mounted assembly Never put the N9000 into the vehicle mounted assembly until the assembly is securely fastened to the vehicle Using the Powered Vehicle Mounted Assembly Before...

Page 66: ...es a connection for serial communications between the N9000 and the host computer or another serial device such as a Barcode scanner or modem Wide input power range from 10V to 60V Ethernet port USB P...

Page 67: ...k the N9000 Turn off the power switch of the vehicle cradle Turn the key counter clockwise Remove the N9000 from the Cradle by pulling it straight up and out of the docking bay If necessary brace the...

Page 68: ...s module by using a softtoothbrush to clean between the contact pins CAUTION Do not use this computer system whileoperating a motor vehicle WARNING Use of this system while operatinga motor vehicle or...

Page 69: ...Doc Name N9000 User s Manual Eng Part R D center Doc Ver v1 1 Date 2013 12 16 Author 68 7 Trouble shooting guide Chapter 7 Trouble shooting guide...

Page 70: ...File and printer sharing function is enabled 2 Symptom Slow or unstable performance Possible Remedy Try to change the channel of the communicating group or move your device closer to the communicating...

Page 71: ...l things that may cause interference with the wireless signal 5 Symptom If you still cannot get a wireless connection of the network Possible Remedy Step 1 Turn the computer off Step 2 Turn the Access...

Page 72: ...not charge Battery Charge indicator does not light green Possible Remedy Make sure that the AC adapter is properly connected Make sure that the battery is not too hot or cold Allow time for the batte...

Page 73: ...device with Bluetooth wireless technology Possible Remedy Make sure that both devices have activated Bluetooth feature Make sure that the distance between the two devices are not over 10 meters or th...

Page 74: ...hooting for Display Problem Symptom Nothing appears on the screen Possible Remedy During operation the screen may automatically turn off as a result of power management Press any key to see if the scr...

Page 75: ...me is incorrect Possible Remedy Correct the date and time via the operating system or BIOS Setup program After you have performed everything as described above and still have the incorrect date and ti...

Page 76: ...ng an external speaker make sure that the speaker is properly connected Symptom 2 Distorted sound is produced Possible Remedy Make sure that the volume control is not set too high or too low In most c...

Page 77: ...Doc Name N9000 User s Manual Eng Part R D center Doc Ver v1 1 Date 2013 12 16 Author 76 8 Firmware update Chapter 8 Firmware update...

Page 78: ...rmware update guide 1 Ensure that the N9000 has power source connected The AC adapter should be the correct one and the main battery needs to be at least 20 of it s charge 2 Terminate the N9000 Utilit...

Page 79: ...center Doc Ver v1 1 Date 2013 12 16 Author 78 6 Run the file as Administrator and click on Win_all bat 7 After the system finishes the Flash process then shutdown the N9000 You should plug out the AC...

Page 80: ...1 1 Date 2013 12 16 Author 79 How to check for firmware updates 1 You will need to turn it on again Press mouse right button on the N9000 and then click the About N9000Utiltity button 2 Verify the Fir...

Page 81: ...Doc Name N9000 User s Manual Eng Part R D center Doc Ver v1 1 Date 2013 12 16 Author 80 9 Appendix Chapter 9 Appendix...

Page 82: ...rference 2 This device must accept any interference received including interference that may cause undesired operation IMPORTANT NOTE FCC RF Radiation Exposure Statement This equipment complies with F...

Page 83: ...this equipment and the radio television receiver Plug the equipment into a different outlet so that the equipment and the radio television receiver are on different power mains branch circuits Consul...

Reviews: