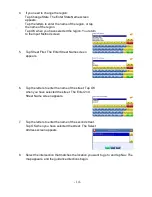
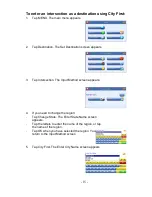
background image

Summary of Contents for I4-BC - Automotive GPS Receiver

Page 1: ...I 4 B C ...

Page 2: ...n address as a destination 10 Using an intersection as a destination 13 Using a Point of Interest POI as a destination 17 Using a Favorite destination as a destination 21 Using a Recent destination as a destination 22 Using a City Center as a destination 23 Adding detours and stopovers 25 Detours 25 Stopovers 26 Creating an itinerary 26 Managing your favorites list 27 Using Shortcuts 28 Setting yo...

Page 3: ... using signals from Global Positioning Satellites GPS orbiting the earth There are 24 GPS satellites orbiting the earth A GPS device can calculate your position on the earth if it can receive signals from at least three of these satellites Starting the system Once you have charged the battery you are ready to start the system ...

Page 4: ...ppears and you are ready to set your first destination Getting a GPS signal To use the system to guide you to a destination the system s GPS antenna must be receiving signals GPS signals can be obstructed by ceilings trees and nearby tall buildings Signals can also be obstructed by the roof of your vehicle For best results position your system where it has a clear view of the sky ...

Page 5: ...em The system doesn t have a keyboard Instead you tap the screen to enter data When you are entering data a screen containing the letters of the alphabet appears As you tap the buttons on the keyboard the list at the top of the screen scrolls to show the next item that matches the letters you ve tapped If you need to enter numbers tap the 1 2 3 button and the numeric keyboard appears ...

Page 6: ...rough the screens The system shows you one screen at a time Each time you tap a button a new screen appears If you want to return to the previous screen tap If there isn t you can Tap MENU to display the main menu ...

Page 7: ...d if the arrow is yellow the GPS signal is weak At the bottom of the map is a scale indicating your current zoom level Maneuver detail If you have set a destination the map displays additional information As you navigate to a destination the top of the map displays the name of the next street the direction of your next turn and the distance to that turn At the bottom of the map you see the time an...

Page 8: ... or view information From the Information screen you have several options s Set start location s Set destination s Save this location s Information Setting the location as a starting point is useful if you are trying to find the distance between two locations Setting the location as your destination is a quick way to set a destination Saving the location adds the location to your Favorites list yo...

Page 9: ... Information screen appears giving you block information about the location including latitude and longitude To view POI information 1 To view information about a POI on the map press firmly on the icon on the map The POI S screen appears 2 Tap Information The Information screen appears giving you block information about the location including latitude and longitude ...

Page 10: ...as Home button 6 Tap on OK to confirm 7 Tap on HOME to quick computer the route to your home Setting a single destination You can set your destination the following ways s Address s Intersection s Point of Interest POI s Favorites s Recent s City Center When you have found your destination you have several options s Nav s Fav s Map Nav calculates the route from your current location or the locatio...

Page 11: ...e street first or be selecting the city first If you use Street First and too many records match you will be asked to use City First To enter an address as a destination using Street First 1 Tap MENU The main menu appears 2 Tap Destination The Set Destination screen appears 3 Tap Address The Input Method screen appears 4 If you need to change the region s Tap Change State The Enter State Name scre...

Page 12: ...ave selected the street The Enter House Number screen appears 7 Select the address that matches the location you want to go to and tap Nav The map appears and the guidance directions begin To enter an address as a destination using City First 1 Tap MENU The main menu appears 2 Tap Destination The Set Destination screen appears ...

Page 13: ...e name of the region s Tap OK when you have selected the region You return to the Input Method screen 5 Tap City First The Enter City Name screen appears 6 Tap the letters to enter the name of the city Tap OK when you have selected the city The Enter Street screen appears 7 Tap the letters to enter the name of the street Tap OK when you have selected the street The Enter House Number screen appear...

Page 14: ...now the names of both streets If there are many cities that have streets with the first name you enter you might be asked to select the city first There are two ways to enter the intersection by selecting the street first or be selecting the city first If you use Street First and too many records match you will be asked to use City First To enter an intersection as a destination using Street First...

Page 15: ...en 5 Tap Street First The Enter Street Name screen appears 6 Tap the letters to enter the name of the street Tap OK when you have selected the street The Enter 2nd Street Name screen appears 7 Tap the letters to enter the name of the second street Tap OK when you have selected the street The Select Address screen appears 8 Select the intersection that matches the location you want to go to and tap...

Page 16: ... Tap Intersection The Input Method screen appears 4 If you need to change the region s Tap Change State The Enter State Name screen appears s Tap the letters to enter the name of the region or tap the name of the region s Tap OK when you have selected the region You return to the Input Method screen 5 Tap City First The Enter City Name screen appears ...

Page 17: ... of the street Tap OK when you have selected the street The Enter 2nd Street Name screen appears 8 Tap the letters to enter the name of the second street Tap OK when you have selected the street The Select Address screen appears 9 Select the intersection that matches the location you want to go to and tap Nav The map appears and the guidance directions begin ...

Page 18: ...ny different types of restaurants choosing a subcategory of restaurant is more like selecting a street The four methods of selecting a specific point of interest include two for nearby POIs and two for all POIs in a region To select a nearby POI as a destination 1 Tap MENU The main menu appears 2 Tap Destination The Set Destination screen appears 3 Tap POI The Points of Interest screen appears 4 T...

Page 19: ... have selected the POI The POI Select screen appears displaying the address of the POI s Tap Nav The map appears and the guidance directions begin 7 To select a nearby POI by distance s Tap By Distance The POI List screen appears listing the closest POIs first s Tap the POI that you want to go to and tap Nav You may need to scroll down the list by tapping the scroll bar The map appears and the gui...

Page 20: ...screen appears 3 Tap POI The Points of Interest screen appears 4 Tap a category Usually a subcategory screen appears Note If you chose Restaurant tap the letters to enter a type of restaurant If you chose Hotel there is no subcategory screen Go to the next step 5 Tap a subcategory The POI Options screen appears ...

Page 21: ...ect screen appears s Tap Nav The map appears and the guidance directions begin 7 To select a POI by city s Tap By City The Enter City Name screen appears s Tap the letters to enter the name of the city and tap OK The Enter POI Name screen appears s Tap the letters to enter the name of the POI and tap OK The POI Select screen appears s Tap Nav The map appears and the guidance directions begin ...

Page 22: ...S screen and from the Location Information screen You can then easily select one of these locations as a destination To select a favorite as a destination 1 Tap MENU The main menu appears 2 Tap Destination The Set Destination screen appears 3 Tap Favorites The Favorites screen appears 4 Tap on the favorite you want to use as a destination and tap Nav The map appears and the guidance directions beg...

Page 23: ...on Managing your recent destinations list is covered later in this section To select a destination from your list of recent destinations 1 Tap MENU The main menu appears 2 Tap Destination The Set Destination screen appears 3 Tap Recent The Recent screen appears 4 Tap on the recent destination you want to go to and tap Nav The map appears and the guidance directions begin ...

Page 24: ...rs and one for all city centers in a region To select a nearby City Center as a destination 1 Tap MENU The main menu appears 2 Tap Destination The Set Destination screen appears 3 Tap City Center The City Center screen appears 4 To select a nearby city center from an alphabetical list s Tap Alphabetical The Enter City Name screen appears s Tap the letters to enter the name of the city Tap OK when ...

Page 25: ...ections begin To select from all City Centers in a region 1 Tap MENU The main menu appears 2 Tap Destination The Set Destination screen appears 3 Tap City Center The City Center screen appears 4 To select a city center from all available in a region s Tap List All The Enter City Name screen appears s Tap the letters to enter the name of the city Tap OK when you have selected the city The City Cent...

Page 26: ...available the system will calculate a new route that avoids the section you marked Note You cannot create a detour if you do not have a current destination To create a detour 1 Tap MENU The main menu appears 2 Tap Destination The Destination Options screen appears 3 Tap Avoid Road The Avoid Road screen appears 4 Mark any segments that you do not want included s Tap on a route instruction to highli...

Page 27: ...ou will be prompted to continue to your final destination To create a stopover 1 Tap MENU The main menu appears 2 Tap Destination The Destination Options screen appears 3 Tap Stopover The Set Stopover screen appears 4 Set your stopover destination using any of the methods explained earlier in this section To cancel a stopover 1 Tap MENU The main menu appears ...

Page 28: ...nt to continue to your final destination 5 Tap Yes The map appears and navigation continues Managing your favorites list You can edit the destinations you add to your favorites list to give them descriptive names You can also remove destinations from your favorites list To manage your favorites list 1 Tap MENU The main menu appears ...

Page 29: ...our favorites list s Tap on the favorite you want to delete s Tap Del The favorite is removed from the list 5 Tap X to close the Favorites screen Using Shortcuts The shortcut feature provides you quick access to some of the most important destinations while you re on the road including s Home s ATM s Gas s Hospital s Parking s Restaurant s Tourist Information By tapping on any of the POI categorie...

Page 30: ...p as you drive so that you are always moving toward the top of the screen North keeps the map oriented with North at the top of the map like a traditional paper map There are two guidance settings which control whether or not the maneuver detail screen appears when you near your next maneuver If you use the auto setting the maneuver detail screen appears The day night setting controls the backgrou...

Page 31: ... choose which categories of POI icons you want displayed The color settings control the background color of the map You can choose from four different colors The 3D view settings control your view of the map 2D shows you the map in traditional 2D mode 1 2 and 3 show you a 3D version of the map with a different angle for each value If you use any of the 3D settings you will not be able to tap on a ...

Page 32: ...n the categories you want displayed The categories to be displayed are highlighted You can use Select All and Clear All to quickly highlight or clear categories s When you have highlighted the categories you want displayed tap OK You return to the Display Options screen 7 Tap your Color preference Yellow Grey White or Fuchsia 8 Tap your 3D View preference 2D 1 2 or 3 9 When you have finished choos...

Page 33: ...but the total time for the route does not take into account the ferry schedule or time spent on the ferry The toll roads setting indicates whether you want to include or exclude toll roads when your route is calculated If you include toll roads those roads will be used if appropriate for the method you selected The carpool setting indicates whether or not you want to include carpool or high occupa...

Page 34: ...d speed alert Auto speed alert uses the type of road to determine the probably speed limit Fixed speed alert lets you enter a speed and will warn you if that speed is exceeded To set the speed alert 1 Tap MENU The main menu appears 2 Tap Speed Alert The Speed Alert screen appears 3 To set auto speed alert s Tap the Auto Speed Alert check box A check mark indicates that Auto Speed Alert is on s Tap...

Page 35: ...me 1 Tap MENU and then Settings menu appears 2 Tap Volume The Volume screen appears 3 Tap on the volume setting you want 4 To test the volume tap Test 5 To save your changes tap OK The Volume screen closes Localization The localization options give you control over the settings affected by your location including s language s time zone s daylight savings time s units TTS Text To Speech ...

Page 36: ...es clear driving instructions with street names on your GPS device You can choose between Off Mixed or Exclusive To set your localization settings 1 Tap MENU The main menu appears 2 Tap Localization The Localizationscreen appears 3 Tap your Language preference English François or Español 4 Tap your Time Zone preference Eastern Central Mountain Pacific Alaska or Hawaii 5 Tap your Daylight Saving pr...

Page 37: ... 36 Screen Display GUIDANCE SCREENS GPS Info Screen ...

Page 38: ... 37 Current Location Screen Route List Screen ...

Page 39: ...y to modify amend or otherwise change or update this manual We reserve the right to do this at any time without any prior notice All specifications and features are subject to change without notice All screen shots shown are simulated and may not represent the actual screen on production unit sold to consumers Mapping database copyright 2006 NAVTEQ NAVTEQ ON BOARD is a trademark of NAVTEQ Navigati...

Page 40: ...ction books information on this product its operation and accessories visit us on the web at www nextar com Or write to us at Nextar Inc 1661 Fairplex Dr La Verne CA 91750 USA copyright 2005 Nextar Inc All Rights Reserved ...

Reviews: