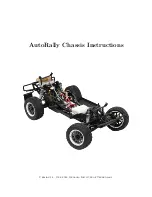
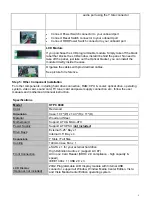

HOME THEATER PC CHASSIS
Model: HTPC 8000
Wooden HTPC Chassis
Quick Installation Guide
(U.S. & Canada Only)
Version 1.0
DISCLAIMER
No warranty or representation, either expressed or implied, is made with respect to the content of this documentation, its quality, performance,
merchantability, or fitness for a particular purpose. Information presented in this documentation has been carefully checked for reliability; however, no
responsibility is assumed for inaccuracies. The information contained in this documentation is subject to change without notice.
In no event will nMedia will be liable for direct, indirect, special, incidental, or consequential damages arising out of the use or inability to use this product or
documentation, even if advised of the possibility of such damages.
TRADEMARKS
All trademarks used in this user guide are the property of their respective owners.
COPYRIGHT
© 2004-2009 by NMEDIA SYSTEM, INC. All rights reserved. No part of this publication may be reproduced, transmitted, transcribed, stored in a retrieval
system, or translated into any language in any form by any means without the written permission of NMEDIA SYSTEM, INC.
TECHNICAL SUPPORT
If a problem arises with your system and no solution can be obtained from this user guide, please contact your place of purchase or local dealer.
REVISION HISTORY
V 1.0
July, 2009
Table of Contents
Overview ___________________________________________ 2
Standard Components Equipped _____________________ 2
Other Suggested Components _______________________ 2
Installation Flowchart (Basic Procedures) ______________ 2
Installation Tools _________________________________ 2
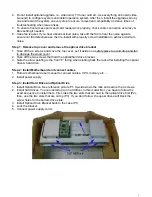
Step 1: Remove top cover and remove the optical drive bracket 3
Step 2: Install Motherboard and connect cables ___________ 3
Step 3: Install Hard Drive and Optical Drive _____________ 3
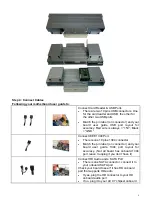
Step 4: Connect Cables _______________________________ 4
Step 5: Other Component Installation ___________________ 5
Reference ___________________________________________ 6
Visit our website for more detail installation in PDF format. 6
Safety Instructions ___________________________________ 6
RMA Return Policy __________________________________ 6
Note:
This user guide is designed to provide the user a quick reference for chassis setup. We assume you need the information regarding how to assemble the
system, such as Motherboard, CPU, RAM Memory, Hard Drive, DVD ROM, Operating System…, etc. Based on this assumption, we make this user
guide of quick installation guide. Please follow the description step by step to install the components. If you have any question in assembling the system,
please refer your questions to the appropriate Technical Support of the component vendors.