background image

Summary of Contents for DMS-1

Page 1: ...y to the descriptive and maintenance practices 1 02 Reason for Reissue to add new and revised information 1 03 The DMS 1 system normally operates automatically The monitor and alarm circuits within th...

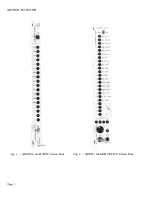
Page 2: ...t Pack Page 2 I ALARM OFFICE II ITCE ALM i l OCP FAIL A l DCP FAIL 8 liNE FAll A 4 LJN fAll 8 S liHE fA IL P 6 8YPASS DP 7 LP8K DP S T BAT 9 L1NE PW lO RINC CEN ll COM PWR u cFAtL ll 8AT fAll 14 0YER...

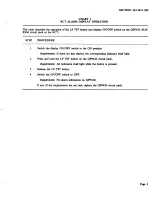
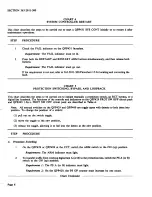
Page 3: ...ON OFF switch to the ON position Requirement If there are any alarms the corresponding indicator shall light 2 Press and hold the LP TST button on the QPP420 circuit pack Requirement All indicators sh...

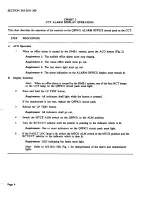
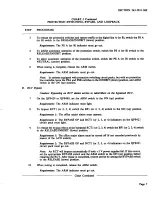
Page 4: ...mps or the CCT lamp on the QPP421 circuit pack must light 2 Press and hold the LP TEST button Requirement All indicators shall light while the button is pressed If the requirement is not met replace t...

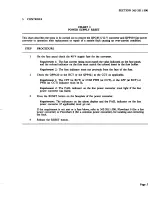
Page 5: ...indicator must not protrude from the face of the fuse 2 Check the QPP420 at the RCT or the QPP421 at the CCT as applicable Requirement 1 The CPF at RCT or COM PWR at CCT or the LPF at RCT or PWR at CC...

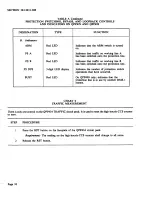
Page 6: ...igital line loopback The functions of the controls and indicators on the QPP429 PROT SW OFF circuit pack and QPP499 1 for n PROT SW OFF circuit pack are described in Table A Note All manual switches o...

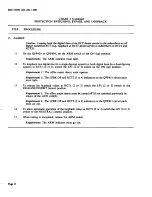
Page 7: ...e bypassed RCT 7 On the QPP429 or QPP499 set the ARM switch to the ON up position Requirement The ARM indicator must light 8 To bypass RCTl or 2 3 4 switch the BPI or 2 3 4 switch to the ON up positio...

Page 8: ...1 2 or 3 switch on the ON up position Requirement 1 The office major alarm must operate Requirement 2 The LPBK OP and RCT2 3 or 4 indicators on the QPP421 circuit pack must light 13 To release the loo...

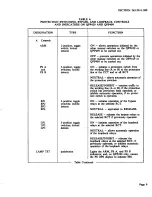
Page 9: ...es traffic to the working line A or B if the protection switch has previously been operated or inhibits automatic operation if no protec tion switch is operated BPI 3 position toggle ON initiates oper...

Page 10: ...line B has been switched onto the protection line 3 digit LED display Indicates the number of protection switch operations that have occurred Red LED On QPP499 only indicates that the protection line...

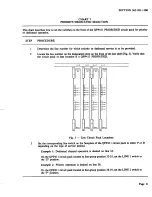
Page 11: ...I UNE o UNEO UNEQ I LINE I f LINE l LINE i UNE I LINE 2 UNE 2 LINE 2 LINE2 LINE 3 LINE 3 LINE J LINE 3 LINE 0 LINE 0 LlHE 0 LINE 0 LINE I LINE 1 LINE J LINE 1 LINE 2 LINE 2 LINE 2 LINE 3 LINE 3 LINE 3...

Page 12: ...its of the DMS 1 between the CCT and the RCT terminals to which the subscriber Page 12 lines are connected this system requires QPP447 TEST ACCESS REMOTE circuit packs and REMOTE BYPASS assemblies ED7...

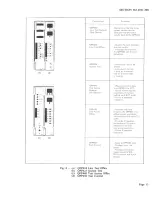
Page 13: ...P424 Selects the test indicates the test results Indicates the status of the QPP423 and the test condition Selects the Iine to be tested Indicates if the line is busy or if another line on the line sh...

Page 14: ...vailable channel to the line ON OFF Pushbutton switch latching When pushed in ON position indicates to the system controller that the system test etreuit pack is in use ASSN Pushbutton switch latching...

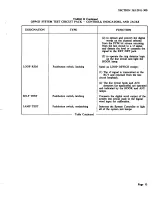
Page 15: ...ne circuit and light the HOOK lamp LOOP REM Pushbutton switch latching Same as LOOP OFFICE except 1 The vf signal is transmitted to the RCT and returned from the line circuit loopback 2 The line circu...

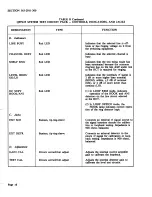
Page 16: ...2 dB or more lower than nominal LO DC SUPV Red LED 1 In LOOP REM mode indicates HOOK ANI operation of the HOOK and ANI detectors on the line circuit selected at the RCT 2 In LOOP OFFICE mode the HOOK...

Page 17: ...e when the START STOP button is pressed When pushed in SEL position it causes test selected by the VOLTS ac FEMF de RES CAP buttons to be repeated and the display updated at each repetition The test s...

Page 18: ...of the test selected are not meaningful because of interference from a previous value e g de on pair 9 V because of battery crossed to pair being measured makes resistance measurements invalid so the...

Page 19: ...available channel to the line When pushed in ON indicates to the system controller that the circuit pack is enabled an automatic 1 second lamp test is made when the switch is frrst turned ON Instruct...

Page 20: ...igital word output of the QPP450 to the digital word input for calibration P SIG RLS Pushbutton switch nonlatching Instructs the system controller to set up a permanent signal release condition on the...

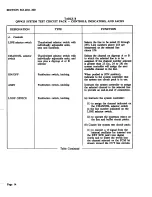
Page 21: ...INDICATORS DESIGNATION CIRCUIT TYPE FUNCTION PACK A Controls Note There are no controls on the QPP447 ON OFF QPP448 Pushbutton switch When pushed in ON indicates only latching to the system controller...

Page 22: ...8 Red LED Indicates that the test pair is QPP447 being used by either this DMS 1 system or an associated DMS 1 system MAINTENANCE QPP448 Red LED Indicates that a manual bypass MANUAL TESTING QPP447 is...

Page 23: ...d vftests by using the assign function ofthe QPP425 circuit pack TEST EQUIPMENT Telephone Test Oscillator Hewlett Packard 236A or equivalent Transmission and Noise Measuring Set TNMS Hewlett Packard 3...

Page 24: ...meter reading is 0 6 0 1 dBm 11 Disconnect the oscillator and TNMS from the EXT SCE and EXT DETR jacks 12 Tum the TEST CAL control until the OK and LO indicators light with equal brilliance 13 Tum th...

Page 25: ...MPEDANCE 900 OHMS BALANCED LEVEL OdBm PATCH CORD f TNMS SWITCH SETTINGS IMPEDANCE 900 OHMS BALANCED TERMINATING LEVEL OdBm Fig 5 Test Equipment Calibration Q GEN SYSTEM TEST liN CHANNEl Qi Poi HA 363...

Page 26: ...the ON OFF switch on the QPP425 circuit pack to OFF b Select another channel c Switch the ON OFF switch on the QPP425 circuit pack to ON Note 2 If the LINE BUSY indicator is on wait until it goes out...

Page 27: ...transmission path through the QPP425 circuit pack is intended only for use in isolating noise or distortion faults to either the CCT or the RCT E Assign End to End VF Connection This procedure assigns...

Page 28: ...p on the QPP424 Requirement 3 Within 4 seconds the TESTING indicator goes out but the dashes remain on If the requirements are not met refer to 363 2011 500 Table F for fault location B Automatic Test...

Page 29: ...ging received at the CCT on a line on the shelf under test other than the line under test causes testing to be stopped until the ringing stops or 5 minutes have elapsed In this case 1 the HALTED indic...

Page 30: ...test to be performed Requirement 1 The associated indicator must light 9 Press the START STOP button Requirement 1 The TESTING lamp must light Requirement 2 An automatic test sequence is performed se...

Page 31: ...e out position btfore starting Step 3 3 Set the CHANNEL selector to the desired channel or to an indication between 24 and 29 if the channel to be used does not matter 4 Set the LINE selector to the n...

Page 32: ...utton Requirement The OK and RING indicators must go out 8 Press and hold the LOOP REM button Requirement 1 The OK and HOOK indicators must light Requirement 2 If the selected line is connected to a u...

Page 33: ...procedure interrupts service on the line under test Be sure the customer connected to the line is not using the line bf ore starting Step 15 15 Perform Steps 3 4 and 5 of this chart 16 Depress the P S...

Page 34: ...PP450 to the desired line number Note The status of the selected line channel and shelf are displayed on the QPP425 or QPP450 Caution The next step interrupts service on the selected line Wait until t...

Page 35: ...ts service on the selected line Wait until the line is idle IH fore starting Step 6 6 Press the SPARE LINE button until it latches Requirement The LINE SPARED indicator must light and the selected lin...

Page 36: ...icator must light Manual bypass Test B does not operate Manual sparing Test C does operate The BUSY condition from an associated DMS 1 system disappears The INHIBIT indicators on all associated DMS 1...

Page 37: ...e for connecting a headset to the order wire circuit packs and for initiating a call STEP PROCEDURE 1 Connect the headset to the HEADSET jacks on the QPP303 telephone set circuit pack 2 Patch the LINE...

Page 38: ...ndset STEP PROCEDURE Unscrew protective cover over the order wire terminations 2 Set talk monitor switch on the handset to monitor 3 Connect the headset to the order wire terminals 4 Set talk monitor...

Page 39: ...L AT THE CCT This chart describes the procedure for connecting a headset to the order wire circuit packs and for answering a service call STEP 1 2 PROCEDURE When the office minor alarm operates for a...

Page 40: ...plug 30 amps is supplied with the cabinet to permit adapting of the emergency generator output to the cabinet input 7 Connect the emergency generator to the RCT cabinet 8 Start the generator and veri...

Page 41: ...rols indications and test points are shown in Fig 7 LD 1 fault locate circuit descriptions are contained in 368 2101 103 LD 1 fault locate procedures are contained in 368 2101 503 SECTION 363 2011 300...

Reviews: