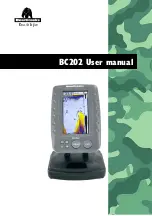
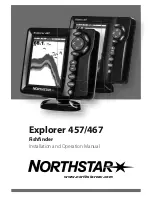
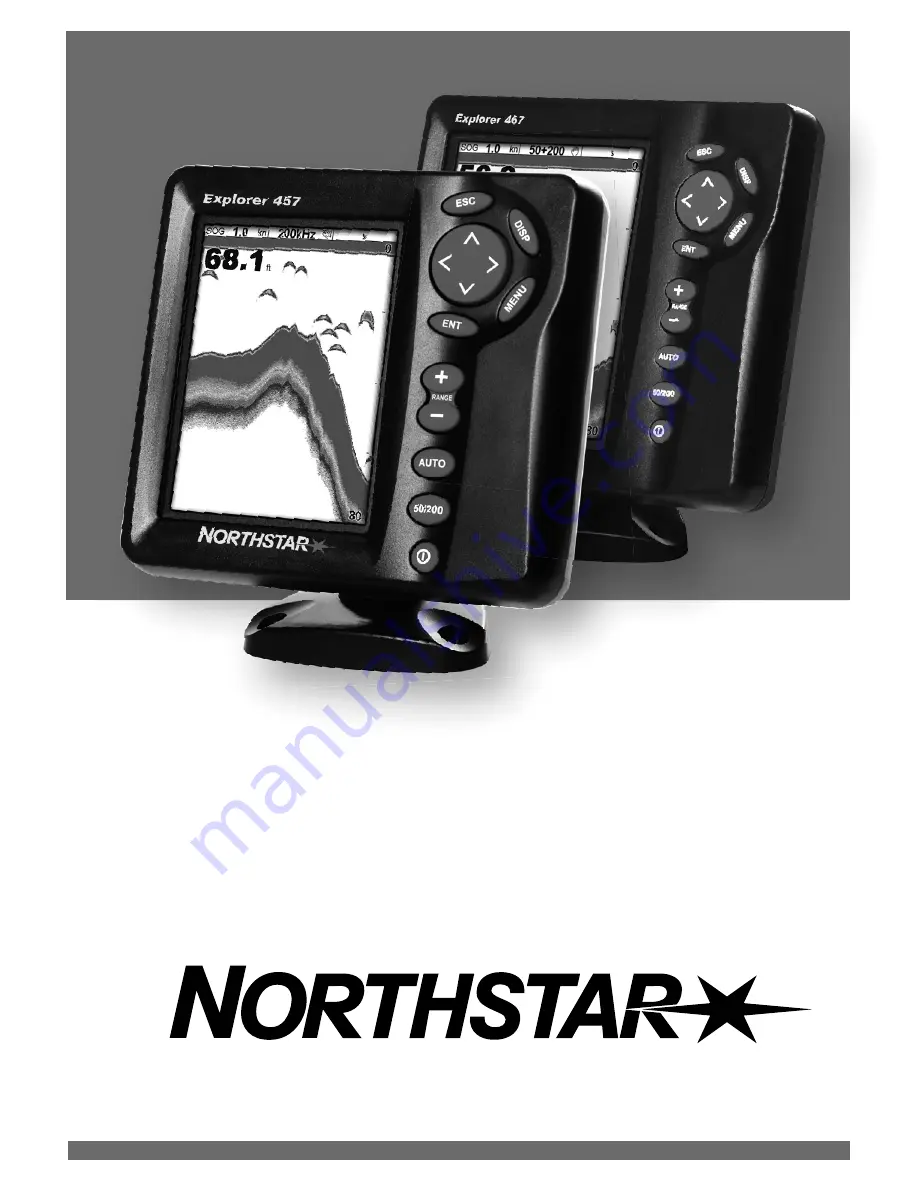
background image

www.northstarnav.com

Explorer 457/467

Fishfi nder

Installation and Operation Manual

Summary of Contents for EXPLORER 457

Page 1: ...www northstarnav com Explorer 457 467 Fishfinder Installation and Operation Manual ...

Page 2: ...l to avoid possible injury or death WARNING WARNINGindicatesapotentiallyhazardoussituationwhich ifnotavoided could result in death or serious injury CAUTION CAUTIONindicatesapotentiallyhazardoussituationwhich ifnotavoided could result in minor or moderate injury CAUTION CAUTION used without the safety alert symbol indicates a potentially hazardous situation which if not avoided may result in prope...

Page 3: ...ed and used correctly Fuel Computer Do not rely on the fuel computer as the sole source of information regarding available fuel onboard Fuel economy can change drastically depending on boat loading and sea conditions Fuel Computer information should be supplemented by visual or other checks of the fuel load This is necessary due to possible operator errors such as forgetting to reset the fuel used...

Page 4: ...narfishfinding Introduction 16 3 1 Using the 457 467 16 3 2 Interpreting the display 17 3 3 Single and Dual frequency fishfinding 19 3 4 Fish detection and display 22 3 5 Range 23 3 6 Gain and threshold 24 4Sonarfishfinding Displays 25 4 1 Sonar history display 25 4 2 Sonar Zoom and Full Screen Zoom displays 26 4 3 Sonar Bottom display 27 4 4 Sonar 50 200 display 27 4 5 Sonar A Scope display 28 5G...

Page 5: ...6 9 1 Installation What comes with the 457 467 46 9 2 Installation Options and Accessories 46 9 3 Installation The display unit 48 9 4 Installation Power data cable 49 9 5 Installation Sonar transducer 50 9 6 Installation Northstar petrol gasoline sensors 50 9 7 Installation SmartCraft 51 9 8 Installation Other NavBus instruments 52 9 9 Installation Other NMEA instruments 52 9 10 Installation Setu...

Page 6: ...7 can send data to other instruments and receive data from other instruments For information on installing options see section 9 2 This manual describes how to install and operate the 457 467 For maximum benefit please read this manual carefully before installing and using the unit For more information on this instrument and other Northstar products go to our website www northstarnav com Feature T...

Page 7: ...t is bracket mounted then the display unit can easily be removed and replaced for security or protection Removing the display unit 1 Turn the display unit off see section 2 2 and put the dust cover on 2 Loosen the knob on the mounting bracket and lift the unit off the bracket 3 Unplug the connectors from the display unit turning each locking collar anticlockwise until you can pull the plug out 4 P...

Page 8: ... highlight to the command for example Language then press Changing data First press or to move the highlight to the data to change then ESCAPE Go back to an earlier menu or display DISPLAY Show a menu of the main displays To go to a display select it from the menu see section 2 6 CURSOR KEYS to move the cursor or the selection highlight MENU Show a menu of the options for the current window Press ...

Page 9: ...7 is not wired for auto power press to turn the unit on If necessary adjust the display to be easy to read see section 2 3 Note If the 457 467 is not wired for auto power then the 457 467 does not record engine hours and might not record fuel consumption see section 9 4 Turningoffmanually If the 457 467 is not wired for auto power or if the ignition switch is off hold down until the display turns ...

Page 10: ...d again if the alarm condition occurs again The 457 467 has user settable alarms see section 8 5 2 3Backlightandnightmode To go to the Backlight window press briefly Backlight The display and keys are backlit To change the backlight level highlight Backlight then press to dim or to brighten When you have finished press Tip Press twice to give the brightest screen with maximum backlight and Night m...

Page 11: ...ick access to the main windows and favorites Full screen Sonar is at the top of the menu followed by favorites Other windows are available from the More sub menu Note The windows available depend on the optional sensors and instruments that are installed see section 1 1 2 6Themainwindows ...

Page 12: ...Northstar FISH 457 467 Installation and Operation Manual 12 Note The windows below the menu divider can only be shown full screen without a data header see section 2 6 3 ...

Page 13: ... 1 Press twice to change the active window 2 Press select Replaceand select the second window The 457 467 exchanges the two windows Replacing a window on the display 1 Press twice to change the active window 2 Press select Replaceand select a new window that is not currently visible Note When some windows are small then not all the data is shown The active window If there is more than one window d...

Page 14: ...the display with the window or windows you want in the new favorite see section 2 6 2 Press and select Save this display The 457 467 displays the favorites list 3 Select where in the list to add the new favorite If you select an existing favorite display then the new favorite will replace the existing favorite in the list Deleting a favorite display from the list 1 Press twice then select Favorite...

Page 15: ...ii Change a data field a Press the cursor keys to highlight the field b Press to display a menu of data items c Select a data item that is available on your system or select None to leave the field empty iii Repeat the above step to set the other data fields Tip If all fields in a line are None then the line will not be displayed and the data header will take less space on the display 5 Press Tip ...

Page 16: ...e of pixels The most recent echo appears on the extreme right of the display with the older echoes being scrolled towards the left eventually disappearing off the display The scroll speed depends upon the water depth and scroll speed setting See sections 8 2 and section 3 2 for more information The appearance of echoes displayed are affected by the 457 467 settings see sections 8 2 3 5 and 3 6 ech...

Page 17: ...ore fish details see section 8 2 If the boat is anchored the echoes all come from the same area of bottom This produces a flat bottom trace on the display The screen shot shows a typical sonar display with the Fish symbols turned Off Strengthofechoes The colors indicate differences in the strength of the echo The strength varies with several factors such as the Size of the fish school of fish or o...

Page 18: ...ne width Depth at 50 kHz at 200 kHz 25 20 5 50 40 10 100 80 20 150 130 30 200 170 40 300 250 60 400 330 80 600 500 120 800 660 150 1000 830 190 45 cone 11 cone The sonar pulse generated by the 457 467 transducer travels down through the water spreading outwards in a cone shape The cone width is dependent upon the frequency of the pulse at 50 kHz it is approximately 45 and at 200 kHz it is approxim...

Page 19: ...fish including bottom dwellers Whentouse50kHz The 50 kHz frequency is particularly suitable for use in deep water typically greater than 500 ft 150 m At 50 kHz the cone covers an area of water about four times wider than the 200 kHz cone and penetrates to a greater depth with minimal loss of the return signal However it produces a lower definition display with more shadow compared to the 200 kHz f...

Page 20: ...combines the 200 kHz and the 50 kHz echoes on one sonar display filling in detailed echoes in the center of the sonar cone Whentouse50 200kHz Operating the 457 467 at both 50 kHz and 200 kHz simultaneously on a split display can be very useful when operating in shallow to medium water typically less than 500 ft 150 m because the 50 kHz section of the display shows the general area while the 200 kH...

Page 21: ...star FISH 457 467 Installation and Operation Manual 21 1 minute ago 30 seconds ago Now Comparisonofthesamefishscenariodisplayedatdifferentfrequencies 50kHzdisplay 200kHzdisplay 200 50Khzdisplay Mixeddisplay ...

Page 22: ... the mixed frequency is selected fish within the 50 kHz beam will be grey fish within the 200 kHz beam will be orange and fish within both beams will be displayed in red To see the maximum amount of information from the echoes turn Fish symbols off Fish appear as arches on the display Fisharches In good conditions a fish passing through the cone shaped ultrasonic pulse is displayed as a fish arch ...

Page 23: ... not adjust the range automatically If the bottom depth is below the range the bottom will not appear on the display Manual range is useful if the bottom depth changes rapidly because Auto range will cause the display to change range frequently To set Manual range or to change the range 1 Go to a sonar display see section 4 2 Either press to increase range or press to decrease range Zoom range and...

Page 24: ...he gain window To display or change the current settings for gain select a sonar display and press Select Threshold to display the thresholds There are separate gain and threshold settings for each sonar frequency 50 kHz and 200 kHz This display is called the gain window Changing mode The 457 467 has three operating modes In Cruising and Fishing modes the 457 467 automatically adjusts gain and thr...

Page 25: ...w To use a window press select Sonar splits then select the type of window to use No split Sonar history window at a single or mixed frequency see section 4 1 Split zoom Sonar history plus a zoomed section see section 4 2 Full screen zoom See section 4 2 Split bottom Sonar history plus a bottom trace in a zoomed section see section 4 3 Split 50 200 Sonar histories at 50 and 200 kHz see section 4 4...

Page 26: ...ection If Bottom lock is off press or to manually adjust the the zoom depth Bottom lock To turn Bottom lock on or off 1 Press and select Bottom lock 2 Select On or Off or If Bottom lock is on pressing or will turn it off D E A Divider line B Depth line marks the center of the zoomed area C Zoom bar D Zoom section E Sonar history A B C 4 1 1Extendedhistorymode To review an old sonar echo use or to ...

Page 27: ... on the right and the bottom signal as a flat trace in the center of the zoom section on the left The flat trace makes it easy to compare the echo strengths shown in the bottom signals This can help to identify the type of bottom and objects close to the bottom The zoom bar on the far right shows the area of the history that is magnified in the zoom section Use the or keys to adjust the zoom range...

Page 28: ... from a school note the species and the strength of the echo that it returns on the A scope Then when that particular echo is seen again it is likely to be the same fish species Bottomtype The shape of the echo strengths in the A Scope can help you to recognise the type of bottom UsingtheA Scopetosetgainand thresholdmanually It is convenient to use the A scope display when adjusting gain and thres...

Page 29: ...ase of the graph can be changed by pressing selecting Time Base pressing and selecting the required time base from the list 5 Gauges window The Gauges window shows boat data such as water speed as analog gauges To select the Gauges window press select More then select Gauges Before using the Gauges window set Speed range Max RPM and Max fuel flow see section 8 3 Selecting a Gauges layout To select...

Page 30: ...uge on the right of the display The height of the yellow bar s show how much fuel remains in the tank s If you have set a low fuel alarm see section 7 4 a red bar shows the level at which the alarm will trigger If there are two tanks the left bar shows the port tank the right bar shows the starboard tank 7 1Whatthefuelcomputerdoes Used The fuel used during a trip On a multi engine boat the data fo...

Page 31: ...e 457 467 otherwise the fuel data will be meaningless A When you completely fill a tank Go to the fuel window and press Then On a single tank boat select Fill tank On a multi tank boat select Fill tank then select the tank you have filled Note Underfloor fuel tanks are often difficult to refill to the same level twice due to air pockets With underfloor fuel tanks Trim the boat to the same angle in...

Page 32: ...heel or pitot sensor select Water speed otherwise select Ground speed to use GPS speed 3 If you selected Water speed and you have both a paddlewheel sensor and a pitot sensor i Press select Smartcraft and select Speed type ii Select Paddlewheel or Pitot Tip You can select a different speed sensor during a trip Note If you follow procedure B every time you add fuel then a small error will accumulat...

Page 33: ...7 5 1 When the current is from ahead ground speed is less than water speed For this example If the boat travels for one hour uses 3 gallons of fuel per hour and has 50 gallons of fuel left Speed Log Economy Range Using water speed 10 knots 10 nm 3 3 nm gal 165 nm Using ground speed 6 knots 6 nm 2 0 nm gal 100 nm Water speed 10 knots Gives a ground speed of about 8 knots Current 4 knots at 45º When...

Page 34: ...u can make fuel consumption curves for different boat weather or sea conditions Compare these with your first curve to see how your boat s performance changes with conditions Making a curve 1 Start running the boat in a straight line 2 Choose a speed source for the curve see section 7 5 1 Normally choose Water speed to measure the boat s potential performance 3 Press twice then select Fuel 4 Selec...

Page 35: ...e type of speed sensor you selected when making the curve see section 7 5 Using a curve C D E F A B Compare your boat s performance now at the current RPMs with the boat s performance when you made the curve You can compare your boat s performance now with a curve made under ideal conditions or with a curve made under similar conditions Information in a curve A RPM of the boat now For a twin engin...

Page 36: ...or s 3 Run the engine at normal cruising speed until at least 4 gallons 15 litres of fuel has been used per engine 4 Check the actual amount of fuel used per engine by refilling the portable tank s to the original level and noting the reading s of the fuel dispenser s gauge 5 Press twice select Fuel then select Setup engines 6 On a single engine boat select Calibrate and change the displayed value...

Page 37: ...shown The setup data available will depend on the optional sensors and instruments installed Logs see 8 4 SmartCraft See the SmartCraft Gateway Installation and Operation Manual Units see 8 6 Comms see 8 7 Calibrate see 8 8 Simulate 8 10 Alarms see 8 5 Fuel see 8 3 Sonar see 8 2 System see 8 1 Favorites 8 9 ...

Page 38: ...e fishfinder appears to turn off however all alarms operate normally To return to normal operation press Power button Ideal to be used as an anchor alarm Factoryreset This option returns all of the 457 467 settings except the language waypoints and routes to the default factory settings shown on the setup menus 8 1Setup System Sonar Disable any sonar transducer and disable sonar functions Deselect...

Page 39: ...displayed as a fish symbol Higher values will display more fish symbols Digitsize Use this to remove or change the size of the depth display on the sonar displays There is a choice of Small Medium and Large Palette Use this to select a color palette Each color within the palette represents a different echo strength as shown on the sonar displays There is a choice of five color palettes Black Blue ...

Page 40: ...o Flow filter Most engines do not draw fuel from the tank at a steady rate To give a stable fuel flow reading the instrument calculates the flow by taking several measurements and averaging them Use the Flow filter to set the period over which the fuel flow is averaged The Flow filter can be set from 0 to 30 seconds Use the lowest value which gives a stable flow Usually a value of 5 to 10 seconds ...

Page 41: ...n curve See section 7 6 8 4Setup Logs Press twice then select Logs The values can be reset independently of each other These log values are saved when the unit is turned off Resettripdist This resets the trip distance to zero Resettotaldist This option resets the total distance to zero Resetenginehours Use this option to reset the engine hours to zero This can be useful after an engine service or ...

Page 42: ... are on can be displayed in the data header see section 2 6 1 An alarm icon is normally black and turns red when the alarm sounds Symbol Alarm Alarm sounds when it is on and the Too shallow Depth is less than the alarm trigger value Too deep Depth is greater than the alarm trigger value Fish Echo matches the profile of a fish Temperature Temperature equals the alarm trigger value Temperature rate Ra...

Page 43: ...e this feature when the 457 467 is connected to other Northstar instruments through NavBus or any compatible NMEA instrument Press twice then select Comms NMEAout NMEA is generally used with third party instruments see section 9 9 Select this to transmit NMEA sentences NMEAdata Use this to specify which NMEA sentences will be transmitted see section 9 9 and Appendix A 8 7Setup Comms NavBus NavBus ...

Page 44: ...e the temperature readout first measure the water temperature with a thermometer known to be accurate 8 8Setup Calibrate Use the cursor keys to display the temperature readout box then increase or decrease the value to match the measured temperature The temperature can be set from 32 to 99 9 F 0 to 37 7 C with a resolution of 0 1 unit To change the units between F Fahrenheit or C Celsius see secti...

Page 45: ...ce then select Simulate Turn simulate mode off Turn simulate mode on Speed The simulated boat speed to use Never have simulate mode on when the 457 467 is on the water WARNING Speedrange The maximum reading to display on an analog boat speed gauge see section 5 Choose a range suitable for your boat Fuel See section 7 7 Calibrate 8 9Setup Favorites See section 2 6 2 ...

Page 46: ...ruction Manual CD 9 2Installation OptionsandAccessories Replacement paddle wheel Northstar carry bag Northstar NavBus junction boxes simplify wiring particularly if several instruments are connected For more information see the NavBus Installation Manual Optionalsensorsandinstruments External alarms Lights or sounders in the boat to sound alarms through the boat see section 9 4 Fuel sensors For fu...

Page 47: ...ons 9 8 and 9 9 Please consult your Northstar dealer for more information Display unit 9 3 Power 9 4 External alarms 9 4 NavBus instruments and VHF radio 9 8 NMEA out to instruments 9 9 Petrol gasoline sensors 9 6 Sonar transducer 9 5 Black White Blue Blue Power data cable Pin Wire Function 1 Black Ground power in NMEA ground The cable has two black wires which are connected inside the cable and i...

Page 48: ...fter installation to reduce any unwanted glare or reflections Carefully select the best viewing position before installation This would generally be in a shaded area 1 Cut a hole in the bulkhead for the display unit using the flush mount template 2 Drill four holes for the mounting studs using the flush mount template 3 Screw the four studs into the brass inserts in the back of the display unit 4 ...

Page 49: ...ta cable to the black display unit connector turn the collar to lock the connector Black Black Power data cable Red Yellow Black 9 4Installation Power datacable Main switch 12 24 V DC Fuse 2A The power data cable has a black locking collar and flying leads 1 Wire the 457 467 for auto power to have the 457 467 turn on with the boat s ignition switch or to to record engine hours or if the 457 467 mu...

Page 50: ... dealer for more information Connect the transducer to the blue 457 467 connector tighten the locking collar During setup a set Sonar to see section 8 1 b set up the sonar options see section 8 2 Blue Sonar cable 9 6Installation Northstarpetrol gasolinesensors Fit the optional petrol gasoline fuel kit following the instructions supplied with the kit Note SmartCraft engines have fuel flow sensors t...

Page 51: ...engine data and trim and can control troll speed Note Fit a single gateway for single engines and a dual gateway for dual engines SmartCraft engines have fuel flow sensors therefore Northstar fuel sensors are not required as well If the fuel tank does not have SmartCraft level sensors wire for auto power see section 9 4 During setup enter the SmartCraft setup data For information on installing set...

Page 52: ...ry barometer history Weather a predication based on changes in barometric pressure Fish forecaster a prediction based on changes in barometric pressure 9 8Installation OtherNavBusinstruments Send data to optional Northstar instruments for example to a repeater Receive and display GPS speed from a GPS receiver Display fuel data from a fuel transducer attached to another Northstar instrument During ...

Page 53: ...n for best viewing and hand tighten the knob 4 Turn the instrument on see section 2 2 When the 457 467 is turned on for the first time it displays an installation menu i Select the language to use ii Change the data if necessary see section 2 1 iii When the setup data is correct press 9 1Installation Setupandtest This data can be changed later see section 8 5 Enter setup data to set up the 457 467...

Page 54: ...deep fish temperature temperature rate low battery low fuel optional SONAR FISHFINDING Depth range 0 6 m 2 ft to 1000 m 3300 ft Sonar output Power Variable up to 600 W RMS Dual frequency 50 kHz and 200 kHz Transom transducer cable length 10 m 33 ft extensions available Depth acquisition time from startup Typically 2 seconds at 30 m 100 ft Temperature Range 0 to 37 7 C 32 to 99 9 F Resolution of 0 ...

Page 55: ...tion and Operation Manual 55 FISH 457 FISH 467 164 0 mm 6 5 0 0 5 1 9 5 m m 0 6 6 1 5 6 m m 5 m m 7 2 1 88 5 mm 3 5 32 0 mm 1 3 33 1 mm 1 3 195 0 mm 7 7 0 9 7 1 7 m m 0 5 9 1 7 7 m m 4 6 m m 3 6 1 88 5 mm 3 5 19 5 mm 0 8 35 2 mm 1 4 ...

Page 56: ...corroded Test the fuse or replace it with a fuse known to be good Appendix B Troubleshooting This troubleshooting guide is written with the assumption that the user has read and understood the relevant sections in this manual It is possible in many cases to solve difficulties without having to send the display unit back to the manufacturer for repair Please follow this troubleshooting section befo...

Page 57: ...sensor s and the fuel tank g Petrol gasoline fuel sensors should be replaced as neccessary 2 3 Fuel remaining seems inaccurate a The 457 467 is not wired for auto power see section 9 4 b You added or removed fuel but did not tell the 457 467 see section 7 3 c The fuel tank may not refill to the same capacity each time due to air pockets This is a particular problem with underfloor tanks B 2Fuelcon...

Page 58: ...noise from the boat s engine or an accessory may be interfering with the transducer s and or the 457 467 This may cause the 457 467 to automatically decrease the Gain unless using Manual Gain The 457 467 thus eliminates weaker signals such as fish or even the bottom from the display This may be checked by switching off other instruments accessories e g bilge pump and the motor until the offending ...

Page 59: ...park plugs 3 5 There is a double bottom trace displayed a The boat may be in an area that generates shadows see section 3 2 b In shallow water the echoes may bounce Reduce the gain setting see section 3 6 and or reduce the sonar pulse power see section 8 2 c Decrease the Range Appendix C Glossary and navigation data NavBus A way of connecting Northstar instruments together to share data see sectio...

Page 60: ...ROPE Unit 2 Ocean Quay Belvidere Rd Southampton SO14 5QY ENGLAND Ph 44 2380 339922 Fax 44 2380 330345 northstaruk northstarnav com AUSTRALIA PO Box 479 Gladesville NSW 2111 AUSTRALIA Ph 61 2 9879 9060 Fax 61 2 9879 9009 northstaraus northstarnav com NEW ZEALAND PO Box 68 155 Newton Auckland Auckland NEW ZEALAND Ph 64 9 481 0500 Fax 64 9 481 0590 northstarnz northstarnav com ...

Reviews: