background image

Océ CS 4040/4050 

Installation Manual

Summary of Contents for CS 4050

Page 1: ...Oc CS 4040 4050 Installation Manual...

Page 2: ...om time to time in the content hereof without obligation to notify any person of such revision or changes Edition 1 1 Oc Technologies B V US Trademarks Products in this manual are referred to by their...

Page 3: ...look at the scanner 10 Front view 10 Rear view 11 SCSI installation 12 SCSI connection precautions 12 SCSI board installation 12 Connection of the scanner to the computer 13 SCSI address setup 14 Def...

Page 4: ...sure platen 32 Cleaning the scanning area 34 Replacing the white reference platen 35 Upgrading the scanner firmware 36 Appendix A Technical references Oc CS 4040 4050 specifications 38 Appendix B Safe...

Page 5: ...5 Oc CS 4040 4050 Installation Manual Chapter 1 Introduction This Installation manual describes the features of the Oc CS 4040 4050 System overview Scanner configurations...

Page 6: ...ckness up to 0 6 15 mm Variable resolution in one dpi increments Individual tone adjustment for each colour channel RGB via gamma and black and white point correction Colour and monochrome 2 D sharpen...

Page 7: ...res in a document and to classify them into categories using a colour LUT look up table You can generate this LUT once and download it to the scanner for a similar class of documents Colour mapping ca...

Page 8: ...tive and ADL apply to monochrome scanning To change firmware configurations see Upgrading the scanner firmware on page 36 Resolution 400 dpi optical Media Width 51 5 1310 mm 50 1270 mm scan width Medi...

Page 9: ...9 Oc CS 4040 4050 Installation Manual Chapter 2 Scanner installation A first look at the CS 4040 4050 scanner SCSI installation Power supply connection Software installation General recommendations...

Page 10: ...This section introduces you to the basic parts of the scanner Front view 1 Scanner front view Label Part or component A Control panel B Scanner cover C Ruler D Document insertion slot E Smart card ho...

Page 11: ...nner installation 11 Rear view At the rear of the scanner you can locate The SCSI connectors left The on off button and power connector right 2 Scanner rear view COP SCSI 1 SCAN SCSI 0 A SCAN SCSI 0 B...

Page 12: ...The total length of all SCSI cables must be less than 4 meters SCSI board installation The SCSI board comes with the SCSI interface kit Attention Use only the SCSI board provided with the scanner Do n...

Page 13: ...on If the scanner is the last device on the SCSI bus turn on switch 4 the built in active SCSI termination If the scanner is not the last device make sure switch 4 is off Attention Do not turn on swit...

Page 14: ...the scanner 2 To locate the DIP switch slide the streamer on the front of the scanner to the left 3 Press the Push button to slide out the smart card holder 4 Remove the smart card to access the switc...

Page 15: ...test switches are OFF Switch 5 SCAN SCSI connectors 0A and 0B When ON it disables SCAN SCSI synchronous transfer mode reverts to asynchronous transfer Use this mode only for testing because it slows d...

Page 16: ...ng an update of the scanner firmware this switch forces the scanner into firmware boot mode enabling you to download the firmware again Switch 8 Continuous test mode You should never use this switch w...

Page 17: ...cate the power connector at the back of your scanner 2 Plug one end of the power cord delivered with the scanner into the connector 3 Verify that the inlet voltage selector setting corresponds to the...

Page 18: ...0 4050 Installation Manual Software installation For the installation of Oc Scan and Oc Colour Copy please refer to the software s respective User Manuals or Installation Guides provided on this docum...

Page 19: ...leaning Do not use liquid cleaners or aerosol cleaners Use a damp cloth for cleaning Operate the scanner using only the type of power source indicated on the marking label If in doubt consult your dea...

Page 20: ...When to call a service technician Unplug the scanner and call for a service technician if you encounter one of the following problems there is damage to the power cord liquid spills onto the scanner t...

Page 21: ...21 Oc CS 4040 4050 Installation Manual Chapter 3 Scanner operation Using the control panel Inserting a document Scanning thick media Checking camera alignment Performing colour calibration...

Page 22: ...s during scanning C Paper reverse This key stops the scanning process To move the document backward through the scanner press and hold down this key D Power on This indicator lights up when you switch...

Page 23: ...referable to center align a document to position it symmetrically on the feed rollers during a scan You can also measure a document in scanner units Scanner units Media size Document width 1 4 Minimum...

Page 24: ...nsertion slot 2 Press the Paper feed key to move the document up to the start position The Ready indicator lights up and blinks intermittently while the document scans To eject a document When scannin...

Page 25: ...ware See Oc Scan Online Guide for details Insert the document center aligned and support it during the scanning process To prevent image distortion the scanner by default does not scan leading and tra...

Page 26: ...ner stores and reuses the last effected automatic adjustment Occasionally you should return to the normal thickness setting at start up to allow the scanner to do its automatic adjustments Setting Max...

Page 27: ...three cameras A B C starting from the right side of the scanner The CS 4050 has four cameras A B C D starting from the right side of the scanner Do not adjust camera B as it is fixed and serves as a h...

Page 28: ...e of the screen moves up Counter clockwise Line on the right side of the screen moves down 3 To adjust the camera C set the Detail window centered about halfway in from the left of the Overview window...

Page 29: ...e number of flashes per period Before adjusting the camera height perform the following procedure on the camera that is out of light Note You cannot adjust camera B 1 Turn the height adjustment screw...

Page 30: ...rovided with the scanner To perform graytone and colour calibration 1 Start Oc Scan 2 From the Scan menu of the main window select Calibrate scanner A wizard screen appears to guide you through the ca...

Page 31: ...1 Oc CS 4040 4050 Installation Manual Chapter 4 Scanner maintenance Removing the original pressure platen Cleaning the scanning area Replacing the white reference platen Upgrading the scanner firmware...

Page 32: ...platen is located under the insertion slot cover To remove the original pressure platen 1 Lift the insertion slot cover 2 Press down on the right extremity of the platen and with your fingers in C sl...

Page 33: ...o replace the original pressure platen 1 Put the original platen back in its operating position by first inserting the right hand side of the plate Note A sticker labeled back shows you the rear side...

Page 34: ...Put the guide plate back in its operating position as described To clean the bottom side of the glass plate 1 Switch the power off and disconnect the power cord 2 Remove the original pressure platen a...

Page 35: ...as described 3 With a screwdriver remove the two screws located at the extremity Take care not to lose the two small washers 4 Remove the angle bracket 5 Turn over the original pressure platen 6 Gent...

Page 36: ...presentative to procure a smart card corresponding to the configuration you want To upgrade the scanner firmware 1 At the front of the scanner locate a streamer with the Oc name At the left extremity...

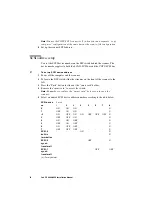
Page 37: ...37 Oc CS 4040 4050 Installation Manual Appendix A Technical references...

Page 38: ...3x3 matrix multiplier RGB tone curve gamma individual set tings for B W points Media and scan width CS 4040 Media width of 6 0 to 51 5 1310 mm scan width of 40 1016 mm CS 4050 Media width of 6 0 to 51...

Page 39: ...39 Oc CS 4040 4050 Installation Manual Appendix B Safety information...

Page 40: ...operated in a commercial environment This equipment generates uses and can radiate radio frequency energy and if not installed and used in accordance with the user manual may cause harmful interferenc...

Page 41: ...r Customer Service If unforeseen circumstances force you to re install the machine without the assistance of Oc Service make sure that the machine is connected to a power outlet which is equipped with...

Page 42: ...ment maintenance Do not place the machine in a room which is subject to excessive vibration Do not place the machine in a room that is too small and insufficiently ventilated See the Oc CS 4040 4050 s...

Page 43: ...adoption of the appropriate safety precautions for his organization and to contact Oc to make sure that he is in possession of the latest version of the sheet If and insofar as limitation of liabilit...

Page 44: ...44 Oc CS 4040 4050 Installation Manual...

Page 45: ...45 Oc CS 4040 4050 Installation Manual Appendix C Miscellaneous...

Page 46: ...by step through all phases of performing the operation Figures and tables Figures and tables are titled and numbered sequentially throughout this manual Figures include pictures of product components...

Page 47: ...at of this manual convenient in size easy to read and layed out well Yes No Did you find the information you were looking for Always Most of the times Sometimes Not at all How did you find the informa...

Page 48: ...l Comments Date This reader s comment sheet is completed by Name optional Occupation Company Phone Address City Country Please return this sheet to Oc Technologies B V Attn ITC User Documentation P O...

Page 49: ...haoyang District Beijing 100028 China Oc esk republika s r o Hanusova 18 14021 Praha 4 Pankr c Czech Republic Oc Danmark A S Kornmarksvej 6 DK 2605 Br ndby Denmark Oc France S A 32 Avenue du Pav Neuf...

Page 50: ...0 Wisma Gulab 190 MacPherson Road Singapore 348548 Oc Espa a SA Business Park MAS BLAU C Osona 2 2 3a Planta 08820 El Prat del Llobregat Barcelona Spain Oc Svenska AB P O box 1231 S 164 28 Kista Swede...

Page 51: ...lour Scanners specifications 38 Operating modes 7 Original pressure platen removing 32 S safety information 41 Scanner configurations 8 features 6 front view 10 operating environment 19 operating mode...

Reviews: