background image

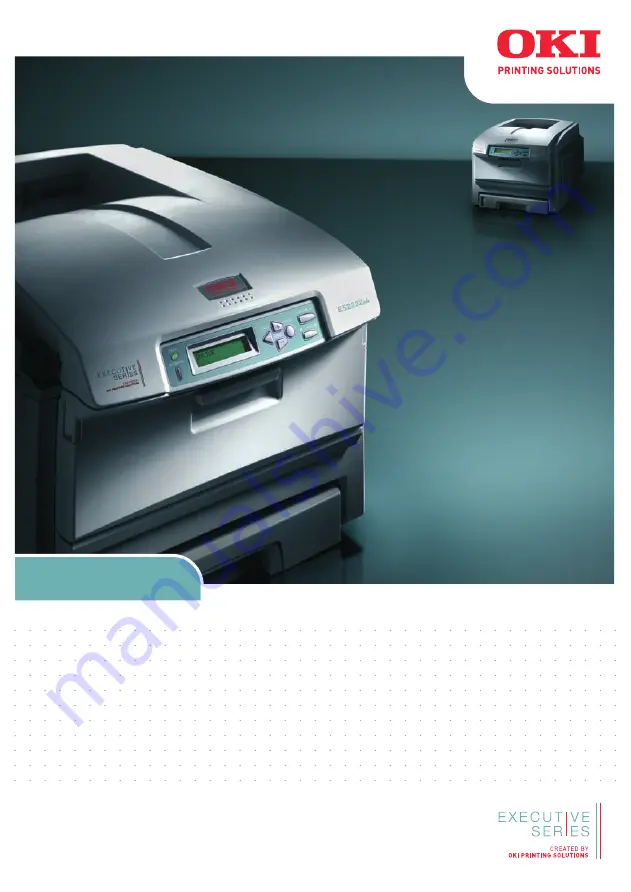
User’s Guide 

ES2232a4
ES2632a4

Summary of Contents for ES2232a4

Page 1: ...User s Guide ES2232a4 ES2632a4...

Page 2: ...rights reserved Oki and Microline are registered trademarks of Oki Electric Industry Company Ltd Energy Star is a trademark of the United States Environmental Protection Agency Microsoft MS DOS and W...

Page 3: ...mounts of water for at least 15 minutes keeping eyelids open Seek medical attention Spillages should be treated with cold water and soap to help reduce risk of staining skin or clothing MANUFACTURER O...

Page 4: ...Face down stacker 14 Face up stacker 14 Duplex unit 14 Loading paper 15 Cassette trays 15 Operation 20 Using the machine 20 Menu functions 21 Operator Panel 21 How to change the settings User 22 How...

Page 5: ...pgrades 72 Duplex unit 72 Memory upgrade 74 Hard disk drive 78 Additional paper tray 80 Adjusting Windows printer drivers 81 Storage Cabinet 81 Clearing paper jams 82 Specifications 91 Factory Default...

Page 6: ...text which may help you to use and understand the product CAUTION A caution appears in this manual like this A caution provides additional information which if ignored may result in equipment malfunc...

Page 7: ...ng colour 600 x 600 1200 x 600 dpi dots per inch and ProQ2400 print resolution for high quality image production showing the finest detail Single Pass colour Digital LED technology for high speed proc...

Page 8: ...urther 530 sheets to minimise operator intervention or different paper stocks for letterhead stationery alternative paper sizes or other print media Additional memory allows printing of more complex p...

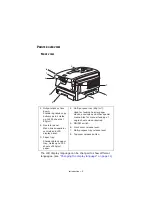
Page 9: ...ets at 80g m 2 Operator panel Menu driven operator controls and LCD display panel 3 Paper tray Standard blank paper tray Holds up to 300 sheets of 80g m paper 4 Multi purpose tray 80g m Used for feedi...

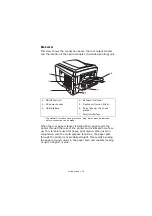
Page 10: ...er exits the printer through the rear of the printer and is stacked here face up This is mainly used for heavy print media When used in conjunction with the multi purpose feed tray the paper path thro...

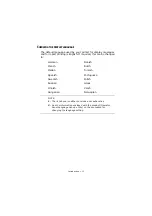
Page 11: ...uired this can be changed to German Danish French Dutch Italian Turkish Spanish Portuguese Swedish Polish Russian Greek Finnish Czech Hungarian Norwegian NOTE 1 The list above is neither conclusive no...

Page 12: ...offset when exposed to the high fuser temperatures used in the printing process Envelopes should be free from twist curl or other deformations They should also be of the rectangular flap type with glu...

Page 13: ...per path through the printer is almost straight The multi purpose tray can feed paper widths as small as 100mm and lengths up to 1200mm banner printing For paper lengths exceeding 356mm Legal 14in use...

Page 14: ...opened and the tray extension pulled out when required for use In this condition paper will exit via this path regardless of driver settings The face up stacker can hold up to 100 sheets of 80g m stan...

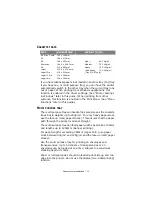
Page 15: ...TRAYS 1 Remove the paper tray from the printer 2 Fan the paper to be loaded at the edges 1 and in the middle 2 to ensure that all sheets are properly separated then tap the edges of the stack on a fla...

Page 16: ...r tray Capacity depends on the type of paper stock Do not load damaged paper Do not load paper of different sizes or types at the same time Do not pull the paper tray out during printing except as des...

Page 17: ...paper weight 7 For face up printing make sure the face up rear stacker 3 is open and the paper support 4 is extended Paper is stacked in reverse order and tray capacity is approximately 100 sheets dep...

Page 18: ...Press gently down on the paper platform 3 to ensure it is latched down 4 Load the paper and adjust the paper guides 4 to the size of paper being used For single sided printing on headed paper load the...

Page 19: ...ed face up with top edge to the left and short edge into the printer Do not select duplex printing on envelopes Do not exceed the paper capacity of about 50 sheets or 10 envelopes Maximum stacking dep...

Page 20: ...f how to use the machine and any optional accessories to print jobs efficiently and effectively please refer to the Printing Guide and the Barcode Guide For full details of how to access and use the p...

Page 21: ...ng on the paper currently loaded when pressed with WRONG PAPER or WRONG PAPER SIZE displayed 5 ATTENTION LED ON A warning occurs Printing is possible e g low toner BLINKING An error occurs Printing no...

Page 22: ...l the menu you wish to view is displayed Then proceed as follows 1 Press ENTER to enter the menu 2 Use the buttons to move up and down through the items in the menu When the item you want to change is...

Page 23: ...password is aaaaaa 6 Press the MENU button until the category you want to change is displayed 7 When it is press the ENTER button 8 Press the MENU button or MENU button until the item you want to cha...

Page 24: ...ITEM ACTION EXPLANATION ENCRYPTED JOB NOT FOUND PRINT DELETE Encrypted Job stored in the HDD After inputting a password SEARCHING JOB is displayed until a job appropriate to the password is found the...

Page 25: ...If DELETE is selected the following message will appear ARE YOU SURE YES NO If NO is selected you will return to the source MENU If YES is selected ALL jobs will be deleted ITEM ACTION EXPLANATION PR...

Page 26: ...ard disk DEMO1 EXECUTE Prints demonstration page containing graphics and text in colour and monochrome PRINT ERROR LOG EXECUTE Prints a list of all errors and warnings experienced COLOR PROF LIST EXEC...

Page 27: ...r size not installed in the selected tray the printer can automatically feed from the multi purpose tray instead If this function is not enabled the printer will stop and request the correct size of p...

Page 28: ...appropriate when the majority of print jobs are in colour The printer automatically switches between 22ppm for each colour page and 20ppm for each black and white page When black and white pages are p...

Page 29: ...M 10 ENVELOPE MONARCH ENVELOPE DL ENVELOPE C5 ENVELOPE Sets the size of the printable page area to match the size of paper in use This is not the same as the physical paper size which is always slight...

Page 30: ...registered in the host PC Server TRAY1 MEDIAWEIGHT LIGHT MEDIUM HEAVY Adjusts the printer for the weight of paper stock loaded in this tray TRAY2 PAPERSIZE A4 A5 B5 LEGAL14 LEGAL13 5 LEGAL13 LETTER E...

Page 31: ...pose tray so that the printer can adjust its internal parameters to better accommodate the selected type of media MPT MEDIAWEIGHT LIGHT MEDIUM HEAVY ULTRA HEAVY Selects the media weight to be fed from...

Page 32: ...will occur at the end of that job and will take up to 55 seconds If set to manual this adjustment will only be performed when initiated by the next menu item ADJUST DENSITY EXECUTE Selecting this wil...

Page 33: ...ts from a range of industry standard colour swatches Note This function only applies to PS models UCR LOW MEDIUM HIGH Selects limitation of the toner layer thickness If paper curl occurs in dark print...

Page 34: ...PS PROTOCOL RAW ASCII Selects PostScript data format for the parallel port USB PS PROTOCOL RAW ASCII Selects PostScript data format for USB port NET PS PROTOCOL RAW ASCII Selects PostScript data forma...

Page 35: ...on ROM slot or additional fonts have been downloaded to RAM as permanent fonts FONT No I0 C001 S001 Sets the current default font number from the currently selected source which could be internal I RO...

Page 36: ...feed LF FUNCTION LF LF CR Selects whether a received line feed character 0Ah also causes a carriage return PRINT MARGIN NORMAL 1 5 INCH 1 6 INCH Sets the non printable page area NORMAL is PCL compati...

Page 37: ...lects whether a received line feed character 0Ah also causes a carriage return LINE LENGTH 80 COLUMN 136 COLUMN Specifies the number of characters per line FORM LENGTH 11 Inch 11 7 Inch 12 Inch Specif...

Page 38: ...spacing WHITE PAGE SKIP OFF ON Selects whether blank pages are printed or not CR FUNCTION CR CR LF Selects whether a received carriage return character 0Dh also causes a line feed LINE LENGTH 80 COLU...

Page 39: ...bles this function ACK WIDTH NARROW MEDIUM WIDE Sets AVVCK width for compatible reception 0 5 s 1 0 s 3 0 s ACK BUSY TIMING ACK IN BUSY ACK WHILE BUSY Sets the order to output the BUSY and ACK signal...

Page 40: ...ISABLE OFFLINE RECEIVE SERIAL NUMBER ENABLE DISABLE Specifies whether to ENABLE or DISABLE a USB serial number The USB serial number is used to identify the USB device connected to your PC NOTE When y...

Page 41: ...mask To change proceed as above GATEWAY ADDRESS xxx xxx xxx xxx Current assigned gateway address To change proceed as above WEB ENABLE DISABLE Enables or disables Web config facility TELNET ENABLE DI...

Page 42: ...for communication via a network hub When AUTO is set negotiation is done automatically FACTORY DEFAULTS EXECUTE Reloads the settings present when the unit was setup by the manufacturer ITEM SETTINGS E...

Page 43: ...DJUST 2 0mm 0 2 0mm If the Duplex option is installed when printing the reverse page of a duplex job adjusts the position of the whole print image in the direction that is perpendicular to the directi...

Page 44: ...OU WANT TO EXECUTE THIS FUNCTION YES NO If you select NO the display returns to the previous menu If you select YES the current menu settings are stored and the menu is exited RESTORE MENU EXECUTE Cha...

Page 45: ...g TRANSPR BLACK SETTING 2 0 2 As above but for mono printing on transparencies TRANSPR COLOR SETTING 2 0 2 As above but for colour printing on transparencies SMR STTING 2 0 2 Sets a correction value f...

Page 46: ...ily equal the number of pages printed from each tray TRAY1 PAGE COUNT The total number of pages fed from tray 1 TRAY2 PAGE COUNT The total number of pages fed from tray 2 if fitted MPT PAGE COUNT The...

Page 47: ...ENABLE DISABLE Prints a list of jobs carried out on this printer LOG SIZE 1 30 100 Specifies the maximum number of data retained for printing data history If the total data history is more than this...

Page 48: ...condition for SHUTDOWN MENU category If DISABLE is selected SHUTDOWN MENU category of USERS MENU will not appear OP MENU PRINT MENU ENABLE DISABLE Set up ENABLE DISABLE condition for PRINT MENU catego...

Page 49: ...r PARALLEL category If DISABLE is selected PARALLEL category of USERS MENU will not appear OP MENU USB MENU ENABLE DISABLE Set up ENABLE DISABLE condition for USB MENU category If DISABLE is selected...

Page 50: ...DISABLE Enables disables illumination of front panel LED when near end of life warning of a toner drum fuser or belt occurs Attention LED is lit when setting is enabled inhibited when disabled FILE SY...

Page 51: ...will go back to the source menu If YES is selected the machine will be automatically rebooted and initialize the FLASH memory FILE SYS MAINTE2 CHK FILE SYS ENABLE DISABLE Enabling this function will r...

Page 52: ...ecover the file system Note 1 It takes from 30 to 40 minutes for a 10GB HDD to complete this function Note 2 This item appears only when a HDD is installed FILE SYS MAINTE2 HDD ENABLE DISABLE If the p...

Page 53: ...is pressed CANCEL NOW YES NO If NO is selected the procedure will continue If YES is selected the procedure will discontinue and the printer will restart after formatting the hard disk Note This item...

Page 54: ...om 6 to 12 digits of alpha numeric characters or mix The default value is aaaaaa The printer will restart after the ADMIN MENU CHANGE PASSWORD VERIFY PASSWORD xxxxxxxxxxxx Verification of above PARTIT...

Page 55: ...toner are used to initially charge the image drum 1 500 A4 pages remaining at 5 coverage REPLACEMENT CARTRIDGE IMAGE DRUM Approximately 20 000 pages calculated on typical office usage where 20 of prin...

Page 56: ...products may adversely affect your printer s performance and invalidate your warranty ITEM LIFE ORDER NO Toner black 8 000 A4 5 43865732 Toner cyan 6 000 A4 5 43865731 Toner magenta 6 000 A4 5 438657...

Page 57: ...r lightly brush it off If this is not enough use a cool damp cloth to remove any residue Do not use hot water and never use solvents of any kind They will make stains permanent NOTE When the LCD displ...

Page 58: ...e four cartridges a Pull the coloured toner release lever 1 on the cartridge to be replaced fully towards the front of the printer WARNING If the printer has been powered on the fuser may be hot This...

Page 59: ...the toner cartridge out of the printer 4 Put the cartridge down gently onto a piece of paper to prevent toner from marking your furniture 5 Remove the new cartridge from its box but leave its wrappin...

Page 60: ...by its top centre with the coloured lever to the right lower it into the printer over the image drum unit from which the old cartridge was removed 9 Insert the left end of the cartridge into the top...

Page 61: ...ensure that it is firmly seated push the coloured lever 1 towards the rear of the printer This will lock the cartridge into place and release toner into the image drum unit 11 Finally close the top co...

Page 62: ...ver release and open the printer s top cover fully 2 Note the positions of the four cartridges CAUTION Static sensitive devices handle with care WARNING If the printer has been powered on the fuser wi...

Page 63: ...o the right pull the lever towards you This will release the bond between the toner cartridge and the image drum cartridge CAUTION The green image drum surface at the base of the cartridge is very del...

Page 64: ...ure 7 Take the new image drum cartridge out of its packaging and place it on the piece of paper where the old cartridge was placed Keep it the same way round as the old unit Pack the old cartridge ins...

Page 65: ...re lower it into place in the printer locating the pegs at each end into their slots in the sides of the printer cavity 11 Finally close the top cover and press down firmly at both sides so that the c...

Page 66: ...ser to cool for about 10 minutes before opening the cover 1 Press the cover release and open the printer s top cover fully 2 Note the positions of the four cartridges It is essential that they go back...

Page 67: ...lts up towards the front and withdraw the belt unit from the printer 7 Lower the new belt unit into place with the lifting bar at the front and the drive gear towards the rear of the CAUTION The green...

Page 68: ...n the two fasteners 5 90 to the right until they lock This will secure the belt unit in place 9 Replace the four image drums complete with their toner cartridges into the printer in the same sequence...

Page 69: ...dle 1 on the top of the fuser unit 3 Pull the two fuser retaining levers 2 towards the front of the printer so that they are fully upright WARNING If the printer has recently been powered on some fuse...

Page 70: ...he transit material 6 Holding the new fuser by its handle make sure that it is the correct way round The retaining levers 2 should be fully upright and the two locating lugs 3 should be towards you 7...

Page 71: ...Clean the LED head when printing does not come out clearly has white lines or when text is blurred 1 Switch off the printer and open the top cover 2 Gently wipe the LED head surface with LED lens clea...

Page 72: ...hich uses even less paper and makes large documents even easier to handle The duplex unit slides straight into the rear of the printer and requires no tools to install 1 Unpack the new unit and remove...

Page 73: ...p is printed press ON LINE to exit the menu system 6 Examine the first page of the menu map Near the top of the page between the two horizontal lines you will see the current printer configuration Thi...

Page 74: ...total memory capacity of 768MB 1 Switch the printer off and disconnect the AC power cable 2 Press the cover release and open the printer s top cover fully 3 Lift the front cover latch and pull open t...

Page 75: ...e it safely to one side 6 Carefully remove the new memory board from its wrapping Try to handle the board only by its short edges avoiding contact with any metal parts as far as possible In particular...

Page 76: ...towards the RAM expansion slot and the small cutout is closer to the rear of the printer 11 Gently push the board into the RAM expansion slot until it latches in and will not go any further 12 Locate...

Page 77: ...first page of the menu map Near the top of the page between the two horizontal lines you will see the current printer configuration This list contains the figure for total memory size This should ind...

Page 78: ...d disconnect the AC power cable 2 Press the cover release and open the printer s top cover fully 3 Lift the front cover latch and pull open the front cover 4 Remove the screw 1 securing the right hand...

Page 79: ...e front cover and the top cover pressing down firmly at each side to latch it closed 11 Reconnect the AC power cable and switch the printer on 12 When the printer is ready print a menu map as follows...

Page 80: ...ter off and disconnect the AC power cable 2 Place additional paper tray on desired location 3 Observing safety rules for lifting and using locating guides place printer on top of the additional paper...

Page 81: ...es are the same If you have installed a memory upgrade it is not necessary to change the printer driver and you can ignore this section If you have installed a duplex unit or hard disk proceed as foll...

Page 82: ...n the paper path through the printer When a jam occurs the printer immediately stops and the Alert LED on the Status Panel together with the Status Monitor informs you of the event If printing multipl...

Page 83: ...ll gently to draw it fully out If it does not remove easily do not use excessive force It can be removed from the rear later CODE LOCATION CODE LOCATION 370 Duplex unit 382 Paper exit 371 Duplex unit...

Page 84: ...e the four image drums to gain access to the paper path 4 Holding it by its top centre lift the cyan image drum complete with its toner cartridge up and out of the printer WARNING If the printer has b...

Page 85: ...Repeat this removal procedure for each of the remaining image drum units 7 Look into the printer to check whether any sheets of paper are visible on any part of the belt unit CAUTION The green image...

Page 86: ...t and pull it forwards into the internal drum cavity and withdraw the sheet To remove a sheet from the central area of the belt 2 carefully separate the sheet from the belt surface and withdraw the sh...

Page 87: ...area Then allow the pressure release lever to rise again 8 Starting with the cyan image drum unit nearest the fuser replace the four image drums into the drum cavity making sure to locate them in the...

Page 88: ...nd into their slots in the sides of the printer cavity 9 Lower the top cover but do not press down to latch it closed yet This will protect the drums from excessive exposure to room lighting while you...

Page 89: ...t to remove it is probably still gripped by the fuser In this case raise the top cover reach around and press down on the fuser pressure release lever 4 11 If you are not using the rear exit tray clos...

Page 90: ...y is undamaged and that the paper guides are properly positioned against the edges of the paper stack When satisfied replace the tray 15 Finally close the top cover and press down firmly at both sides...

Page 91: ...djustment Auto consumable counter reset Memory 256MB standard upgradable to 512MB or 768MB Operating platform Windows 2000 XP XP Pro x64 bit Edition NT4 0 Server 2003 Server 2003 x64 bit Edition Vista...

Page 92: ...per skew 1 mm 100 mm Image expansion compression 1 mm 100 mm HDD Capacity 40Gb Interfaces Universal Serial Bus USB Network Parallel Interface USB specification Version 2 0 Connection USB type B Cable...

Page 93: ...2 C dry Off 0 to 43 C 10 to 90 RH optimum 26 8 C wet 2 C dry Print environment 30 to 73 RH 10 C 30 to 54 RH 32 C 10 to 32 C 30 RH 10 to 27 C 80 RH Colour 17 to 27 C 50 to 0 RH Noise Sound pressure le...

Page 94: ...INT MENU COPIES 1 DUPLEX OFF BINDING LONG EDGE PAPER FEED TRAY1 AUTO TRAY SWITCH ON TRAY SEQUENCE DOWN MP TRAY USAGE DO NOT USE MEDIA CHECK ENABLE RESOLUTION 600 X 1200 dpi TONER SAVE MODE OFF MONO PR...

Page 95: ...TRAY1 MEDIATYPE PLAIN TRAY1 MEDIAWEIGHT MEDIUM TRAY2 PAPERSIZ A4 TRAY2 MEDIATYPE PLAIN TRAY2 MEDIAWEIGHT MEDIUM MPT PAPERSIZE A4 MPT MEDIATYPE PLAIN MPT MEDIAWEIGHT MEDIUM UNIT OF MEASURE MILLIMETER X...

Page 96: ...GHLIGHT 0 M MID TONE 0 M DARK 0 Y HIGHLIGHT 0 Y MID TONE 0 Y DARK 0 K HIGHLIGHT 0 K MID TONE 0 K DARK 0 C DARKNESS 0 M DARKNESS 0 Y DARKNESS 0 K DARKNESS 0 C REG FINE AJST 0 M REG FINE AJST 0 Y REG FI...

Page 97: ...WARNING ONLINE AUTO CONTINUE OFF MANUAL TIMEOUT 60 secs WAIT TIMEOUT 40 secs LOW TONER CONTINUE JAM RECOVERY ON ERROR REPORT OFF PCL EMULATION FONT SOURCE RESIDENT FONT No 10 FONT PITCH 10 00 CPI SYMB...

Page 98: ...RACTER SET SET 2 SYMBOL SET IBM 437 LETTER 0 STYLE DISABLE ZERO CHARACTER NORMAL LINE PITCH 6 LPI WHITE PAGE SKIP OFF CR FUNCTION CR LF FUNCTION LF LINE LENGTH 80 COLUMN FORM LENGTH 11 7 INCH TOF POSI...

Page 99: ...FUNCTION LF LINE LENGTH 80 COLUMN FORM LENGTH 11 7 INCH TOF POSITION 0 0 INCH LEFT MARGIN 0 0 INCH FIT TO LETTER DISABLE TEXT HEIGHT SAME PARALLEL MENU PARALLEL ENABLE BI DIRECTION ENABLE ECP ENABLE A...

Page 100: ...55 255 0 GATEWAY ADDRESS 0 0 0 0 192 168 100 254 WEB PP ENABLE TELNET ENABLE FTP DISABLE SNMP DISABLE NETWORK SCALE NORMAL HUB LINK SETTING AUTO NEGOTIATE MEMORY MENU RECEIVE BUF SIZE AUTO RESOURCE SA...

Page 101: ...101 MAINTENANCE MENU POWER SAVE ENABLE PAPER BLACK SET 0 PAPER COLOR SET 0 TRNSPR BLACK SET 0 TRNSPR COLOR SET 0 SMR SETTING 0 BG SETTING 0 JOB LOG MENU ENTER PASSWORD 0000 JOB LOG DISABLE LOG SIZE 3...

Page 102: ...u map 25 Network menu 40 PCL emulation menu 35 PPR emulation menu 36 Print jobs menu 24 Print menu 26 resetting 44 System configuration menu 34 Usage menu 46 USB menu 40 42 43 Multi purpose tray how t...

Page 103: ...Oki Europe Limited Central House Balfour Road Hounslow TW3 1HY United Kingdom Tel 44 0 208 219 2190 Fax 44 0 208 219 2199 www okiexecutiveseries com 07089401 iss1...

Reviews: