background image

Service Guide OKIFAX 5250/5400

Chapter 

0 About This Manual

Front Cover


OKIFAX 

5250 & 5400

Facsimile Products

Adobe Acrobat printable reference copy 

of the OKIDATA Service Training Manual.

11/16/99

Note: This Adobe Acrobat version of the Okidata Service Training Manual was built with the pictures 

rendered at 72 dpi, which is ideal for screen viewing. For future updates to this manual, and 
more on-line information visit our 

Business Partner Exchange (BPX) at 

http://bpx.okidata.com

.

Summary of Contents for FAX 5250

Page 1: ...ence copy of the OKIDATA Service Training Manual 11 16 99 Note This Adobe Acrobat version of the Okidata Service Training Manual was built with the pictures rendered at 72 dpi which is ideal for scree...

Page 2: ...ID Format Example 18 TSI Printing Example 19 Cancel Report Format Power Outage Report Example 20 Activity Report Example 21 Message Confirmation Report 22 Broadcast Entry Report Example 23 Broadcast...

Page 3: ...tric Photographic Process Flow 70 3 2 Actual Electo photographic Process 71 3 3 Boards and Units Block Diagram 72 Block Diagram 73 3 4 Overall Dimension and Mechanical Structure 74 4 Disassembly 4 1 G...

Page 4: ...Test 109 6 11 MF Send Test 110 6 12 Tone TEL FAX 111 6 13 Protocol Data Dump 112 Dump data description 113 Data Analysis 114 FCF Facsimile Control Field Conversion Table 115 6 14 System Reset 116 6 1...

Page 5: ...Output 160 14 Vertical White Stripes on Output 161 15 Poor Fusing 162 8 Dipswitch Settings 8 1 General Information 163 A Board Descriptions A1 1 Unit Configuration and Block Diagram 164 Block Diagram...

Page 6: ...Fan Motor 207 Interface between E17 Board and 2 nd Tray 208 A3 1 12 E17 Main Power Supply Circuit Diagram 209 Sensor Functions 210 Sensors and Switch Control 211 Fuser Unit Temperature Control 212 Hig...

Page 7: ...EL W2 Circuit Diagram 258 Block Diagram of TEL W2 259 TEL W1 Circuit Diagram 260 Block Diagram of TEL W1 261 TEL W2F Circuit Diagram 262 Block Diagram of TEL W2F 263 A3 7 MEMO memory Circuit Diagram o...

Page 8: ...Diagrams C 1 General Information 306 D Illustrated Parts List Assembly 307 1 Cabinet Assembly 308 2 Control Panel Assembly 309 3A Printer Assembly 1 of 2 310 3B Printer Assembly 2 of 2 311 4A Base As...

Page 9: ...Installation 355 2 2 1 Registering the RMCS Basic System 356 2 2 2 Registering the Facsimile Model No 357 2 2 3 Deleting the Facsimile Model No 358 2 2 4 Updating the Password 359 2 2 5 Updating the...

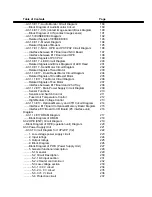
Page 10: ...Table of Contents Page I General Information 382 OKIDATA S Web Site 383...

Page 11: ...RER DISCARD USED BATTERIES ACCORDING TO THE MANUFACTURER S INSTRUCTIONS and ATTENTION IL Y A DANGER D EXPLOSION S IL Y A REMPLACEMENT INCORRECT DE LA BATTERIE REMPLACER UNIQUEMENT AVEC UNE BATTERIE DU...

Page 12: ...per cut 250 sheets capacity 20 1b bond Second cassette Option l NA Letter NA Legal A4 size plain paper cut 500 sheets capacity 20 1b bond Manual loading feeder l Single Sheet Feeder Transparency for o...

Page 13: ...re leased telephone type circuit l ITU T Rec V 27 ter 4800 bps modem for use in PSTN Public Switched Telephone Network l ITU T Rec V 21 channel 2 300 bps duplex modem for PS TN l ITU T Rec V 17 2 wire...

Page 14: ...ing the optional board CTR board the MFP l function can be realized PC Printer Function PC Scanner Function PC Fax Modem Function Location Programming Function Note For details see Product Specificati...

Page 15: ...transmission Delayed broadcast l Delayed transmission l OKIFAX 5400 20 times OKIFAX 5250 10 timers 17 Relay broadcast initiate 18 Subaddress transmission 19 Confidential message transmission Hopper 1...

Page 16: ...8 Transmission contrast and resolution control 39 Transmission contrast and resolution control 40 Key touch tone 41 Printer counter display For drum toner total print 42 Total page counter Scan 43 Qui...

Page 17: ...lt l RAM check l RAM check MEMORY board option l PC IF board parallel check l Print test l 02 Sensor calibration Adjustment of scanning level 03 LED test 04 Tone send test 05 Multi frequency MF send t...

Page 18: ...vice Guide OKIFAX 5250 5400 Chapter 1 General Information 1 4 General Appearance Figure 1 4 1 shows the general appearance Figure 1 4 2 shows the control panel General Appearance of the OKIFAX 5250 OK...

Page 19: ......

Page 20: ...1 1 9 Basic Performance Specifications Table 1 5 1 2 9 Basic Performance Specifications Table 1 5 1 3 9 Basic Performance Specifications Table 1 5 1 4 9 Basic Performance Specifications Table 1 5 1 5...

Page 21: ...22 3 Receiving power level 0 dBm to 40 dBm or 6 dBm to 46 dBm In case of V 34 TX RX 3 to 43 dBm 3 Type of document to be transmitted 1 Width Max 216 mm NA Letter Min 148 mm ISO A5 size Note Effective...

Page 22: ...cuments shall be placed face down on ADF stacker The first sheet will be fed first in the feeder and will exit face down in the document stacker 6 Document skew Max 2 6 mm skew over a document of A4 l...

Page 23: ...00 sheets of 431 8 mm 17 inch by 558 8 mm 22 inch or 1 sheet size 1000 mm by 1000 mm 4 Thickness 0 08 mm to 0 12 mm 5 Condition New paper For the manual loading feeder 1 Type Plain paper transparency...

Page 24: ...T 12 3 0 12 3 0 12 3 0 12 3 B 12 3 0 12 3 0 12 3 0 12 3 L 09 2 3 0 08 2 0 09 2 3 0 09 2 3 R 09 2 3 0 08 2 0 09 2 3 0 09 2 3 1 Guaranteed printing area Letter Size A4 Size 14 inch Legal Size 13 inch Le...

Page 25: ...cal and horizontal addressing error 3 mm of recording paper No Item Specifications 12 Copy stacking The fax can discharge printed copies and stack them face down Maximum sheets on the copy stacker 100...

Page 26: ...ength 300 to 412 dot inch l 3 85 to 5 06 line mm STD l 7 7 to 10 13 line mm FINE l 15 4 to 20 24 line mm EX FINE l 17 Recording system Electro photographic printing 1 211 3 mm 2496 bit or 216 7 mm 256...

Page 27: ...ccur according to the following sequence by FTT RTN or PPR Fallback rank Transmission speed Activated by FTT Times Activated by RTN Times Protocol 1st 14400 bps 1 1 ITU T V 17 V 17 2nd 12000 bps 1 1 I...

Page 28: ...T ECM 29 Communication mode Half duplex 30 Ringing signal detection sensitivity 1 Voltage range 25 to 150 V r m s Inoperative below 10 V Note This range may differ by the requirement of PTT 2 Frequen...

Page 29: ...ermostat in the fuser unit prevents the heater from being overheated even in the event of the failures in the above temperature control circuit 35 PC interface applications The following four modes ar...

Page 30: ......

Page 31: ...ral Information Table 1 5 1 9 9 Basic Performance Specifications In operation Power off mode During Storage Unit Temperature 50 90 10 32 32 110 0 43 14 110 10 43 o F o C Humidity 20 80 10 90 10 90 RH...

Page 32: ...ension Main body 1 Width Approx 330 mm 2 Depth Approx 420 mm 3 Height Approx 245 39 Weight Main body Approx 13 kg Excluding optional units recording paper and packing materials 40 Attachment to the ma...

Page 33: ...ition occurs 05 Activity report The fax can print out an activity report manually or automatically when 30 communications are recorded REPORT PRINTOUT 1 Manual printout 06 Message confirmation report...

Page 34: ...ervice Guide OKIFAX 5250 5400 Chapter 1 General Information Call back Message Example 1 Date and time 2 Sender ID 3 CSI Personal ID 4 Letters PLEASE CALL BACK 5 Sender ID 6 Sender s call back telephon...

Page 35: ...Page 18 Service Guide OKIFAX 5250 5400 Chapter 1 General Information Sender ID Format Example...

Page 36: ...Page 19 Service Guide OKIFAX 5250 5400 Chapter 1 General Information TSI Printing Example Local Date and Time Printing Example Note TSI printing TF 05 Local date and time printing TF 04...

Page 37: ...Page 20 Service Guide OKIFAX 5250 5400 Chapter 1 General Information Cancel Report Format Power Outage Report Example Note Memory reception only is printed on the mode in the report as called...

Page 38: ...Page 21 Service Guide OKIFAX 5250 5400 Chapter 1 General Information Activity Report Example...

Page 39: ...Explanation of Example...

Page 40: ...on FWD R Fax Forwarding RX FWD T Fax Forwarding TX 10 Number of transmitted pages or received pages 11 Result code OK Note1 NO STOP Note 2 BUSY PAPER Out of recording paper S_JAM Document jam R_JAM Re...

Page 41: ...Page 22 Service Guide OKIFAX 5250 5400 Chapter 1 General Information Message Confirmation Report...

Page 42: ...tion 5 Length of time for which the fax was connected to the line 6 Identification of the remote station Personal ID Location ID TSI CSI Dial number 7 Communication mode Reference to ACTIVITY REPORT 8...

Page 43: ...Page 23 Service Guide OKIFAX 5250 5400 Chapter 1 General Information Broadcast Entry Report Example...

Page 44: ......

Page 45: ...1 Identification of remote station Personal ID TSI Location ID or Dial Number Printing in this order depending if information is programmed in remote fax machine...

Page 46: ...5400 Chapter 1 General Information Broadcast Confirmation Report Example 1 Identification of remote station Personal ID TSI Location ID or Dial Number Printing in this order depending if information i...

Page 47: ...Page 25 Service Guide OKIFAX 5250 5400 Chapter 1 General Information Confidential Reception Report Example...

Page 48: ...Page 26 Service Guide OKIFAX 5250 5400 Chapter 1 General Information Telephone Directory Examples 1 through 6 Example 1 of 6...

Page 49: ......

Page 50: ...Example 2 of 6...

Page 51: ......

Page 52: ...Example 3 of 6 Example 4 of 6...

Page 53: ......

Page 54: ...Example 5 of 6...

Page 55: ......

Page 56: ...Example 6 of 6...

Page 57: ......

Page 58: ......

Page 59: ...Page 27 Service Guide OKIFAX 5250 5400 Chapter 1 General Information Configuration Report...

Page 60: ......

Page 61: ......

Page 62: ...Page 28 Service Guide OKIFAX 5250 5400 Chapter 2 Installation Procedures 2 1 General The following flowchart outlines the installation procedure...

Page 63: ......

Page 64: ......

Page 65: ...f installation surface 1 degree max 07 Other requirements Avoid installing in any of the following places A place exposed to direct sunlight l A place near a heat source or exposed to vibration l A du...

Page 66: ......

Page 67: ...stallation Procedures 2 3 Unpacking Unpacking Procedure 1 01 Remove tape on the top of the carton box and open its cover 02 Take out the accessory box from the carton box 03 Take out the machine with...

Page 68: ...Unpacking Procedure 3...

Page 69: ......

Page 70: ...nied accessories from the carton box check the contents according to the following list Contents List Item No Name Q ty Remarks 1 OKIFAX 5250 OF 5400 machine 1 2 AC power cord 1 3 Image Drum Unit 1 Al...

Page 71: ...ts 01 Items Image Drum ID Unit already installed l Toner cartridge l Recording paper l Document stacker l 02 Procedure 1 Toner cartridge Peel off the fixed tape attached to the copy stacker l Open the...

Page 72: ...to l eliminate the toner deflection and peel off the seal gently Ensure that the plastic tab on the right hand side of the toner cartridge recess lines up with the groove on the l toner cartridge Pre...

Page 73: ...03 Recording Paper Cassette Installation Note About 250 sheets of 20 lb paper can be set in the recording paper cassette Remove the paper cassette from the facsimile by pulling the cassette tab l She...

Page 74: ...04 Document Stacker Installation Place the document stacker into the hanging position l...

Page 75: ...0VAC Voltage range 198 to 250VAC Check whether the AC voltage of your input is within the above mentioned voltage range If so check that the power switch is turned OFF After turning off the power swit...

Page 76: ...Page 34 Service Guide OKIFAX 5250 5400 Chapter 2 Installation Procedures 2 7 Telephone and Line Connections 1 Procedure Connect the lines l...

Page 77: ...250 5400 Chapter 2 Installation Procedures 2 8 Packing for Shipment CAUTION When packing the unit for shipment REMOVE THE IMAGE DRUM AND TONER FROM THE UNIT AND SHIP SEPARATELY Failure to do so will r...

Page 78: ...9 1 Key Operation Flowchart 2 9 2 Technical Functions 2 9 3 Technical Functions Example 2 9 4 User s Functions 2 9 5 User s Functions Examples 2 9 6 Clock Adjustment 2 9 7 Dual Access Operation 2 9 8...

Page 79: ...Page 37 Service Guide OKIFAX 5250 5400 Chapter 2 Installation Procedures 2 9 1 General Procedure of Key Operation Figure 2 9 1 below shows the general procedure of key operation...

Page 80: ......

Page 81: ......

Page 82: ......

Page 83: ......

Page 84: ...ountry Each item can be accessed by entering the corresponding service number on Technical Function The detailed procedures of the initial setting items will be explained on the following pages Note 1...

Page 85: ...ble during dialing but the monitor will be switched off automatically after the elapse of specified time about 5 sec However when TF02 is set to ON the monitor is available during communication also O...

Page 86: ...ypes selectable OFF TYPE1 TYPE2 TYPE1 Real time dialing is available when the optional telephone handset is OFF HOOK TYPE2 Real time dialing is available when the optional telephone handset is OFF HOO...

Page 87: ...o transmit a bit 32 in DIS ON Transmits a bit 32 OFF Disable Note Disable only if communication compatibility problems occur with an older remote machine ON 19 Error criterion Registers the threshold...

Page 88: ...t always have to set the LED print head strobe signal Note 2 Intensity ranking is determined by the 1st 2nd and 3rd digits from the right on the LED print head serial number i e 212 212 is the intensi...

Page 89: ...31 Symbol rate Symbol rate later Selects the V 34 modem symbol rate for OKIFAX 5600 Plus 2400 2800 3200 3429 selectable 2800...

Page 90: ...mined time If the operator at the called side does not lift the handset within the predetermined time the machine automatically starts a document receiving operation Voice conversation will automatica...

Page 91: ...k by phone pick up handset 3 The called party can send CED to the calling party immediately to start FAX communications if the CNG is detected during the period 4 If the fax does not detect CNG signal...

Page 92: ...calling station Note 1 TAD modes settings are selected through Technical Function No 07 Note 2 Time selections range between 20 or 35 sec Note 3 You have a choice of message sending level Choices are...

Page 93: ...force FAX RX during TAD Mode Operation TAD Mode Flowchart Type 2 If the fax does not detect CNG signal during working of TAD the machine will go to standby mode NOTE If REMOTE RX Function is set to a...

Page 94: ...he LCD operation panel may differ from the fonts written this manual Setting the Service Bit 1 Purpose To enable or disable the following functions Drum and toner counter display clear l Service defau...

Page 95: ...Technical Functions 01 11 Technical Functions 12 16 Technical Functions 17 23 Technical Functions 24 27...

Page 96: ...Technical Functions 28 31...

Page 97: ...Page 43 Service Guide OKIFAX 5250 5400 Chapter 2 Installation Procedures Technical Functions 01 to 11...

Page 98: ......

Page 99: ......

Page 100: ...Page 44 Service Guide OKIFAX 5250 5400 Chapter 2 Installation Procedures Technical Functions 12 to 16...

Page 101: ......

Page 102: ...Page 45 Service Guide OKIFAX 5250 5400 Chapter 2 Installation Procedures Technical Functions 17 to 23...

Page 103: ......

Page 104: ......

Page 105: ...Page 46 Service Guide OKIFAX 5250 5400 Chapter 2 Installation Procedures Technical Functions 24 to 27...

Page 106: ......

Page 107: ......

Page 108: ...Page 47 Service Guide OKIFAX 5250 5400 Chapter 2 Installation Procedures Technical Functions 28 to 31...

Page 109: ...accessed by entering the corresponding function number on Function Programming The detailed procedure of the initial setting items will be explained on the following pages Note S ON Effective if the...

Page 110: ...location number 1 Fax dial A fax number is registered as an alternate location number When a call to the first location number is not answered the alternate location number will be automatically diale...

Page 111: ...e touch keys and some two digit auto dial codes to which telephone numbers have been assigned This group setting makes broadcast operation simple 07 Telephone directory and Location ID Alpha Search In...

Page 112: ...ayed transmission from the memory The fax can automatically transmit documents at five specified times from the memory 14 Polling transmission To be polled Document s placed on the feeder can be colle...

Page 113: ...ation memory TX or memory RX Note Condition for operation a Copy is invalid when the machine is already engaged in an operation which is using or could use the printer 3 Call reception while the fax i...

Page 114: ...Page 50 Service Guide OKIFAX 5250 5400 Chapter 2 Installation Procedures Dual Access Combination Table 1 2...

Page 115: ...Page 51 Service Guide OKIFAX 5250 5400 Chapter 2 Installation Procedures Dual Access Combination Table 2 2...

Page 116: ...Page 52 Service Guide OKIFAX 5250 5400 Chapter 2 Installation Procedures 2 1 One Touch Key Operations...

Page 117: ......

Page 118: ......

Page 119: ...cast 1 The fax can print a broadcast confirmation report if specified in operating sequence 03 Confidential transmission To program the mail box number 01 to 64 Available remote station s mail box num...

Page 120: ...ion program 1 One touch key One touch keys allows registering 1 Telephone number numeral P and space in 32 digits 2 Alternate fax telephone number in 32 digits additional registration 3 ID for the tel...

Page 121: ...ters 1 REDIAL TRIES 2 REDIAL INTERVAL 3 DIAL TONE DETECT 4 BUSY TONE DETECT 5 MF TONE DP PULSE 6 PULSE DIAL RATE 7 PULSE MAKE RATIO 8 PULSE DIAL TYPE 9 MF TONE DURATION 10 PBX LINE 11 FLASH EARTH NORM...

Page 122: ...r has been newly supplied or an operator performs the substitutive operation When memory reception data exists in the memory and the MEMORY RX MODE is indicated by AUTO REC key operation the machine w...

Page 123: ...nsmission error occurs Excepts for service bit 0 ON Printing the error report OFF Disables this function ON 04 Image in MCF Enables or disables the automatic printing of the image on the first sheet b...

Page 124: ...electable Refer to the Tel Fax Mode Flowchart in this chapter 35 sec 11 Ring response time User can register ring response time if National code is INT L GBR NOR SWE USA HOL ESP ITA GRE or GER Selects...

Page 125: ...ry or feeder setting can register as the default by operating the F OT 2 FEEDER TX 20 ECM function Enables or disables ECM error correction mode communication ON Enables OFF Disables ON 21 Remote diag...

Page 126: ...ervice Guide OKIFAX 5250 5400 Chapter 2 Installation Procedures 2 9 5 User s Functions Example Note The font displayed on the LCD operation panel may differ from fonts written in this manual 1 Functio...

Page 127: ...Page 56 Service Guide OKIFAX 5250 5400 Chapter 2 Installation Procedures User s Functions Table...

Page 128: ......

Page 129: ......

Page 130: ......

Page 131: ......

Page 132: ......

Page 133: ...response time set the service bit on following the operations shown in 2 9 3 1 Service Bit Setting 3 Dial parameters Service Bit OFF To get the DIAL PARAMETER message on the display perform the same o...

Page 134: ......

Page 135: ...The following table can be set depending on the National codes even if the service bit is off...

Page 136: ......

Page 137: ...Note The blank in the table is not indicated on the LCD...

Page 138: ...Page 57 Service Guide OKIFAX 5250 5400 Chapter 2 Installation Procedures 2 9 6 Clock Adjustment...

Page 139: ...Page 58 Service Guide OKIFAX 5250 5400 Chapter 2 Installation Procedures 2 9 7 Dual Access Operation...

Page 140: ......

Page 141: ......

Page 142: ...OKIFAX 5250 5400 Chapter 2 Installation Procedures 2 9 8 System Data Programming TSI CSI Default Blank l Registration of sender ID Default Blank l Registration of telephone number for the call back me...

Page 143: ......

Page 144: ......

Page 145: ...Page 60 Service Guide OKIFAX 5250 5400 Chapter 2 Installation Procedures 2 9 9 Dial Parameters Settings...

Page 146: ......

Page 147: ...2 Purpose same diagram table side view...

Page 148: ......

Page 149: ......

Page 150: ...e dial rate Selects the dialing pulse rates for the line 10 pps 16 pps 20 pps selectable 10 pps 07 Pulse make ratio Selects pulse dial rate 33 39 39 08 Pulse dial type Selects pulse dial type Normal N...

Page 151: ...ne Tests 1 Purpose Activate self diagnosis which includes Print test l CPU ROM version printing l CPU RAM check l PROG version printing l LANGUAGE version printing l DEFAULT version printing l RAM che...

Page 152: ...Self Diagnosis Print Test Example...

Page 153: ...1 marked item is shown for condition of all RAM except EXCEED RAM 2 marked item is shown to SRAM for EXCEED 3 marked items are option...

Page 154: ...telephone number of the remote machine by the ten key pad 4 Make sure that the telephone number of the remote machine is shown on the display 5 Press the START button 6 Typical message transmission f...

Page 155: ......

Page 156: ...Typical Reception Flow...

Page 157: ......

Page 158: ......

Page 159: ...hone handset l Second paper cassette unit l 2 Procedure Turn the facsimile power switch OFF and remove the AC power cord l Note Unplug the AC power cord from the wall outlet first and then from the fa...

Page 160: ...7 l board Remove Rear Cover Remove the rear cover by removing the two screws S1 and S2 Install Memory Board First install the memory board on to the connector CN13 of the main control board and then t...

Page 161: ...tallation of CTR PC interface board OF5400 only Remove Rear Cover Remove the rear cover by removing the two screws S1 and S2 Install CTR board First install CTR board on to the connector CN12 CN17 of...

Page 162: ...tween the mold of Rear Cover and cut out it Note Be careful not to rotate the cutter or Nipper since this can cause scratching on the Rear Cover b Grasp the mold of Rear cover and rotate it up and dow...

Page 163: ...nal Telephone Set 1 After having taken out the telephone set telephone handset and curled cord from the carton box connect them as shown 2 After installing the connection cable to the telephone set ex...

Page 164: ...sition shown by lifting the facsimile transceiver unit slightly When the second paper tray is mounted on the facsimile transceiver unit install the telephone assembly in the position shown 5 Connect t...

Page 165: ......

Page 166: ...tallation 1 Turn the facsimile power switch off and remove the AC power cord Note Unplug the AC power cord from the wall outlet first and then from the facsimile 2 Open the Manual Feed Guide 3 Gently...

Page 167: ...on the Second Paper Cassette Unit 5 Install the Second Paper Cassette Approximately 500 sheets of recording paper 20 Ib bond can be loaded 6 Reconnect the power cord to the wall and the facsimile and...

Page 168: ......

Page 169: ...voltage to the charge roller When the applied DC voltage exceeds a threshold value charging of the drum begins 2 Exposure Light emitted from the LED head irradiates the negatively charged surface The...

Page 170: ...aper The toner charged negative that is attracted to the Image drum surface is transferred to the upper side of the recording paper by the positive charge on the lower side of the paper 5 Fusing The u...

Page 171: ...Page 70 Service Guide OKIFAX 5250 5400 Chapter 3 Brief Technical Description Electric Photographic Process Flow...

Page 172: ...5250 5400 Chapter 3 Brief Technical Description 3 2 Actual Electo photographic Process The electro photographic process consists of six essential processes Process 1 Charging 2 Exposure 3 Developing 4...

Page 173: ...4 Network control unit board NCU UNC WN5 DN5 FN5 Memory board option MEM MEM 2 4MB Telephone interface board option TEL TEL U TEL W1 TEL W2 TEL W2D NTIF HOOK 10 KEY PC interface board OF5400 option Bi...

Page 174: ...Page 73 Service Guide OKIFAX 5250 5400 Chapter 3 Brief Technical Description Block Diagram...

Page 175: ...Page 74 Service Guide OKIFAX 5250 5400 Chapter 3 Brief Technical Description 3 4 Overall Dimension and Mechanical Structure...

Page 176: ......

Page 177: ...age 75 Service Guide OKIFAX 5250 5400 Chapter 4 Disassembly 4 1 General This chapter explains the procedures for replacement of assemblies and units in the field 4 1 1 Precautions for Parts Replacemen...

Page 178: ...ons 6 When handling items such as printed circuit boards do not wear gloves that are likely to generate static electricity 7 Using a wrist band connected to the ground will protect semiconductors on p...

Page 179: ...Page 77 Service Guide OKIFAX 5250 5400 Chapter 4 Disassembly 4 2 Tools The tools shown below are required for the replacement of parts...

Page 180: ...2 Disassembly Procedure Flow 4 1 2 of 2 4 3 1 LED Print Head 4 3 2 Image Drum Covers Rear NCU Main Separation Plate Boards NCU Modem 4 3 3 Control Panel Assembly Paper Guide U Assembly 4 3 4 Sub rolle...

Page 181: ...Page 79 Service Guide OKIFAX 5250 5400 Chapter 4 Disassembly Disassembly Procedure Flow 4 1 1of 2...

Page 182: ......

Page 183: ......

Page 184: ...Page 80 Service Guide OKIFAX 5250 5400 Chapter 4 Disassembly Disassembly Procedure Flow Figure 4 2 2 of 2...

Page 185: ......

Page 186: ......

Page 187: ...Page 81 Service Guide OKIFAX 5250 5400 Chapter 4 Disassembly 4 3 1 LED Print Head...

Page 188: ......

Page 189: ......

Page 190: ...Page 82 Service Guide OKIFAX 5250 5400 Chapter 4 Disassembly 4 3 2 Image Drum Covers Rear NCU Main Separation Plate Boards NCU Modem...

Page 191: ......

Page 192: ......

Page 193: ......

Page 194: ......

Page 195: ...Page 83 Service Guide OKIFAX 5250 5400 Chapter 4 Disassembly 4 3 3 Control Panel Assembly Paper Guide U Assembly...

Page 196: ......

Page 197: ......

Page 198: ......

Page 199: ......

Page 200: ...Page 84 Service Guide OKIFAX 5250 5400 Chapter 4 Disassembly 4 3 4 Sub roller ADF Roller Assembly Pinch Roller Contact Image Sensor Document Detectors PC1 and PC2...

Page 201: ......

Page 202: ......

Page 203: ......

Page 204: ......

Page 205: ...Page 85 Service Guide OKIFAX 5250 5400 Chapter 4 Disassembly 4 3 5 Motors Resist Drum Assemblies Release Guide Manual Guide Stacker Cover Fusing Unit...

Page 206: ......

Page 207: ......

Page 208: ...Page 86 Service Guide OKIFAX 5250 5400 Chapter 4 Disassembly 4 3 6 Lower Base Motor Assembly Back up Roller Transfer Roller...

Page 209: ......

Page 210: ......

Page 211: ...Page 87 Service Guide OKIFAX 5250 5400 Chapter 4 Disassembly 4 3 7 Resist Roller Hopping Roller Sensor Plate...

Page 212: ......

Page 213: ......

Page 214: ...Page 88 Service Guide OKIFAX 5250 5400 Chapter 4 Disassembly 4 3 8 E17 Board Power Supply Unit Contact Assembly Transformer Sub PSU...

Page 215: ......

Page 216: ......

Page 217: ...you do not always have to set the LED print head drive time Adjustment 1 Turn AC power ON 2 Use this table to set the LED print head drive time Table 5 1 1 Setting of Technical Function No 27 Note 1 T...

Page 218: ...d E17 CN16 1 pin and ground terminal l Specification 5V 4 4 5V to 5 2V l 3 5V DC Voltage Measurement point Main control board E17 CN1 B12 A13 B13 pin and ground terminal l Specification 5V 4 4 5V to 5...

Page 219: ...bly in Chapter 4 2 3 Connect extension cables to the M17 board 4 Connect the frequency counter for clock frequency digital voltmeter for power voltage and Oscilloscope for SIG signal Refer to the Meas...

Page 220: ...Page 92 Service Guide OKIFAX 5250 5400 Chapter 5 Adjustments Measurement Points on M17 Board...

Page 221: ...able parts User Replaceable No Part name Expected Use Before Replacement Item No in Ref Diagram 1 Toner Cartridge 2500 sheets cartridge ITU T document sample No 1 second or later cartridge to a new I...

Page 222: ...ng and Maintenance Service Technician Replaceable No Part name Expected Use Before Replacement Item No in Ref Diagram 1 Fuser Unit 180 000 sheets 3 2 Separation Rubber The Separation Rubber will not r...

Page 223: ...Page 95 Service Guide OKIFAX 5250 5400 Chapter 6 Cleaning and Maintenance Replaceable Items Diagram...

Page 224: ...s for all specified recording paper 3 Battery The life of the battery is five years Battery maintains system time and date during power outage ONLY 4 Mean Time Before Failure MTBF The MTBF for the ove...

Page 225: ...ng and Maintenance 6 2 Routine Inspection Basically the routine inspection of the following items is performed about half yearly or every one year after the machine is installed The description of rou...

Page 226: ...r becomes dirty and the dirt causes misfeeding of documents perform this cleaning 5 6 Contact Image Sensor Check for accumulation of paper dust etc Clean with ethyl alcohol if necessary 6 7 Separation...

Page 227: ...Page 99 Service Guide OKIFAX 5250 5400 Chapter 6 Cleaning and Maintenance Preventative Maintenance Diagram...

Page 228: ...rinter Counter Display Clear User 1 Purpose A user can clear the image drum counter and also check some of the other counters such as the print counter scan counter by using the key or key 2 Procedure...

Page 229: ...Note Clear Operation After having cleared the drum counter warning message will disappear...

Page 230: ...rpose The service personnel can clear and check the following counters Image Drum l Toner l Image Drum Total l Print l Scan l Note DRUM T count is used to display the total in use life of the machine...

Page 231: ......

Page 232: ...Page 102 Service Guide OKIFAX 5250 5400 Chapter 6 Cleaning and Maintenance 6 5 Self Diagnosis Test...

Page 233: ......

Page 234: ...Page 103 Service Guide OKIFAX 5250 5400 Chapter 6 Cleaning and Maintenance Self Diagnosis Test Sample...

Page 235: ......

Page 236: ......

Page 237: ...Page 104 Service Guide OKIFAX 5250 5400 Chapter 6 Cleaning and Maintenance 6 6 Sensor Calibration Test...

Page 238: ...NOTE After adjustment of levels check the copy quality by copying test charts or documents...

Page 239: ...Page 105 Service Guide OKIFAX 5250 5400 Chapter 6 Cleaning and Maintenance 6 7 LED Test...

Page 240: ......

Page 241: ...Page 106 Service Guide OKIFAX 5250 5400 Chapter 6 Cleaning and Maintenance 6 8 Tone Send Test...

Page 242: ...AX 5250 5400 Chapter 6 Cleaning and Maintenance 6 9 High speed Modem Send Test 1 Purpose To check the telephone line quality in combination with a remote station programmed to the high speed modem rec...

Page 243: ...Page 108 Service Guide OKIFAX 5250 5400 Chapter 6 Cleaning and Maintenance High speed Modem Send and Receive Test Diagram...

Page 244: ......

Page 245: ...AX 5250 5400 Chapter 6 Cleaning and Maintenance 6 10 High speed Modem Receive Test 1 Purpose To check the telephone line quality in combination with a remote station programmed to the high speed modem...

Page 246: ...Page 110 Service Guide OKIFAX 5250 5400 Chapter 6 Cleaning and Maintenance 6 11 MF Send Test 1 Purpose To send the multi frequencies of tone dialing to the line 2 Procedure...

Page 247: ......

Page 248: ...Page 111 Service Guide OKIFAX 5250 5400 Chapter 6 Cleaning and Maintenance 6 12 Tone TEL FAX...

Page 249: ...Page 112 Service Guide OKIFAX 5250 5400 Chapter 6 Cleaning and Maintenance 6 13 Protocol Data Dump...

Page 250: ...Page 113 Service Guide OKIFAX 5250 5400 Chapter 6 Cleaning and Maintenance Dump data description 1 Data sample...

Page 251: ......

Page 252: ......

Page 253: ...leaning and Maintenance Data Analysis The printed out data permits to analyze G3 facsimile communication protocol signals between two facsimile machines Below is the result of an analysis on the print...

Page 254: ......

Page 255: ...er Identification DCS 41 C1 Digital Command Signal CFR 21 A1 Confirmation to Receive MCF 31 B1 Message Confirmation FTT 22 A2 Failure to Train MPS 72 F2 Multi Page Signal EOM 71 F1 End of Message EPO...

Page 256: ...Page 116 Service Guide OKIFAX 5250 5400 Chapter 6 Cleaning and Maintenance 6 14 System Reset...

Page 257: ......

Page 258: ......

Page 259: ...on terminates normally 3 The activity report prints one of the service codes 90XX when a communication terminates abnormally 4 In addition to service codes 90XX the codes listed below also identify er...

Page 260: ...y transmitter is not set up and open 29C1 In closed Network setting TSI CSI is either not received or if received it is not authorized 29E0 Contents of CM JM are faulty at receive side 29E1 Phase 2 ti...

Page 261: ...prior to transmission 90C6 Normal or error free lines not received for 13 seconds 90C7 Error frame protocol received 90D4 Hardware error in transmission system response of modem not detected 90D5 ENC...

Page 262: ...1 2 No LCD operation A 7 1 3 ALARM LED on A 7 1 4 Printing test failure A B 7 1 5 No local copy A B 7 1 6 Auto dial failure A 7 1 7 Transmission problem A 7 1 8 Auto reception failure A 7 1 9 Receptio...

Page 263: ...Page 120 Service Guide OKIFAX 5250 5400 Chapter 7 Troubleshooting 7 1 Overall Troubleshooting Flow Chart...

Page 264: ......

Page 265: ......

Page 266: ...Page 121 Service Guide OKIFAX 5250 5400 Chapter 7 Troubleshooting 7 2 No LCD Operation...

Page 267: ......

Page 268: ......

Page 269: ...Page 122 Service Guide OKIFAX 5250 5400 Chapter 7 Troubleshooting 7 3 Alarm LED On...

Page 270: ......

Page 271: ......

Page 272: ...Page 123 Service Guide OKIFAX 5250 5400 Chapter 7 Troubleshooting 7 4 Printing Test Failure...

Page 273: ...Page 124 Service Guide OKIFAX 5250 5400 Chapter 7 Troubleshooting 7 5 No Local Copy...

Page 274: ......

Page 275: ......

Page 276: ...Page 125 Service Guide OKIFAX 5250 5400 Chapter 7 Troubleshooting 7 6 Auto Dial Failure...

Page 277: ......

Page 278: ......

Page 279: ...26 Service Guide OKIFAX 5250 5400 Chapter 7 Troubleshooting 7 7 Transmission Problem This section explains how to localize the cause of problems occurred after completion of connection with a remote s...

Page 280: ...Description Protective tone is 1700 Hz 200 ms This signal is added to training signal to protect the training signal against echo as follows...

Page 281: ...Page 127 Service Guide OKIFAX 5250 5400 Chapter 7 Troubleshooting 7 8 Auto Reception Failure...

Page 282: ......

Page 283: ......

Page 284: ...128 Service Guide OKIFAX 5250 5400 Chapter 7 Troubleshooting 7 9 Reception Problem This section explains how to localize the cause of problems occurred after completion of connection with a remote sta...

Page 285: ......

Page 286: ...Page 129 Service Guide OKIFAX 5250 5400 Chapter 7 Troubleshooting 7 10 Sensor Calibration Test...

Page 287: ...Page 130 Service Guide OKIFAX 5250 5400 Chapter 7 Troubleshooting 7 11 LED Test...

Page 288: ......

Page 289: ......

Page 290: ...Page 131 Service Guide OKIFAX 5250 5400 Chapter 7 Troubleshooting 7 12 Tone Send Test...

Page 291: ......

Page 292: ......

Page 293: ...Page 132 Service Guide OKIFAX 5250 5400 Chapter 7 Troubleshooting 7 13 High speed Modem Test...

Page 294: ......

Page 295: ......

Page 296: ...Page 133 Service Guide OKIFAX 5250 5400 Chapter 7 Troubleshooting 7 14 MF Send Test...

Page 297: ......

Page 298: ...Page 134 Service Guide OKIFAX 5250 5400 Chapter 7 Troubleshooting 7 15 Tone TEL FAX Send Test...

Page 299: ......

Page 300: ......

Page 301: ...Page 135 Service Guide OKIFAX 5250 5400 Chapter 7 Troubleshooting 7 16 No Acoustic Line Monitor There are two source routes of acoustic line monitor a General communication signal b DP pulse signal...

Page 302: ......

Page 303: ...Page 136 Service Guide OKIFAX 5250 5400 Chapter 7 Troubleshooting 7 17 Power Supply Unit...

Page 304: ......

Page 305: ......

Page 306: ...Action Items...

Page 307: ......

Page 308: ......

Page 309: ......

Page 310: ......

Page 311: ...00 Chapter 7 Troubleshooting 7 18 No Document Feeding Note This section places an emphasis on troubleshooting of mechanical portions Therefore it is recommended to replace the E17 Board first and then...

Page 312: ......

Page 313: ...Page 138 Service Guide OKIFAX 5250 5400 Chapter 7 Troubleshooting 7 19 Multiple Document Feeding...

Page 314: ...Page 139 Service Guide OKIFAX 5250 5400 Chapter 7 Troubleshooting 7 20 Document Skew...

Page 315: ......

Page 316: ......

Page 317: ...Page 140 Service Guide OKIFAX 5250 5400 Chapter 7 Troubleshooting 7 21 Document Jam...

Page 318: ......

Page 319: ......

Page 320: ...Page 141 Service Guide OKIFAX 5250 5400 Chapter 7 Troubleshooting 7 22 Printer Unit 7 22 1 Precautions 7 22 2 Troubleshooting flow Charts of Printer Unit 7 22 3 Image Problems Table...

Page 321: ...replacement part EP unit been replaced properly 3 Is the recording paper normal 4 Has the image drum unit been loaded properly 2 Tips for correcting image troubles 1 Do not touch or bring foreign matt...

Page 322: ...ng Flow Charts of Printer Unit Overall Troubleshooting Flowchart 1 Top Cover is Open 2 Replace Image Drum Message 3 Engine Controller Error 4 Fan Motor Rotation Error 5 Fuser Unit Thermal Error 6 Pape...

Page 323: ...TEL PLEASE CONFIRM Engine controller error Opt 2nd Tray 3 PRINTER ALARM 3 TEL PLEASE CONFIRM Fan Motor Rotation Error 4 Engine errors PRINTER ALARM 4 TEL PLEASE CONFIRM Fuser unit thermal error 5 Rec...

Page 324: ...Page 145 Service Guide OKIFAX 5250 5400 Chapter 7 Troubleshooting 1 Top Cover is Open...

Page 325: ...Page 146 Service Guide OKIFAX 5250 5400 Chapter 7 Troubleshooting 2 Replace Image Drum Message...

Page 326: ...Page 147 Service Guide OKIFAX 5250 5400 Chapter 7 Troubleshooting 3 Engine Controller Error...

Page 327: ...Page 148 Service Guide OKIFAX 5250 5400 Chapter 7 Troubleshooting 4 Fan Motor Rotation Error...

Page 328: ...Page 149 Service Guide OKIFAX 5250 5400 Chapter 7 Troubleshooting 5 Fuser Unit Thermal Error...

Page 329: ...Page 150 Service Guide OKIFAX 5250 5400 Chapter 7 Troubleshooting 6 Paper Jams...

Page 330: ......

Page 331: ...Page 151 Service Guide OKIFAX 5250 5400 Chapter 7 Troubleshooting 7 No Paper Tray or No Paper...

Page 332: ...heck thermister resistance about 100 kilo ohms at room temperature and about 1 5 kilo ohms at high temperature POWER SUPPLY UNIT Clean contacts on fuser and contact assembly 10 Check connection betwee...

Page 333: ...rence Figure Troubleshooting Flow Chart No Light or blurred images Fig A 8 Smeared output background Fig B 9 Blank output Fig C 10 Vertical black stripes Fig D 11 Evenly spaced repeating marks Fig E 1...

Page 334: ...Page 154 Service Guide OKIFAX 5250 5400 Chapter 7 Troubleshooting Sample Image Problems...

Page 335: ...Page 155 Service Guide OKIFAX 5250 5400 Chapter 7 Troubleshooting 8 Light or Blurred Output...

Page 336: ...Page 156 Service Guide OKIFAX 5250 5400 Chapter 7 Troubleshooting 9 Smeared Background on Output...

Page 337: ...Page 157 Service Guide OKIFAX 5250 5400 Chapter 7 Troubleshooting 10 Blank Output...

Page 338: ...Page 158 Service Guide OKIFAX 5250 5400 Chapter 7 Troubleshooting 11 Vertical Black Stripes on Output...

Page 339: ...Page 159 Service Guide OKIFAX 5250 5400 Chapter 7 Troubleshooting 12 Evenly Spaced Marks on Output...

Page 340: ......

Page 341: ...Page 160 Service Guide OKIFAX 5250 5400 Chapter 7 Troubleshooting 13 Missing Print on Output...

Page 342: ...Page 161 Service Guide OKIFAX 5250 5400 Chapter 7 Troubleshooting 14 Vertical White Stripes on Output...

Page 343: ......

Page 344: ...Page 162 Service Guide OKIFAX 5250 5400 Chapter 7 Troubleshooting 15 Poor Fusing...

Page 345: ...Page 163 Service Guide OKIFAX 5250 5400 Chapter 8 Dipswitch Settings 8 1 General Information The OKIFAX 5250 and OKIFAX 5400 do not have any dipswitches...

Page 346: ...Page 164 Service Guide OKIFAX 5250 5400 Chapter A Board Descriptions A1 1 Unit Configuration and Block Diagram The unit configuration of the OKIFAX 5250 5400 is as follows Diagram 1 Main control board...

Page 347: ...ce board CTR OKIFAX 5400 option only 5 Memory board MEM option 6 Power supply unit 1VP 120V 2VP 230V 7 Power supply unit SUB POW 8 Operation panel board 05WH 9 Optional board Telephone interface board...

Page 348: ...Page 165 Service Guide OKIFAX 5250 5400 Chapter A Board Descriptions Block Diagram...

Page 349: ......

Page 350: ......

Page 351: ...Central processing unit D MOTOR Drum motor DRV Motor drive DRAM Dynamic random access memory EXSEED Image processing gate array FAN Fan motor FLASH Flash memory IOGA 3 Input output gate array PCi Pho...

Page 352: ...M l Memory storage for ECM operations memory broadcast delayed broadcast etc Back up battery circuit l Real time clock IC l Audio monitor circuit l Contact image sensor control l I EXSEED l Image data...

Page 353: ...ignals to telephone line l Input of receive data and receive signals from telephone line l 4 Power supply unit SUB POW board Conversion of main alternating current to the following direct currents l 5...

Page 354: ...Second paper cassette unit MOS CPU l Motor control l...

Page 355: ...e OKIFAX 5250 5400 Chapter A Board Descriptions A2 1 Signal Flow Explanation 1 Copy Mode 2 G3 Send Mode 3 G3 Receive Mode 4 300bps Send Mode 5 300bps Receive Mode 6 Report Printing 7 Memory Transmissi...

Page 356: ...ta is sent to EXSEED image processing LSI and SRAM Here the picture data undergoes various kinds of picture processings EXSEED and SRAM converted to two level binary data black and white and then sent...

Page 357: ...Page 170 Service Guide OKIFAX 5250 5400 Chapter A Board Descriptions Copy Picture Signal...

Page 358: ......

Page 359: ......

Page 360: ...for one line is transferred from DRAM to CPU The CPU performs the picture data processing encode for this picture data FILLER fill bits are inserted etc and again stores into the DRAM The stored enco...

Page 361: ...Page 172 Service Guide OKIFAX 5250 5400 Chapter A Board Descriptions G3 Send Pciture Signal...

Page 362: ......

Page 363: ......

Page 364: ...as R signal After demodulation by modem the picture data is sent to CPU The CPU performs the picture data processing decode for this picture data and stores into the DRAM Then the stored picture data...

Page 365: ...Page 174 Service Guide OKIFAX 5250 5400 Chapter A Board Descriptions G3 Receive Picture Signal...

Page 366: ......

Page 367: ......

Page 368: ...s read into DRAM in the sequence the contents of various data stored in the FLASH memory area in advance under the control of CPU The contents of the frame has been edited on the DRAM by CPU and sent...

Page 369: ...Page 176 Service Guide OKIFAX 5250 5400 Chapter A Board Descriptions 300 bps Send Signal...

Page 370: ......

Page 371: ......

Page 372: ...ed signals received via the telephone line L1 and L2 of the NCU are sent from pin R to Pin RXA1 of the modem After demodulation by the modem the demodulated digital signals are sent to the CPU via the...

Page 373: ...Page 178 Service Guide OKIFAX 5250 5400 Chapter A Board Descriptions 300 bps Receive Signal...

Page 374: ......

Page 375: ......

Page 376: ...d to print Activity Report Message Confirmation Report etc The report data is read into DRAM in the sequence the contents of data stored in the FLASH memory in advance under the control of CPU The con...

Page 377: ...Page 180 Service Guide OKIFAX 5250 5400 Chapter A Board Descriptions Report Printing Signal...

Page 378: ......

Page 379: ......

Page 380: ...Descriptions 7 Memory Transmission This signal route describes the memory transmission used in broadcast mode delayed broadcast mode etc The stored encoded data undergoes buffering passes through CPU...

Page 381: ...Page 182 Service Guide OKIFAX 5250 5400 Chapter A Board Descriptions 8 Memory Reception This signal route describes the memory reception used in no paper mode no toner reception confidential mode etc...

Page 382: ...gram A3 1 4 E 17 CIS Circuit Diagram A3 1 5 E 17 IEXSEED Circuit Diagram A3 1 6 E 17 Modem Circuit Diagram A3 1 7 E 17 NCU OPE and PC1 PC2 Circuit Diagram A3 1 8 E 17 LED Circuit Diagram A3 1 9 E 17 S...

Page 383: ...nting control l Various image data processing control for scanning data l Strobe signals control for LED head l Smoothing control for printing data l DMA Direct Memory Access control l Interrupt proce...

Page 384: ...Page 185 Service Guide OKIFAX 5250 5400 Chapter A Board Descriptions Related Signals of CPU Diagram...

Page 385: ......

Page 386: ...ry is also used for the user data area instead of SRAM chips 256 KByte x 16 bit Flash memory x 1 FLS l Used for work area report recording etc 2 Back up battery circuit The non rechargeable lithium ba...

Page 387: ...Page 187 Service Guide OKIFAX 5250 5400 Chapter A Board Descriptions Block Diagram of FLS MASK and Real Time Clock...

Page 388: ...he transformer on the NCU board to this circuit as RM signal and the signal power is input to the IC11 The IC11 adjusts the monitor volume by MONC0 MONC1 and MONC2 signal under the control of CPU Outp...

Page 389: ...Page 189 Service Guide OKIFAX 5250 5400 Chapter A Board Descriptions Block Diagram of Audio Monitor Circuit...

Page 390: ...information 2 Function One line picture data is read in the sequence from the scanning unit CIS as SIG signal analog data to A D converter analog digital converter of IC6 via amplifier After conversi...

Page 391: ...Page 191 Service Guide OKIFAX 5250 5400 Chapter A Board Descriptions Block Diagram of CIS contact image sensor...

Page 392: ...ated Signals and Block Diagram of CIS for more information 2 Function IEXSEED300 is developed LSI for the image processing IEXSEED300 contains the following functions Contact image sensor driver l Sen...

Page 393: ...Page 193 Service Guide OKIFAX 5250 5400 Chapter A Board Descriptions Related Signals of IEXSEED300...

Page 394: ...picture data 2 ITU T Rec V17 14400 12000 9600 7200 bps for G3 picture data 3 ITU T Rec V33 14400 12000 bps for G3 picture data 4 ITU T Rec V29 9600 7200 bps for G3 picture data 5 ITU T Rec V27 ter 480...

Page 395: ...Page 195 Service Guide OKIFAX 5250 5400 Chapter A Board Descriptions Related Signals of Modem...

Page 396: ...uplers PC1 PC2 in the mechanism and the signal is output to the input port of CPU via this interface circuit PC1 Presence of document on hopper l When sub power supply is applied to the fax machine th...

Page 397: ...rmation etc to l OPE in serial data from CPU RXDOPE This signal transmits sequentially the contents of each data of RXD key code information etc to l CPU in serial data from OPE OPECHK Use to monitor...

Page 398: ...Page 197 Service Guide OKIFAX 5250 5400 Chapter A Board Descriptions Interface between E17 Board and NCU Board...

Page 399: ...Page 198 Service Guide OKIFAX 5250 5400 Chapter A Board Descriptions Interface between E17 Board and OPE...

Page 400: ...Page 199 Service Guide OKIFAX 5250 5400 Chapter A Board Descriptions Related Signals of PC1 PC2...

Page 401: ...a of 1664 LEDs on the LED print head is loaded into the shift registers by the HCLCK 6 67 MHz signal After the 1664 bit 208mm data is loaded in the shift registers it is then loaded in the latch circu...

Page 402: ...Page 201 Service Guide OKIFAX 5250 5400 Chapter A Board Descriptions Related Signals and Block Diagaram of LED Head...

Page 403: ...circuit of IEXSEED consists of the following blocks Setting of the excitation operation l Setting of the chopping operation l Setting of the chopping frequency l Setting of the motor forward l Setting...

Page 404: ...Page 203 Service Guide OKIFAX 5250 5400 Chapter A Board Descriptions Related Signals of Send Motor...

Page 405: ...esist Motor Diagram 2 Function 1 Drum motor control The drum motor is driven by the motor driver IC9 It is two phase excited and bipolar driven according to the DMPH1 and DMPH2 signals that are genera...

Page 406: ...Page 205 Service Guide OKIFAX 5250 5400 Chapter A Board Descriptions Related Signals of Drum Resist Motor...

Page 407: ...motor is controlled by the FANON signal generated from IOGA3 under the temperature control of the heater The operating status of the fan is supervised by the FANSNS N signal The fan rotates in the fol...

Page 408: ...Page 207 Service Guide OKIFAX 5250 5400 Chapter A Board Descriptions Related Signals of Fan Motor...

Page 409: ...Page 208 Service Guide OKIFAX 5250 5400 Chapter A Board Descriptions Interface between E17 Board and 2 nd Tray same diagram different size...

Page 410: ......

Page 411: ...1 Sensors and switch control Six types of sensors are used in the printer as listed below All of their output enter IOGA3 ports for referring to and processing by the CPU For more information refer t...

Page 412: ...to turn on the light of the LED head 0 Paper exists 1 paper does not exist PSOUT N Outlet sensor Located at the exit of the printer to supervise the paper exit operation 0 Paper exists 1 paper does n...

Page 413: ...Page 211 Service Guide OKIFAX 5250 5400 Chapter A Board Descriptions Sensors and Switch Control...

Page 414: ...switches the output signal THON from pin 65 between high and low states to check for a blown or shorted thermister according to the status of the THCHK signal A built in thermostat in the fuser unit p...

Page 415: ......

Page 416: ...inside the power supply unit The SB1 SB2 toner supply voltage of about 0 V 450 V is used for the toner supply roller The DB1 DB2 developing voltage of about 300 V 300 V is used for the developing roll...

Page 417: ...or Connector CN13 that provides an interface between M17 board and optional memory board l Connector CN12 and CN17 that provides an interface between M17 board and CTR PC interface board l For more in...

Page 418: ...Page 215 Service Guide OKIFAX 5250 5400 Chapter A Board Descriptions Interface E17 Board to Optional Memory Board Diagram...

Page 419: ...Page 216 Service Guide OKIFAX 5250 5400 Chapter A Board Descriptions Interface E17 Board to CR Board PC interface unit Diagram...

Page 420: ...l For more information refer to the Block Diagram of DRAM 2 Function 1 PSRAM 2 MByte DRAM x 1 RAM3 for ODA version 512 KByte DRAM x 2 RAM4 and RAM5 for INT L version Used as follows l Picture memory...

Page 421: ...Page 218 Service Guide OKIFAX 5250 5400 Chapter A Board Descriptions Block Diagram of DRAM...

Page 422: ...trix are scanned sequentially by the software In the case 1 is any of output from KSCAN0 to KSCAN7 signal which corresponds to the row 8 in the block diagram the software reads input port KSENS0 to KS...

Page 423: ...Page 220 Service Guide OKIFAX 5250 5400 Chapter A Board Descriptions Block Diagram of OPE operation unit Diagram...

Page 424: ...Page 221 Service Guide OKIFAX 5250 5400 Chapter A Board Descriptions A3 3 Power Supply Unit A3 3 1 Circuit Diagram for 1VP 2VP 1 of 2 A3 3 2 Circuit Diagram for 1VP 2VP 2 of 2...

Page 425: ...it 1VP 2VP board be performed by replacement of the whole power supply unit not by replacement of components Therefore 1 circuit descriptions in this section are for reference 2 orders for components...

Page 426: ...it This circuit generates the following voltages Output Voltage Output Voltage 5 V Logic circuit supply voltage IC LSI and high voltage source voltage etc 8 V CIS contact image sensor 8 V CIS contact...

Page 427: ...Page 224 Service Guide OKIFAX 5250 5400 Chapter A Board Descriptions 2 Input ratings Voltage l AC 120 V 6 15 AC 102 V to 127 V AC 230 V 15 14 AC 198 V to 264 V Frequency l 50 Hz 60Hz 2...

Page 428: ...Rated Voltage Rated Current Current Range Voltage Range Output Ripple Output Noise CN3 B11 B13 A13 5V 1 8 A 0 2 to 4 5 A 5 V 4 100 mVP P 250 mVP P CN3 A15 B15 30 V 1 20 A 0 to 1 20 A 4 0 VP P CN3 A14...

Page 429: ...in the following table Symbol 1VP Board 2VP Board Remarks INLET Ass y 4YS4011 2894P001 4YS4011 2894P002 F1 51MS063L 19181 5A F2 51MS016L Not mounted F3 GGS 3 15 21702 5 T1 Transformer 10 4YB4049 7082P...

Page 430: ...Page 227 Service Guide OKIFAX 5250 5400 Chapter A Board Descriptions Block Diagram of PWU Power Supply Unit...

Page 431: ......

Page 432: ......

Page 433: ...IFAX 5250 5400 Chapter A Board Descriptions 5 General functional description 5 1 General 5 2 Circuit description 5 3 Low voltage section 5 4 Protection circuits 5 5 Cover open circuit 5 6 High Voltage...

Page 434: ...CB is composed of five main circuits AC input section heater control section low voltage section high voltage section and protection circuit The low voltage section provides a 5V output by a DC DC con...

Page 435: ...Page 230 Service Guide OKIFAX 5250 5400 Chapter A Board Descriptions 5 2 Circuit Description 5 2 1 AC input section 5 2 2 Heater control circuit...

Page 436: ...1 is used for protecting the heater circuit 2 The filter circuit consists of L101 R1 C1 C2 C3 and L1 Capacitors C1 and C2 are not mounted in the power unit for 120VAC input 3 Fuse F2 is used for prote...

Page 437: ...o the heater via D1 operating as a switch from the power PCB 2 The on off operation of D1 is controlled by the operation of photocoupler PC1 whose operation is controlled by the HEAT N signal applied...

Page 438: ...Page 233 Service Guide OKIFAX 5250 5400 Chapter A Board Descriptions 5 3 Low voltage section 5 3 1 30 V circuit 5 3 2 8 V circuit 5 3 3 5 V circuit...

Page 439: ...circuit 1 The 30 V circuit provides 30 V output by rectifying the corresponding output of transformer T1 by a rectifier diode DS1 and smoothing the rectified signal by capacitor C7 2 Resistor R53 is u...

Page 440: ...t provides 8 V and 8 V outputs by rectifying the corresponding output of transformer T1 by rectifier diodes D10 and D11 and smoothing the rectified signals by capacitors C13 and C14 2 Resistors R22 an...

Page 441: ...d type operating at about 30 kHz in present power supply unit 3 Q1 is a power transistor D7 is a flywheel diode and L3 C10 and C20 compose a smoothing circuit 4 The 5 V output is regulated as follows...

Page 442: ...The protection circuit includes fuse F3 for 30 V and 5 V overcurrent protection circuit 2 If an overvoltage is applied to the 5 V circuit D8 R9 and D6 operate to short circuit the 30 V circuit for ha...

Page 443: ...opened the cover open microswitch SW2 on the 1VP 2VP board is turned off to cut the supply of H5V to the high voltage power supply circuit As a result all high voltage outputs are interrupted At the s...

Page 444: ...am 2 2 This circuit consists of photo sensors and high voltage generation unit Note If the high voltage unit inside the 1VP 2VP circuit board is replaced the output voltage and current output from the...

Page 445: ...Page 240 Service Guide OKIFAX 5250 5400 Chapter A Board Descriptions 5 6 High voltage Section 5 6 1 Functional overview 5 6 2 SB2 DB1 DB2 and CB 5 6 3 TR1 and TR2 5 6 4 CH...

Page 446: ...A of E17 board is applied to High voltage power supply circuit As result the driver current is applied to the drive circuit which will provide the high voltage outputs Signal Name Output Voltage Appli...

Page 447: ...e obtained from the flyback voltage of Q10 2 The positive and negative voltages of DB1 and DB2 are obtained by switching the charging direction under the triac and thyristor 3 Feedback is not applied...

Page 448: ...as both constant current hereinafter called CC and constant voltage hereinafter called CV modes 3 At first TR1 output circuit operates in the CC mode Once the voltage determined by parameters such as...

Page 449: ...e Guide OKIFAX 5250 5400 Chapter A Board Descriptions 5 6 4 CH 1 The CH output voltage is stabilized by keeping the primary flyback voltage obtained by switching operation of Q16 at a constant voltage...

Page 450: ...d according to the time of arrival at the sensor and the time of passage of paper 2 PS2 photosensor 2 WRSNS Detects the leading part of sensor Supervises the paper running state 3 PS3 photosensor 3 PS...

Page 451: ...Page 246 Service Guide OKIFAX 5250 5400 Chapter A Board Descriptions A3 4 UNC WN5 FN5 and DN5 Circuit Diagram UNC Circuit Diagram WN5 Circuit Diagram FN5 Circuit Diagram DN5 Circuit Diagram...

Page 452: ...may be omitted depending on the dial parameters Note 2 MF Multi frequency tone is generated by the modem and transferred to the telephone line via the NCU board 4 Description on the NCU Block Diagram...

Page 453: ...transformer T1 14 Ring detectors IC1 These circuits detect a ring signal arriving to the line If the input ring signal exceeds a specific voltage the circuits output a signal having of RI the same fre...

Page 454: ...Page 248 Service Guide OKIFAX 5250 5400 Chapter A Board Descriptions Block Diagram of UNC...

Page 455: ......

Page 456: ......

Page 457: ...ivity R537 R539 R837 R839 The receiving sensitivity at line hunting is determined by R539 to R839 depending on the line impedance Similarly the MF tone receiving sensitivity at parallel pickup is dete...

Page 458: ...g a line Usually IC2 is short circuited by the CML relay 7 in the standby state and RL7 is used for off hook detection 17 Impedance switches CN15 to CN45 These circuits set the impedance according to...

Page 459: ...Page 250 Service Guide OKIFAX 5250 5400 Chapter A Board Descriptions Block Diagram of WN5...

Page 460: ......

Page 461: ...ircuit selectively switches the line between the telephone or facsimile 8 SR RL2 This circuit connects the line with the telephone During facsimile transmission it disconnects the telephone 9 DP IC5 T...

Page 462: ...ohm F 18 DC resistance switches CN26 and CN36 These switches set the DC resistance according to the line requirement 27 FICC IC6 This circuits reduces the DC resistance to increase the loop current m...

Page 463: ...Page 252 Service Guide OKIFAX 5250 5400 Chapter A Board Descriptions Block Diagram of FN5...

Page 464: ......

Page 465: ......

Page 466: ...39 to R639 depending on the line impedance Similarly the MF tone receiving sensitivity at parallel pickup is determined by R537 or R637 The receiving sensitivity is set using the DIP switches S4 5 to...

Page 467: ...S4 3 220 ohm 820 ohm 115 nF S4 4 600 ohm 19 Ring impedance switches S1 4 These switches set the ring impedance according to the line requirement 20 Ring sensitivity switch S4 4 S4 2 This switch sets t...

Page 468: ...Page 254 Service Guide OKIFAX 5250 5400 Chapter A Board Descriptions Block Diagram of DN5...

Page 469: ......

Page 470: ......

Page 471: ...Page 255 Service Guide OKIFAX 5250 5400 Chapter A Board Descriptions A3 5 TELU TEL W2 TEL W1 and TEL W2F Circuit Diagram option TELU TEL W2 TEL W1 TEL W2F...

Page 472: ...ent l Return Loss Adjustment l AGC automatic gain control l Manual Pad l Sending Frequency Response Adjustment l Receiving Frequency Response Adjustment l Pulse Dialing for TEL W1 l MF Dialing for TEL...

Page 473: ...tput to the telephone line via UNC Hook switch and DB2 rectifier Receive signal route l Receive signal from the telephone line enters Speech IC via UNC Hook switch and DB2 and is output to pin 2 3 of...

Page 474: ...Page 257 Service Guide OKIFAX 5250 5400 Chapter A Board Descriptions Block Diagram of TEL U option...

Page 475: ......

Page 476: ......

Page 477: ...ending Frequency Response Adjustment The circuit section affecting the low range level of the sending frequency response is formed by capacitors C59 C35 C36 and C60 which are connected in series to th...

Page 478: ...speech IC The AGC gain is high wen the resistor values are small and the AGC gain is low when the resistor values are large The AGC gain is adjusted by ON OFF setting of SW6 2 and 3 connected to R43...

Page 479: ...Page 259 Service Guide OKIFAX 5250 5400 Chapter A Board Descriptions Block Diagram of TEL W2...

Page 480: ......

Page 481: ......

Page 482: ...l Increase the resistor value to set quieter receiving level i e higher RLR value l 4 Sending Frequency Response Adjustment The adjustment of the high range frequency response is performed by changing...

Page 483: ...y as shown in the table 9 AGC automatic gain control AGC is a function for adjusting the sending and receiving levels automatically in accordance with the line current values so that the optimal commu...

Page 484: ...Page 261 Service Guide OKIFAX 5250 5400 Chapter A Board Descriptions Block Diagram of TEL W1...

Page 485: ......

Page 486: ......

Page 487: ...vel is maximum when all the bits of R110 R114 are set to Mount and minimum when all the bits of R110 R114 are set to Not mount 3 Receiving Level Adjustment The receiving level is determined by the cir...

Page 488: ...2 Return loss 3 Sending level 4 Receiving level 5 Side tone level...

Page 489: ...Page 263 Service Guide OKIFAX 5250 5400 Chapter A Board Descriptions Block Diagram of TEL W2F...

Page 490: ......

Page 491: ......

Page 492: ...y for the ECM send receive modes l Picture memory for the memory transmission mode l Picture memory for the retransmission data l Picture memory for the reception in memory l 2 Memory capacity 4 Mbyte...

Page 493: ...Page 265 Service Guide OKIFAX 5250 5400 Chapter A Board Descriptions Related Signals of Memory Board...

Page 494: ...ing MFP Multi Function Peripheral function can be realized Example PC printer function 300 Q600 dpi 8PPM l PC Scanner function 300 dpi l PC Fax Modem function TIA EIA Class 1 l PC Memory function l PC...

Page 495: ...s a raster image data in Host PC and transfers a data with HIPER W emulation 2 Scanner Oki SCL 1 Oki Scanner Control Language 1 Transfers and image data of document scanned in Fax machine to the Host...

Page 496: ...Page 267 Service Guide OKIFAX 5250 5400 Chapter A Board Descriptions Related Signals of P050 PC interface unit Diagram...

Page 497: ...wing functions Paper capacity 500 sheets l Paper size A4 Letter Legal l Paper size selection Automatic l Cassette no cassette selection Automatic l Paper no paper selection Automatic l Paper route ope...

Page 498: ...Page 269 Service Guide OKIFAX 5250 5400 Chapter A Board Descriptions Block Diagram of 2nd Tray same diagram side view...

Page 499: ......

Page 500: ......

Page 501: ...50 5400 Chapter B Print Operation Description Overview This appendix describes the print operation processes and assemblies of the unit B 1 Mechanical Components B 2 Description of Print Operations B...

Page 502: ...271 Service Guide OKIFAX 5250 5400 Chapter B Print Operation Description B 1 Mechanical Components 1 Image drum cartridge 2 Resist motor 3 Drum motor 4 LED head 5 Fuser Layout of Print Station Compon...

Page 503: ...ation Description 1 Image drum cartridge The image drum cartridge I D or EP electro photographic consists of an image drum a charger and a developer The cartridge forms a toner image on the drum using...

Page 504: ...tion Description 2 Resist motor This resist motor is a pulse motor of 48 steps rotation that is two phase excited by the signal from the M17 board It drives the hopping roller and the resist roller vi...

Page 505: ...OKIFAX 5250 5400 Chapter B Print Operation Description 3 Drum motor This drum motor is a pulse motor of 48 steps rotation that is two phase excited by the signal from the M17 board and is the main mo...

Page 506: ...hapter B Print Operation Description 4 LED head Image data for each dot on a line from the M17 board is received by the shift registers and latch registers The Letter size LED head are driven to radia...

Page 507: ...trol of the HEAT N signal from the M17 board This AC voltage heats the heater The M17 board supervises the heat roller temperature via the thermistor and regulates the heater roller at a predetermined...

Page 508: ...Page 277 Service Guide OKIFAX 5250 5400 Chapter B Print Operation Description Layout of Print Station Components same diagram side view...

Page 509: ......

Page 510: ......

Page 511: ...Page 278 Service Guide OKIFAX 5250 5400 Chapter B Print Operation Description B 2 Description of Print Operations B2 1 Process Operations...

Page 512: ...79 Service Guide OKIFAX 5250 5400 Chapter B Print Operation Description B2 1 Process Operations 1 Hopping and feeding 2 Charging 3 Exposure 4 Developing 5 Transfer 6 Fusing 7 Cleaning 8 Cleaning of ro...

Page 513: ...o that turning each of these gears in the reverse direction will not be transmitted to the corresponding roller a Hopping 1 Hopping turns the resist motor in the a direction in the clockwise CW direct...

Page 514: ...b direction in the counter clockwise CCW direction drives the resist roller to advance the paper In this case the hopping gear also turns but the hopping roller is prevented from turning by the one wa...

Page 515: ...CCW Counterclockwise...

Page 516: ...e drum surface The charge roller is composed of two layers consisting of a conductive layer and a surface protective layer that has elasticity in order to secure a good contact with the image drum Whe...

Page 517: ......

Page 518: ...part of the image drum drops thereby forming an electrostatic latent image associated with the image signal The image drum is coated with an underlayer UL a carrier generation layer CGL and carrier t...

Page 519: ...carriers flow into the aluminum layer ground The positive carriers moved to the CTL combine with the negative charges on the image drum surface accumulated by the contact charge of the charge roller...

Page 520: ...developing roller and the toner allowing the toner to be attracted to the developing roller The developing roller surface is charges positive and the toner negative 2 The toner attracted to the devel...

Page 521: ...tric field Note The toner supply roller and the developing roller are supplied with bias voltages required during the developing process as shown below 450 VDC is supplied to the toner supply roller 3...

Page 522: ...larity to the toner is applied to the paper from its reverse side The application of a high positive voltage 1 KVDC from the Power Supply Unit 1VP 2VP board to the transfer roller causes the positive...

Page 523: ...r roller with a Teflon coating incorporates a 500 W heater Halogen lamp which heats the heat roller A thermister which is in contact with the heater roller regulates the heater roller at a predetermin...

Page 524: ...AX 5250 5400 Chapter B Print Operation Description 7 Cleaning After the end of the transfer residual toner on the image drum is attracted to the cleaning roller temporarily by static electricity to cl...

Page 525: ...power on time l In warning up after the cover is opened and closed l When the number of accumulated sheets is 10 or more and the printout operation ends l Changes in bias voltage applied to each rolle...

Page 526: ...Page 288 Service Guide OKIFAX 5250 5400 Chapter B Print Operation Description B 3 Errors B 3 1 Errors List B 3 2 Major Trouble Errors B 3 3 Recoverable Errors...

Page 527: ...larm 2 l Cover open l 2 Recoverable errors 2 nd tray route open l No cassette in 2 nd tray l No paper in 1 st cassette l No paper in 2 nd cassette l 3 Alarms warning Low toner l Paper width error l No...

Page 528: ...e Guide OKIFAX 5250 5400 Chapter B Print Operation Description B 3 2 Major Trouble Errors B 3 2 1 Fuser Error B 3 2 2 Fan Error B 3 2 3 Paper Feed Monitoring B 3 2 4 2 nd Tray Communication Error B 3...

Page 529: ...1 Fuser Error The fuser error indicates an error in thermister on heater In case the fuser error occurs at the time of printing the heater is turned off soon but the printing continues of that page Ho...

Page 530: ...goes 1 while the fan is running at full speed Operation of the FANSNS signal when the fan is turned on is described below Since the fan alarm is not monitored during printing the fan alarm does not ap...

Page 531: ...sensor OFF up to write sensor OFF 44 mm 1 73 or less Transport system jam 3 Indicates an error in the paper transport system Error transfer roller and or heat roller From write sensor ON to outlet se...

Page 532: ...ion B 3 2 4 2 nd Tray Communication Error Printer Alarm 2 This error is generated if on sending a command to the 2 nd tray is returned no status 40s or an undefined status However in case there is no...

Page 533: ...hapter B Print Operation Description B 3 2 5 Cover Open Cover open sensor 0 indicates an open cover When the cover is closed the CU control unit section sends the reset signal and processes in the sam...

Page 534: ...f Supervising Sensor 2 nd tray route open Paper supply route from the option 2 nd tray to the main body is open recording paper of the 1 st tray is being replaced No paper 1 st cassette No paper has b...

Page 535: ...97 Service Guide OKIFAX 5250 5400 Chapter B Print Operation Description B3 3 3 1 Toner Low Detection Composition Operation Operation during toner full state Operation during toner low state Low Toner...

Page 536: ...of the stirring gear which rotates at a constant rate the stirring bar and the magnet on the stirring bar The stirring bar rotates through the link on the protrusion in the stirring gear The configura...

Page 537: ...uide OKIFAX 5250 5400 Chapter B Print Operation Description Operation Toner Low is detected by monitoring the time interval between the encounter of the magnet set on the sensor lever and the magnet o...

Page 538: ...Operation during toner full state The stirring bar rotates due to interlocking l with the stirring gear When the magnet on the stirring bar reaches l the maximum height since the other end of the bar...

Page 539: ...ner low state When the stirring bar reaches the maximum l height the small amount of toner at the other end of the bar offers little resistance The bar falls to the minimum height due to its own weigh...

Page 540: ...nsor is not monitored while the drum motor is in halt l Toner Low is established when the toner low state is detected two times in a row l Toner Low is canceled when the toner full state is detected t...

Page 541: ...Page 303 Service Guide OKIFAX 5250 5400 Chapter B Print Operation Description B 4 Other Special Cases B 4 1 Manual Paper Feed B 4 2 Cleaning...

Page 542: ...IFAX 5250 5400 Chapter B Print Operation Description B 4 1 Manual Paper Feed Turning on of the inlet sensors without the hopping operation indicates manual paper feeding for OKIFAX 5250 OKIFAX 5400 ex...

Page 543: ...ial is 1 reversed due to poor electrification and or 2 insufficient on the image drum surface Recovery of the toner to developing roller Cleaning is performed when the number of prints exceed 10 sheet...

Page 544: ...306 Service Guide OKIFAX 5250 5400 Chapter C Circuit Diagrams C 1 General Information The OKIFAX 5250 and OKIFAX 5400 Circuit Diagrams contain component level repair information and are OKIDATA propri...

Page 545: ...Page 307 Service Guide OKIFAX 5250 5400 Chapter D Illustrated Parts List Assembly...

Page 546: ......

Page 547: ......

Page 548: ...Page 308 Service Guide OKIFAX 5250 5400 Chapter D Illustrated Parts List 1 Cabinet Assembly...

Page 549: ......

Page 550: ...y Gray 1 51011001 RSPL 6 40044501 Board UNC 1 40044501 RSPL 7 40274601 Board S34 OF5600 1 40274601 RSPL 8 3PP4120 1088P1 Plate Partition 1 51019501 RSPL 9 1PP4120 1090P1 Cover Rear 1 5307601 RSPL 10 1...

Page 551: ...Page 309 Service Guide OKIFAX 5250 5400 Chapter D Illustrated Parts List 2 Control Panel Assembly...

Page 552: ......

Page 553: ...79109 RSPL 2 Film One touch Cover 1 52203301 RSPL 3 Sheet One touch L 1 52081310 RSPL 4 Sheet 1 5 Label Ten Key 1 6 40047001 Sheet One Touch OF5400 1 40047001 RSPL 7a 53077901 Cover One touch OF5250 1...

Page 554: ...V 1 50220801 RSPL 8b 2YX4120 1128G2 Fusing Unit Assy 230V 1 50220802 RSPL 9 3PA4122 1295G1 Shaft Hopping Roller Assy 1 50219601 RSPL 10 4PP4083 6022P2 Bearing 5 51607402 RSPL 11 4PP4083 6086G1 Sensor...

Page 555: ...PP4083 6053P1 Lever Reset L 1 50805801 RSPL 26 4PP4083 6057P1 Spring Stacker Cover Reset 1 50924201 RSPL 27 4PB4083 6197P1 Gear Stacker Cover Damper 1 51229401 RSPL 28 4PP4083 6191G1 Arm Stacker Cover...

Page 556: ...age 311 Service Guide OKIFAX 5250 5400 Chapter D Illustrated Parts List 3B Printer Assembly 2 of 2 Rev No Oki parts Number Description Q ty Remarks 31 2PA4120 1085G1 Guide Release Assy 1 51019201 RSPL...

Page 557: ...RSPL 35 4YX4120 1124G1 Cable LED Head Assy 1 56632401 RSPL 36 N A Screw N A 37 N A Screw N A 38 N A Screw N A 39 N A Screw N A 40 N A Screw N A 41 N A Screw N A 42 4PA4120 1170G1 Wire Sensor Assy 1 40...

Page 558: ...Page 312 Service Guide OKIFAX 5250 5400 Chapter D Illustrated Parts List 4A Base Assembly 1 of 2...

Page 559: ......

Page 560: ...PL 9 4PP4083 7666P1 Spring Sheet 2 50929901 RSPL 10 4PP4083 7658G1 Link Sheet R 1 50808601 RSPL 11 1PA4120 1162G1 Cassette Paper Assy Gray 1 50110501 RSPL 12 3PP4083 5663G1 Frame Separator Assy 1 4025...

Page 561: ...Page 313 Service Guide OKIFAX 5250 5400 Chapter D Illustrated Parts List 4B Base Assembly 2 of 2...

Page 562: ......

Page 563: ...187P1 Plate Earth PCFX OF5600 1 51024001 RSPL 33 4PP4083 7665P001 FG Plate D 1 51023601 RSPL 34 4YC4061 5115P001 Tape Teflon 2 n a 35 36 40275501 Plate Guard 1 40275501 37 PB4120 1130P001 Screw Hexago...

Page 564: ...Page 314 Service Guide OKIFAX 5250 5400 Chapter D Illustrated Parts List 5 Scan Unit...

Page 565: ...PL 11 4PP4120 1022P1 Spring Pinch R 1 50930301 RSPL 12 4PP4120 1021P1 Spring Pinch L 1 50930201 RSPL 13 4PP3529 5033P1 Gear ADF Idle 1 51229501 RSPL 14 4PA3529 5082G1 Roller Sub Assy 1 50406101 RSPL 1...

Page 566: ...Page 315 Service Guide OKIFAX 5250 5400 Chapter D Illustrated Parts List 6 Paper Guide U Assembly...

Page 567: ......

Page 568: ...05101 RSPL 8 4PP3529 5035P1 Gear Z28 1 51236401 RSPL 9 4PA3529 5087G1 Rubber Separation Assy 1 53344901 RSPL 10 3PA4120 1049G1 Roller Sensor Assy 1 51410501 RSPL 11 4PP3529 5034P1 Gear Z22 1 51236501...

Page 569: ...Page 316 Service Guide OKIFAX 5250 5400 Chapter D Illustrated Parts List 7 Cables...

Page 570: ...Rev No Oki J Part Description Q ty Oki Part Remarks...

Page 571: ...AC 220V pictured 1 56631701 RSPL 8 56635001 Cord TEL1 TEL2 1 56635001 RSPL 9a 236A3161P2 Cord Modular Telephone 1 56621001 RSPL 10 105A1051C1003 Core Ferrite 1 55505303 RSPL 11 40048201 Connection Cor...

Page 572: ...Page 317 Service Guide OKIFAX 5250 5400 Chapter D Illustrated Parts List 8 Option Telephone...

Page 573: ...Rev No Oki parts Number Description Q ty Remarks 1 1PP4120 1095P011 Cradle 1 N A 2 4YA4129 1006G001 Board Hook 1 N A 6 4YA4129 1005G001 Board TELU 1 N A 7 1PP4120 1096P001 Base Cradle 1 N A...

Page 574: ...4YB3512 2029G004 Handset 1 N A 12 4YS4111 5552P001 Connection Cord 1 N A 14 4YS4111 5551P001 Moduler Jack Cord 1 N A 17 4YS3522 1252G002 Cord Handset 1 56628101 RSPL 18 N A Tapping Screw 1 N A 19 N A...

Page 575: ...uide Inner Assembly 1 50221501 5 1PA4122 1362G004 Cassette Assembly 2nd Tray 1 50107304 6 4PP4120 1009G001 Frame Separation F Assembly 1 50222101 7 1PP4122 1323P001 Cover Rear 1 53075201 8 4PB4122 144...

Page 576: ...Hopping Assy 2nd Tray 1 50409501 22 1YX4122 1364G002 Guide 2nd Cassette R Assembly 1 50222201 23 4PB4122 1382P001 Clutch One way 2nd Tray 1 51401101 24 4YA4046 1651G002 TQSB 2 PCB 1 55078102 25 3PA41...

Page 577: ...301 4 3PA4122 1371G001 Guide Inner Assembly 1 50221501 5 1PA4122 1362G004 Cassette Assembly 2nd Tray 1 50107304 6 4PP4120 1009G001 Frame Separation F Assembly 1 50222101 7 1PP4122 1323P001 Cover Rear...

Page 578: ...A4122 1367G001 Roller Hopping Assy 2nd Tray 1 50409501 22 1YX4122 1364G002 Guide 2nd Cassette R Assembly 1 50222201 23 4PB4122 1382P001 Clutch One way 2nd Tray 1 51401101 24 4YA4046 1651G002 TQSB 2 PC...

Page 579: ...Page 320 Service Guide OKIFAX 5250 5400 Chapter D Illustrated Parts List 10 Miscellaneous Whole Unit Consumables Options...

Page 580: ...Model Description Part OF5250 120V English 62210701 OF5250 120V English Latin American Spanish 62210702 OF5250 120V English Brazilian Portuguese 62210703 OF5400 120V English 62210401 OF5400 120V Engli...

Page 581: ...Page 322 Service Guide OKIFAX 5250 5400 Chapter D Illustrated Parts List Consumables Kit Image Drum P N 56116901 Cartridge Toner P N 52106701...

Page 582: ...ry Backup P N 70029101 1 5 MB Memory Battery Backup P N 70031501 2 MB Memory No Battery Backup P N 70029201 2 5 MB Memory Battery Backup P N 70031601 4 MB Memory P N 40231622 500 Sheet Letter Legal Pa...

Page 583: ...rol Board E17 l UNC 5 Network Control Unit l Power Supply Unit l O5WH Operator Panel Board l S34 Modem Board MODEM OKIFAX 5400 Only l CTR PC Interface Board Option l MEM Memory Board Option l TEL Tele...

Page 584: ...SPL 4 4YS4111 3441P1 Cord Connector C1S 1 56634501 RSPL 5 4YS4111 3442P1 Cord Connector PC1 2 1 56634601 RSPL 6 105A1070C0001 Core Ferrite D 2 55505201 RSPL 7b 4YS3512 1485P1 Cord AC Power 1 56618901...

Page 585: ...00 Main Assy 1 40476108 RSPL 40035901 PWR Unit ACDC Drop 120V Power Supply Unit 40319201 RSPL 40035902 PWR Unit ACDC Drop 230V Power Supply Unit 40035902 RSPL 40105308 Op Panel OF5250 55083202 RSPL 40...

Page 586: ...Page 325 Service Guide OKIFAX 5250 5400 Chapter F Second Paper Feeder 1 Outline 1 1 Functions 1 2 External View and Component Names Figure 1 1...

Page 587: ...ch is driven by signals sent from CPU of the Second Paper Feeder under the control of the facsimile The main functions are listed below Paper that can be used Paper Type Standard paper Xerox 4200 20 l...

Page 588: ...Page 327 Service Guide OKIFAX 5250 5400 Chapter F Second Paper Feeder 1 2 External View and Component Names...

Page 589: ...Page 328 Service Guide OKIFAX 5250 5400 Chapter F Second Paper Feeder 2 Mechanism Description 2 1 General Mechanism 2 2 Hopper Mechanism...

Page 590: ...e which drives the pulse motor inside the Second Paper Feeder and this motion is transmitted to rotate the one way clutch of the hopping frame assembly The paper is delivered from the hopper into the...

Page 591: ...pper Mechanism The hopper automatically feeds the facsimile with the paper being set single sheet at a time When the paper is loaded in the paper cassette it is then transported by the pulse motor car...

Page 592: ...r the disassembly reassembly and installations in the field This section describes the disassembly procedures and for reassembly procedures basically proceed with the disassembly procedures in the rev...

Page 593: ...ure and do not disassemble any more than necessary 4 Only specified service tools may be used 5 Disassembly must be carried out according to the prescribed procedures Parts may be damaged if such proc...

Page 594: ...Page 333 Service Guide OKIFAX 5250 5400 Chapter F Second Paper Feeder 3 2 Parts Layout This section describes the layout of the main components...

Page 595: ...3 3 Parts Replacement Methods This section describes the parts replacement methods for the components listed in the disassembly order diagram below Second Paper Feeder Stepping motor hopping 3 3 1 TQS...

Page 596: ...ve six screws 2 and remove the upper plate 3 Remove two screws 5 and remove the hopping frame assy 6 4 Remove the front cover assy 4 off the guide boss on the guide L 2nd assy 7 by bending the guide L...

Page 597: ...screw 12 which is keeping the rear cover 13 and guide R 2nd assy 10 Remove the guide R 2nd assy 10 7 Remove the protect M 14 guide bracket 15 planet gears 16 and planet gear bracket 17 8 Remove the E...

Page 598: ...9 Remove three remaining screws 21 which are keeping the motor on the motor bracket 22 and remove the connector off the Stepping Motor 23 10 Remove two screws 24 on the Stepping Motor 23...

Page 599: ......

Page 600: ...400 Chapter F Second Paper Feeder 3 3 2 TQSB2 PCB 1 Remove the pulse motor see 3 3 1 2 Remove the connector 25 from the TQSB 2PCB 26 3 Remove the screw 27 and remove the TQSB 2PCB 26 Note Refer to Det...

Page 601: ...e hopping frame assy 2 Remove the screw 1 and remove the earth plate 2 Remove the sensor lever 7 and remove the ground plate 6 Remove the gear 3 and remove the metal bush 5 and Hopping Roller shaft As...

Page 602: ...e Guide OKIFAX 5250 5400 Chapter F Second Paper Feeder 4 Troubleshooting 4 1 Precautions Prior to the Troubleshooting 4 2 Preparations for the Troubleshooting 4 3 Troubleshooting Method 4 3 1 LCD Stat...

Page 603: ...eder 4 1 Precautions Prior to the Troubleshooting 1 Go through the basic checking list provided in the user s documentation 2 Obtain as much information as you can from the user about the problem 3 Ch...

Page 604: ...4 2 Preparations for the Troubleshooting 1 Display on the Operator panel The status of the problem is displayed on the LCD Liquid Crystal Display on the Operator panel Go through the appropriate trou...

Page 605: ...Page 341 Service Guide OKIFAX 5250 5400 Chapter F Second Paper Feeder 4 3 Troubleshooting Method When a problem occurs go through the troubleshooting according to the following procedure...

Page 606: ...r Feeder 4 3 1 LCD Status Message List 1 Indicates the same message on the display when 1st or 2nd cassette becomes jam error feeding 2 However if 1st cassette has recording paper LCD indicates the st...

Page 607: ......

Page 608: ......

Page 609: ...Page 343 Service Guide OKIFAX 5250 5400 Chapter F Second Paper Feeder 5 Connection Diagram 5 1 Interconnection Diagram 5 2 PCB Layout...

Page 610: ...Page 344 Service Guide OKIFAX 5250 5400 Chapter F Second Paper Feeder 5 1 Interconnection Diagram...

Page 611: ...Page 345 Service Guide OKIFAX 5250 5400 Chapter F Second Paper Feeder 5 2 PCB Layout...

Page 612: ...Page 346 Service Guide OKIFAX 5250 5400 Chapter F Second Paper Feeder 6 Parts List 1 Cabinet and Cassette Assembly...

Page 613: ...2 Paper Feeder...

Page 614: ...Rev No Oki J Part Number Description Q ty Oki Data P N 1 1PP4122 1401P001 Plate Upper 1 51023301...

Page 615: ...nector 1 56633901 15 3PB4122 1399P001 Motor Pulse 1 56512201 16 4PP4122 1384G001 Bracket 1 51712001 17 4PP4122 1383P001 Gear Z24 2 51238901 18 4PP4122 1226P001 Gear Z87 Z60 1 51239101 19 2PP4122 1389P...

Page 616: ...stem RMCS refers to setting registration data and conducting the following types of maintenance operations from a remote location Refer to Figure 1 The purpose of this system is to speed up customer s...

Page 617: ...Page 348 Service Guide OKIFAX 5250 5400 Chapter G RMCS System 1 Notes to Users 1 1 Identifying the Packaged Contents 1 2 Required Devices 1 3 Connectable Peripheral Equipment...

Page 618: ...rvice Guide OKIFAX 5250 5400 Chapter G RMCS System 1 1 Identifying the Packaged Contents Before using this system the packaged contents with the package list Contact your dealer if any component from...

Page 619: ...o way local channel Operating system PC DOS Ver 3 1 or later This system requires ANSI SYS for screen control Confirm the following line in the CONIG SYS file if not found please add to write the comm...

Page 620: ...00 Chapter G RMCS System 1 3 Connectable Peripheral Equipment Printer Mouse Microsoft mouse or equivalent Telephone To use a mouse a mouse driver program is required This program is automatically inco...

Page 621: ...1 Mounting 2 1 1 Mounting Procedures 2 2 Installation 2 2 1 Registrering the RMCS Basic System 2 2 2 Registering the Facsimile Model No 2 2 3 Deleting the Facsimile Model No 2 2 4 Updating the Passwor...

Page 622: ...0 5400 Chapter G RMCS System 2 1 Mounting Conceptual connection diagram of RMCS with other devices This system RMCS Model 20 is used FX050 series Facsimile with PC I F Conceptual connection diagram of...

Page 623: ...plug of the IBM PC AT from the system plug socket 2 Disconnect the power plug of FX050 series Facsimile too and set PC I F board to the Facsimile 3 Connect RS232C cable between COM Port of the IBM PC...

Page 624: ...ayed enter commands as shown below to activate the installation program C A Enter A INST Enter Select processing with the numeric keypad 1 Register the RMCS basic system 2 Register the facsimile model...

Page 625: ...rent from that of updating First the flow of new registration is described below 1 Enter the drive No used to register the system 2 Enter the directory name with up to eight alphanumeric characters 3...

Page 626: ...only press Enter OFF corresponds to 1 and ON to 0 Therefore set the dip switches to 11000000 in the following case 5 When the setting is correct enter Y The system is now registered If not correct ent...

Page 627: ...e system is found register the model number 2 Insert a disk corresponding to the model into drive A then press any key The model number is displayed and the confirmation screen is displayed 3 When the...

Page 628: ...hen the system is found a list of registered models is displayed 2 Select the model number to be deleted This number is then displayed in inverse video The confirmation screen is also displayed 3 When...

Page 629: ...played on the screen You are prompted to enter a new password 2 Register a new password of up to 15 alphanumeric characters excluding Press Enter to display the confirmation screen 3 When the setting...

Page 630: ...ry in which the system is registered When the system is found the dip switch setting is displayed For the detail of setting refer to 2 2 1 of Appendix G After setting is completed press Enter Then the...

Page 631: ...1 Service Guide OKIFAX 5250 5400 Chapter G RMCS System 2 2 6 Deleting the RMCS Basic System 1 When to delete enter Y then whole RMCS system is deleted When not to delete enter N The installation menu...

Page 632: ...ter G RMCS System 3 RMCS Basic Operation 3 1 Activating and Terminating the system 3 1 1 To Activate 3 1 2 Entering the ID and Password 3 2 TEL Directory 3 2 1 To Terminate 3 2 2 Selecting Destination...

Page 633: ...5250 5400 Chapter G RMCS System 3 1 Activating and Terminating the system Before Activating the system If the facsimile terminal is equipped with a selector function to enable or unable remote mainten...

Page 634: ...ide OKIFAX 5250 5400 Chapter G RMCS System 3 1 1 To Activate Enter the following command in the PC DOS command input state C RMCS After completing the necessary preparations the ID and password entry...

Page 635: ...s part of the system operator history Enter up to 50 alphanumeric characters except for the ID Enter the password registered at installation When the correct password is entered TEL Directory menu scr...

Page 636: ...m 3 2 TEL Directory You can select such services items registration and deletion of information related to users There are two ways to specify an item select by using the up arrow key and the down arr...

Page 637: ...ter G RMCS System 3 2 1 To Terminate To terminate this system select Terminate on TEL directory menu screen or the main menu screen to return to PC DOS Caution After terminating remote management rest...

Page 638: ...ing Destination Drive Now select the destination drive Press Space to change the drive name Select Terminate to stop processing and return to the TEL directory menu screen Select Execute to copy user...

Page 639: ...the up arrow and down arrow keys then press Enter or enter the number before each item Environment Setting details are described later Submenus can also be specified by using the function keys Press...

Page 640: ...n port setting Select communication port to connect the IBM PC AT and PC I F Frame size setting Select a frame size for each frame to transfer TEL number data and program language default data during...

Page 641: ...X 5250 5400 Chapter G RMCS System 4 Message Modifying Tool 4 1 Activating the Program 4 2 Modifying Message 4 2 1 File Selection 4 3 Saving Message 4 3 1 Confirmation 4 4 Loading Message 4 4 1 Confirm...

Page 642: ...he hard drive insert the RMCS system disk into drive A When C _ is displayed enter the following commands to activate the program C A Enter A SCRNED Enter Then the screen for menu selection is display...

Page 643: ...screen then the following screen is displayed Enter the key No indicated on the left of the model to modify Then the screen for file selection is displayed Press Page Up or Page Down to scroll the scr...

Page 644: ...modify Select the position with up arrow key down arrow key and keys and press the Enter key then the position is selected Press Page Up or Page Down to scroll the screen back to the previous page or...

Page 645: ...n the menu screen then the following screen is displayed Enter the key number indicated on the left side of the model with messages to store Press Page Up or Page Down to scroll the screen back to the...

Page 646: ...with the Space key Since it is assumed that data is stored on a floppy disk you can select drive A or drive B When setup is ready insert a formatted floppy into the drive and press the Enter key then...

Page 647: ...AD on the menu screen the following screen is displayed Enter the key number indicated on the left side of the model with a message reset Press Page Up or Page Down to scroll the screen back to the pr...

Page 648: ...he Space key It is assumed that a message is loaded on the machine from the floppy disk you can select drive A or drive B When setup is ready insert a floppy disk which stores the message into the dri...

Page 649: ...ng message files are available RMCS SYSTEM err_mess tx Error message text rms_env tx Operator ID text sc OOOO p tx Printing screen text u_print tx Printing text rms_env2 tx New user text online tx tx...

Page 650: ...al information obtained after product release Firmware updates part number changes and procedural changes are some of the subjects covered by these bulletins The Product Service Bulletins are distribu...

Page 651: ...to OKIDATA s product and service information The Business Partner Exchange BPX provides Dealer Only information to OKIDATA s sales and service providers The information covers ALL OKIDATA products an...

Page 652: ...n Recommended Spare Parts Lists RSPL s contain the current part numbers descriptions and pricing information for OKIDATA product spare parts The Recommended Spare Parts Lists are distributed via OKIDA...

Page 653: ...DATA s Web Site provides easy access to OKIDATA s product and service information The Business Partner Exchange BPX provides Dealer Only information to OKIDATA s sales and service providers The inform...

Reviews: