background image

Summary of Contents for 1996 Silhouette

Page 1: ......

Page 2: ......

Page 3: ...ditions ProblemsontheRoad 5 1 This section tells you what to do if you have a problem whiledriving such as a flat tire or overheated engine etc Here the manual tells you how to keep your Oldsmobile running properly andlooking good This section tells you when to perform vehicle maintenanceand what fluids and lubricants to use This section tells you how to contact Oldsmobile for assistance and how t...

Page 4: ...e without further notice Please keep this manual in your Oldsmobile so it will be there if you ever need it when you re on the road If you sell thevehicle please leave this manual in it so the new owner canuse it Litho in U S A Part No 22639051 B First Edition WE SUPPORT VOLUNTARY TECHNICIAN CERTIFICATIONTHROUGH National Institutefor A U T O M O T I V E S E R V I C E EXCELLENCE We support voluntar...

Page 5: ...he manual and the page numberwhere you ll find it Safety Warnings andSymbols You will find a number of safety cautions in this book We use a box and the word CAUTION to tell you about thingsthat could hurtyou if youwere to ignore the warning These mean there is something that could hurt you or other people I In the caution area we tell you what the hazard is Then we tell you what to do to help avo...

Page 6: ...mething that can damage your vehicle Many times this damage would not be covered by your warranty and it could be costly But the notice will tell youwhat to doto help avoid the damage When you read other manuals you might see CAUTION and NOTICE warnings in different colors or in different words You ll also see warning labels onyour vehicle They use the same words CAUTION orNOTICE ...

Page 7: ...our passengers whenever your vehicle is driven DOOR LOCK UNLOCK SEAT BELTS These symbols have to do with your lights SIGNALS TURN FOG LAMPS 0 These symbols are on some of your controls WINDSHIELD WIPER WINDOW DEFOGGER VENTILATING FAN These symbols are used on warning and indicator lights ENGINE k COOLANT t6 TEMP CHARGING I 1 BAllERY SYSTEM BRAKE 0 h COOLANT ENGINEOIL e PRESSURE ANTI LOCK BRAKES He...

Page 8: ...NOTES vi ...

Page 9: ... Seat Controls This section tells you about the seats how to adjust them take them out put them back in and fold them up and down Driver s 4 Way Manual Seat A CAUTION You can lose control of the vehicle if you try to adjust a manual driver s seat while the vehicle is moving The suddenmovement could startle and confuse you or make you push a pedal when you don t wantto Adjust the driver s seat only...

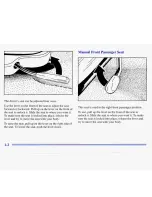
Page 10: ...urethe seat is locked into place release the lever and try to move the seat with your body To raise the seat pull up on the lever on the right side of the seat To lower the seat push the lever down This seat is used in the right front passenger position To use pull up the lever on the front of the seat to unlock it Slide the seat to where you want it To make sure the seat is locked into place rele...

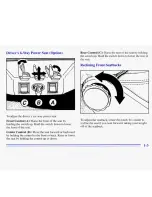
Page 11: ...ise the rear of the seat by holding the switch up Hold the switch down to lower the rear of the seat Reclining Front Seatbacks To adjust the seatback rotatethis knob It is easier to recline the seat if you lean forward taking your weight off of the seatback Center Control B Move the seat forward or backward by holding the control to the front or back Raise or lower the seat by holding the control ...

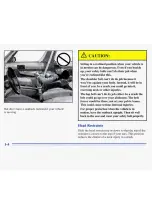
Page 12: ...ld go into it receiving neckor otherinjuries The lapbelt can t do itsjob either In a crash the belt could go up over your abdomen The belt forces would be there notat your pelvic bones This could cause serious internal injuries For proper protection when the vehicle is in motion have the seatback upright Then sit well back in theseat and wear your safety belt properly Head Restraints Slide the hea...

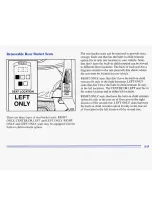
Page 13: ...ack of each seat has a diagram similar to the one pictured that shows where the seat must be located in your vehicle RIGHT ONLY seats that don t have the built in child restraint fit only in the right locations LEFT ONLY seats thatdon t have the built in child restraint fitonly in the left locations The CENTER OR LEFT seat fits in the centerlocation and in either left location RIGHT ONLY seats tha...

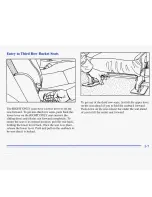
Page 14: ...the upper lever to fold the seatback forward Push down on the rear release bar located behind the seat and tilt the entire seat and seatback forward To release the RIGHT ONLY seat from this position Pull the entire seat back to the upright position Lift the upper lever to lift the seatback up again Push and pull on the seat and the seatback to be sure both are locked into position To release the C...

Page 15: ...rward completely To return the seat to itsnormal position pull the seatback holding the lower lever back Once the seat is in place release thelower lever Push and pull on the seatback to be sure that it is locked To get outof the third row seats first lift the upper lever on the seat ahead of you to fold the seatback forward Push down on the rear release bar under the seat ahead of you to tilt the...

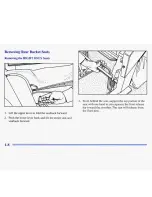
Page 16: ...er to fold the seatback forward 2 Push the lower lever back and tilt the entire seat and seatback forward 3 From behind the seat supportthe top portion of the seat with one hand as you squeeze the front release bar toward the crossbar The seat will release from the floor pins ...

Page 17: ...Removing LEFT ONLY and CENTER OR LEFT Seats 2 Push down on the rear release bar located behind the seat and tilt the entireseat forward 1 Lift the upper lever to fold the seatback forward 1 9 ...

Page 18: ...ns tingRear Seats Each rear seatlocation has two sets of floor pins Seats equipped with thebuilt in child restraint option must be secured in the rear set of floor pins Seats that don t have the built in child restraint can be secured in either set of floor pins Move the position of these seats up or back to provide a little more room behind or in front of a seat 1 10 ...

Page 19: ...o place the seats in backward becausethey won t latch that way A seat thatisn t locked into place properly can move around in a collision or sudden stop People in the vehicle could be injured Be sure to lock the seat into place properly when installing it 1 With the entire seat tilted forward place the front hooks of the seat latch onto the front floor pins 2 Firmly press the rear hooks onto the r...

Page 20: ...ne This part of the manual tells you how to use safety belts properly It also tells you some things you should not do with safety belts And it explains the SupplementalRestraint System SRS or airbag system U Don t let anyone ride where he or she can t wear a safety belt properly If you are in a crash and you re not wearing a safety belt your injuries can be much worse You can hit things inside the...

Page 21: ...es aremild and some crashescan be so serious that even buckled up a person wouldn t survive But most crashes are in between In many of them people who buckleup can surviveand sometimes walk away Without belts they could havebeen badly hurt or killed After more than 25 years of safety belts in vehicles the facts are clear In most crashes bucklingup does matter a lot Why Safety Belts Work When you r...

Page 22: ...Put someone on it Get it up to speed Then stopthe vehicle The rider doesn t stop 1 14 ...

Page 23: ...The person keeps going until stopped by something In a real vehicle it could be the windshield or the instrument panel 1 15 ...

Page 24: ... if you re upside down And your chance of being conscious during and after an accident so you cun unbuckle and get out is much greater if you are belted If my vehicle has air bags why should I have to wear safety belts A Air bags are in many vehicles today and will be in most of them in the future But they are supplemental systems only so they work with safety belts not instead of them Every air b...

Page 25: ...ty Belts Properly Adults This part is only for people of adult size Be aware that thereare special things to know about safety belts and children And thereare different rulesfor smaller children and babies If a child will be riding in your Oldsmobile see thepart of this manual called Children Follow those rules for everyone s protection First you llwant to know which restraint systems your vehicle...

Page 26: ...e slowly 4 Push the latch plate into the buckle until it clicks If the belt stops before it reaches the buckle tilt the latch plate and keep pulling until you can buckle the belt Pull up on the latch plate to make sureit is secure If the belt isn t long enough see Safety Belt Extender at the end of this section Make surethe release button on the buckle is positioned so you would be able to unbuckl...

Page 27: ...ong pelvic bones And you d be less likely to slide under the lap belt If you slid under it the belt would apply force atyour abdomen This could cause serious or even fatal injuries The shoulder belt should go over the shoulder and across the chest These parts of the body are best able totake belt restraining forces The safety belt locks if there s a sudden stop or crash or if you pull the belt ver...

Page 28: ...y hurt if your shoulder belt is too loose In a crash you would move forward too much which could increase injury The shoulder belt should fit against yourbody A The shoulder belt is too loose It won t give nearly as much protection this way 1 20 ...

Page 29: ...You can be seriously injured if your beltis buckled in thewrong place like this In a crash the belt would go up over your abdomen The belt forces would bethere not at the pelvic bones This could cause serious internal injuries Always buckle your belt into the buckle nearestyou ...

Page 30: ... an armrestlike this The belt would bemuch too high In a crash you can slide under thebelt The belt force would then be applied at the abdomen not at the pelvic bones and thatcould cause serious or fatalinjuries Be sure the belt goes under the armrests A The belt is over an armrest 1 22 ...

Page 31: ...TION You can be seriously injured if you wear the shoulder belt under your arm In a crash your body would movetoo far forward which would increase the chanceof head and neck injury Also the belt would apply too much force to the ribs which aren t as strong as shoulder bones You could also severely injure internal organs like your liver or spleen ...

Page 32: ...You can be seriously injured by a twisted belt In a crash you wouldn t have the full width of the belt to spread impactforces If a beltis twisted make it straight so it can work properly or ask your retailer to fix it A The belt is twisted across the body 1 24 ...

Page 33: ...erelyinjured or killed in a crash if you aren t wearing your safety belt even if you have an air bag Wearing your safety belt during a crash helps reduce your chance of hitting things inside the vehicle or being ejectedfrom it The air bag is only a supplemental restraint That is it works with safety belts but doesn t replace them Air bags are designed to work only in moderate to severe crashes whe...

Page 34: ... Always wear your safety belt even with an air bag and sitas far back as you can while still maintaining control of your vehicle AIR BAG There isan air bag readiness light on the instrument panel which shows the words AIR BAG I The system checks the air bag s electrical system for malfunctions The light tells you if there is an electrical problem See Air Bag Readiness Light in the Index for more i...

Page 35: ...g wheel A LAUTION Don t put anything on or attachanything to the steering wheel Also don t put anything such as pets or objects between the driver and the steering wheel If something is between an occupant and an air bag it could affect the performance of the air bag or worse it could cause injury 1 27 ...

Page 36: ...cle damage is only one indication of this What makes an air bag inflate In a frontal or near frontal impact of sufficient severity the air bag sensing system detects that the vehicle is suddenly stopping as a result of a crash The sensing system triggers a chemical reaction of the sodium azide sealed in the inflator The reaction produces nitrogen gas which inflates the air bag The inflator air bag...

Page 37: ...breathing problems but can t get out of the vehicle after an air bag inflates then get fresh air by opening a window or door The air bag is designed to inflate only once After it inflates you ll need some new parts for your air bag system If you don t get them the air bagsystem won t be there tohelp protect you in another crash A new system will include the air bag module and possibly other parts ...

Page 38: ... vehicle and the air bag system To purchase a service manual see Service and Owner Publications in the Index For upto two minutes after the ignition key is turned off and the battery is disconnected an air bag canstill inflate during improperservice You can be injured if you are close to an airbag when it inflates Avoid wires wrapped with yellow tape or yellow connectors They are probably part of ...

Page 39: ...lt See Driver Position earlier in this section Rear Seat Passengers It s very important for rearseat passengers to buckle up Accident statistics show that unbelted people in the rear seat are hurt more often in crashes than those who are wearing safety belts Rear passengerswho aren t safety belted can be thrown out of the vehicle in a crash And they can strike others in the vehicle who arewearing ...

Page 40: ...cross Pull up on the latch plate to make sure it is secure You very quickly If this let the go back If the belt is not long enough see Safety Belt slightly to unlock it Thenpull the belt across you more slowly Extender at the end of this section Make sure the release button on the buckle is positioned so you would 2 Push the latch plate into the buckle until it clicks be able to unbuckle the safet...

Page 41: ...hips just touching the thighs In a crash this applies force to the strong pelvic bones And you dbe less likely to slideunder the lap belt If you slidunder it the belt would apply force at yourabdomen This could cause serious or even fatal injuries The shoulderbelt should go over the shoulder and across the chest These parts of the body are best able to takebelt restraining forces 1 33 ...

Page 42: ...e beltvery quickly out of the retractor You ca de seriously hurt if your shoulder belt is too loose In a crash you would move forward too much which could increase injury The shoulder belt should fit against your body To unlatch the belt just push the button on the buckle 1 34 ...

Page 43: ...actor 1 Pick up the latch plate and in a single motion pull the belt across you Don t let it get twisted 2 Push the latch plate into the buckle until it clicks If the belt stops before it reaches the buckle let it go back into the retractor all the way and start again Pull up on the latch plate to make sure it is secure 3 Feed the lap belt into the retractor to tighten it 1 35 ...

Page 44: ...N LOCATlON SHOWN SEE OWNERS MANUALFOR WccxB DDo ADDmONAL INFORMATION I The centerposition bucket seat is a CENTER OR LEFT type seat Because it is the only bucket seat with a lap belt and has a buckle on only one side there are certain places a CENTER OR LEFT type bucket seat should and should not be used See Seats in the Index If the CENTER OR LEFT bucket seat is used on the left side of the vehic...

Page 45: ...always be restrained in a child or infant restraint The instructions for the restraint will say whether itis the right type and size for yourchild A very young child s hip bones are so small that a regular belt might not stay low on the hips as it should Instead the belt will likely beover the child s abdomen In a crash the belt would apply force right on the child s abdomen which could cause seri...

Page 46: ...until a crash During a crash a baby will becomeso heavy youcan t hold it For example in a crash CAUTION Continued at only 25 mph 40 km h a 12 1b 5 5 kg baby will suddenly become a 2404b 110 kg force on your arms The baby would bealmost impossible to hold Secure the baby in an infantrestraint ...

Page 47: ...e Pad F Seat Belt Latch Plates G Buckle H Seat Belt Buckle Release Button Red I Shoulder Harness Release Strap Black J Shoulder Harness Adjustment Strap Grey K Child Restraint Cushion This child restraint system conforms to all applicable Federal MotorVehicle Safety Standards This child restraint is designed for use only by children who weigh between 20 and 40 pounds 9 and 18 kg and whose height i...

Page 48: ...r seat can be used by children over 40 lbs 18 kg or whose shouldersare above the shoulder belt anchorages of the five point child restraint harness The vehicle s lap shoulder belt is used instead of the five point harness system If a child s shoulders are higher than the shoulder belt anchorages while using the five point harness the spine could be injured in a collision ...

Page 49: ...le your built in child restraint needs to be periodically checked and may need to haveparts replaced after a crash See Checking Your Restraint Systems and Replacing Seat and Restraint System PartsAfter a Crash in the Index Using the Built in Child Restraint I 1 Pull the child head restraint release strap and raise the head restraint until you hear the latch click The child head restraint is not fo...

Page 50: ...ion 3 Before placing the child in the child restraint add slack to the shoulder harness Pull the black shoulder harness release strap firmly At the same time pull both shoulder harness straps through the slots in the seatback as shown ...

Page 51: ...ulder Insert both seat belt latch plates into the buckle and pull up on them to make sure they are firmly latched Be sure that the seat belt buckle is free of foreign objects that may prevent you from properly latching the latch plates If an object is in the opening see your Oldmobile retailer for servicebefore using the child restraint ...

Page 52: ...e snug against the child s shoulders 8 To release the child from the harness separate the halves of the shoulder harness clip Then push the red release button in the buckle Move the shoulder harness straps to the side and remove the child If you expect that the child will sleep while riding a U shaped pillow that supports the child s chin may be helpful in providing additional comfort Such devices...

Page 53: ...ner strip Also be sure the shoulder harness adjustment strap grey is folded up in the seat This will allow the cushionto fold completely into the seatback Raise the cushion 2 Unlatch the child head restraint by pulling the release strap Lower the head restraint and press it firmly into the seatback until you hear the latch click ...

Page 54: ... strap and raise the head restraint until you hear the latch click A CAUTION The child head restraint is not for use by an adult Useof this head restraint by an adult could result in injury in the event of a collision 2 Lower the child restraint cushion 1 46 ...

Page 55: ...ind the removablepad The pad is held in place by fastener strips 4 Place the child on the cushion and fasten the vehicle lap shoulder belt around the child 5 To release the child from the vehicle lap shoulder belt push the red button on the buckle 1 47 ...

Page 56: ... they are restrainedin the rear rather than the front seat We at General Motors therefore recommend that you put your child restraint in the rear seat unless the child is an infant and you re the only adult in the vehicle In that case you might want to secure the restraint in the firont seat whereyou can keep an eye on the baby Wherever you install it be sure to secure the child restraint properly...

Page 57: ...ourself your retailer can tell you how to do it Once you have the top strap anchored you llbe ready to secure the child restraint itself You ll be using the lap shoulder belt See the earlier part about the top strap if the child restraint has one 1 Put the restraint on the seat Follow the instructions for the child restraint 2 Secure the child in the child restraint as the instructions say 3 Pick ...

Page 58: ...needed If the shoulder belt goes in front of the child s face or neck put it behind the child restraint 4 Buckle the belt Make sure the release button is positioned so you would be able to unbuckle the safety belt quickly if youever had to 1 50 ...

Page 59: ...ve the child restraint just unbuckle the vehicle s safety belt and let it go back all the way The safety belt will move freely again and be ready to work for an adult or larger child passenger You ll be using the lap belt See the earlier part about the top strap if the child restraint has one 1 Put the restraint on the seat Follow the instructions for the child restraint 2 Secure the child in the ...

Page 60: ...le holding it out run the belt through or around the child restraint The child restraint instructions will show you how 5 Buckle the belt Make sure the release button is positioned so you would be able to unbuckle the safety belt quickly if youever had to 1 52 ...

Page 61: ...raint just unbuckle the vehicle s safety belt and let it go back all theway The safetybelt will move freely again and be ready towork for an adult or larger child passenger Children who have outgrown child restraints should wear thevehicle s safety belts If youhave the choice a child should sit next to a window so the child can wear a lap shoulder belt and get the additional restraint a shoulder b...

Page 62: ...ed together and seriouslyinjured A belt must be used by only oneperson at a time What if a child is wearing a lap shoulder belt but the child is so small that theshoulder belt is very closeto the child s face or neck A Move the child toward the center of the vehicle but be sure that the shoulder belt still is on the child s shoulder so that in a crash the child s upper body would have the restrain...

Page 63: ...in thisway in a crash thechild might slide under the belt The belt s force would then be applied right on the child s abdomen That could cause serious or fatal injuries Wherever the child sits the lap portion of the belt should be worn low and snug on the hips just touching the child s thighs This applies belt force to the child s pelvic bones in a crash 1 55 ...

Page 64: ...an rip apart under impact forces If a belt is torn or frayed get a new one right away If your vehicle has the built in child restraint torn or frayed harness straps can rip apart under impact forces just like torn or frayed safety belts can They may not protect a child in a crash If a harness strap is torn or frayed get a new harness right away Also look for any opened or broken air bag covers and...

Page 65: ...el and the warning systems that tell you if everything is working properly and what to do if you have a problem Keys A c LL I Leaving young children in a vehicle with the ignition key is dangerous for many reasons A child or others could be badly injured or even killed They could operate power windows or other controls or even make the vehicle move Don t leave the keys in a vehicle with young chil...

Page 66: ...lls your retailer or a qualified locksmithhow to make extra keys Keep the plugs ina safe place If you lose your keys you llbe able to have new ones made easily using these plugs NOTICE Your Oldsmobile has a number of new features that can help prevent theft But you can have a lot of trouble getting into your vehicle if you ever lock your keys inside You may even have to damage your vehicle to get ...

Page 67: ...Front Doors Pay attentionwhen you open or close these doors from the outside Stay clear of the upper rear corner to avoid hitting your head ...

Page 68: ...ous You increase the chance of being thrown outof the vehicle in a crash if the doors aren t locked Wear safety belts properly lock your doors and you will befar better off whenever youdrive yourvehicle To lock the door from the inside slide the locking lever rearward To unlock the door slide the locking lever forward There areseveral ways to lock and unlock your vehicle From the outside use your ...

Page 69: ... close it If you have the optional RemoteLock Control system this feature will be replaced by a different lock delay system See Remote Lock Control later in this section With power locks when the doors are locked the inside as well as the outside door latch release cannot open the doors This safety feature prevents a door from being accidentally opened from the insideby moving the handle To overri...

Page 70: ...eature you can still lock or unlock the doors at any time either manually or with the power door lock switches To override the lock delay feature press the front of the power door lock switch the unlock position while the shift lever is in PARK P If you have the Remote Lock Control system there are three additional ways you can disable the lock delay feature see Remote Lock Control laterin this se...

Page 71: ...dto PARK P press the lock symbol on your remote transmitter once All doors will lock indicating that this mode has been successfully programmed Disengage the Automatic Door Locks System To disengage the automatic door locks system press the lock symbol on your remote transmitter once all doors will lock Press the lock symbol again All doors will lock again indicating that this mode has been succes...

Page 72: ...mful interference and 2 This device must accept any interference received including interference that may cause undesired operation Should interference to this system occur try this Check to determine if battery replacement is necessary See the instructionson battery replacement Check the distance You may be too far from your vehicle This product has a maximum range blocking the signal Check the l...

Page 73: ...Power Door Locks earlier in this section For the lock delay feature to work the ignition and the interior lamps control located to the left of the instrument panel cluster must be off If you wish to lock the doors with the interior lamps on press the lock symbol or the rear of either power door lock switch twice If any door is open when you press the lock symbol or the rear of either power door lo...

Page 74: ... another transmitter from unlocking your vehicle If a transmitter is lost or stolen a replacement can be purchased through your retailer Remember to bring any remaining transmitters with you when you go to your retailer When the retailer matches the replacement transmitter to your vehicle any remaining transmitters must also be matched Once the new transmitter is coded the lost transmitter will no...

Page 75: ...rol system When you open the driver s door by itself or in combination with any passenger door orthe liftgate the interior lamps will come on and then gradually dim to off 10seconds after the last door is closed If the driver s door has not been opened the interior lamps will immediately dim to off When you press the unlock symbol on your remote transmitter the lamps inside your vehicle will go on...

Page 76: ...f the latch release out and then toward the rear If you slide the door all the way back it will latch in the open position To move the door forward you must first pull the inside or outside latch release out and then forward or the door will remain latched in the open position ...

Page 77: ...the sliding door lock has a delay feature See Power Door Locks or Automatic Door Locks in the Index Power Sliding Door Option A With this option you can open and close the sliding door with switches inside your vehicle If you have the optional Remote Lock Control system you can also operate the sliding door with your remote transmitter See Remote Lock Control in the Index ...

Page 78: ...e switch to OFF When your vehicle goes through an automatic car wash be sure the power sliding door ON OFF switch is in the OFFposition To open or close the sliding door press and release one of two PWR DOOR switches There is one mounted on the wall just infront of the sliding door the other is the rear most switch on the sideof the overhead console If you have thecompact overhead console this swi...

Page 79: ...ght that the sliding door is not completely closed I A C TION I If you shift the transaxle out of PARK P and accelerate before the power sliding door latches closed the doormay reverse to the open position A child or others could fall out of the vehicle and be injured Always make sure the power sliding door is closed and latched beforeyou drive away If anything obstructs the power sliding door whi...

Page 80: ...tside latch release and let go the door will open fully and remain latched in the open position To manually open the power sliding door when the ON OFF switch is in the OFF position pull the inside or outside latch release and slide the door all the way back to the latch position If your vehicle is facing downward on a steep grade 20 or more the door may notstay open and could slam shut possibly i...

Page 81: ... all because of the following conditions 0 A low voltage or dead battery 0 Disconnecting the battery 0 If the GUAGES TAIL or TURN B U fuse is removed or blown See Fuse Panel in the Index for more information about your fuse panel If any of these conditions occur the power sliding door will need tobe reset To do this follow the directions listed here It will be easier if you read through them once ...

Page 82: ...the security lock by pressing the PWR DOOR switch when the power sliding door ON OFFswitch is in the ON position See Power Sliding Door earlier in this section The security lock lever is located on the inside of the sliding door near the rear edge of the door To access the lever open the sliding door Use the security lock label on the rear edge of the door as a guide Reach around the inside rear c...

Page 83: ...iding doorwhen the security lock is on unlock the sliding door from the inside and open the door from the outslde If you have the optional power sliding door slide the power sliding door ON OFF switch to the ON position Press either PWR DOOR switch You should let adults and older childrenknow how the security lock works and how to cancel the lock If you don t adults or older childrenwho ride in th...

Page 84: ...n come into yourvehicle You can t see or smell CO It can cause unconsciousness and even death If you must drivewith theliftgate open orif electrical wiring or other cable connections must pass through the seal between the body and the liftgate 0 Make sure all windows are shut lhrn the fan on your heatingor cooling system to its highest speed with the setting on BI LEV Bi Level or UPPER That will f...

Page 85: ... it can makeit impossible to steal However thereare ways you can help Key in the Ignition If you leave your vehicle with the keys inside it s an easy target forjoy riders or professional thieves so don t do it When you park your Oldsmobile and open the driver s door you ll heara chime reminding you to remove your key from the ignition and takeit with you Always do this Your steering wheel will be ...

Page 86: ...ehicle Break In NOTICE Your modern Oldsmobiledoesn t needan elaborate break in But it will perform better in the long run if you followthese guidelines Don t drive at any one speed fast or slow for the first 500miles 804km Don t make full throttle starts 200 miles 322km orso During thistime your new brake linings aren t yet broken in Hard stops with newlinings can mean premature wear and earlierre...

Page 87: ...essories Use this position if your vehicle must be pushed or towed but never try to push start your vehicle A warning chime will sound if you open the driver s door when the ignition is OFF and the key is in the ignition RUN D An on position to which the switch returns after you start your engine and release the switch The switch stays in the RUN position when the engine is running But even when t...

Page 88: ...k the key or the ignition switch Ifnone of this works then yourvehicle needs service Starting Your Engine Move your shift lever to PARK P or NEUTRAL N Your engine won t start in any other position that s a safety feature To restart when you re already moving use NEUTRAL N only I NOTICE Don t try to shiftto PARK P if your Oldsmobile is moving If you do you could damage the transaxle Shift to PARK P...

Page 89: ...or cool down Then push your acceleratorpedal all the way to the floor Hold itthere Then hold the key in START This clearsthe extra gasolinefrom the engine When the engine starts let go of the key and the accelerator pedal If the engine still doesn t start wait another 15seconds and repeat this step NOTICE Your engine is designed to work with the electronics in your vehicle If you add electrical pa...

Page 90: ...3 Plug it into a normal grounded 110 volt AC outlet I tPlugging the cord into an ungrounded outlet could cause an electrical shock Also the wrong kind of extension cord could overheat and cause a fire You could beseriously injured Plug the cord into a properly grounded three prong 110 volt AC outlet If the cordwon t reach use a heavy duty three prong extension cord rated for at least 15amps 4 Afte...

Page 91: ...ular brakes before you can shift from PARK P when the ignition key is in the RUN position As you step on the brake pedal while in PARK P you may hear a click from the solenoid of the BTSI This Automatic Transaxle Operation ensures that the BTSI is operating properly If you cannot shift out of PARK P ease pressure on PARK P as you maintain brake application Then move the shift lever into the gear y...

Page 92: ...ift lever to PARK P See ShiftingInto PARK P in the Index If you re pulling a trailer see Towinga Trailer in the Index REVERSE R Use this gear to back up NOTICE Shifting to REVERSE R while your vehicle is movingforward could damage your transaxle Shift to REVERSE R only after your vehicle is stopped I To rock your vehicle back and forth to get out of snow ice or sand without damaging your transaxle...

Page 93: ...ATIC OVERDRIVE This position is for normal driving If you need more power for passing and you re Going less than about 35 mph 56km h push your accelerator pedal about halfway down Going about 35 mph 56kmh or more push the You ll shift down to the next gear and have more power THIRD D This position is also used for normal driving but it offers more power and lower fuel economy than AUTOMATIC OVERDR...

Page 94: ...xle Use THIRD D or AUTOMATIC OVERDRIVE 0 as much as possible Don t shift into SECOND 2 unless you are going slowerthan 65 mph 105 km h or you can damage your engine NOTICE If your vehicle seemsto start up rather slowly or if it seems not to shift gears asyou gofaster something may bewrong with a transaxle system sensor If you drive very far that way your vehicle can be damaged So if this happens h...

Page 95: ...k in very deep sand or mud or were up against asolid object You could damage your transaxle Also if you stop when goinguphill don t hold your vehicle there with onlythe accelerator pedal This could overheat and damage the transaxle Use your brakes or shift into PARK P to hold your vehicle in position on a hill To set the parking brake hold the regular brake pedal down with your right foot and push...

Page 96: ...em and you could also damage other parts of your vehicle If you are towinga trailer andare parking on anyhill see Towing a Trailer in the Index That section shows what to do first to keep the trailer from moving Shifting Into PARK P It can be dangerous toget out of your vehicle if the shiftlever is not fully in PARK P with the parking brakefirmly set Your vehiclecan roll If you have left the engin...

Page 97: ... like this Pull the lever toward you Move the lever up as far as it will go 3 Move the ignition key to the LOCK position 4 Remove the key and take it with you If you can leave your vehicle with the ignition key in your hand yourvehicle is in PARK P ...

Page 98: ...ever away from PARK P without first pulling it toward you If you can itmeans that the shift lever wasn t fully locked into PARK P 1 If you are parking on a hill and you don t shift your transaxle into PARK P properly the weight of the vehicle may put too much force onthe parking pawl in the transaxle You may find it difficult to pull the shift lever out of PARK P This is called torque lock To prev...

Page 99: ...f PARK P ease pressure on the shift lever push the shift lever all the way into PARK P as you maintain brake application Then move the shift lever into the gear you want If you ever hold the brake pedal down but still can t shift out of PARK P try this 1 Turn the key to the OFF position 2 Apply and hold the brake until the end of Step 4 3 Shift to NEUTRAL N 4 Startthe vehicle and then shiftto the ...

Page 100: ...ly with all the windows downto 0 Have your vehicle fixed immediately or different modified improperly blow out any CO and Running Your Engine While You re Parked It s better not to park with the enginerunning But if you ever have to here are some things to know Idling the engine withthe air system controloff could allowdangerous exhaustinto your vehicle see the earlier Caution under Engine Exhaust...

Page 101: ...vehicle can move suddenly You or others could be injured To be sure your vehicle won t move even when you re on fairly level ground always set yourparking brake and move the shiftlever to PARK P Follow the proper steps to be sure your vehicle won t move See Shifting Into PARK P in the Index If you re pulling a trailer see Towing a Trailer in the Index Windows Manual Windows Use the manual crank to...

Page 102: ...down feature fully press the rear of the switch then release Thewindow will lower completely To stop the window from lowering all the way press the front of the switch To raise the window press and hold the front of the switch atches The rear of the side windows swings open To open pull the latch forward to release it then swing the window outward Press the center of the latch to secure the window...

Page 103: ...veyour legs more room when you exit and enter the vehicle To tilt the wheel hold the steering wheel and pull the lever Move the steering wheel to a comfortable level then release the lever to lock the wheel in place The lever on the left side of the steering column includes your 0 Turn Signal and Lane Change Indicator 0 Headlamp HighLow Beam Changer 0 Cruise Control Option 2 39 ...

Page 104: ...just stay on a signal bulb may be burned out and other drivers won t see your turn signal If a bulb is burned out replace itto help avoid an accident If the arrows don t go on at all when you signal a turn check for burned out bulbs and check the fuse see Fuses and Circuit Breakers inthe Index If you have a trailer towing option with added wiring for the trailer lamps a different turn signal flash...

Page 105: ...e cycle the higher the position the faster the cycle For steady wiper cycles Slide the upper control either to the LO or HI position depending on the wiper speed you want To turn the wipersoff Slide the upper control to the OFF position Remember that damaged wiper blades may prevent you from seeing well enough to drive safely To avoid damage be sure to clear ice and snow from the wiper blades befo...

Page 106: ... wipers had already been on In that case the wipers will resume the wiper speed you had selected earlier 2 42 Driving without washer fluid can be dangerous A bad mud splash canblock your vision You could hit another vehicle or go off the road Check your washer fluid level often In freezing weather don t use your washer until the windshieldis warmed Otherwise the washer fluid can form ice on the wi...

Page 107: ... rear wiper slide the lower control to the rear window wiper symbol To wash the rear window slide thelower control to the rear window washer symbol and hold it The washer and wiper will operate only as long as the controlis held in that position Then the wiper will return to DELAY ...

Page 108: ...at a steady speed So don t use your cruisecontrol on winding roads or inheavy traffic slippery roads On such roads fast changes in tire tractioncan cause needless wheel spinning and you could losecontrol Don t use cruise control on slippery roads Cruise control can be dangerouson Setting Cruise Control A CAUTION 9 If you leave your cruise control switch on when you re not using cruise you might hi...

Page 109: ...ME I I OFF ON RESUME ACCEL CRUISE b 1 Move the cruise control switch to ON 2 Get up to the speed you want 3 Push in the SET button at the end of the lever and release it 4 Take your foot off the accelerator pedal ...

Page 110: ...f the lever then release the button and the accelerator pedal You ll now cruise at the higher speed Move the cruise switch from ON to WA Hold it there untilyou get up to the speedyou want and then release the switch To increase your speed in very small amounts move the switch to WA for less thanhalf a second and then release it Each time you do this your vehicle will go about 1mph 1 6kmh faster Su...

Page 111: ...lls How well your cruise controlwill work on hills depends upon your speed load and the steepness of the hills When goingup steep hills you may have to step onthe accelerator pedal to maintain your speed When going downhill you may have to brake or shift to a lower gear to keep your speed down Of course applying the brake takes you out of cruise control Many drivers findthis to be too much trouble...

Page 112: ...itch to turn off the lamps g Push this switch to turn on the headlamps together with Parking Lamps Sidemarker Lamps 0 Taillamps 0 Instrument Panel Lights Pull the switch to turn off the lamps Lamps On Reminder If you turn the ignition key to the OFF or LOCK position while leaving the lamps on you will hear a warning chime 2 48 ...

Page 113: ...ent panel lights down to decrease the brightness Slide the control all the way down to turn them off Interior Lights Control Slide the upper lights control located to the left of the instrument panel cluster all the way up to turn on the interior lamps Interior Lights Override Switch This switch is located to the left of the cigarette lighter in the center instrument panel console It has two posit...

Page 114: ...ehicle will go on then gradually dim to off after about 40 seconds unless a door or the liftgate is opened When you turn on the ignition the interior lamps will immediately dim to off Overhead Console Reading Lamps To turn on or off either reading lamp press the switch next to it To adjust the aim of the lamps pivot the lamps in their sockets Center Dome Lamp This lamp is located in the center of ...

Page 115: ...strument panel console to OFF To turn on either reading lamp press the switch next to it Rear CompartmentLamps There are two lamps in the liftgate to light the rear cargo area Thesewill come on each time you open the liftgate unless the interior lights override switch is in the OFF position The rear dome lamp alsohas two reading lamps 2 51 ...

Page 116: ... siderearview mirror or to the right to select the passenger s side rearview mirror Then use the To reduce glare from lights behind you pull the lever toward you to the night position To return the mirror to the day position push the lever away from you control to adjust each mirror so that you can just see the side of your vehicle when you are sitting in a comfortable driving position 2 52 ...

Page 117: ...ents Extended Overhead Console Option A convex mirror can make things like other vehicles look farther away than they really are If you cut too sharply into the right lane you couldhit a vehicle on your right Check your inside mirror or glance over your shoulder before changing lanes The front overhead console has the front reading lamps two switches for the optional power sliding door storage com...

Page 118: ...ece of self sticking Velcro 2 Peel the protective backing from the Velcro and press it firmly to the back of your garage door opener 3 To make sure the button on your garage door opener is centered above the button on the compartment door use the intersecting lines on the Velcro inside the compartment as a guide Center the control button of your garage door opener over the point where the lines in...

Page 119: ... on your garage door opener when pressed 5 Add one peg at a time until your garage door opener operates with the compartment door closed when you press the button Temperature and Compass Display The outsideair temperature and the compass are displayed at the front of the overhead console The control switchesare located to the left of the display 2 55 ...

Page 120: ...pear briefly on the display It s there to caution the driver that road conditions may be icy and that appropriate precautions should be taken Compass Calibration The compass is self calibrating so it does not need to be manually set However when your Silhouette is new the compass may function erratically If it does CAL calibration will appear on the display To correct the problem drive in a comple...

Page 121: ...storage compartmentin the overhead console press the release button Pull the compartment down to the full open position Glove Box Your vehicle has a glovebox below the dash To open the glove box pinch the latch release The fusepanel is located inside the glove box door See Fuses and Circuit Breakers in the Index Compact Overhead Console The overhead console includes two reading lamps and a storage...

Page 122: ...htray with your fingertips and pull up and out in a rocking motion To use the lighter push it in all the way and let go When it s ready it will pop back by itself NOTICE Don t holda cigarette lighterin with your hand while it is heating If you do it won t beable to back away from the heating element when it s ready That can makeit overheat damaging the lighter and the heatingelement I NOTICE Don t...

Page 123: ...l have a flip upcover To remove the ashtray for cleaning pull up on the snuffer or thecover I At the base of the center instrument panel console is a storage bin Use the doorkey to lock and unlock it To open the bin pinch the latch release Inside the storage bin you will find a coinholder To remove the bin for cleaning open it part way then pull out and slightly up To clean theinside of the bin va...

Page 124: ...ch side of the bin at the bottom into the hinge guides one at each side of the console opening at the base then close the bin If the hinge pins are placed properly in the guides the bin will close easily To open the storage compartment push in the latch release then lift the lid ...

Page 125: ...corner Attach the lower loops to the hooks onthe floor The sideof the convenience net closest to the front of the vehicle is higher than the side closestto the liftgate Once you ve loaded items into the net stretch the higher side of the net up and over the top of the load to hold it firmly in place The conveniencenet has a maximum capacity of 100Ibs 45 kg It is not designed to hold larger heavier...

Page 126: ...rivers to have a collision and of course damage your vehicle You may beable tocarry something like this inside But never carry something longer or wider than the luggage carrier on top of your vehicle If you have the optional luggage carrier you can load things on top of your vehicle The luggage carrier has slats and side rails attached to the roof as well as sliding crossrails and places to use f...

Page 127: ...u can Then slide the crossrailup against therear of the load to help keep it from moving You can thentie it down Don t exceed the maximum vehicle capacity when loading your Oldsmobile For more information on vehicle capacity and loading see Loading Your Vehicle in the Index To prevent damage or loss of cargo as you re driving check now and then to make surethe luggage carrier and cargo arestill se...

Page 128: ...fter repositioning the crossrails be sure to tighten the release knobs by turning them clockwise locking the crossrails in place Reposition the tie downs by turning them counterclockwise then slide them along the side rail Turn the tie downs clockwise to tighten them in place Tiedowns may be removed and used in the adjustable tapped plates in the crossrails You may also use these tapped plates to ...

Page 129: ...ess the tapped plates on the crossbar After the tiedowns or other equipmentis removed be sure to reinstall the bumper strips n Visors Visor Vanity Mirrors To block out glare you can swing down the visors You can also remove them from the center mount and swing them to the side Lift the cover to expose the vanity mirror ...

Page 130: ...NOTICE Air Inflator System Option Your vehicle may be equipped with an air inflator It will be located in the rear compartment onthe driver s side along with the accessory power outlet With it you can inflate things like air mattresses and basketballs and you can also use it to bring your tires up to the proper pressure To open slide the latch down and remove the cover I When using the accessory p...

Page 131: ...ish to inflate Attach the other end of the hose to the outlet Press the ON switch The ON switch will work even with the ignition off If the air inflator does not operate a fuse may be blown or installed incorrectly See your retailer for service Your air inflator will automatically shut off after about 10minutes To reset it press the ON switch again Don t run your air inflator for longerthan 30 min...

Page 132: ...The Instrument Panel Your Information System 2 68 ...

Page 133: ...low 1 Side Vents 2 Lamp Controls 3 Turn Signal MultifunctionLever 4 Tilt Steering Wheel Lever 5 Instrument Cluster 6 Gearshift Lever 7 Wiper Washer Controls 8 Center Vents 9 StorageCompartment 10 Side Vents 11 Circuit Breaker Relay Panel 12 GloveBox Fuse Panel 13 Audio System 14 Rear Fan Controls 15 CupholdedAshtray 16 Locking Storage Bin 17 Lighter 18 Interior Lights Override Switch 19 ClimateCon...

Page 134: ...Instrument Panel Cluster Your cluster includes indicator warning lights and gages that are explained on the following pages 2 70 ...

Page 135: ...meone has probably tried to turn it back so the numbers may not be true You may wonder what happens if your vehicle needs a new odometer installed If the new one can be set to the mileage total of the old odometer then that will be done If it can t then it s set at zero and a label must be put on the driver s door to show the old mileage reading when the new odometer was installed Tachometer c 8 T...

Page 136: ... or is a problem with one of your vehicle s functions As you will see in the details on the next few pages some warning lights come on briefly when you start the engine justto let you know they re working If you are familiar with this section you should not be alarmed when this happens Gages can indicate when there may be or is a problem with one of your vehicle s functions Often gages and warning...

Page 137: ...he air bag s electrical system for malfunctions The light tells you if there is an electrical problem The system check includes the air bag sensors the air bag module the wiring and the diagnostic module For more information on the air bag system see Air Bag in the Index AIR BAG You will see this light flash for afew seconds when you turn your ignition to RUN or START Then the light should go out ...

Page 138: ...parts If one part isn t working the other part can still work and stop you For good braking though you need both parts working well If the warning light comes on there could be a brake problem Have your brake system inspected right away IBRAKEI This light should come on briefly when you turn the ignition key to RUN If it doesn t come on then have it fixed so it will be ready to warn you if there s...

Page 139: ...ll stay on for three seconds That s normal When the ignition is on the brake system warning light will also comeon when you set your parking brake The light will stay on if your parking brake doesn t release fully If it stays on after your parking brake is fully released it means you have a brake problem If the light flashes when you re driving you don t have anti lock brakes and there could be a ...

Page 140: ...e driving your Oldsmobile needs service If the light is on but not flashing and the regular brake system warning light isn t on you still have brakes but you don t have anti lock brakes The anti lock brake system warning light should come on briefly when you turn the ignition key to RUN If the light doesn t come on then have it fixed so it will be ready to warn you if there is a problem Engine Coo...

Page 141: ...ex and have your vehicle servicedas soon as possible This system is called OBD I1 On Board Diagnostics Second Generation and is intended to assure that emissions areat acceptable levels for the life of the vehicle helping to produce a cleaner environment TheSERVICE ENGINE SOON light comes onto indicate that there is a problem and service is required Malfunctions often will be indicated by the syst...

Page 142: ...nter diagnosis and service is required Light On Steady An emission control system malfunction has been detected on your vehicle Retailer orqualified service center diagnosis and service may be required The following may prevent more serious damageto your vehicle 0 Reduce vehicle speed 0 Avoid hard accelerations 0 Avoid steep uphill grades 0 If towing a trailer reduce the amount of cargo being haul...

Page 143: ...an detect this Adding fuel should correctthis condition Make sureto install the fuel cap properly It will take a few drivingtrips to turn the light off Have you recently changed brands of fuel If so be sure to fuel your vehicle with quality fuel see Fuel in the Index Poor fuel quality will cause your engine not to run as efficiently as designed You may notice this as stalling after start up stalli...

Page 144: ... s oil level may be dangerously low or there may be another problem causing low oil pressure Driving your vehicle with low oil pressure can cause extensive engine damage Have your vehicle serviced immediately A CA T1ON I Don t keep drivingif the oil pressure islow If you do your engine can become so hot that it catches fire You or others could be burned Check youroil as soon as possible and have y...

Page 145: ...d You need to check the oil level right away Driving your vehicle without enough oil can cause extensive engine damage Have your vehicle serviced immediately If you shift the transaxle out of PARK P while the sliding door is open or in the process of closing and the power sliding door ON OFF switch is in the ON position the power sliding door warning light will flash and a buzzer will sound Thisis...

Page 146: ...door is closed and latchedbefore you drive away If you manually slam the power sliding door shut when the ignition is on the powersliding door warning light may come on and stay on To turn the light off reopen and close the door using either power door switch or manually open and close the door again more slowly Lift Aja Wan 19Light 1 The liftgate ajar symbol on your instrument panel will come oni...

Page 147: ...how aproblem with your fuel gage 0 At the service station the gas pump shuts off before 0 It takes a little more or less fuel to fill up than the the gage reads FULL F gage indicated For example thegage may have indicated the tank was half full but it actually took a little more or less than half the tank s capacity to fill the tank The gage moves a little when you turn a corner brake or speed up ...

Page 148: ... the ignition but the engine is not running to show you it is working If it doesn t come onas you start your vehicle have it fixed right away When there is between 3 gallons 11 L and 0 5 gallon 1 8 L of fuel left in the tank the warning light next to the fuel symbol will go on ...

Page 149: ...e Comfort Controls This section tells you how to make your air system work for you Your comfort control systemuses ozone friendly R 134arefrigerant With these systemsyou can control the heating cooling and ventilation in your Oldsmobile Your vehicle also has a flow through ventilation system described later in this section rii BI LEV I Your vehicle s heater and air conditioner will work best if yo...

Page 150: ... your vehicle UPPER This setting directs outside air through the instrument panel outlets Adjust the temperature of the air with the temperature control lever BI LEV The BI LEV setting directs outside air into your vehicle in two ways Cooler air is directed toward your upper body through the front instrument panel outlets while warmed air is directed through the heater ducts at your feet At times ...

Page 151: ... UPPER BI LEV or LOWER To turn off the air conditioner compressor in these settings press A C again the indicator light will go off Each timeyou turn on the ignition the air conditioner will default to the setting you had selected before last turning off the ignition When the air conditioner compressor is on you may sometimes notice slight changes in your vehicle s engine performance and power Thi...

Page 152: ...ough ventilation system supplies outside air into the vehicle when it is moving Outside air will also enter the vehicle when the heater or the air conditioning fan is running Your vehicle has airoutlets that allow you to adjust the direction and amount of airflow inside the vehicle Push the outlet up or down to direct airflow to your preference Increase or reducethe amount of airflow by opening an...

Page 153: ... the front passengers uncomfortable adjust the front fanspeed first then adjust the temperature setting To turn off the rear fan slide the control to OFF Ventilation Tips Keep the hood and front air inlet freeof ice snow or any other obstruction such as leaves This will allow the heater and defroster to work much better reducing the chance of fogging the inside of your windows When you enter a veh...

Page 154: ... RECIRC mode or if you press A C when the system is in the UPPER or BI LEV modes cooled air will be directed to the rear of the vehicle through the overhead and third row air conditioning outlets If you select A C in the LOWER mode cooled air will be directed through the rear floor vent see Rear Air Vents later in this section unless the temperature control lever is set approximately 30 percent fr...

Page 155: ... between and under the front seats freeof objects that could obstructairflow to the rear Rear Fan Master Control The master control for the rear fan is located below the audio system To maintain a comfortable temperature in the rear area select the force of air you want from LO to HI by sliding the control to the desired setting To transfer control of the rear fan to the rear control switch slidet...

Page 156: ...er control Defogging and Defrosting To rapidly defrost the windshield slide the temperature control lever all the way to WARM and press DEE Adjust the fan to the highest speed To keep the windshield clear and bring in heated air through the heater ducts press DEFOG When the temperature outside is abovefreezing the air conditioner compressor will run in these settings to help remove moisture from t...

Page 157: ...audiosystem has been designed to operate easily and give years of listening pleasure You will get the most enjoyment outof it if you acquaint yourself with it first Find out what your Delco system can do and how to operate all its controls to be sure you re getting the most out of the advanced engineering that went into it Setting the Clock for AM FM Stereo Press SET Within five seconds press and ...

Page 158: ...en AM and seven FM 1 Find the station you want by using TUNE orSEEK 2 Press SET The SET indicator will appear briefly on the display Playing the Radio VOL Turn this knob clockwise to increase volume Turn it counterclockwise to decrease volume RECALL Press this button briefly to recall the station being played or to display the clock 3 Press one of the four pushbuttons within five seconds Whenever ...

Page 159: ...nd down to decreaseit If a station is weak or noisy slide the lever down to reduce the noise Adjusting the Speakers BAL This controlbehind the upper knob adjusts the sound between the right and left speakers FADE This controlbehind the lower knob adjusts the sound between your front and rear speakers AM FM Stereo with Cassette Tape Player Option Playing the Radio VOL BAL PROG RCL This knob turns t...

Page 160: ...eset on each band by pressing two adjoining buttons at the same time Just 1 Tune in the desired station 2 Press SET The SET indicator will appear on 3 Press any two adjoining pushbuttons at the same the display time within five seconds 4 The sound will mute When it returns release the buttons Whenever you press the same buttons the station you set will return PSCAN Press both SEEK arrows and PSCAN...

Page 161: ...h side of the tape is playing Note that cassette tape adapter kits for portable compact disc players will not work in your cassette player These adapters will cause an error message to show on the display and the adapter cassettewill be ejected FORWARD Press the right arrow torapidly advance the tape It will continue forwardinguntil you press the right arrow again lightly REVERSE Press the left ar...

Page 162: ...TUNE Turn the lower knob to choose radio stations SEEK Press the right arrow to go to the next higher station and the left arrow to go to the next lower station SCAN Press the SCAN button to listen to stations for a few seconds The radio will go to a station stop for a few seconds then go on to the next station Press the SCAN button again to stop scanning PUSHBUTTONS The fivenumbered pushbuttons l...

Page 163: ...row is lit selections listed on the bottom side of the cassette are playing When the up arrow is lit selections listed on the top side of the cassette are playing Thetape player automatically begins playing the other side when it reaches the end of the tape This system has automatic Dolby Noise Reduction to reduce background noise on tapes encoded with Dolby NR Dolby Noise Reduction is manufacture...

Page 164: ... the station that was tuned in when you inserted a tape Pressing the button again will allow the tape to resume playing EJECT Press this button to remove the tape The radio will play EJECT may be activated with either the ignition or the radio off AM FM Stereo with CompactDisc Player Option Playing the Radio POWER Press this button to turn the system on or off when the ignition is on VOL Press the...

Page 165: ...ar on the display while scanning PUSHBUTTONS The five pushbuttons let you return to your previously played stations You can set up to 10 stations five AMand five FM 1 2 3 4 S Find the station you want by using TUNE Press SET The SET indicator will appear briefly on the display Press one of the five pushbuttons within five seconds Whenever you press that button the station you set will return Repea...

Page 166: ...laying The track number will also appear on the display when you change volume orwhen a new track starts playing Y Y COMP Press this button to make loud and soft passages more nearly equal in volume Press COMP again to resume normal play REV Press and hold this button to return to a previously played passage rapidly Release the button to play the passage FF Press and hold this button to fast forwa...

Page 167: ...ur vehicle loses battery power for any reason you must enter your secret codeagain before the system will turn on the TI tterrent 1 ature The instructions which follow explain how to enter your secret codeto activate the Delco Loc I1 system It is recommended that you read through all of the steps before starting the procedure NOTE If you allow more than 15 seconds to elapse between any steps the r...

Page 168: ...use no more than 15seconds between steps 2 Press SET and 000 will appear on the display 3 Press SCAN to makethe first digit of your code appear 4 Press SEEK to make the second and third digits of your code appear 5 Press AM FM and 000 will appear on the display again Now you are ready to enter the last three digits of your code 6 Press SCAN to make the fourth digit of your code appear 7 Press SEEK...

Page 169: ... three digits of your code 8 Enter the last three digits of your code Thedisplay will show the numbers as entered 9 Press AM FM after you have confirmed that the code matches the secret code you have written down The display will show indicating that the radio is no longer secured If the code entered is incorrect SEC will appear on the display The radio will remain secured until the correct code i...

Page 170: ...FM MUTE Press this button to silence the system Press it again to turn on the sound This buttonmay be used when listening to the radio a cassette tapeor a compact disc SEEK Press this button to tune to a higher or lower radio station The sound will be muted while seeking When playing a cassette tape or compact disc press SEEK to hear the next selection TUNE Press the up arrow to tune to a higher r...

Page 171: ...l can be loud and harmful to your hearing Take precautions by adjusting the volumecontrol on your radio to a safe sound level before your hearing adapts to it To help avoid hearing loss or damage 0 Adjust the volume control tothe lowest setting 0 Increase volume slowly until you hear comfortably and clearly I NOTICE Before youadd anysound equipmentto your vehicle like a tape player CB radio mobile...

Page 172: ...ive cleaning cassette with pads which scrub the tape head as the hubs of the cleaner cassette turn A scrubbing action cleaning cassette is available through your Oldsmobile retailer You may also choose a non scrubbing action wet type cleaner which uses a cassette with a fabricbelt to clean the tape head It may not clean as thoroughly as the scrubbing type cleaner Cassettes are subject to wear and ...

Page 173: ...CE Don t mount anything to your roof or headliner such as an antenna or a luggage carrier If you puncture the roof or headliner you could damage or destroy your integrated roof antenna Have any work of this type doneby your retailer If you want to add a mobile phone or two way radio to your vehicle there are special precautions you ll need to take because of your integrated roof antenna See Adding...

Page 174: ...NOTES ...

Page 175: ...dex Defensive driving really means be ready for anything On city streets rural roads or freeways it means always expect the unexpected Assume that pedestrians or otherdrivers are going to be careless and make mistakes Anticipate what they might do Be ready for their mistakes Rear end collisions are aboutthe most preventable of accidents Yet they are common Allow enough following distance It s the ...

Page 176: ...hol In most cases these deaths are the result of someone who was drinking and driving In recent years some 18 000 annual motor vehicle related deaths have been associated with the use of alcohol with more than 300 000 people injured Many adults by some estimates nearly half the adult population choose never to drink alcohol so they never drive after drinking For persons under 21 it s against the l...

Page 177: ...me other countries it s even lower The BAC limit for all commercial drivers in the United States is 0 04 percent The BAC will be over 0 10percent after three to six drinks in one hour Of course as we ve seen it depends on how much alcohol is in the drinks and how quickly the person drinks them But the ability to drive is affected well below a BAC of 0 10 percent Research shows that the driving ski...

Page 178: ...ohol in a person s system can make crash injuries worse especially injuries to the brain spinal cord or heart This means that when anyone who has been drinking driver or passenger is in a crash that person s chance of being killed or permanently disabled is higher than if the person had not been drinking Drinking and then drivingis very dangerous Your reflexes perceptions attentiveness and judgmen...

Page 179: ...me Then you have to bring up your foot and do it That s reaction time Average reaction time is about 3 4 of a second But that s only an average It might be less with one driver and as long as two or three seconds or more with another Age physical condition alertness coordination and eyesight all play a part So do alcohol drugs and frustration But even in 3 4 of a second a vehicle moving at 60 mph ...

Page 180: ...e power brake assist But you will use it when you brake Once the power assist is used up it may take longer to stop and the brake pedal will be harder to push Anti Lock Brakes Your vehicle has anti lock brakes ABS ABS is an advanced electronic braking system that will help prevent a braking skid When you start your engine orwhen you begin to drive away your anti lock brake system will check itself...

Page 181: ...Suddenly an animaljumps outin front of you You slam on the brakes Here s what happens with ABS A computer senses that wheels are slowing down If one of the wheels is about to stop rolling the computer will separately work the brakes at each front wheel and at the rear wheels You can steeraround the obstacle while braking hard As you brake your computer keeps receiving updates on wheel speed and co...

Page 182: ...er Steering If you lose power steering assist because the engine stops or the system is not functioning you can steer but it will take much more effort Steering Tips Driving on Curves It s important to take curves at a reasonable speed A lot of the driver lost control accidents mentioned on the news happen on curves Here s why Experienced driver or beginner each of us is subject to the same laws o...

Page 183: ... to adjust your speedso you can drive through the curve Maintain a reasonable steady speed Wait to accelerate until you are outof the curve and then accelerate gently into thestraightaway Steering in Emergencies There aretimes when steering can be more effective than braking For example you come over a hill and find atruck stopped in your lane or a car suddenly pulls out fromnowhere or achild dart...

Page 184: ... defensive driving at all times and wear safety belts properly Off Road Recovery You may find sometime that your right wheels have dropped off the edge of a road onto the shoulder while you re driving SLOW DOWN edge of paved surface If the level of the shoulder is only slightly below the pavement recovery should be fairly easy Ease off the accelerator and then if there is nothing inthe way steer s...

Page 185: ...tes it s all right to pass providing the road ahead isclear Never cross a solid line on yourside of the laneor a double solid line even if the road seems emptyof approaching trafic Do not get too close to the vehicle you want to pass while you re awaiting an opportunity For one thing following too closely reduces your area of vision especially if you re followinga larger vehicle Also you won t hav...

Page 186: ...ght Loss of Control Let s review what driving experts say about what happens when the three control systems brakes steering and acceleration don t have enough friction where the tires meet the road to do what the driver has asked In any emergency don t give up Keep trying to steer and constantly seek an escape route or area of less danger Skidding In a skid a driver can lose control of the vehicle...

Page 187: ...trol more limited While driving on a surface with reduced traction try your best to avoid sudden steering acceleration or braking including enginebraking by shifting to a lower gear Any sudden changes could causethe tires to slide You may not realize the surface is slippery until your vehicle is skidding Learn to recognize warning clues such as enough water ice orpacked snow on the road to make a ...

Page 188: ... night They may cut down on glare from headlamps but they also make a lot of things invisible You can be temporarily blinded by approaching headlamps It can take a second or two or even several seconds for your eyes to readjust to the dark When you are faced with severe glare as from a driver who doesn t lower the high beams or avehicle with misaimed headlamps slow down a little Avoid staring dire...

Page 189: ...t wet suddenly when your reflexes are tuned for driving on dry pavement The heavier the rain the harder it is to see Even if your windshield wiper blades are ingood shape a heavy rain can makeit harder to seeroad signs and traffic signals pavement markings the edge of the road and even people walking It s wise to keepyour wiping equipment in good shape and keep your windshield washer tank filled w...

Page 190: ... Try to avoid puddles But if you can t try to slow down before you hit them Wet brakes can cause accidents They won t work well in a quick stop and may cause pulling to one side You could lose control of the vehicle After driving through a large puddle of water or a car wash apply your brake pedal lightly until your brakes work normally ...

Page 191: ...ard and fast rule about hydroplaning The best adviceis to slow down when it is raining Driving Through Deep Standing Water NOTICE If youdrive too quickly through deep puddles or standing water water can come in through your engine sair intake and badly damage your engine Never drive through water that is slightly lower than the underbody of your vehicle If you can t avoid deep puddles or standing ...

Page 192: ... a city map and plan your trip into an unknown part of the city just as you would for a cross country trip Try to use the freeways that rim and crisscross most large cities You ll save time and energy See the next part Freeway Driving Treat a green light as a warning signal A traffic light is there because the corner is busy enough to need it When a light turns green and just before you start to m...

Page 193: ... gap at close to the prevailing speed Switchon your turn signal check your mirrors and glance over your shoulder as often as necessary Try to blend smoothly with the traffic flow Once you are on the freeway adjust your speed to the posted limit or to the prevailing rate if it s slower Stay in the right lane unless you want to pass Before changing lanes check your mirrors Then use your turn signal ...

Page 194: ...before starting out Of course you ll find experienced and able service experts in Oldsmobile retail facilities all across North America They ll be ready andwilling to help if you need it Here are some things you can check before a trip 0 0 0 0 0 0 0 Windshield Welsher Fluid Is the reservoir full Are all windows clean inside and outside WiperBlades Are they in good shape Fuel Engine Oil Other Fluid...

Page 195: ...e the road in less than a second and you could crashand be injured What can you do about highway hypnosis First be aware that it can happen Then here are some tips 0 Make sure your vehicle is well ventilated with a comfortably coolinterior 0 Keep your eyes moving Scan the road ahead and to the sides Check your mirrors and your instruments frequently Hill and Mountain Roads Driving on steep hills o...

Page 196: ... or with the ignition off is dangerous Yourbrakes will have to do all the workof slowing down They could get so hot that they wouldn t work well You would then have poor braking or even none going down a hill You could crash Always have your engine running and your vehicle in gear whenyou go downhill Knowhowto go uphill Youmaywant to shift down to a lower gear The lower gears help cool your engine...

Page 197: ... reflective warning triangles And if you will be driving under severe conditions include a small bag of sand a piece of old carpet or a couple of burlap bags to help provide traction Be sure you properly secure these items in your vehicle Driving on Snow or Ice Most of the time those places where your tires meet the road probably have good traction However if there is snow or ice between your tire...

Page 198: ...i lock brakes improve your vehicle s stability when you make a hard stop ona slippery road Even though you have an anti lock braking system you ll want to begin stopping sooner than you would on dry pavement See Anti Lock in the Index 0 Allow greater following distance on any slippery road Watch for slippery spots The road might be fine until you hit a spot that s covered with ice On an otherwise ...

Page 199: ...ou re Caught in a Blizz Tie a red cloth to your vehicle to alert police that you ve been stopped by the snow passengers safe 0 Turn on your hazard flashers You can run the engine to keep warm but be careful ...

Page 200: ...you must This saves fuel When you run the engine make itgo a little faster than just idle That is push the accelerator slightly This uses less fuel forthe heat that you get and it keeps the battery charged You will need a well charged battery to restart the vehicle and possibly for signaling later on with your headlamps Let the heater run for awhile Then shut the engineoff and close the window alm...

Page 201: ... inflation pressures needed to obtain the gross weight capacity of your vehicle This is called the GVWR Gross Vehicle WeightRating The GVWR includes the weight of the vehicle all occupants fuel and cargo The CertificatiodTirelabel also tells you the maximum weights for the front and rear axles called the Cross Axle Weight Rating GAWR To find out the actual loads on your frontand rear axles you nee...

Page 202: ...l you can have your vehicle serviced see Fuses and Circuit Breakers inthe Index Using heavier suspension components to get added durability might not change yourweight ratings Ask your retailer to help you load your vehicle the right way I 6 AUTIONr Do not load your vehicle any heavier than the GVWR or either themaximum front or rear GAWR If you do parts on your vehicle can break or it can change ...

Page 203: ...d to If you don t use the correct equipment and drive properly you can lose control when youpull a trailer For example if the trailer is too heavy the brakes may not work well or even at all You and your passengers could be seriously injured Pull a trailer only if you have followed all the steps in this section Ask your Oldsmobile retailer for advice and information about towing a trailer with you...

Page 204: ...istance increasing the pulling requirements If You Do Decide To Pull A Trailer If you do here are some important points 0 0 0 0 0 There aremany different laws including speed limit restrictions having to dowith trailering Make sure your rig will belegal not only where you live but also where you ll be driving A good source for this information can be state orprovincial police Consider using a sway...

Page 205: ...h up to six occupants orup to 3 000 lbs 1 360 kg with up to twooccupants But even that can be too heavy It depends onhow you plan to use your rig For example speed altitude road grades outside temperature and how much your vehicle is used to pull a trailer are allimportant And it can alsodepend on any special equipmentthat you have on your vehicle You can ask your retailer for ourtrailering inform...

Page 206: ... hitch the trailer tongue A should weigh 10percent of the total loaded trailer weight B If you re using a weight distributing hitch the trailer tongue A should weigh 12percent of the total loaded trailer weight B After you ve loaded your trailer weigh the trailer and then the tongue separately to see if the weights are proper If they aren t you may be able to get them right simply by moving some i...

Page 207: ...eadly carbon monoxide CO from your exhaust can get into yourvehicle see Carbon Monoxide in the Index Dirt and water can too You should always attach chains between your vehicle and your trailer Cross the safety chains under the tongue of the trailer so that the tongue will not drop to the road if it becomes separated from thehitch Instructions about safety chains may be provided by the hitch manuf...

Page 208: ... experience Before setting out for the open road you ll want to get to know your rig Acquaint yourself with the feel of handling and braking with the added weight of the trailer And always keep in mind that the vehicle you are driving is now a good deal longerand not nearly as responsive as your vehicle is by itself Before you start checkthe trailer hitch and platform and attachments safety chains...

Page 209: ...ning with a trailer make wider turns than normal Do this so your trailer won t strikesoft shoulders curbs road signs trees or other objects Avoid jerky or sudden maneuvers Signal well in advance Turn Signals When Towing a Trailer When you tow a trailer your vehicle has to have extra wiring and a different turn signal flasher included in the optional trailering package The arrowson your instrument ...

Page 210: ...IRD D instead of AUTOMATIC OVERDRIVE or as you need to a lower gear This will minimize heat build up and extend the life of your transaxle You really should not park your vehicle with a trailer attached on a hill If something goes wrong your rig could start to move People can be injured and both your vehicle and the trailer can bedamaged But if you ever have to park your rig on a hill here s how t...

Page 211: ... TrailerTowing Your vehicle will need service more often when you re pulling a trailer See the Maintenance Schedule formore on this Things that are especially important in trailer operation are automatic transaxle fluid don t overfill engine oil belts cooling system and brake adjustment Each of these is covered in this manual and the Index will help you find them quickly If you re trailering it s ...

Page 212: ...NOTES 4 38 ...

Page 213: ...ard Warning Flashers Your hazard warning flashers let you warn others They also let police know you have aproblem Your front and rear turn signal lamps will flash on and off Your hazard warning flashers switch is on the steering column below the ignition switch Press the button in to turn on your flashers 5 1 ...

Page 214: ...tery has run down you may want to use another vehicle and some jumper cables to start your Oldsmobile But please use the following steps listed to do it safely On vehicles equipped with the optional power sliding door a low voltage battery or replacing a battery may cause the system to become inoperative See Power Sliding Door in the Index for more information I NOTICE Ignoring these steps could r...

Page 215: ...cidthat can burnyou They contain gasthat canexplode or ignite They contain enough electricity to burn you NOTICE If you don t follow these stepsexactly some or all of these things can hurt you You could be injured if the vehicles roll Set the parking brake firmly on each vehicle Put an automatic transaxlein PARK P or a manual 1 Check the other vehicle It must have a 12 volt battery with a negative...

Page 216: ...arranty 4 Open the hoods and locate the batteries An electric fan can start up even when the engine is not running and can injure you Keep hands clothing and tools away from any underhood electric n 1 5 Find the positive and negative terminals on each battery Your Oldsmobile has a remote positive jump starting terminal The terminal is in the red box on the same side of the engine compartment as yo...

Page 217: ... it in your eyes or on your skin flush the place with water andget medical help immediately 6 Check that the jumper cables don t have loose or missing insulation If they do you could get a shock The vehicles could be damaged too Before you connect the cables here are some things you should know Positive will go to positive and negative will go to negative or a metal engine part Don t connect posit...

Page 218: ...t go to the dead battery It goes to a heavy unpainted metal part on the engineof the vehicle with the dead battery 10 Attach the cable at least 18inches 45cm away from the dead battery but not near engine parts that move The electrical connection is justas good there but the chance of sparks getting back to the battery is much less 11 Now start the vehicle with the good battery and run the engine ...

Page 219: ... factory new by adding aftermarket items like fog lamps aero skirting or special tires and wheels these instructions and illustrations may not be correct Before you do anything turn on the hazard warning flashers When you call tell the towing service That your vehicle cannot be towed from the front with sling type equipment That your whicle has front wheel drive 0 The make model and year of your v...

Page 220: ...amped in a straight ahead position with a clamping device designed for towing service Do not use the vehicle s steering column lock for this The transaxle should be in NEUTRAL N and the parking brake released A vehicle can fall from a car carrier if it isn t adequately secured This can cause a collision serious personal injury andvehicle damage The vehicle should be tightly secured with chains or ...

Page 221: ...ng a vehicle over rough surfaces could damage avehicle Damagecan occur from vehicle to ground or vehicle to wheel lift equipment To help avoid damage installa towing dolly and raise the vehicle until adequate clearance is obtained between the ground and or wheel lift equipment Do not attachwinch cables or J hooks to suspension components when using car carrier equipment Always use T hooksinserted ...

Page 222: ...es in the slotted holes in the bottom of the frame rails behind the front wheels These slots are to be used when loading and securing to car carrier equipment Attach a separate safety chain around the outboard end of each control arm ...

Page 223: ... chains on both sides in the slotted holes in the frame rails just ahead of the rear wheels lnese slots are to be used when using sling type equipment orwhen loading and securing to car carrier equipment I Position the lower sling crossbardirectly under the rear bumper ...

Page 224: ...Engir Overheating You will find a coolant temperature gage on your Oldsmobile s instrument panel See EngineCoolant Temperature Gage in the Index You also have a low coolant level light on your instrument panel See Low Coolant Light in the Index Steam Is COI d r From Your ine I 5 12 ...

Page 225: ...u keep driving with nocoolant your vehicle can be badly damaged Thecostly repairs would not be covered by your warranty If No Steam Is Coming From Your Engine If you get the overheat warning but see or hear no steam the problem may not be too serious Sometimes the engine can get a littletoo hot when you 0 Climb a long hill on a hot day 0 Stop after high speed driving 0 Idle for long periods in tra...

Page 226: ...ull over stop and park your vehicle right away If there s still no sign of steam you can idle the engine for two orthree minutes while you re parked to see if the warning stops But then if you still have the warning turn 08the engine and get everyone out o f the vehicle until it cools down You may decide not to lift the hood but to get service help right away A Coolant Recovery Tank B Radiator Pre...

Page 227: ...ls away from any underhood electric fan If the coolant insidethe coolant recovery tank is boiling don t do anything elseuntil it cools down The coolant level should be at or abovethe FULL HOT mark If it isn t you may have aleak in the radiator hoses heater hoses radiator water pump or somewhere else in the cooling system 5 15 ...

Page 228: ...service How to Add Coolant to the Coolant Recovery Tank If you haven t found a problem yet but the coolant level isn t at or above the FULL HOT mark add a 501 50 mixture of den72 water preferably distilled and DEX COOL TM orange colored silicate free antifreeze at the coolant recovery tank See Engine Coolant in the Index for more information Adding only plain water to your cooling system can be da...

Page 229: ...Coolant contains ethylene glycol and itwill burn if the engine parts arehot enough Don t spill coolant on a hot engine I I When the coolant in the coolant recovery tank is at or above the FULL HOT mark start your vehicle If the overheat warning continues there s one more thing you can try You can add the proper coolant mix directly to the radiator but be sure the cooling system is cool before you ...

Page 230: ... are underpressure and if you turn the radiator pressure cap even a little they can come out at high speed Neverturn thecap when the cooling system including the radiator pressure cap is hot Waitfor thecooling systemand radiator pressure cap to cool if you ever have to turn the pressurecap ...

Page 231: ...remove the radiator pressure cap when the cooling system including the radiator pressure cap and upper radiator hose is no longer hot Turn the pressure cap slowly counterclockwise until it first stops Don t press down while turning the pressure cap If you hear a hiss wait for that to stop A hiss means there is still some pressure left 5 19 ...

Page 232: ...adiator with the proper mix up to the base of the filler neck 4 Then fill the coolant recovery tank to the FULL HOT mark 5 Put the cap back on the coolant recovery tank but leave the radiator pressure cap off 5 20 ...

Page 233: ... radiator filler neck may be lower If the level is lower add more of the proper mix through the filler neck until the level reaches the base of the filler neck 8 Then replace the pressure cap At any time during this procedure if coolant begins to flow out of the filler neck reinstall the pressure cap Be sure the arrows on the pressure cap line up like this 5 21 ...

Page 234: ...umpy and noisy but you can stillsteer Gently brake to a stop well off the road if possible If a tire goes flat the next part shows how to use your jacking equipment to change a flat tire safely Air Inflator Option Your vehicle may have an air inflator used to bring tires up to the proper pressure See Air Inflator System in the Index for more details Changing a Flat Tire If a tire goes flat avoid f...

Page 235: ...ire and Tools The equipment you ll need is in the storage compartment at the rear of the vehicle on the passenger s side T Open thejack storage compartmentby sliding the latch down and removing the compartment cover 5 23 ...

Page 236: ...folding wrench and shaft from the pouch The compact sparetire is located under the vehicle behind the rear bumper Insert the narrow end of the shaft into the hole above the rear bumper Then attach the folding wrench to the shaft Rotate the folding wrench counterclockwise to lower the compact spare tire until it can bepulled from under the vehicle ...

Page 237: ...Slide the cable retainerthrough the center of the spare then place the compact sparetire near the flat tire 1 1 The tools you ll be using include the jack A folding wrench B and shaft C ...

Page 238: ...h wheel nut is covered with a nylon cap Use the folding wrench to remove the nylon caps from the wheel nuts before you loosen the nuts m I I 2 Loosen the wheel nuts but do not remove them using the folding wrench ...

Page 239: ...ise the jack head a few inches 4 Near each wheel there is a notch in the vehicle s frame Position the jack and raise the jack head until it fits firmly into the notch in the vehicle s frame nearest the flat tire Do not raise the vehicle yet Put the compact spare tirenear you 5 27 ...

Page 240: ...withthe jack improperly positioned will damage thevehicle or may allow the vehicle to fall off the jack Be sure to fit the jack lift head into theproper location before raising your vehicle 1 5 Raise the vehicle by rotating the folding wrench clockwise in the jack Raise the vehicle far enough off the ground so there is enoughroom for the spare tire to fit 6 Remove all the wheel nuts and take off t...

Page 241: ...t from theplaces where the wheel attaches to the vehicle In an emergency you can use a cloth or a paper towel to do this but be sure to use a scraper orwire brush later if you need to to get all the rust or dirt off 8 Replace the wheel nuts with the rounded end of the nuts toward the wheel Tighten each nut by hand until the wheel is held against the hub 7 I A CAUTION Never use oilor grease on stud...

Page 242: ...cross sequence as shown Incorrect wheel nuts orimproperly tightened wheel nuts cancause the wheel to become loose and even come off This could lead to an accident Be sure to use the correctwheel nuts If you have to replace them be sure toget newGM original equipment wheel nuts Stop somewhere as soon as you can and have the nutstightened with a torquewrench to 100 lb ft 140 N m ...

Page 243: ... equipment in the passenger compartment of the vehicle could cause injury In a sudden stop or collision loose equipmentcould strike someone Store allthese in the proper place Lay the flat tire near the rear of the vehicle with the valve stem down Slide the cable retainer through the center of the wheel and raise the flat tire until you hear the hoist mechanism click twice This means that the wheel...

Page 244: ...g the compact spare on your vehicle you should stopas soon as possible and make sure your spare tireis correctly inflated The compact spareis made to perform well at posted speed limits for distances up to 3 000miles 5 000 km so you can finish your trip and have your full size tire repaired or replaced where you want Of course it s best to replace your sparewith a full size tireas soon as you can ...

Page 245: ...ck In Sand Mud Ice or Snow What you don t want to do when your vehicle is stuck is to spin your wheels too fast Themethod known as rocking canhelp you get out when you re stuck but you must use caution A CAUTION If you let your tires spin at high speed they can explode and you or others could beinjured And the transaxleor other partsof the vehicle can overheat That could cause an engine compartmen...

Page 246: ...ur vehicle to get it out First turn your steering wheel left and right That will clear the area around your front wheels Then shift back and forth between REVERSE R and a forward gear spinning the wheels as little as possible Release the accelerator pedal while you shift and press lightly on the accelerator pedal when the transaxle is in gear If that doesn t get you out after a few tries you may n...

Page 247: ...and supported service people We hope you ll want to keep yourGM vehicle all GM Genuine GM parts have one of these marks Delco Doing Your Own Service Work If you want to do some of your own servicework you ll want to getthe proper Oldsmobile Service Manual It tells you much more about how to service your Oldsmobile than this manual can To order the proper service manual see Serviceand Owner Publica...

Page 248: ... you may get a heavy knocking noise when you drive If it s bad enough it can damage your engine If you re using fuel rated at 87 octane or higher and you still hear heavy knocking your engine needs service But don t worry if you hear a littlepinging noise when you re accelerating or driving up a hill That s normal and you don t have to buy a higher octane fuel to get rid of pinging It s the heavy ...

Page 249: ... they comply with the specifications described earlier NOTICE Your vehicle was not designed for fuel that contains methanol Don t use it It can corrode metal partsin your fuel system and also damage plastic and rubber parts That damage wouldn t be covered under your warranty Fuels in Foreign Countries If you plan on driving in another country outside the United States or Canada the proper fuel may...

Page 250: ...ries Don t smoke if you re near gasoline or refueling your vehicle Keep sparks flames and smoking materials away from gasoline The cap is behind a hingeddoor on the driver s side of your vehicle You will notice that on the inside of the hinged door there is a place to hold the gas capwhile you are adding fuel 6 4 ...

Page 251: ...he cap inside the fuel door To take off the cap turn it slowly to the left counterclockwise Be careful not to spill gasoline Clean gasoline from painted surfaces as soon as possible See Cleaning the Outside of Your Oldsmobile in the Index When you put the cap back on turn it to the right until you hear at leastthree clicks Make sure you fully install the cap The diagnostic system can deterrnine if...

Page 252: ...ric fan under the hood can start up and injure you even whenthe engine is not running Keep hands clothing and tools awayfrom any underhood electric fan Hood Release A CAUTION I Things that burncan get on hot engine parts and start a fire These include liquids like gasoline oil coolant brake fluid windshield washer and other fluids and plastic or rubber You or others could beburned Be careful not t...

Page 253: ...he vehicle Next go to the front of the vehicle and pull up on the underhood release Lift the hood The hood prop rod may be hot due to increased engine temperatures under the hood so be careful when handling it Use your hood prop sleevewhen handling the hood prop ...

Page 254: ...Coolant Recovery Tank B Power Steering Fluid Reservoir C Engine OilFill D Engine Oil Dipstick E Transaxle Fluid Dipstick E Brake Master Cylinder G Air Cleaner H Windshield Washer Fluid Reservoir I Battery ...

Page 255: ... the instrument panel comes on it means you need to check your engine oil level right away For more information see LOW OIL Light in the Index You should check your engine oil level regularly this is an added reminder It s a good idea to check your engine oil every time you get fuel In order to get an accurate reading the oil must be warm and the vehicle must be on level ground The engine oil dips...

Page 256: ...e oil is at or below the ADD mark then you ll need to add some oil But you must use the right kind This part explains what kind of oil to use For crankcase capacity see Capacities and Specifications in the Index NOTICE Don t add too much oil If your engine has so much oil that the oil level gets above the cross hatched area that shows the proper operating range your engine could be damaged 6 10 ...

Page 257: ...cates that the oil has been certified by the American Petroleum Institute API Do not use any oil which does not carry this Starburst symbol What Kind of Oil to Use If you change your own oil be sure you use oil that has the Starburst symbol on the front of the oil container If you have your oil changed for you be sure the oil put into your engine is American Petroleum Institute certified for gasol...

Page 258: ...s going to be 0 F 18O C or above These numbers on an oil container show its viscosity or thickness Do not use other viscosity oils such as SAE 2OW 50 NOTICE Use only engine oil with the American Petroleum Institute Certified For Gasoline Engines Starburst symbol Failure to use the recommended oil can result in engine damage not covered by your warranty GM Goodwrench oil meets all the requirements ...

Page 259: ...rst Driving a vehicle with a fully warmed engine under highway conditions causes engine oil to break down slower Whatto Do with Used Oil Did you know thatused engine oil contains certain elements thatmay be unhealthy for your skin and could even cause cancer Don t let used oil stay on your skin for very long Clean your skin and nails with soap and water or a good handcleaner Wash or properly throw...

Page 260: ...intenance Services in the Index A CAUTION cause you or others to be burned The air cleaner not only cleans the air it stopsflame if the engine backfires If it isn t there and the engine backfires you could beburned Don t drive with it off and be careful working on the engine with the air cleaner off NOTICE If the air cleaner is off a backfire can cause a damaging engine fire And dirt can easily ge...

Page 261: ...le fluid level is when the engine oil is changed Change both the fluid and filter every 50 000miles 83 000 krn if the vehicleis mainly dnven under one or more of these conditions In heavy city traffic where the outside temperature regularly reaches90O F 32O C or higher 0 In hilly or mountainous terrain 0 When doing frequent trailer towing Uses such as found in taxi police or delivery service If yo...

Page 262: ...ving 0 When outside temperatures are above90 F At high speed for quite a while In heavy traffic especially in hotweather 0 While pulling a trailer 32 C ___ _ To get the right reading the fluid should be at normal operating temperature which is 180 F to 200 F 82 C to 93 C Get the vehicle warmed up by driving about15miles 24 km when outside temperaturesare above 50 F 10 C If it s colderthan 50 F lO ...

Page 263: ...op design for easier identification Pull out the dipstick and wipe it with a clean rag or paper towel 2 Push it back in all the way wait three seconds and then pull it back out again 3 Check both sides of the dipstick and read the lower level The fluid level must be in the cross hatched area 4 If the fluid level is in the acceptablerange push the dipstick back in all the way 6 17 ...

Page 264: ...your new vehicle warranty 0 After adding fluid recheck the fluid level as described under How to Check When the correct fluid level is obtained push the dipstick back in all the way The cooling system in your vehicle is filled with new DEX COOL TM orange colored silicate free engine coolant This coolant is designed to remain in your vehicle for 5 years or 100 000miles 166 000 km whichever occurs f...

Page 265: ... meets GM Specification 6277M which won t damage aluminum parts Use GM Engine Coolant Supplement sealer GM Part No 3634621 with any complete coolant change If you use this mixture you don t need to add anything else Adding only plain water to yourcoolingsystem can be dangerous Plainwater or some other liquid like alcohol can boil before the proper coolant mix will Your vehicle s coolant warning sy...

Page 266: ...a year have your retailer check your cooling system NOTICE If you use the proper coolant you don thave to add extra inhibitors or additives which claim to improve thesystem These can be harmful Checking Coolant The engine coolant reservoir is located on the passenger s sideof the vehicletowards the middleof the engine compartment When your engine is cold the coolant levelshould be at FULL COLD or ...

Page 267: ... toblow out and burn you badly With the coolant recovery tank you will almost never have to add coolant at the radiator Never turn the radiator pressure cap even a little when the engine and radiator are hot Add coolant mix at the recovery tank but be careful not to spill it I You can be burned if you spill coolant on hot engine parts Coolant contains ethylene glycol and itwill burn if the engine ...

Page 268: ...eplace your radiator pressure cap an AC cap is recommended Thermostat Engine coolant temperature is controlled by a thermostat in the engine coolant system The thermostat stops the flow of coolant through the radiator until the coolant reaches a preset temperature When you replace your thermostat an AC thermostat is recommended Power SteeringFluid The power steering fluid reservoir is located to t...

Page 269: ... When the engine compartmentis hot the level should be at the H mark Whenit s cold the level should be at the C mark If the fluid is at the ADD mark you should add fluid What to Use Refer to the Maintenance Scheduleto determine what kind of fluid to use See Recommended Fluids and Lubricants inthe Index Always use the proper fluid Failure to use the proper fluidcan cause leaks and damage hosesand s...

Page 270: ... s instructions for adding water Don t mixwater with ready to use washer fluid Water can cause the solution to freeze and damage your washer fluid tank and other partsof the washer system Also water doesn t clean as well as washer fluid Fill your washer fluid tank only three quarters full when it s very cold This allows for expansion which could damage the tank if it is completely full Don t use r...

Page 271: ...stem fixed sincea leak means that sooner or later your brakes won t work well or won t work at all So it isn t a good idea to top off your brake fluid Adding brake fluid won t correcta leak If you add fluid when your linings are worn then you ll have too much fluid when you get new brake linings You should add or remove brake fluid as necessary only when work is done on the brake hydraulic system ...

Page 272: ...kesmay not work well or they may not even work at all This could cause a crash Always usethe proper brake fluid NOTICE a 0 Using the wrong fluid can badly damage brake system parts For example just a few drops of mineral based oil such as engine oil inyour brake system can damagebrake system parts so badly that they ll have to be replaced Don t letsomeone put in the wrong kind of fluid If you spil...

Page 273: ...driving conditions or climates may cause a brake squeal when the brakes are first applied or lightly applied This does not mean something is wrong with your brakes Free movementof brake calipers and properly torqued wheel nuts are necessary to help prevent brake pulsation When tires are rotated inspect brake calipers for movement brake pads for wear and evenly torque wheel nuts in the proper seque...

Page 274: ...ne puts in brake linings that are wrong for your vehicle the balance between your front and rear brakes can change for the worse The braking performance you ve come to expect can change in many other ways if someone puts in the wrong replacement brake parts Every new Oldsmobile has a Delco Freedom battery You never have to add water to one of these When it s time for a new battery we recommend a D...

Page 275: ...b see ReplacementBulbs in the Index HalogenBulbs Halogen bulbs have pressurized gas inside and can burstif you drop or scratch the bulb You or others couldbe injured Be sureto read and follow the instructions on the bulb package 1 I Heac 1 Remove the two black knobs 2 Tilt the bulb housingforward 6 29 ...

Page 276: ...ng and the two black knobs Front Parking lbrn Signal Lamps 1 Remove the headlamp assembly as described in Headlamps 2 Remove the lamp socket furthest inboard by pinching the lever and turning counterclockwise 3 After replacing the bulb line up the flangeson the socket withthe slotsin the headlamp capsule 4 Push andturn the socket one sixth of a turn clockwise Front Sidemarker 1 From behind the fro...

Page 277: ...amplens in the liftgate and tighten from the lamp lens clockwise in the lamp lens with screws Back up Lamp 1 2 3 4 5 6 Remove the license plate Unscrew the twobolts and pull the housing away from the tailgate Remove the bulb from the lamp socket Replace with the new bulb and twist the lamp socket clockwise in the lamp assembly Reinstall the entireback up lamp housing and secure with the screws Rep...

Page 278: ...oplar 1 Remove the two screws from the lamp assembly 2 Pull the assembly out and away from the liftgate 3 Remove the bulbs from the lamp socket 4 Reinstall the lamp assembly into the liftgate and secure with the screws 6 32 ...

Page 279: ...h the lever and twist the bulb assembly one sixth of a turn counterclockwise to remove 6 Remove the bulb by pressing in and turning one eighth of a turn counterclockwise 7 Line up the small retainer bumps on the replacement bulb so that the lower bump slides into the deepest slot in the housing Press in and twist the bulb one eighth of a turn clockwise Reposition the bulb assembly in the taillamp ...

Page 280: ...ging procedure not listed in this section contact your Oldsmobile retailer service department Replacement blades for your vehicle are24 inches 61cm in length They come in different types and are removed in different ways Here s how to remove the type with a release clip 1 Pull the windshield wiper arm away from the windshield 2 Lift the release clip with a screwdriverand pull the 3 Push the new wi...

Page 281: ...ld have an air out anda serious accident See Loading Your Vehicle in the Index CAUTION Continued 0 0 0 Underinflated tirespose the same danger as overloadedtires The resulting accident could cause seriousinjury Check all tires frequently to maintain the recommended pressure Tire pressure should be checked when your tiresare cold Overinflated tiresare more likely to be cut puncturedor brokenby a su...

Page 282: ...ding 0 Bad wear 0 Bad handling 0 Bad fuel economy NOTICE Continued NOTICE Continued I If your tireshave too much air overinflation you can get the following 0 Unusual wear 0 Bad handling 0 Rough ride 0 Needless damage from road hazards When to Check Check your tires once a month or more Don t forget your compact spare tire It should be at 60 psi 420 Wa How to Check Use a good quality pocket type g...

Page 283: ...ertificatiodTire label Make certain that all wheel nuts are properly tightened See Wheel Nut Torque in the Index The purpose of regular rotation is to achieTe 1yicsre uniform wear for all tires on the vehicle The first rotation is the most important See Scheduled Maintenance Services in the Index for scheduled rotation intervals Rust or dirton a wheel or on the parts to which it is fastened can ma...

Page 284: ...showing through the tire s rubber 0 The tread or sidewall is cracked cut or snagged deep enough to show cord or fabric The tires installed on your vehicle when it was new had a Tire Performance Criteria Specification TPC Spec number on each tire s sidewall When you get new tires get ones with that same TPC Specnumber That way your vehicle will continue to have tires that are designed to give prope...

Page 285: ...rs of 10 to 12 inches 25 to 30 cm or to some limited productiontires While the tires available on General Motors passenger cars and light trucks may vary with respect to these grades they must also conform to Federal safety requirements and additional General Motors Tire Performance Criteria TPC standards Treadwear The treadwear grade is a comparativerating based on the wear rate of the tire when ...

Page 286: ... Excessive speed underinflation or excessive loading either separately or in combination can cause heat buildup and possible tire failure Wheel Alignment and Tire Balance The wheels on your vehicle were aligned and balanced carefully at the factory to give you the longest tire life and best overall performance In most cases you will not need to have your wheels aligned again However if you notice ...

Page 287: ... which you or others could be injured Always use the correctwheel wheelbolts and wheel nuts for replacement NOTICE The wrong wheel can also cause problems with bearing life brake cooling speedometer or odometer calibration headlamp aim bumper height vehicle ground clearanceand tire or tire chain clearance to the body and chassis See Changing a Flat Tire in the Index for more information Used Repla...

Page 288: ...ome are toxic Others can burst into flameif you strike a match or get them on a hot part of the vehicle Some are dangerous if you breathe their fumes in a closed space When you use anything from acontainer to clean your Oldsmobile be sure to follow the manufacturer s warnings and instructions And always open your doors or windows when you re cleaning the inside Never use these to clean your vehicl...

Page 289: ... cleanersIn a well ventilated area only If you use them don t saturate the stained area If a ring forms after spot cleaning clean the entire area immediately orit will set Using Foam vpe Cleaner on Fabric I Vacuum and brush the area to remove any loose dirt 2 Always clean a whole trim panel or section Mask surrounding trim along stitch or welt lines 3 Mix Multi Purpose Powdered Cleaner following t...

Page 290: ...stain 2 Follow the solvent type instructions described earlier 3 h o e polish wax crayon tar and asphalt will stain if left on a vehicle s seat fabric They should be removed as soon as possible Be careful because the cleaner will dissolve them and may cause them to spread Non Greasy Stains Stains caused by catsup coffee black egg fruit fruit juice milk soft drinks wine vomit urine and blood can be...

Page 291: ...Instrument Pal 1 Use only mild soap and water to cleanthe top surfaces of the instrument panel Sprays containing silicones or waxes may cause annoying reflectionsin the windshield and even makeit difficult to see through the windshield under certain conditions Cleaning the Built In Child Restraint Pad The built in child restraint pad is attached to the seat frame with fastener strips You can remov...

Page 292: ...1050011 The windshield is cleanif beads do not form when you rinse it with water Clean the blade by wiping vigorously with a cloth soaked in full strength windshield washer solvent Then rinse the blade with water Wiper blades should be checked on a regular basis and replaced when worn Weatherstrips Silicone grease onweatherstrips will make them last longer seal better and not stick or squeak Apply...

Page 293: ...dex Your Oldsmobile has a basecoat clearcoat paint finish The clearcoat givesmore depth and gloss to the colored basecoat Always use waxes and polishes that are non abrasive and made for abasecoat clearcoat paint finish NOTICE Machine compounding or aggressive polishing on a basecoatklearcoatpaint finish may dull the finish or leave swirl marks Foreign materials such as calcium chloride and other ...

Page 294: ...t has silicon carbide tire cleaning brushes These brushes can also damage the surface of these wheels Tires To clean your tires use a stiff brush with a tire cleaner I NOTICE When applying a tire dressing always take care to wipe off any oversprayor splash from all painted surfaces on the body or wheels of the vehicle Petroleum based products may damage the paint finish Finish Damage Any stone chi...

Page 295: ...mposite SMC Sheet Molded Compound fiberglass body panels and molded RIM Reaction Injection Molded front fendersand bumper covers Thesepanels require different collision repair proceduresthan metal paneled vehicles See your Oldsmobile retailer for information on collision repair Chemical Paint Spotting Some weatherand atmospheric conditionscan create a chemical fallout Airborne pollutants can fall ...

Page 296: ...Appearance Care Materials Chart 6 50 ...

Page 297: ...ppears on the Vehicle Certification and Service Parts labels and the certificates of title and registration Engine Identification The eighth characterin your VIN is the engine code This codewill help you identify your engine specifications and replacement parts Service Parts Identification Label You ll find this label inside the glove box door It s very helpful if you ever need to order parts On t...

Page 298: ...n and off or insome cases to remain off If this happens have your headlamp system checked right away Windshield Wipers The windshield wiper motor is protected by a circuit breaker and a fuse If the motor overheats due to heavy snow etc the wiper will stop until the motor cools If the overload is caused by some electrical problem be sure to get it fixed Power Windows and Other Power Options Circuit...

Page 299: ... size and rating If you ever have a problem on the road and don t have a spare fuse you can borrow one that has the same amperage Justpick some featureof your vehicle that you can get alongwithout like the radio or cigarette lighter and use its fuse if it is the correct amperage Replace it assoon as you can There are four fuse blocks in your vehicle the instrument panel fuse block the Anti Lock Br...

Page 300: ... Ignition Warning Hazards Rear Stoplamps Anti Lock Brake System ABS Center High Mounted Stoplamp Fuel Pump Rear Engine Fan Relay Radio Cigarette Lighter Accessory Power Outlet Trailer Harness Heater A C Control Headlamp and Instrument Panel Dimmer Switch to LPS fuse Power Sliding Door Controller Powertrain Control Module Automatic Door Locks Module Back up Lamps Power Sliding Door Alarm Module Fog...

Page 301: ... A C Control InstrumentPanel Cluster Illumination for Power Sliding Door Switches ABS Enable Relay Fuse RD02 R WIPER F WIPER IGN HTR A C R BLW Usage Radio Steering Wheel Controls Temperature and Compass Display Rear Window Wipermasher Windshield and Rear Window Wipermasher Cruise Control Switch Heater A C Control Speedometer and Tachometer Rear Window Defogger Relay Safety Belt Reminder Chime Lamp...

Page 302: ...e SolenoidValve Evaporative Emissions Canister Purge Vacuum Diagnostic Switch Linear Exhaust Gas Recirculation EGR Valve Front EngineFan Relay Heated Oxygen Sensors Mass Air Flow MAF Sensor Powertrain Control Module PCM 3 4 5 6 7 8 9 10 6 56 Not Used Power Windows Power Seat Power Sliding Door Controller Power Door Locks Rear Defogger Air ConditioningBlower Rear Blower Motor Horns Safety Belt Remi...

Page 303: ... just behind the passenger s sideheadlamp It ismountedonthe faceof the bracket in the position closestto thepassenger s side of the vehicle The fuseservices the injectors fuel pump oil pressure sender and fuel pump switch To access the fuse pry back the latch with a screwdliver then pull down on the base of the unit If you need to replace the fuse be sure to useone with the same amperage Push the ...

Page 304: ...77 Front Parkingmurn Signal Lamps 3357 Halogen Headlamps License Plate Lamp 194 Outer 9006 Inner 9005 FogLamps H 1 Front Sidemarker Lamps 194 Stop Tail TurnSignal Lamps Upper Two Positions 194 Lower Two Positions 2057 Underhood Lamp 561 BULB INSIDELAMPS Dome Lamps Front 561 Rear 561 ...

Page 305: ...priate level as recommended in this manual Refrigerant R l34a Air Conditioning FrontA Conly 2 25 lbs 1 02kg Front and Rear A C 3 lbs 1 36kg Not all air conditioning refrigerants are the same rfthe airconditioning system inyour vehicle needsrefrigerant be sure the properrefrigerant is used lfyou re notsure ask your Oldsmobile retailez For additional information see your Warrantyand Owner Assistance...

Page 306: ...arts Engine Oil Filter AC Type PF 47 Air Cleaner Element AC Type A 974C PCVValve ACTypeCV 892C Spark Plugs AC Type 4 1 940 Gap 0 060 inch 1 52 mm Remote Lock Control Battery 1 CR 2032 Dimensions Wheelbase 109 8inches 2788 mm Tread Width Front 59 2 inches 1503mm Rear 61 4 inches 1559mm Width 73 9 inches 1878 mm Length 194 7 inches 4946 mm Height 65 7 inches 1670 mrn 6 60 ...

Page 307: ...and OwnerAssistance booklet o y your Oldsnwbile retailer for details Introduction Your Vehicle and the Environment Proper vehicle maintenance not only helps to keep your vehicle in good working condition but also helps the environment All recommended maintenance procedures are important Improper vehicle maintenance can even affect the quality of theair we breathe Improper fluid levels or the wrong...

Page 308: ...ice and Owner Publications in the Index Part B Owner Checks and Services tells you what should be checked whenever you stop for fuel It also explains what you can easily do to help keep your vehicle in good condition Part C Periodic Maintenance Inspections explains important inspections that your Oldsmobile retailer s service department or another qualified service center should perform Part D Rec...

Page 309: ...Oldsmobile retailer This part tells you the maintenance services you should have done and when you should schedule them If you go to your retailer for your service needs you ll know that GM trained and supported service people will perform the work using genuine GM parts The proper fluids and lubricants to use are listed in Part D Make sure whoever services your vehicle uses these All parts should...

Page 310: ...own sooner Short Trip City Intervals Every 3 000Miles 5 000 km Engine Oil and Filter Change or3 months whichever occurs first Every 6 000 Miles 10000 km Chassis Lubrication or 6 months whichever occurs first At 6 000 Miles 10000 km Then Every 12 000Miles 20000 km Tire Rotation Every 15 000 Miles 25 000 km Air Cleaner Filter Inspection if driving in dusty conditions Every 30 000Miles 50 000 km Air ...

Page 311: ...chever occurs first At 7 500 Miles 12 500 km Then Every 15 000 Miles 25 000 km Tire Rotation Every 30 000 Miles 50 000 km Air Cleaner Filter Replacement Every 50 000 Miles 83 000 km Automatic Transaxle Service severe conditions only Every 60 000 Miles 100000 km Engine Accessory Drive Belt Inspection Fuel Tank Cap and Lines Inspection or every 60 months whichever occurs first Service orevery 60 mon...

Page 312: ...orm this maintenance item will not nullify the emission warranty or limit recall liability prior to the completion of the vehicle s useful life We however urge that all recommended maintenance services be performed at the indicated intervals and the maintenance be recorded Lubricate the parking brake cable guidesand underbody contact points and linkage 3 000 Miles 5 000 km 0Change engine oil and f...

Page 313: ...whichever occursfirst 0Rotate tires See Tire Inspection and Rotation in the Index for proper rotation pattern and additional information During tire rotation check brake calipers for freedom of movement and lubricate if required DATE SERVICEDB Y ACTUAL MILEAGE 9 000 Miles 15 000 km 17Change engineoil and filter or every 3 months whichever occurs first AI Emission Contt ol Service DATE SERVICED B Y...

Page 314: ... components see footnote or every6 months whichever occurs first DATE ACTUAL MILEAGE SERVICED BY 15 000 Miles 25 000 km 0Change engine oil and filter or every 3 months whichever occurs first An Emission Control Service I J Inspect air cleaner filter if you are driving in dusty conditions Replace filter if necessary An Emission Control Service DATE ACTUAL MILEAGE SERVICEDBY I 7 8 ...

Page 315: ... months whchever occurs first Rotate tires See Tire Inspection and Rotation in the Index for proper rotation pattern and additional information During tire rotation checkbrake calipers for freedom of movement and lubricate if required ACTUAL MILEAGE SERVICED BY 21 000 Miles 35000 km 0Change engine oiland filter or every 3 months whichever occurs first An Emission ControlSewice DATE SERVICEDBY ACTU...

Page 316: ...onths whichever occurs first Lubricate chassis components see footnote or every 6 months whichever occursfirst An Emission Control Service 27 000 Miles 45 000 km 0Change engine oil and filter or every 3 months whichever occurs first An Emission Control Service I DATE I ACTUALMILEAGE ISERVICEDB Y I 7 10 ...

Page 317: ...lace air cleaner filter 0Rotate tires See Tire Inspection and An Emission Control Service Rotation in the Index for proper rotation pattern and additional information During ti rerotation check brake calipers for freedom of movement and lubricate if required I ACTUAL MILEAGE SERVICEDB Y 33 000 Miles 55 000 km 0Change engine oil and filter or every 3 months whichever occurs first An Emission Contro...

Page 318: ...ver occurs first An Emission Control Service 0Lubricate chassis components see footnote or every 6 months whichever occurs first DATE ACTUALMILEAGE SERVICED BY 39 000 Miles 65000 km 0Change engine oil and filter or every 3 months whichever occurs first An Emission Control Service DATE ACTUALMILEAGE SERVICEDBY 7 12 ...

Page 319: ...e 0Lubricate chassis components see footnote 0Inspect air cleaner filterif you are driving or every6 months whichever occursfirst Rotation in the Index for proper rotation pattern and additional information During tire rotation check brake calipers for freedom of movement and lubricate if required 0Rotate tires See Tire Inspection and DATE ACTUAL MILEAGE SERVICED BY in dusty conditions Replace fil...

Page 320: ... Miles 83 000 kn 0Change automatic transaxle fluid and filter if the vehicle is mainly driven under one or more of these conditions In heavy city traffic where the outside temperature regularly reaches 9OoF 32 C or higher In hilly or mountainous terrain When doing frequent trailer towing Uses such as found in taxi police or delivery service Ifyou do not use your vehicle under any of these conditio...

Page 321: ...ange engine oil and filter or every 3 months whichever occurs first An Emission Control Service Lubricate chassis components see footnote or every 6 months whichever occursfirst 0Rotate tires See Tire Inspection and Rotation in the Index for proper rotation pattern and additional information During tire rotation check brake calipers for freedom of movement and lubricate if required DATE SERVICED B...

Page 322: ...y 3 months whichever occurs first AIIElnissior 7 Control Service Lubricate chassis components see footnote or every 6 months whichever occ 0Inspect engine accessory drive be 0Replace air cleaner filter An EInission Control Service urs first It 0Inspect fuel tank cap and lines for damage or leaks Inspect fuel cap gasket for any damage Replace parts as needed An Emission Corltrol Service DATE SERVIC...

Page 323: ...Change engine oil and filter or every 3 months whichever occurs first An Emission Control Service 0Lubricate chassiscomponents see footnote or every6 months whichever occurs first 0Rotate tires See Tire Inspection and Rotation in the Index for proper rotation pattern and additional information During tire rotation check brake calipers for freedom of movement and lubricate if required DATE ACTUAL M...

Page 324: ...er occurs first An Emission ControlSewice I DATE I ACTUALMILEAGE SERVICEDBY I 72 000Miles 120 000 km 0Change engineoil and filter or every 3 months whichever occurs first An Emission Control Sewice 0Lubricate chassis components see footnote or every6 months whichever occurs first DATE ACTUAL MILEAGE SERVICED BY 7 18 ...

Page 325: ...ion Control Service s OOO Miles 130 000 km 0Change engineoil and filter or every 3 months whichever occurs first An Emission Control Service 0Lubricate chassis components see footnote or every6 months whichever occurs first 0Rotate tires See Tire Inspection and Rotation in the Index for properrotation pattern and additional information During tire rotation check brake calipers for freedom of movem...

Page 326: ...r occurs first Emission Control Service 84 000 Miles 140000 km 0Change engine oil and filter or every 3 months whichever occurs first An Emission Control Sewice 0Lubricate chassis components see footnote or every 6 months whichever occurs first DATE ACTUAL MILEAGE SERVICED BY 7 20 ...

Page 327: ...r every 3 months whichever occurs first An Emission Confro1 Service 0Lubricate chassiscomponents see footnote or every6 months whichever occurs first 0Replace air cleaner filter Rotate tires See Tire Inspection and An E nission Control Service Rotation in the Index for proper rotation pattern and additional information During tire rotation check brake calipers for freedom of movement and lubricate...

Page 328: ...ever occurs first An Emission Control Service DATE SERVICEDB Y ACTUALMILEAGE 96 000 Miles 160000 km I7Change engine oil and filter or every 3 months whichever occurs first An Emission Control Service 0Lubricate chassis components see footnote or every 6 months whichever occurs first DATE SERVICEDB Y ACTUALMILEAGE I ...

Page 329: ...RVICED BV 100 000 Miles 166000 km Drain flush and refill cooling system or every 60 months sincelast service whichever occurs first See Engine Coolant inthe Index for what to use Inspect hoses Clean radiator condenser pressure capand neck Pressure test cooling system and pressure cap An Emission Control Service 0Inspect spark plug wires A11 Emission Control Service Continued 7 23 ...

Page 330: ...ese conditions In heavy city traffic where the outside temperature regularly reaches 90O F 32 C or higher An Emission Control Service In hilly or mountainous terrain When doing frequent trailer towing Uses such as found in taxi police or delivery service If you do notuse your vehicle under any of these conditions thefluid andfilter do not requirechanging DATE ACTUAL MILEAGE SERVICEDB Y I 7 24 ...

Page 331: ... s useful life We however urge that all recommended maintenance services be performed at the indicated intervals and the maintenance be recorded Lubricate the parking brake cable guides and underbody contactpoints and linkage 7 500Miles 12500 km 0Change engine oil and filter or every 12months whichever occurs first An Emission ControlService nLubricate chassis components see footnote or every 12mo...

Page 332: ... ACTUAL MILEAGE 22 500 Miles 37500 km 17Change engine oil and filter or every 12months whichever occurs first An Emission Control Service 0Lubricate chassis components see footnote or every 12 months whichever occurs first 0Rotate tires See Tire Inspection and Rotation in the Index for proper rotation pattern and additional information During tire rotation check brake calipers for freedom of movem...

Page 333: ...ol Service DATE ACTUAL MILEAGE SERVICED B Y _ 37 500 Miles 62 500 km 0Change engine oil and filter or every 12 months whichever occurs first An Emission Control Service 0Lubricate chassis components see footnote or every 12months whichever occurs first 0Rotate tires See Tire Inspection and Rotation in the Index for proper rotation pattern and additional information During tire rotation check brake...

Page 334: ...0 Miles 83 000 km 0Change automatic transaxle fluid and filter if the vehicle is mainly driven under one or more of these conditions In heavy city traffic where the outside temperature regularly reaches 90 F 32 C or higher In hilly or mountainous terrain When doing frequent trailer towing Uses such as found in taxi police or delivery service I Y O L L do not use your vehicle under any o f these co...

Page 335: ...g tire rotation check brake calipers for freedom of movement and lubricate if required DATE ACTUAL MILEAGE SERVICEDBY 60 000 Miles 100 000 km 0Change engine oil and filter or every 12months whichever occurs first An Emission Control Service 0Lubricate chassis components see footnote or every 12months whichever occursfiist 0Inspect engineaccessory drive belt 0Replace air cleaner filter An Emission ...

Page 336: ...ire Inspection and Rotation in the Index for proper rotation pattern and additional information During tire rotation check brake calipers for freedom of movement and lubricate if required DATE SERVICEDB Y ACTUAL MILEAGE 75 000Miles 125 000 km C IChange engine oil and filter or every 12 months whichever occurs first An Emission Control Service 0Lubricate chassis components see footnote or every 12 ...

Page 337: ...n the Index for proper rotation pattern and additional information During tire rotation check brake calipers for freedom of movement and lubricate if required DATE SERVICED B Y ACTUAL MILEAGE 90 000 Miles 150 000 km 0Change engine oil and filter or every 12 months whichever occurs first An Emission Control Service 17Lubricate chassiscomponents see footnote or every 12 months whichever occurs first...

Page 338: ...oper rotation pattern and additional information During tire rotation check brake calipers for freedom of movement and lubricate if required 100 000 Miles 166000 km 0Drain flush and refill cooling system or every 60 months since last service whichever occurs first See Engine Coolant in the Index for what touse Inspect hoses Clean radiator condenser pressure cap and neck Pressure test the cooling s...

Page 339: ... heavy city traffic where me outside temperature regularly reaches 90O F 32 C or higher An Emission Control Service In hilly or mountainous terrain When doing frequent trailer towing Uses such as found in taxi police or delivery service I f you do not use your vehicle under any o f these conditions thefluid andfilterdonot require changing DATE SERVICEDB Y ACTUAL MILEAGE 7 33 ...

Page 340: ...ine oil level and add the proper oil if necessary See Engine Oil in the Index for further details Engine Coolant Level Check Check the engine coolant level and add the proper coolant mix if necessary See Engine Coolant in the Index for further details Windshield Washer Fluid Level Check Check the windshield washer fluid level in the windshield washer tank and add the proper fluid if necessary See ...

Page 341: ...ty belts or harness straps replaced Also look for any opened orbroken air bag covers and have them repaired or replaced The airbag system does not need regular maintenance Automatic Transaxle Check Check the transaxle fluid level add if needed See Automatic Transaxle in the Index A fluid loss may indicate a problem Check the system and repair if needed Key Lock Cylinders Service Lubricate the key ...

Page 342: ...d be ready to turn off the engine immediately if it starts Try to start the engine in each gear The starter should work only in PARK P or NEUTRAL N If the starter works in any other position your vehicle needs service 1 2 3 Before you start be sure you have enough room around the vehicle It should be parked on a level surface Firmly apply the parking brake see Parking Brake in the Index if necessa...

Page 343: ... remove foot pressure from the regular brake pedal Do this until the vehicle is held by the parking brake only To check the PARK P mechanism s holding ability With the engine running shift to PARK P Then release all brakes Underbody Flushing Service At least every spring use plain water to flush any corrosive materials from the underbody Take care to clean thoroughly any areas where mud and other ...

Page 344: ... for broken damaged missing or out of position parts as well as open seams holes loose connections or other conditions which could cause a heat build up in the floor pan or could let exhaust fumes into the vehicle See Engine Exhaust in the Index Radiator ancd Heater Hose Inspection Inspect the hoses and have them replaced if they are cracked swollen or deteriorated Inspect all pipes fittings and c...

Page 345: ...rench DEX COOLTM or Havoline DEX COOL orange colored silicate free antifreeze conformingto GM Specification 6277M See Engine Coolant in the Index USAGE Coolant Supplement Sealer Hydraulic Brake System Parking Brake Cable Guides Power Steering System Automatic Transaxle Key Lock Cylinders GM Part No 3634621 or equivalent with a completeflush and refill GM Part No 1052535or Chassis lubricant GM Part...

Page 346: ...or lubricant meeting requirements of NLGI Grade 2 Category LB or GC LB USAGE Hood and Door Hinges Rear Folding Seat Fuel Door Hinge Rear Compartment Lid Hinges Sliding Door Track Weatherstrip Conditioning FLUIDLUBRICANT Multi purposelubricant Superlube GM Part No 12346241 or equivalent Lubriplate lubricant aerosol GM Part No 12346293 orequivalent or lubricant meeting requirements of NLGI Grade2 Ca...

Page 347: ...nd who performed the service the following record pages Also you should retain all in the boxes provided after the maintenance interval maintenance receipts Your owner information portfolio Any additional information from Owner Checksand is a convenient place to store them Maintenance Record ODOMETER DATE MAINTENANCE PERFORMED SERVICED BY READING 7 41 ...

Page 348: ...MaintenanceRecord ODOMETER SERVICED BY MAINTENANCE PERFORMED 7 42 ...

Page 349: ...ations andhow to report any safety defects This section includes information on 0 0 0 0 0 0 0 The CustomerSatisfaction Procedure Customer Assistance for Text Telephone TTY Users Roadside Assistance Courtesy Transportation BBB Auto Line Alternative Dispute Resolution Program Reporting Safety Defects Service and Owner Publications Customer Satisfaction Procedure 8 1 ...

Page 350: ...t the owner of the retail facility or the General Manager STEP TWO If after contacting a member of retail facility management it appears your concern cannot be resolved by the retail facility without further help contact the Oldsmobile Customer Assistance Network by calling 1 800 442 6537 In Canada contact GM of Canada Communication Centre in Oshawa by calling 1 800 263 3777 English or 1 800 263 7...

Page 351: ...tance Representative Oldsmobile Central Office 920 Townsend Street P O Box 30095 Lansing MI 48909 Refer to your Warranty and OwnerAssistance Information booklet for addresses of Canadian and GM Overseas offices When contacting Oldsmobile please remember that your concern will likely be resolved in the retail facility using the retailer s facilities equipmentand personnel That is why we suggest you...

Page 352: ...service locate the nearest Oldsmobile retail facility take your request for an Oldsmobile computerized trip routing or simply answer any questions the Oldsmobile driver may have about the coverage provided by your Oldsmobile Roadside Assistance Program The Oldsmobile Roadside Assistance number is fully staffed and operational 24 hours a day 365 days ayear Who Is Covered Oldsrnobile Roadside Assist...

Page 353: ... car if necessary Having your car serviced is rarely convenient but with Courtesy Transportation at least you ll be able to get where you need to go whether it s here or there Some stateinsurance regulations make it impractical to rent vehicles to people under 21 years of age If you are under 21 and have difficulty renting a vehicle Oldsmobile will reimburse up to 30 day for documented transporati...

Page 354: ... a disagreement regarding vehicle repairs or interpretation of the New Vehicle Limited Warranty To assist in resolving these disagreem ents Oldsmobile voluntarily participates in BBB AUTO LINE BBB AUTO LINE is an out of court program administered by the Better Business Bureau system to settle disputes between customers and automobile manufacturers This program is available free of charge to custom...

Page 355: ...For further information contact the BBB at 1 800 955 5 100 or the Oldsmobile Customer Assistance Network at 1 800 442 6537 REPORTING SAFETY DEFECTS TO THE UNITED STATES GOVERNMENT If you believe that your vehicle has a defect which could cause a crashor could causeinjury or death you should immediately inform the National Highway Traffic Safety Administration NHTSA in addition to notifying General...

Page 356: ...wa OntarioKlG 352 REPORTING SAFETY DEFECTS TO GENERAL MOTORS In addition to notifying NHTSA or Transport Canada in a situation like this we certainly hope you ll notify us Please call us at 1 800 442 6537 or write Oldsmobile Customer Assistance Network P O Box 30095 Lansing MI 48909 In Canada please call us at 1 800 263 3777 English or 1 800 263 7854 French Or write General Motors of Canada Limite...

Page 357: ...nited States 1 800 551 4123 Canada 1 800 668 5539 ServiceManuals Service manuals contain diagnostic and repair information forall chassis and body systems They may be useful for owners whowish to get a greater understanding of their vehicle They are alsouseful for owners with the appropriate skilllevel or training who wish to perform do it yourself service Theseare authentic General Motors service...

Page 358: ...others may help avoid future costly repairs Servicebulletins are meant for qualified technicians In some cases bulletins refer to service manuals specialized tools equipment and safety procedures necessary to service the vehicle Since thesebulletins are issued throughout the model year and beyond an index is required and published quarterly to help identify specific bulletins Subscriptions areavai...

Page 359: ...heels Cleaning 6 48 AMAX 3 17 Antenna Integrated Roof 3 25 Antifreeze 6 18 AirBag 1 25 I Anti Lock Brake System Warning Light 2 75 4 6 Brakes 4 6 Appearance Care 6 42 AppearanceCareMaterials 6 50 Ashtrays 2 58 2 59 Audio Equipment Adding 3 23 Audio Systems 3 9 Automatic Door Locks 2 6 Customizing 2 6 OverridingLockDelay 2 6 AutomaticOverdrive 2 29 Automatic Transaxle Check 7 35 Automatic Transaxle...

Page 360: ...9 2 ...

Page 361: ...2 56 Compass Electronic 2 55 Control of a Vehicle 4 5 ConvenienceNet 2 61 Convex Outside Mirror 2 53 Coinholder 2 59 Coolant 6 18 Adding 6 21 Checking 6 20 Heater Engine 2 26 RecoveryTank 5 16 Whattouse 6 19 Courtesy Transportation 8 5 Cruise Control 2 44 Cupholders 2 58 2 61 Customer Assistance for Text Telephone Users 8 3 Customer Assistance Information 8 1 Customer Satisfaction Procedure 8 1 Cu...

Page 362: ...ectronicLevelControl 4 28 Engine 6 8 Coolant 6 18 CoolantHeater 2 26 Coolant Level Check 7 34 CoolantTemperatureGage 2 76 CoolingSystem 6 59 Exhaust 2 36 OilLevelCheck 7 34 Overheating 5 12 Running While Parked 2 36 Specifications 6 60 Starting Your 2 24 EngineOil 2 80 6 9 Adding 6 10 Additives 6 12 Checking 6 10 Pressure Indicator 2 80 Used 6 13 WhattoUse 6 11 Whentochange 6 13 Exhaust Engine 2 3...

Page 363: ...ransaxle 2 27 GloveBox 2 57 Gross Axle Weight Rating 4 27 Gross Vehicle Weight Rating 4 27 GAWR 4 27 GVWR 4 27 Halogen Bulbs 6 29 Hazard Warning Flashers 5 1 HeadRestraints 1 4 Headlamps 2 48 BulbReplacement 6 29 HighLow BeamChanger 2 40 OnReminder 2 48 Wiring 6 52 Hearing Impaired Customer Assistance 8 3 Heating 3 3 High BeamHeadlamps 2 40 Highway Hypnosis 4 21 Hill and Mountain Roads 4 21 Hitche...

Page 364: ...7 Identification 6 5I Service PartsIdentification 6 5 1 Tire LoadingInformation 4 27 Vehicle IdentificationNumber 6 51 Lamps 2 48 Dome 2 50 Interior 2 49 On Reminder 2 48 Underhood 6 9 Leaving YourVehicle 2 7 Leaving Your Vehicle with the Engine Running 2 34 License Plate LampBulb Replacement 6 31 Liftgate 2 19 Liftgate Ajar Light 2 82 LiftgateLock 2 21 Lighter 2 58 Lights AirBagReadiness 1 26 2 7...

Page 365: ...y Intervals 7 5 Owner Checks and Services 7 34 Periodic MaintenanceInspections 7 38 Recommended Fluids and Lubricants 7 39 Scheduled Maintenance Services 7 3 Short Trip CityDefinition 7 4 Short Trip City Intervals 7 4 YourVehicleandthe Environment 7 1 Maintenance Underbody 6 49 MaintenanceWhen Trailer Towing 4 37 MalfunctionIndicator Lamp 2 77 Manual Front Seat 1 2 Matching TransmitterstoYourVehic...

Page 366: ...OptionFuses 6 52 RemoteControlMirror 2 52 Seat 1 3 Sliding Door Warning Light 2 8 1 Parking Steering 4 8 Steering Fluid 6 22 Windows 2 37 Pregnancy Use of Safety Belts 1 30 Problems on the Road 5 1 Publications Service and Owner 8 9 Radiator 5 19 RadiatorPressureCap 6 22 Radio Reception 3 23 Radios 3 9 ReadingLamps 2 50 2 51 Rear AirVents 3 7 ClimateControl 3 6 Rain Driving In 4 15 Fan 3 7 Outside...

Page 367: ...31 Roadside Assistance 8 4 Rocking Your Vehicle 5 34 Rotation Tires 6 37 Safety Belt Extender 1 56 Adults 1 17 Care 6 45 Children 1 37 Driver Position 1 17 Extender 1 56 How to Wear Properly I 17 Incorrect Usage 1 20 1 54 1 55 LapBelt 1 35 Lap Shoulder 1 17 1 31 Larger Children 1 53 Passenger Position 1 31 Questions andAnswers 1 16 Rear Seat Passengers 1 31 ReplacingAfter a Crash 1 56 Smaller Chil...

Page 368: ...9 10 ...

Page 369: ...nce 6 40 BuyingNew 6 38 Chains 6 42 ChangingaFlat 5 22 Cleaning 6 48 Compact Spare 5 32 Inflation 6 36 Thermostat 6 22 Inflation Check 7 34 Inspection and Rotation 6 37 Pressure 6 36 Temperature 6 40 Traction 6 39 Treadwear 6 39 Uniform Quality Grading 6 39 Wear Indicators 6 38 WheelReplacement 6 40 When It s Time for New 6 38 Loading 4 27 TopStrap 1 48 TorqueLock 2 34 Torque Wheel Nut 5 30 6 59 T...

Page 370: ...41 UnderbodyMaintenance 6 49 Vehicle Control 4 5 Damagewarnings iv Dimensions 6 60 Identification 6 51 Loading 4 27 Storage 6 28 Ventilation System 3 4 Ventilation System Rear Fan 3 4 VisorVanity Mirrors 2 65 VentilationTips 3 5 Visors 2 65 Voltmeter 2 74 ...

Page 371: ......

Page 372: ......

Reviews: