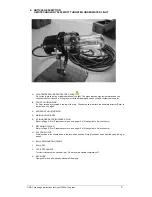
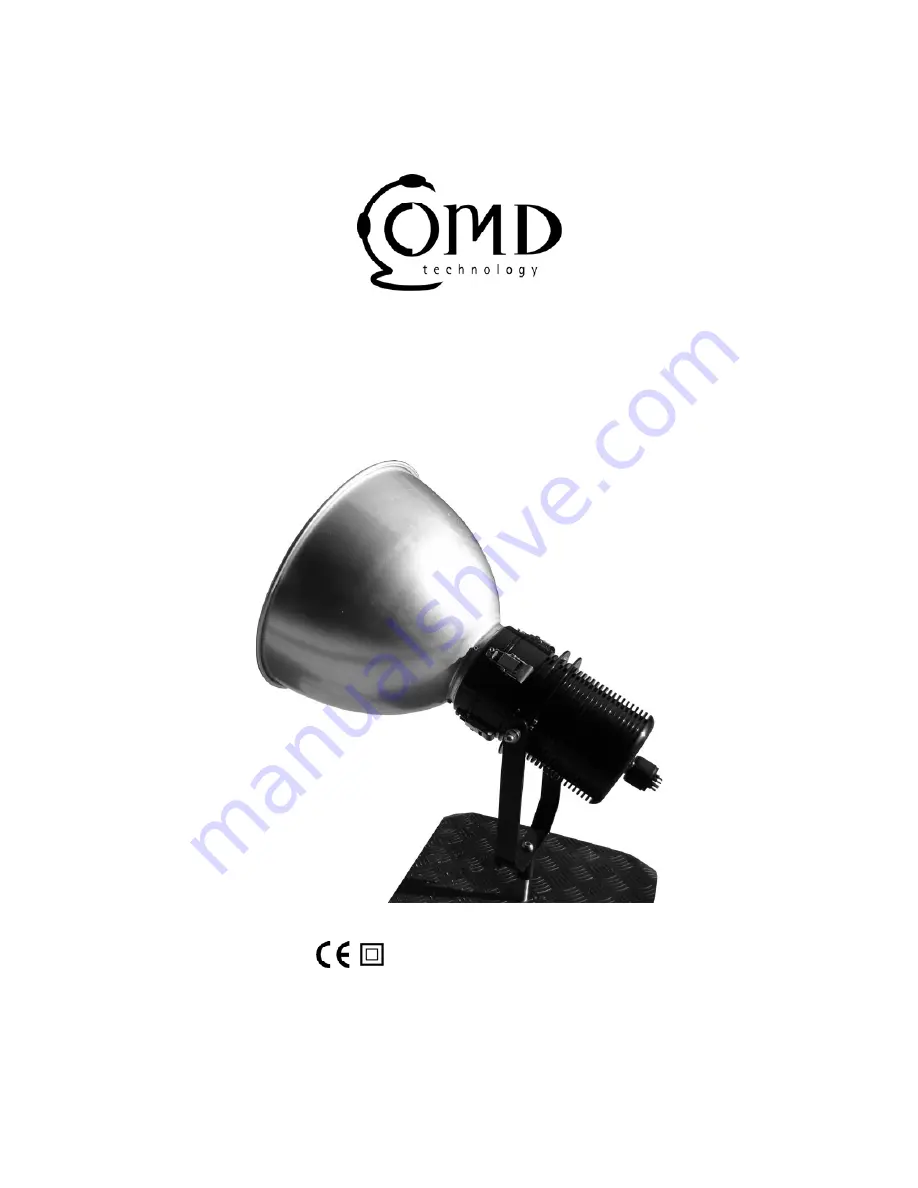
background image

www.omdtechnology.com.au 


Instructions for use 

OMD Technology 5000w Tungsten 

Underwater Light 


COMPLIES WITH IEC60598.2.17


APPROVAL NO. Q031496 

MADE IN AUSTRALIA 

Summary of Contents for 5000w Tungsten

Page 1: ...www omdtechnology com au Instructions for use OMD Technology 5000w Tungsten Underwater Light COMPLIES WITH IEC60598 2 17 APPROVAL NO Q031496 MADE IN AUSTRALIA ...

Page 2: ...r of property damages physical damages or death 2 SAFETY HAZARD WARNING SIGN Parts of this instruction manual are marked with the above listed sign This symbol denotes a warning where a hazard may exist If not adhered to there is a danger of property damages physical damages or death 3 APPLICATIONS This lamp is designed for underwater use 4 GUARANTEE Provided the following instructions for the use...

Page 3: ...ach the separate reflector Refer to instructions on page 8 C MID FRONT HOUSING RING D MAIN HOUSING BODY E 8 PIN UNDERWATER BULKHEAD PLUG Refer to Page 5 9 for Preparation for use and page 10 of Quick guide to 8 pin connector F RETAINING COLLAR Refer to Page 5 9 for Preparation for use and page 10 of Quick guide to 8 pin connector G PULL DOWN CLIP Stainless steel clips should all be in the lock dow...

Page 4: ...egrees K Depth 100ft 30 metres Duty Underwater only Earth leakage Clipsal OMD Technology 230 240 V 32A 2400W max 10mA residual trip WEIGHT Weight out of Water 6kgs 13lbs Weight In Water 450gms 1lb FREIGHTING SPECIFICATIONS Light Case Weight 19kg 42lbs Dimensions 80cm L x 52 7cm W x 29 2cm D Contents 1 x OMD 5k head Cable Case Weight 17kg 38lbs Dimensions 65cm L x 42cm W x 28cm D Contents 1 x 30m O...

Page 5: ...the lock down position BEFORE USE 1 Remove light from road case Note don t lose the rubber strip that protects the glass in transit It will be needed when returning light to road case 2 Check for damage during transportation Note warning above 3 Check that globe is central to the protective glass If not contact your supplier 4 Plug together the lamp and header cable and secure locking collar Ensur...

Page 6: ...OMD Technology Instructions for Use of 5000w Tungsten 6 5 Plug together the header cable and RCD box and secure locking collar 6 Test RCD box by pressing the test button ...

Page 7: ...OMD Technology Instructions for Use of 5000w Tungsten 7 7 To fit supplied par reflector if required 7a Remove PAR reflector from road case 7b Utilise 5mm holes to secure PAR reflector ...

Page 8: ...flector over protective glass 7d Using a long shank screw driver secure the 4 x 5mm screws 7e Ensure that the glass and the black aluminium ring don t touch all around If so loosen screws and re fit PAR reflector This is important as the glass may crack when in operation ...

Page 9: ...OMD Technology Instructions for Use of 5000w Tungsten 9 8 The light is now ready for operation Refer to applications on page 2 ...

Page 10: ...are joined in the same manner cable to cable cable to light fixture and cable to earth leakage device Push firmly to join connection A small amount of Silicone grease or spray ONLY can aid the process Ensure locking collars are secure DO NOT USE THESE TO PULL PLUG TOGETHER When using OMD lighting equipment always ensure that the supplied earth leakage device is connected Always test the earth leak...

Page 11: ...en on Heat can reflect back into the light causing damage or possible injury or death Do not touch the protective glass tube at any stage during use and after Burning hazards may result The light is depth rated to a maximum of 30 metres 100ft Do not exceed this depth Water inside the housing especially sea water can have fatal consequences due to conduction of electricity and build up of pressure ...

Page 12: ...at you fit the length of rubber supplied over the bulb before closing This can be found in the road case and prevents the bail arm from damaging the protective glass Do not pack light head in roadcase if hot or warm Burning hazards from the packing material may result 12 TRANSPORT 1 Ensure that light head is placed back into the supplied road case as it arrived 2 Ensure that all locking clips are ...

Page 13: ...ips when light is turned ON or in use 8 Connector is not joined or in the wrong configuration 8 Isolate electrically Make sure that the connectors have be mated correctly refer to page10 Re connect and ensure locking collars have been tightened 9 Water in electrical connectors 9 Isolate electrically Disassemble the connectors and check to make sure there is no water present Dry and re assemble A s...

Page 14: ...UCKLAND 318 Richmond Road Grey Lynn Auckland New Zealand Tel 64 09 361 4999 PANALUX WELLINGTON 151 Park Road Miramar Wellington New Zealand Tel 64 04 380 30308 Fax 64 04 380 9462 All General enquires info panalux asia UNITED KINGDOM PANALUX LONDON Waxlow Road London NW10 7NU 44 020 8233 7000 Fax 44 020 8233 7001 PANALUX BRISTOL 4 Avon Riverside Estate Victoria Road Avonmouth Bristol BS11 9DB Unite...

Page 15: ... Business Park Koeberg Road Milnerton 7435 Cape Town South Africa Tel 27 021 529 4200 Fax 27 021 529 4204 PANALUX JOHANNESBURG Gold Island Studios 79 Reedbuck Crescent Corporate Park Old Pretoria Road Midrand Johannesburg South Africa Tel 27 011 314 5700 Fax 27 011 314 5701 CENTRAL EUROPE PANALUX PRAGUE Barrandov Film Studios Kˇríˇzeneckého nám 322 152 00 Praha 5 Czech Republic Tel 420 2 6707 2888...

Reviews: