background image

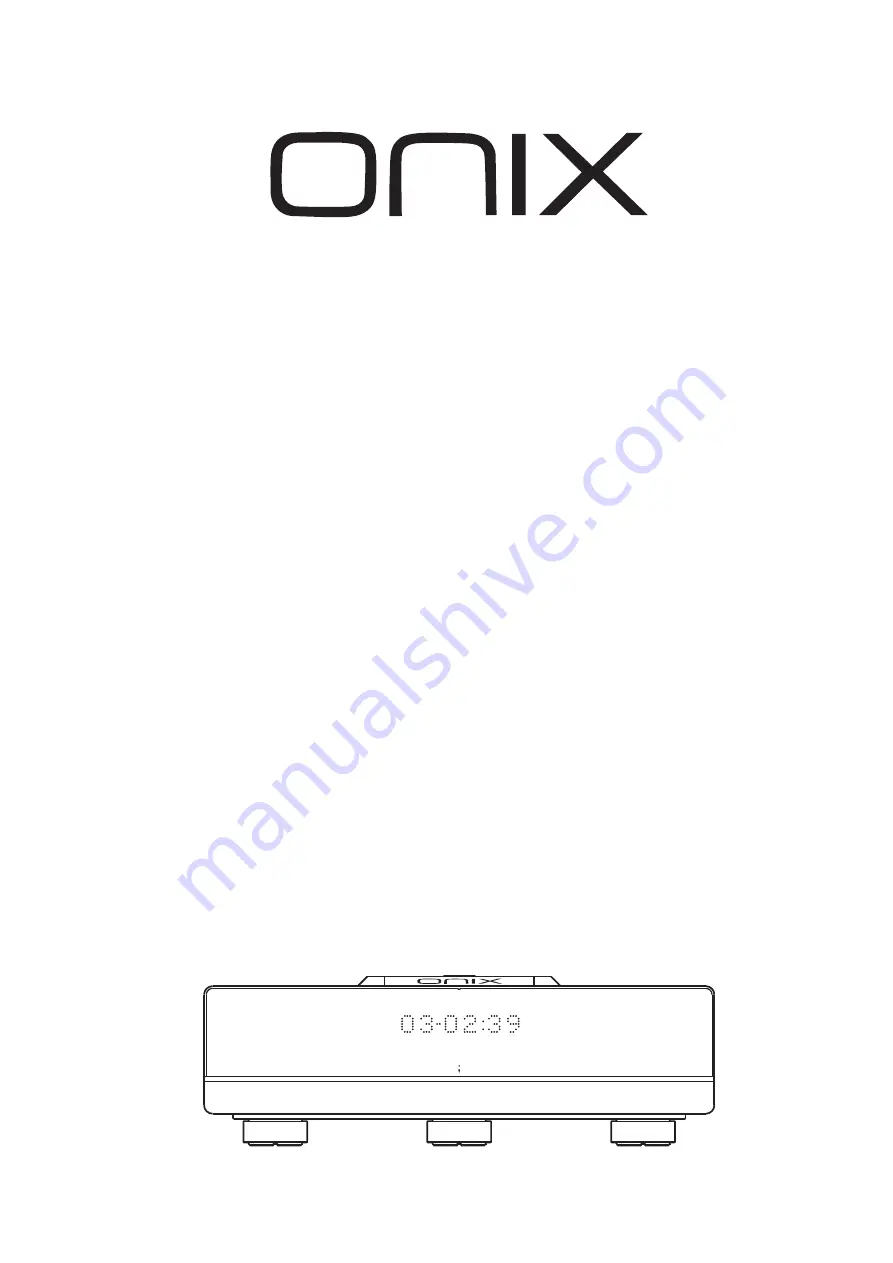
OC83s

OWNER

 MANUAL

'S

CD PLAYER

CD  PLAYER  

OC83s

ON / STANDBY

Summary of Contents for OC83s

Page 1: ...OC83s OWNER MANUAL S CD PLAYER CD PLAYER OC83s ON STANDBY ...

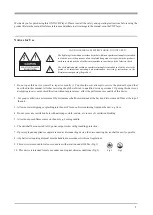
Page 2: ...ptingtocarryoutanymodificationwithoutapprovalmay affect theperformanceorqualityof thisdevice 2 For good ventilation a minimum of 10cm clearance shall be maintained at the back and two sides and 20cm at the top of theunit Allow nowaterdrippingorsplashingintotheunit Placeno objectcontainingliquidon theunit e g Vase 4 Do notcoveranyventilationholewithnewspaper cloth curtain etc incaseofventilationblo...

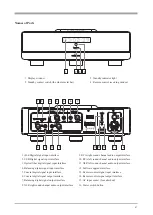
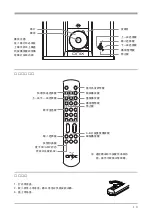
Page 3: ... metal bar 3 Standby indicator light 4 Remote control receiving window 1 iPod Digital signal input interface 2 USB Digital signal input interface 3 Optical fiber digital signal input interface 4 Balancing digital signal input interface 5 Coaxial digital signal input interface 6 Coaxial digital signal output interface 7 Balancing digital signal output interface 8 XLR right sound channel audio outpu...

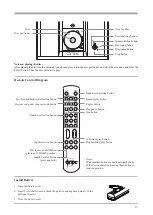
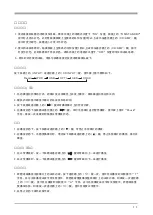
Page 4: ...press the PLAY button Then the disc will start to play Area for disc Previous song button Input selection button Next song button Play pause button Stop button Disc Disc positioner Fast forward backward selection button Previous song next song selection button Numbers selection button Input selection button Brightness adjusting button Random play button Replay button Play pause button Stop button ...

Page 5: ...al number of songs and playing time will be displayed on the display screen 3 Press the button of the device or on the remote control the disc will start to play 4 When the disc is playing press the button of the device or on the remote control the disc will stop to play and Pause willbedisplayedon thescreen Press thebuttononceagain thedevicewillrestarttoplay Stop 1 When the disc is playing press ...

Page 6: ...current song and ifyoupress the buttonon thedeviceortheremotecontrol youcanselectthenextoneofthecurrentsong Random play 1 When the disc stops playing or is playing press the button then there will be a R before the play time and it will be displayed with the current playing song alternately which means the random play function is started The random playingfunctionisrandomlyplayingthecontentofthedi...

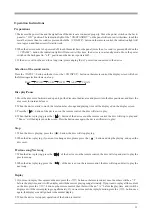
Page 7: ... on the remotecontrol andselectthecorrespondingUSB inputsignal 3 Install the attached USB drive optical disc to the computer 4 Set the Sound item of the computer and tick the speaker 2 XMOS USB Audio as the default equipment Troubleshooting Fault Possible causes Treatment No power Poor connection in socket or no utility Check power source and connect socket tightly Unable to play Disc seriously cu...

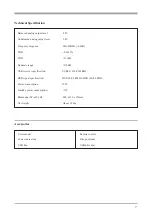
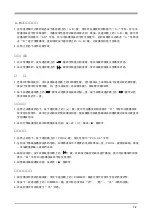
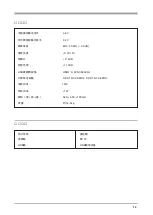
Page 8: ...013 SNR 113dB Dynamic range 110dB USB receiver specification USB2 0 32bit 384KHz DSD signal specification DSD 1bit 2 8MHz DSD 1bit 5 6MHz Power consumption 15W Standby power consumption 1W Dimension W D H 480 393 159mm Net weight About 18 5kg Accessories User manual Power source line USB line Remote control Disc positioner USB drive disc ...

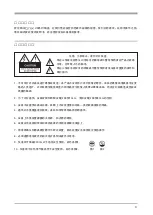
Page 9: ...设备应当连接到带保护接地连接的电网电源输出插座上 5 设备上不要放置裸露的火焰源 如点燃的蜡烛 4 通风孔不要覆盖诸如报纸 桌布和窗帘等物品而防碍通风 8 必须遵照电池废弃的相关地方条例来废弃旧电池 2 为了充分通风 设备背面和两侧应最少保留10cm 顶部应最少保留20cm的空间 敬爱的用户 欢迎购买 CD系列唱盘 让我们借此机会向您表示诚挚的谢意 我们向您建议 在动手操作之前 请仔细阅读此使用说明书 并注意存放好以备随时参考 使用注意事项 注意 为防电击 请勿打开机盖 等边三角形中有箭头闪电符号的图形表示警告使用者在产品内有高 压电 会导致人为的触电 等边三角形中有叹号的图形表示警告使用者该设备有重要的操作和 维护指示 9 仅适用于海拔2000m以下地区安全使用 标志见图1 10 仅适用于非热带气候条件下安全使用 标志见图2 图1 图2 ...

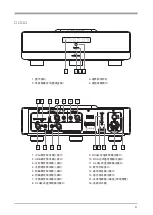
Page 10: ...T FUSE 100V 120V T2AL 220V 240V T1AL AC IN POWER ON OFF XLR RCA RCA XLR USB OPTICAL COAXIAL COAXIAL AES EBU AES EBU L R iPod CD PLAYER OC83s ON STANDBY 1 2 3 4 5 6 7 8 9 10 11 12 13 14 15 16 1 iPod数字信号输入接口 2 USB数字信号输入接口 3 光纤数字信号输入接口 4 平衡数字信号输入接口 5 同轴数字信号输入接口 6 同轴数字信号输出接口 7 平衡数字信号输出接口 8 XLR右声道音频输出接口 9 RCA右声道音频输出接口 10 RCA左声道音频输出接口 11 XLR左声道音频输出接口 12 软件升级接口 13 遥控信号输入接口 14 遥控信号输出接口 15 交流电源输入插座 带保险管 16...

Page 11: ... 编程播放键 输入选择键 1 打开电池盖 2 装入两节七号电池 确认电池正负极安装正确 3 盖上电池盖 电池安装 遥控器示意图 XRC 3B MUTE DIMMER TUNING MEM PRESET FREQ BAND ENTER MENU OK FAVORITE RETURN INPUT VOLUME PROG CD AMP NWP AUX A B CD INPUT 放碟区 上一曲选择键 输入选择键 下一曲选择键 播放 暂停键 停止键 播放注意 放入碟片后必须放 上碟压并关上碟盖 后按播放键即可播 放碟片曲目内容 碟片 碟压 机型切换键 置于CD AMP状态 待机开关键 长按 10 ...

Page 12: ...置于 ON 位置 面板上的 ON STANDBY 指示灯点亮为红色 此时可触摸面板上金属条的任何位置 1秒以上 或长按遥控器上的 CD AMP 键 指示灯变为绿色 机器进入正常工作状态 2 要关闭本机电源时 触摸面板上金属条的任何位置 1秒以上 或长按遥控器上的 CD AMP 键 指示 灯变为红色 此时机器处于待机状态 再将后板上的电源开关置于 OFF 位置即可关闭本机电源 4 在播放状态下按机器或遥控器上的 键 可对当前碟片进行暂停播放 显示屏上显示 Pause 字符 再按一次该键时则恢复正常播放状态 停止 1 在播放状态下 按下机器或遥控器上的 键 可停止当前碟片的播放 2 在播放状态下 当想更换碟片时 请先按下机器或遥控器上的 键 停止当前碟片的播放 再打开 碟盖 重复播放 1 若想连续播放当前碟片上的曲目内容 按下遥控器上的 键一次 显示区在播放时间前显示 T 字符 并与当前播放曲...

Page 13: ...按下需编程播放曲目的号码 如果错误按下不需要的号码可再按一次 PROG 键取消编程 再按 一次该键重新编入喜欢的曲目 编程播放 1 在停止或播放状态下 按下遥控器上的 键 显示区在播放时间前显示 R 字符和当前播放曲 目字符交替显示 表示已在开始执行随机播放功能 随机播放功能是随碟机自动播放碟片曲目内容直至 全部播放完毕 2 在执行随机播放过程中如想取消该功能 按一次 键或 键即可 随机播放 快退 快 进 1 在正常播放时 按住遥控器上的 键即可快速向后搜索 放开该键时恢复正常播放状态 2 在正常播放时 按住遥控器上的 键即可快速向前搜索 放开该键时恢复正常播放状态 选 曲 1 选第1至第9首曲目 可以直接按遥控器上的1至9数字键 选10首或以上曲目先按十位数对应的数字键 再按个位数字对应数字键 如 选12首曲目 先按数字键1 再按数字键2即可 2 按下机器或遥控器上的 键可以选择当前曲目...

Page 14: ... d输 入 13 常 见故障及排除 US B设 置 1 将USB电缆从电脑连接到机器后板上 2 打开机器电源并按下机器上的 INPUT 或遥控 器上的 CD INPUT 键 选择到对应的USB输 入信号 3 将随机附带的 USB驱动光盘 安装到电脑上 4 将电脑的 声音 选项进行设置 并把 扬声器 2 XMOS USB Audio 勾选为默认设备 如右图 电源插座接触不良或无电 正确连接音频电缆 检查电源的来路 插紧插座 可能的原因 处理办法 音频电缆没接好 清洁碟片或换用良好的碟片 将碟片有字或图案的一面朝上 碟片严重划伤或污浊 碟片放反 故障现象 电源无法接通 无声音 不能播放 遥控器的电池装反或耗尽 重新安装电池或更换新电池 注 如按以上方法还无法正常工作 请与当地经销商或维修点联络 必要时将机器送维修点检查 无遥控 ...

Page 15: ... 频率响应 6Hz 20KHz 0 5dB 谐波失真 0 0013 信噪比 113dB 动态范围 110dB 消耗功率 15W 待机功率 1W 体积 宽 深 高 480 393 159mm 净 重 约 18 5kg 用户手册 电源线 遥控器 碟 压 USB驱动光盘 USB接收器规格 USB2 0 32bit 384KHz DSD信号规格 DSD 1bit 2 8MHz DSD 1bit 5 6MHz 14 非平衡模拟输出电平 2 4V USB线 ...

Page 16: ...由于产品不断改进 各项规格及设计随时更改 恕不另行通知 Due to continuous improvement every specification and design is subjecttochangeatanytimewithoutfurthernotice www onix audio co uk ONIX ELECTRONICS LTD ENGLAND ...

Reviews: