


1
GB
Oregon Scientific
TM
JUMBO RF CLOCK
with Indoor Thermometer
(JM889/JM889U)
User Manual
TABLE OF CONTENTS
Introduction ........................................................................ 2
Key features ....................................................................... 2
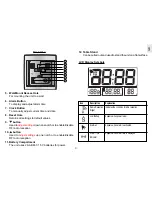
Front view ........................................................................ 2
Back view ........................................................................ 3
LCD display symbols ....................................................... 3
Safety and care instructions ............................................. 4
Safety precautions ........................................................... 4
Caring for your product .................................................... 4
Getting started ................................................................... 4
Unpacking the product ..................................................... 4
Batteries .......................................................................... 5
Placement of unit ............................................................. 5
Indoor temperature display .............................................. 6
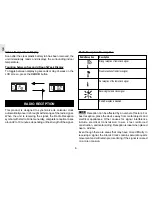
Toggling between seconds/day-of-week display ............. 6
Radio reception .................................................................. 6
Radio reception description ............................................. 6
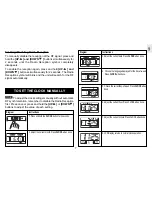
Enabling/disabling radio reception ................................... 7
To set the clock manually ................................................. 7
Language options ............................................................ 8
Alarm functions .................................................................. 8
Basic functions ................................................................ 8
Displaying alarm time ...................................................... 8
Adjusting the alarm time .................................................. 9
Activating / deactivating the alarm ................................... 9
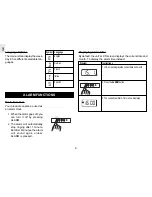
Reset hole ........................................................................... 9
Troubleshooting guide .................................................... 10
Specifications ................................................................... 11
Warnings ........................................................................... 11
Additional resources ....................................................... 12
EC-Declaration of conformity.......................................... 12


