background image

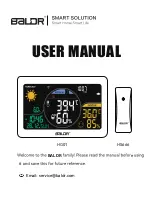
Full Weather Station with Radio Controlled
Clock and Projection
(Model #: PS-M02 / PS-M02U)

User Manual

EN

PS M02 English Cover R7 op

7/24/03, 11:57 AM

1

Black

Summary of Contents for PSM02A

Page 1: ...Full Weather Station with Radio Controlled Clock and Projection Model PS M02 PS M02U User Manual EN PS M02 English Cover R7 op 7 24 03 11 57 AM 1 Black...

Page 2: ...TABLE OF CONTENTS About this guide 2 Product overview 3 Getting started 8 Batteries 8 AC power adapter 8 Switch between modes 8 Change settings 9 Remote unit setup 9 Clock 10 Alarm 11 Calendar 12 Moon...

Page 3: ...PS M02 PS M02U This powerful device bundles time keeping alarm indoor and wireless outdoor temperature and humidity monitoring weather forecasting and projection features into a single tool you can us...

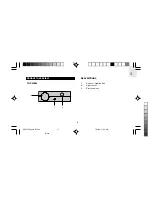
Page 4: ...3 EN DESCRIPTIONS 1 Snooze Light button 2 Light sensor 3 Projection lens PRODUCT OVERVIEW TOP VIEW 2 1 3 PS M02 English R18 op 7 24 03 11 56 AM 3 Black...

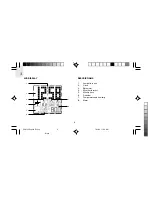
Page 5: ...LCD DISPLAY DESCRIPTIONS 1 Low battery icon 2 Clock 3 Barometer 4 Weather forecast 5 Moon phase 6 Calendar 7 Temperature and humidity 8 Alarm 1 2 3 4 5 6 7 8 PS M02 English R18 op 7 24 03 11 56 AM 4 B...

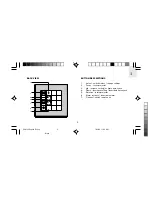
Page 6: ...ings 2 Focus focus projector 3 Up increase setting activate auto synch 4 Down decrease setting deactivate auto synch 5 Rotation rotate projector 6 Alarm activate deactivate alarm 7 Channel switch remo...

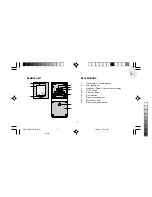
Page 7: ...ND SIDE VIEW DESCRIPTIONS 1 Battery compartment 2 Backlight switch 3 Reset button 4 Light sensitivity knob 5 DC power input jack AC power adapter not shown NOTE 5 4 1 2 PS M02 English R18 op 7 24 03 1...

Page 8: ...end display 2 Low battery icon 3 Humidity Trend Comfort Level display 4 C F switch 5 Channel switch 6 Reset button 7 Battery compartment 8 Wall mount hole 9 Battery compartment lid 1 2 5 3 4 6 7 8 9 P...

Page 9: ...the point of a blunt object such as a ball point pen Insert the batteries in the remote unit before you set up the main unit Do not use rechargeable batteries AC POWER ADAPTER An AC power adapter is...

Page 10: ...one remote unit be sure to select a different channel number for each unit INSTALLATION Mount the remote unit on a flat surface using the recess holes on the back of the unit For best results Before...

Page 11: ...to complete Once complete the icon will stop blinking For best results place the unit away from metal or electrical objects and near a window with a clear view to the sky TO DISABLE OR ENABLE AUTO SY...

Page 12: ...r two minutes The LCD display lights up for the first 8 seconds SET ALARM 1 Press SELECT several times until the Alarm area flashes 2 Press and hold SELECT for 2 seconds to enter the setting mode 3 Se...

Page 13: ...until the calendar area flashes 2 Press and hold SELECT for 2 seconds to enter the calendar setting mode 3 Select the year month date and language Press UP or DOWN to change the setting Press SELECT t...

Page 14: ...are measured by the main indoor unit BAROMETRIC TREND The barometric trend arrow for the last 30 minutes is always displayed VIEW THE LAST 24 HOURS Press SELECT 2 times until the Barometer Area flashe...

Page 15: ...hPa or inHg Press UP or DOWN to change the setting Press SELECT to confirm WEATHER FORECAST This product forecasts the next 12 to 24 hours of weather within a 30 to 50 km 19 31 mile radius with 70 to...

Page 16: ...NNEL While in the Temperature Humidity Mode press CHANNEL to switch between CH 1 2 or 3 or press and hold CHANNEL for 2 seconds to enter Auto scan mode If only 1 remote unit is in use you will not be...

Page 17: ...and outdoor units This is normal and does not affect the general performance of the product Reception will automatically resume once the interference ends COMFORT ZONE The indoor and outdoor comfort...

Page 18: ...Press SELECT to confirm BACKLIGHT Press SNOOZE LIGHT to illuminate the backlight for 5 seconds CONTINUOUS BACKLIGHT The AC power adapter must be plugged in to use this feature 8 1 The BACKLIGHT switc...

Page 19: ...ht The maximum projection range is 2 meters 6 feet The image gets larger the farther you display it PROJECT TIME ALARM STATUS In a darkened room press SNOOZE LIGHT to display the time and alarm status...

Page 20: ...again to deactivate RESET SYSTEM The RESET buttons are located in the battery compartments for the main and remote units Press these buttons with the tip of a blunt object such as a ball point pen whe...

Page 21: ...main unit to extreme force shock or fluctuations in temperature or humidity Do not tamper with the internal components Do not mix new and old batteries or batteries of different types Do not use recha...

Page 22: ...will return to default 3 Replace batteries Temp Shows LLL or HHH Temperature is out of range Problem Symptom Remedy Backlight No continuous backlight Plug in AC power adapter Check the BACKLIGHT swit...

Page 23: ...ches Weight 136 grams with battery Temperature Unit C or F Range Main unit 5 C to 50 C 23 F to 122 F Problem Symptom Remedy 4 Place clock near window away from electrical devices and wait 10 20 minute...

Page 24: ...Minimum maximum Trend 3 change Barometer Unit mb hPa or inHg Range 500 to 1050 mb 14 77 to 31 01 inHg Resolution 1 mb 0 03 inHg Altitude 100 to 2500 meters 328 to 8202 feet Display Rainy cloudy partl...

Page 25: ...low tide Alarm 7 melody 2 minute crescendo Snooze 8 minutes Projector Display Current time alarm status Rotation 180 and image flip Focusing Manual Projection 5 second or continuous Power Main unit 4...

Page 26: ...ew product and other Oregon Scientific products such as digital cameras hand held organizers health and fitness gear and weather stations The website also includes contact information for our customer...

Page 27: ...R TTE Directive applied standard s ETSI EN 301 489 1 3 Ver 1 4 1 2002 08 Safety of information technology equipment Article 3 1 a of the R TTE directive applied standard s EN 60950 2000 Additional in...

Reviews: