
Projection Clock Glow in Dark
Model: TW221
USER MANUAL
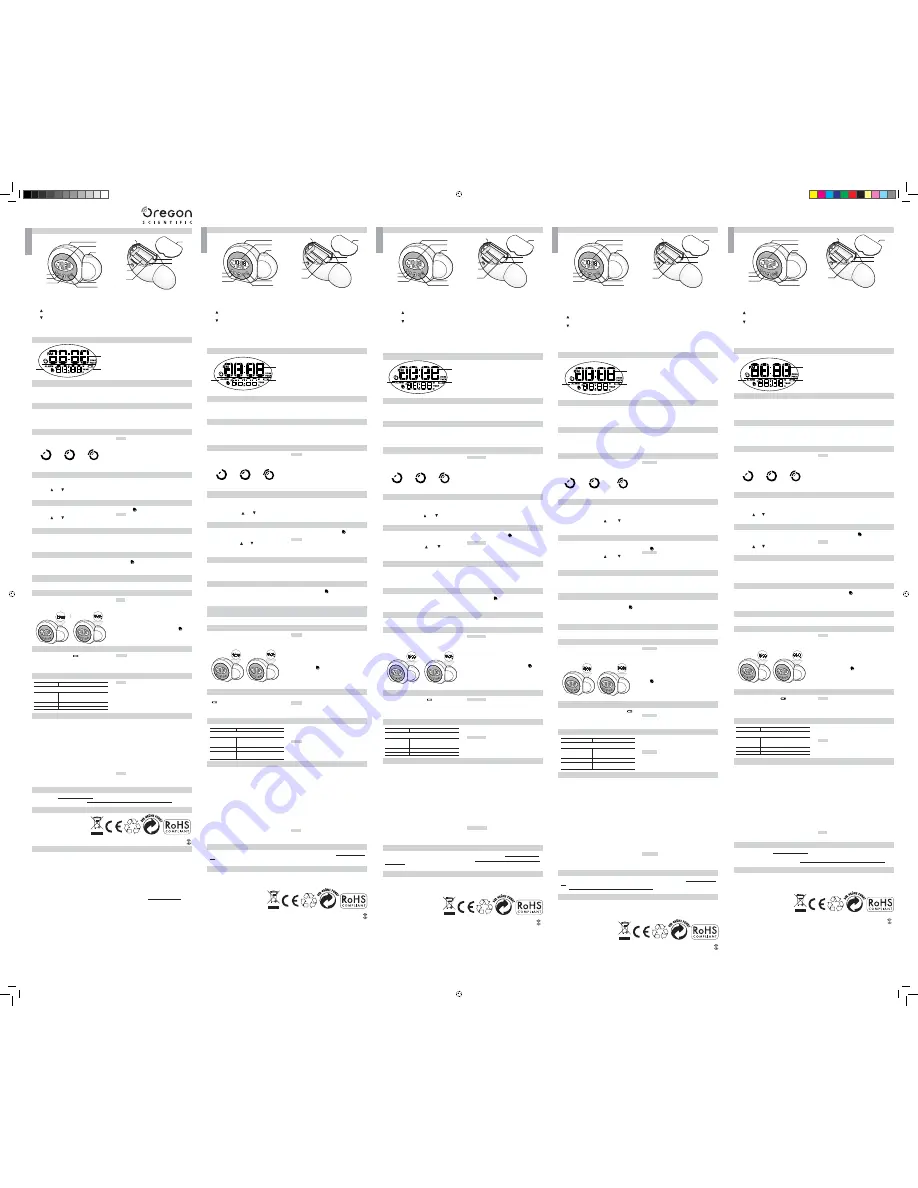
OVERVIEW
1. Projector
2. LCD display
3.
SNOOZE / LIGHT
key
• In normal time mode, press it once to turn on the
backlight for 5 seconds.
4.
key
• press it to incre ase the setting values.
5.
key
• press it to decrease the setting values.
6.
SET CLOCK
key
7.
SET ALARM
key
8.
ALARM ON / OFF
key
9. DC jack
10.
AA size battery compartment
11.
RESET
key
12.
PROJECTION ON / OFF
slide switch
• Slide it to turn on / off the projector.
13.
180° FLIP
key
• Press it to rotate the projected image by 180°.
14.
RCC
key
• In normal time mode, press it once to receive the
RCsignal for reception testing.
15. BEEP / NATURE slide switch
16. BATTERY DOOR
LCD DISPLAY
1. Low battery indicator
2.
Time
3.
Alarm time & Date
BATTERY COMPARTMENT
1.
Remove the battery door
2.
Insert 2 new AA size batteries as per the polarity
information marked on the battery compartment.
3. Press “
RESET
” key to restart the clock.
4.
Replace the battery door.
RECEPTION OF RADIO CONTROLLED TIME SIGNAL
The time and calendar are radio-controlled. The current
time and calendar are automatically synchronized with
time signal transmitted from Germany.
When used for the first time (after inserting batteries or
pressing “
RESET
” key), the clock will start to receive
the time signals and the signal reception indicator will
be flashing for 5 minustes.
SIGNAL RECEPTION INDICATOR
The wave sigment flashing means time signals are
being received. The signal quality could be classifed
into 3 types:
No signal
Weak
signal
Excellent
signal
NOTE
1.
The unit will automatically search for the time signal
at 2:00 (3:00 or 4:00 is also available if the signal
is not received at 2:00), 8:00, 14:00 and 20:00
each day.
2.
Always place the unit away from interfering sources
such as TV set, computer, etc.
3.
Avoid placing the unit on or next to metal plates.
TIME AND CALENDAR MANUAL SETTING
1.
In normal time mode, press “
SET CLOCK
” key once
to enter the time setting mode.
2. Press “ ” or “
” key to change the settings.
3. Press “
SET CLOCK
” to confirm. The setting order
is: 12 / 24 -hr format, + / - 23 hours time difference
time, year, day / month format, date.
4. Press “
SET CLOCK
” key to save and exit the
setting mode.
ALARM TIME SETTING
1.
In normal time mode, press “
SET ALARM
” key once
to enter the alarm time setting mode.
2. Press “ ” or “
” key to set hour / minute.
3. Press “
SET ALARM
” key to save and exit the setting
mode. “ ” indicates alarm is ON.
NOTE
•
The alarm will be automatically turned on when you
set the alarm time.
USING ALARM FUNCTION
1.
Set the alarm time as the above section.
2.
In normal time mode, press “
ALARM ON / OFF
” key once to display the current alarm time.
3.
Press it again to turn alarm ON / OFF.
TO SILENCE THE ALARM
1. Press “
SNOOZE / LIGHT
” to silence the alarm for 8 minutes. The “ ” will be flashing.
2.
Press any other key to turn the alarm off and activate it again after 24 hours.
3.
If no key is pressed within 120 seconds, the alarm will be turned off and be activated again after 24 hours.
TO SELECT BEEP OR SOOTHING SOUND ALARM
1.
Slide Beep/Nature switch to select Beep sound or Soothing sound for alarm.
USING THE PROJECTOR
Slide “
PROJECTION ON / OFF
” to turn on / off the
projector, and project to a dark background within 1-4
meters so that the time will be shown as below:
NOTE
1.
Slide “
PROJECTION ON / OFF
” to turn on the
projection function.
2. Press “
SNOOZE / LIGHT
” to turn on the projector
for 5 seconds.
3.
When using DC power adapter, the projector will be
turned on all the time.
4.
If the alarm is turned, on the alarm icon “
” will
also be projected.
5.
Press “
180 FLIP
” to rotate the projected image
by 180°.
BATTERY REPLACEMENT
If the low battery indicator “
” displays beside the
time, it indicates that battery power of main unit is not
enough and you should replace with 2 new AA size
batteries at once.
NOTE Attention! Please dispose of the used unit or
batteries in an ecologically safe manner.
SPECIFICATIONS
TYPE
DESCRIPTION
MAIN UNIT
L x W x H
149 x 57 x 100 mm
(5.87 x 2.24 x 3.94 in)
Weight
176g
Power
2 x AA 1.5V batteries or 4.5V DC
NOTE We recommend that you use alkaline batteries
with this product for longer usage and lithium batteries
in temperatures below freezing.
PRECAUTIONS
•
Do not subject the unit to excessive force, shock,
dust, temperature or humidity.
•
Do not cover the ventilation holes with any items
such as newspapers, curtains etc.
•
Do not immerse the unit in water. If you spill liquid
over it, dry it immediately with a soft, lint-free cloth.
•
Do not clean the unit with abrasive or
corrosivematerials. Do not tamper with the unit’s
internal components. This invalidates the warranty.
•
Only use fresh batteries. Do not mix new and old
batteries.
•
Images shown in this manual may differ from the
actual display.
•
When disposing of this product, ensure it is collected
separately for special treatment and not as normal
household waste.
•
Placement of this product on certain types of wood
may result in damage to its finish for which Oregon
Scientific will be responisble.
•
Consult the furniture manufacturer’s care instructions
for information.
•
The contents of this manual may not be reproduced
without the permission of the manufacturer.
•
Do not dispose old batteries as unsorted municipal
waste. Collection of such waste separately for special
treatment is necessary.
•
Please note that some units are equipped with a
battery safety strip. Remove the strip from the battery
compartment before first use.
NOTE The technical specifications for this product and
the contents of the user manual are subject to change
without notice.
ABOUT OREGON SCIENTIFIC
Visit our website (www.oregonscientific.com ) to learn more Oregon Scientific products.
For international inquiries, please visit: http://corporate.oregonscientific.com/afterSales_contactUs.asp
7.
1.
4.
8.
2.
5
.
3.
6.
13.
16.
10.
14.
11.
15
.
9.
12.
2.
1.
3.
EU-DECLARATION OF CONFORMITY
Hereby, Oregon Scientific, declares
that this Projection Clock Glow in Dark
(Model: TW221) is in compliance with
R&TTE99 / 5. A copy of the signed
and dated Declaration of Conformity
is available on request via our Oregon
Scientific Customer Service.
FCC COMPLIANCE STATEMENT
This device complies with part 15 of the FCC Rules.
Operation is subject to the following two conditions: (1)
This device may not cause harmful interference, and
(2) this device must accept any interference received,
including interference that may cause undesired
operation. Changes or modifications nor expressly
approved by the party responsible for compliance could
void the user’s authority to operate the equipment.
FCC WARNING
This equipment has been tested and found to comply with
the limits for a Class B digital device, pursuant to Part 15
of the FCC Rules. These limits are designed to provide
reasonable protection against harmful interference in a
residential installation.
This equipment generates, uses and can radiate radio
frequency energy and, if not installed and used in
accordance with the instructions, may cause harmful
interference to radio communications.
However, there is no guarantee that interference will not
occur in a particular installation. If this equipment does
cause harmful interference to radio or television reception,
which can be determined by turning the equipment off
and on, the user is encouraged to try to correct the
interference by one or more of the following measures:
•
Reorient or relocate the receiving antenna.
•
Increase the separation between the equipment and
the receiver.
•
Connect the equipment into an outlet different from
that to which the receiver is connected.
• Consult the dealer or an experienced radio/TV
technician for help.
CAUTION :
1. RISK OF EXPLOSION IF BATTERY IS REPLACED BY
AN INCORRECT TYPE.
2. DIPOSE OF USED BATTERIES ACCORDING TO THE
INSTRUCTIONS.
3. Use only with the provided adaptor model
4. The socket-outlet shall be installed near the equipment
and install be easily accessible.
The following information is not to be used as contact for
support or sales. Please call our customer service number
(listed on our website at www.oregonscientific.com
or on
the warranty card for this product) for all inquiries instead.
We
Name: Oregon Scientific, Inc.
Address: 19861 SW 95th AVe., Tualatin, Oregon 97062 USA
Telephone No.: 1-800-853-8883
Declare that the product
Product No.: TW221
Product Name: Projection Clock Glow in Darkre
Manufacturer: Oregon Scientific, Inc.
Address: Block C, 9/F, Kaiser Estate, Phase 1, 41 Man Yue
St., Hung Hom, Kowloon, Hong Kong
is in conformity with Part 15 of the FCC Rules. Operation is
subject to the following two conditions:
1) This device may not cause harmful interference.
2) This device must accept any interference received,
including interference that may cause undesired operation.
ALL EU countries, Switzerland
and Norway
COUNTRIES RTTE APPROVAL COMPLIED
Orologio con proiezione che si illumina al buio
Modello: TW221
MANUALE PER L’UTENTE
PANORAMICA
1. Proiettore:
2. Display LCD
3. Tasto
SNOOZE / LIGHT
• in modalità ora normale, premerlo una volta per
attivare la retroilluminazione per 5 secondi.
Tasto
• premere per aumentare i valori dell’impostazione.
5.
Tasto
• premere per diminuire i valori dell’impostazione.
6. Tasto
SET CLOCK
7. Tasto
SET ALARM
8. Tasto
ALARM ON/OFF
9. Ingresso DC
10. Vano batterie
per pile stilo tipo AA da 1,5V
11. Tasto
RESET
12. Interruttore PROJECTION ON / OFF
• spostarlo per accendere / spegnere il proiettore.
13. Tasto
180° FLIP
• premerlo per ruotare l’immagine proiettata di 180°.
14. Tasto
RCC
• in modalità ora normale, premerlo una volta per
ricevere il segnale radiocontrollato e testare la
ricezione.
15. Interruttore BEEP/NATURE
16.
Coperchio vano batterie
DISPLAY LCD
1. Indicatore di batteria in esaurimento
2. Ora
3. Ora della sveglia e data
VANO BATTERIE
1. Rimuovere il
coperchio del vano
batterie.
2. Inserire 2 nuove batterie di tipo AA rispettando la
polarità indicata.
3. Premere “
RESET
” per riavviare l’orologio.
4. Riposizionare la copertura del vano batterie.
RICEZIONE DEL SEGNALE ORARIO RADIOCONTROLLATO
L’ora e la data sono radiocontrollate. Ora e data correnti
vengono automaticamente sincronizzate con il segnale
orario trasmesso dalla Germania.
Al primo utilizzo (dopo aver inserito le batterie o aver
premuto il tasto “
RESET
”), l’orologio comincia a
ricercare
il segnale orario e l’indicatore della ricezione del segnale
lampeggia per 5 minuti.
INDICATORE DELLA RICEZIONE DEL SEGNALE
Il segmento delle onde che lampeggia indica
il livello di
ricezione del segnale di radiocontrollo
. La qualità del
segnale può essere classificata in 3 livelli:
Nessun
segnale
Segnale
debole
Segnale
ottimo
NOTA
1. L’unità eseguirà automaticamente la ricerca del
segnale orario ogni giorno alle 2:00 (anche alle
3:00 o alle 4:00 se il segnale non è stato ricevuto
alle 2:00), alle 8:00, alle 14:00 e alle 20:00.
2. Collocare sempre l’unità lontano da fonti di
interferenze come televisori, computer etc.
3. Evitare di collocare l’unità sopra o vicino a piastre
metalliche.
IMPOSTAZIONE MANUALE DI ORA E DATA
1. In modalità ora normale, premere una volta il
tasto “
SET CLOCK
” per accedere alla modalità
impostazione dell’ora.
2. Premere il tasto “
” o “
” per modificare le
impostazioni.
3. Premere “
SET CLOCK
” per confermare. L’ordine
delle impostazioni è: formato 12 / 24 ore, fuso orario
+ / - 23 ore, anno, formato giorno / mese, data.
4. Premere il tasto “
SET CLOCK
” per salvare e uscire
dalla modalità di impostazione.
IMPOSTAZIONE DELL’ORA DELLA SVEGLIA
1. In modalità ora normale, premere una volta il
tasto “SET ALARM” per accedere alla modalità
impostazione della sveglia.
2. Premere il tasto “
” o “
” per impostare ora e
minuti.
3. Premere il tasto “SET ALARM” per salvare e uscire
dalla modalità di impostazione. “ ”
indica
che la
sveglia è attiva.
NOTA
1. La sveglia si accende automaticamente quando si
imposta l’ora della sveglia.
UTILIZZO DELLA FUNZIONE DELLA SVEGLIA
1. Impostare l’ora della sveglia come spiegato in precedenza.
2. In modalità ora normale, premere una volta il tasto “
ALARM ON / OFF
” per visualizzare l’ora corrente della sveglia.
3. Premerlo nuovamente per attivare / disattivare la sveglia.
SILENZIAMENTO DELLA SVEGLIA
1. Premere “
SNOOZE / LIGHT
” per silenziarla per 8 minuti. Lampeggia il simbolo “
” .
2. Premere qualsiasi altro tasto per spegnere la sveglia e per attivarla nuovamente dopo 24 ore.
3. Se non viene premuto nessun tasto entro 120 secondi, la sveglia verrà disattivata e si riattiverà dopo 24 ore.
SELEZIONE DELLA SVEGLIA CON SEGNALE ACUSTICO O CON MELODIA
RILASSANTE
1. Spostare l’interruttore Beep/Nature per selezionare la sveglia con segnale acustico o con melodia rilassante.
USO DEL PROIETTORE
Spostare l’interruttore “
PROJECTION ON / OFF
” per
accendere / spegnere il proiettore e proiettare l’ora su
uno sfondo scuro entro una distanza di 1-4 metri, in modo
che l’ora venga visualizzata come di seguito:
NOTA
1. Spostare “
PROJECTION ON / OFF
” per attivare la
funzione di proiezione.
2. Premere “
SNOOZE / LIGHT
” per accendere il
proiettore per 5 secondi.
3. Quando si utilizza un alimentatore DC, il proiettore
rimane acceso per tutto il tempo.
4. Se la sveglia è attiva, verrà proiettata anche l’icona
della sveglia“
” .
5. Premere “
180 FLIP
” per ruotare l’immagine proiettata
di 180°.
SOSTITUZIONE DELLE BATTERIE
Se l’indicatore di batteria in esaurimento mostra l’icona
“
” accanto all’ora, significa che l’alimentazione
dell’unità principale non è sufficiente e che è necessario
sostituire immediatamente le batterie con 2 batterie
nuove di tipo AA.
NOTA
Attenzione! Smaltire l’unità o le batterie usate in modo
rispettoso dell’ambiente.
SPECIFICHE
TIPO
DESCRIZIONE
UNITÀ PRINCIPALE
L x P x H
149 x 57 x 100 mm
Peso
176g
Alimentazione
2 batterie da 1,5 V di tipo AA
or 4.5V DC
NOTA
per un uso prolungato del prodotto, si consiglia di
utilizzare batterie alcaline, mentre in caso di temperature
inferiori allo zero si consiglia l’uso di batterie al litio.
PRECAUZIONI
•
Non sottoporre il prodotto a forza eccessiva, urti,
polvere, temperatura o a umidità.
•
Non otturare i fori di aerazione con oggetti come
giornali, tende, etc.
•
Non immergere il prodotto in acqua. Se si versa del
liquido sul prodotto, asciugarlo immediatamente con
un panno morbido e liscio.
•
Non pulire l’unità con materiali abrasivi o corrosivi.
•
Non manomettere i componenti interni dell’unità. In
questo modo si invalida la garanzia.
•
Utilizzare solo batterie nuove. Non mescolare batterie
nuove con batterie vecchie.
•
Le immagini del manuale possono differire dalla
realtà.
•
Al momento dello smaltimento del prodotto, utilizzare
la raccolta differenziata per il trattamento speciale
e non smaltire come normale rifiuto domestico.
•
Oregon Scientific
TM
declina ogni responsabilità
per eventuali danni alle finiture causati dal
posizionamento del prodotto su determinati tipi di
legno.
•
Consultare le istruzioni fornite dal fabbricante del
mobile per ulteriori informazioni.
•
Il contenuto di questo manuale non può essere
ristampato senza l’autorizzazione del fabbricante.
•
Non smaltire le batterie vecchie come rifiuto non
differenziato.
•
È necessario che questo tipo di rifiuto venga smaltito
separatamente per essere trattato in modo specifico.
•
Alcune unità sono dotate di una striscia protettiva
per le batterie. Rimuoverla dal vano batterie prima
dell’utilizzo.
NOTA le specifiche tecniche del prodotto e il contenuto
del manuale per l’utente possono essere modificati
senza preavviso.
INFORMAZIONI SU OREGON SCIENTIFIC
Per avere maggiori informazioni sui nuovi prodotti Oregon Scientific visita il nostro sito internet www.oregonscientific.
com, dove potrai trovare tutte le informazioni di cui hai bisogno.
7.
1.
4.
8.
2.
5
.
3.
6.
13.
16.
10.
14.
11.
15
.
9.
12.
4
2.
1.
3.
Horloge à Projection Brille dans le Noir
Modèle : TW221
MODE D’EMPLOI
VUE D’ENSEMBLE
1. Projecteur :
2. Écran LCD
3. Bouton
PAUSE / LUMIÈRE
• En mode horaire normal, appuyer une fois pour
allumer le rétroéclairage pendant 5 secondes.
4. Bouton
• Appuyer pour augmenter les valeurs de réglage.
5. Bouton
• Appuyer pour diminuer les valeurs de réglage.
6. Bouton
RÉGLAGE DE L’HEURE
7. Bouton
RÉGLAGE DE L’ALARME
8. Bouton
ALARME ARRÊT / MARCHE
9. Prise CA
10. Compartiment à piles AA
11. Bouton
REMISE À ZÉRO
12. Interrupteur coulissant PROJECTION ARRÊT /
MARCHE
• Faire coulisser pour allumer / éteindre le
projecteur.
13. Bouton
TOUR À 180°
• Appuyer pour faire tourner l’image projetée de
180°.
14. Bouton
RP
• En mode horaire normal, appuyer une fois
pour recevoir le signal Radio Piloté pour tester la
réception.
15. Bouton BIP/NATURE
16. COUVERCLE DES PILES
ÉCRAN LCD
1. Indicateur piles faibles
2. Heure
3. Heure d’alarme & Date
COMPARTIMENT À PILES
1. Enlever le couvercle du compartiment
2. Installer 2 piles AA neuves selon la polarité indiquée
dans le compartiment à piles.
3. Appuyer sur le bouton “
RESET
” pour redémarrer
l’horloge.
4. Remettre le couvercle des piles en place.
RÉCEPTION DU SIGNAL HORAIRE RADIO PILOTÉ
L’heure et le calendrier sont radio-pilotés. L’heure et le
calendrier courants sont automatiquement synchronisés
par le signal émis depuis l’Allemagne.
Quand elle est utilisée pour la première fois, (après avoir
installé les piles ou appuyé sur le bouton “
RESET
”),
l’horloge commencera à recevoir le signal horaire et
l’indicateur de réception du signal clignotera pendant
5 minutes.
INDICATEUR DE RÉCEPTION DE SIGNAL
Les segments d’onde clignotants veulent dire que les
signaux horaires sont en train d’être reçus. La qualité
du signal peur être classée en 3 types :
Aucun
Signal
Signal
Faible
Signal
Excellent
REMARQUE
1. L’appareil va automatiquement chercher le signal
horaire à 2H00 (3H00 ou 4H00 sont aussi disponibles
si le signal n’a pas été reçu à 2H00), 8H00, 14H00
et 20H00 chaque jour.
2. Toujours placer l’appareil loin de sources
d’interférence telles que téléviseur, ordinateur, etc.
3. Éviter de place l’appareil sur ou à côté de plaques
métalliques.
RÉGLAGE MANUEL DE L’HEURE ET DU CALENDRIER
1. En mode horaire normal, appuyer sur le bouton
“
SET CLOCK
” une fois pour entrer dans le mode
de réglage horaire.
2. Appuyer sur le bouton “ ” ou “ ” pour changer
les réglages.
3. Appuyer sur “
SET CLOCK
” pour confirmer. L’ordre
de réglage est: format 12 / 24 -hr, + / - 23 heures
de décalage horaire, an, format jour / mois, date.
4. Appuyer sur le bouton “
SET CLOCK
” pour enregistrer
et sortir du mode réglage.
RÉGLAGE DE L’HEURE D’ALARME
1. En mode horaire normal, appuyer sur le bouton
“SET ALARM” une fois pour entrer dans le mode
de réglage de l’alarme.
2. Appuyer sur le bouton “ ” ou “ ” pour régler
heure / minute.
3. Appuyer sur le bouton “SET ALARM” pour enregistrer
et sortir du mode réglage. “ ” indique que l’alarme
est en marche ON.
REMARQUE
1. L’alarme se mettra automatiquement en marche
quand l’heure d’alarme sera réglée.
UTILISATION DE LA FONCTION ALARME
1. Régler l’heure d’alarme comme indiqué ci-dessus.
2. En mode horaire normal, appuyer sur le bouton “
ALARM ON / OFF
” une fois pour afficher l’heure d’alarme
courante.
3. Appuyer de nouveau pour allumer / éteindre l’alarme.
POUR STOPPER L’ALARME
1. Appuyer sur “
SNOOZE / LIGHT
” pour stopper l’alarme pendant 8 minutes. “ ” va clignoter.
2. Appuyer sur tout autre bouton pour éteindre l’alarme et qu’elle se réactive de nouveau dans 24 heures.
3. Si aucun bouton n’est utilisé dans les 120 secondes, l’alarme s’éteindra et se réactivera dans 24 heures.
POUR CHOISIR ENTRE LE BIP ET LES SONS APAISANTS POUR L’ALARME
1. Faire coulisser l’interrupteur Bip/Nature pour choisir le bip sonore ou les sons apaisants pour l’alarme.
UTILISATION DU PROJECTEUR
Faire coulisser l’interrupteur “
PROJECTION ON / OFF
”
pour allumer / éteindre le projecteur et projeter sur un
fond sombre entre 1 et 4 m. de distance pour que l’heure
apparaisse comme il est montré ci-dessous :
REMARQUE
1. Faire coulisser “
PROJECTION ON / OFF
” pour
allumer la fonction projection.
2. Appuyer sur “
SNOOZE / LIGHT
” pour allumer le
projecteur pendant 5 secondes.
3. Si l’adaptateur CA est utilisé, le projecteur restera
allumé en permanence.
4. Si l’alarme est en route, l’icone d’alarme“
” sera
aussi projeté.
5. Appuyer sur “
180 FLIP
” pour faire tourner l’image
projetée de 180°.
REMPLACEMENT DES PILES
Si l’indicateur de piles faibles “
” s’affiche à côté de
l’heure, cela indique que la charge des piles n’est pas
suffisante et qu’il faudrait remplacer les piles avec 2 piles
AA neuves immédiatement.
REMARQUE
Attention! Veuillez disposer de l’appareil ou des piles
usagées d’une manière écologiquement responsable.
CARACTÉRISTIQUES
TYPE
DESCRIPTION
UNITÉ PRINCIPALE
L x l x H
149 x 57 x 100 mm
(5,87 x 2,24 x 3,94 pouces)
Poids
176g
Alimentation
2 x piles AA 1,5V or 4.5V DC
REMARQUE
Nous recommandons de toujours utiliser des piles
alcalines avec cet appareil pour une durée d’utilisation
prolongée et des piles au lithium quand les températures
sont inférieures à zéro.
PRÉCAUTIONS
•
Ne pas faire subir à l’appareil des forces, chocs,
poussières, températures ou humidité excessifs.
•
Ne pas couvrir les orifices de ventilation avec des
objets tels que journaux, rideaux, etc.
•
Ne pas plonger l’appareil dans l’eau. Si du liquide
est renversé sur l’appareil, le sécher immédiatement
avec un chiffon doux qui ne peluche pas.
•
Ne pas nettoyer l’appareil avec des produits abrasifs
ou corrosifs.
•
Ne pas toucher aux composants internes de
l’appareil, ceci annule la garantie.
•
Utiliser seulement des piles neuves. Ne pas mélanger
les piles neuves et usées.
•
Les images montrées dans ce mode d’emploi
peuvent être différentes de l’aspect réel de ce
produit.
•
Quand ce produit est mis au rebut, s’assurer qu’il est
collecté séparément pour être traité spécialement
et pas avec les ordures ménagères.
•
Placer cet appareil sur certains types de bois
peut causer des dégâts à sa finition dont Oregon
Scientific
TM
ne peut pas être tenus pour responsable.
•
Consulter la notice d’entretien du fabricant de meuble
pour connaitre l’information.
•
Le contenu de ce mode d’emploi ne peut pas être
reproduit sans la permission du fabricant.
•
Ne pas jeter les piles avec les ordures ménagères.
•
La collecte de tels déchets se fait séparément car
un traitement particulier est nécessaire.
•
Veuillez remarquer que certains appareils sont
équipés d’un ruban de sécurité des piles. Enlever
le ruban du compartiment à piles avant la première
utilisation.
REMARQUE Les caractéristiques techniques de ce
produit et le contenu de ce mode d’emploi sont sujets à
changements sans avertissement préalable.
À PROPOS D’OREGON SCIENTIFIC
Pour plus d‘informations sur les produits Oregon Scientific France, rendez-vous sur notre site info@oregonscientific.com
.
Pour des renseignements internationaux, rendez vous sur le site: http://corporate.oregonscientific.com/afterSales_
contactUs.asp
.
7.
1.
4.
8.
2.
5
.
3.
6.
13.
16.
10.
14.
11.
15
.
9.
12.
2.
1.
3.
Projektionsuhr „Glow in Dark”
Modell: TW221
BEDIENUNGSANLEITUNG
ÜBERSICHT
1. Projektor
2. LCD-Display
3.
SNOOZE- / LIGHT
-Taste
• Im normalen Uhrzeitmodus 1x drücken, um
die Hintergrundbeleuchtung 5 Sekunden lang
einzuschalten.
4.
-Taste
• Drücken, um die Einstellungswerte zu erhöhen.
5.
-Taste
• Drücken, um die Einstellungswerte zu verringern.
6.
SET CLOCK
-Taste
7.
SET ALARM
-Taste
8.
ALARM ON / OFF
-Taste
9. Netzbuchse
10. Batteriefach (Typ AA)
11.
RESET
-Taste
12. PROJECTION ON / OFF-Schiebeschalter
• Verschieben, um den Projektor ein- /
auszuschalten.
13.
180° FLIP
-Taste
• Drücken, um das projizierte Bild um 180 ° zu
drehen.
14.
RCC
-Taste
• Im normalen Uhrzeitmodus 1x drücken, um das
Funksignal für den Empfangstest zu empfangen.
15. BEEP/NATURE-Schiebeschalter
16. BATTERIEDECKEL
LCD-DISPLAY
1. Anzeige für schwache Batterie
2. Uhrzeit
3. Alarmzeit und Datum
BATTERIEFACH
1. Entfernen Sie den Batteriedeckel.
2. Legen Sie 2 neue Batterien des Typs AA ein und
beachten Sie die Markierungen zur Polarität im
Batteriefach.
3. Drücken Sie die “
RESET
”-Taste, um die Uhr
neuzustarten.
4. Bringen Sie den Batteriedeckel wieder an.
EMPFANG DES FUNKGESTEUERTEN ZEITSIGNALS
Die Uhrzeit und der Kalender werden funkgesteuert. Die
aktuelle Uhrzeit und der Kalender werden automatisch
mit dem aus Deutschland gesendeten Zeitsignal
synchronisiert.
Bei erstmaliger Inbetriebnahme (nach Einlegen der
Batterien oder Drücken der “
RESET
”-Taste) startet die
Uhr den Empfang des Zeitsignals; die Anzeige für den
Signalempfang blinkt 5 Minuten lang.
ANZEIGE FÜR SIGNALEMPFANG
Ein blinkendes Wellensegment weist darauf hin, dass
Zeitsignale empfangen werden. Die Signalgüte kann in
3 Arten eingeteilt werden:
Kein Signal
Schwaches
Signal
Hervorragendes
Signal
HINWEIS
1. Das Gerät sucht täglich automatisch um 2.00 Uhr
(3:00 oder 4:00 Uhr sind ebenfalls verfügbar, wenn
das Signal um 2:00 Uhr nicht empfangen wird), 8:00
Uhr, 14:00 Uhr und 20:00 Uhr nach dem Zeitsignal.
2. Stellen Sie das Gerät stets entfernt von Störquellen,
wie TV-Geräte, Computer, usw. auf.
3. Vermeiden Sie es, das Gerät auf oder in die Nähe
von Metallflächen zu stellen.
MANUELLE EINSTELLUNG VON UHRZEIT UND KALENDER
1. Drücken Sie im normalen Uhrzeitmodus 1x auf die
Taste “
SET CLOCK
”, um den Uhreinstellungsmodus
aufzurufen.
2. Drücken Sie auf die Taste “
” oder “
” , um die
Einstellungen zu ändern.
3. Drücken Sie zur Bestätigung auf “
SET CLOCK
”.
Die Reihenfolge der Einstellungen lautet: 12 /
24-Stundenformat, + / - 23 Stunden Zeitverschiebung,
Jahr, Tages- / Monatsformat, Datum.
4. Drücken Sie auf die Taste “
SET CLOCK
”,
um die Änderungen zu speichern und den
Einstellungsmodus zu beenden.
EINSTELLUNG DER ALARMZEIT
1. Drücken Sie im normalen Uhrzeitmodus
1x auf die Taste “SET ALARM”, um den
Alarmeinstellungsmodus aufzurufen.
2. Drücken Sie auf die Taste “
” oder “
” , um die
Stunde / Minute einzustellen.
3. Drücken Sie auf die Taste “SET ALARM”, um zu
speichern und den Einstellungsmodus zu beenden.
“
” gibt an, dass der Alarm aktiviert ist.
HINWEIS
1. Der Alarm wird automatisch aktiviert, wenn Sie die
Alarmzeit einstellen.
VERWENDUNG DER ALARMFUNKTION
1. Stellen Sie die Alarmzeit ein, wie im obigen Abschnitt erläutert.
2. Drücken Sie im normalen Uhrzeitmodus 1x auf die Taste “
ALARM ON / OFF
”, um die aktuelle Alarmzeit anzuzeigen.
3. Drücken Sie erneut auf die Taste, um den Alarm ein- / auszuschalten.
STUMMSCHALTUNG DES ALARMS
1. Drücken Sie auf “
SNOOZE / LIGHT
”, um den Alarm
8 Minuten lang stummzuschalten. Das Symbo “
”
blinkt dabei.
2. Drücken Sie eine beliebige andere Taste, um den
Alarm auszuschalten und ihn nach 24 Stunden
erneut zu aktivieren.
3. Wenn innerhalb von 120 Sekunden keine Taste
gedrückt wird, wird der Alarm deaktiviert und nach
24 Stunden erneut aktiviert.
AUSWAHL DES ALARMS MIT SIGNALTON ODER BERUHIGENDEM KLANG
1. Verschieben Sie den Beep/Nature-Schalter, um den Signalton oder den beruhigenden Klang als Alarm zu wählen.
VERWENDUNG DES PROJEKTORS
Verschieben Sie den Schalter “
PROJECTION ON /
OFF
”, um den Projektor ein- / auszuschalten, und damit
die Uhrzeit im Abstand von 1 - 4 m auf einen dunklen
Hintergrund zu projizieren (siehe unten):
HINWEIS
1. Verschieben Sie “
PROJECTION ON / OFF
”, um die
Projektorfunktion einzuschalten.
2. Drücken Sie auf “
SNOOZE / LIGHT
”, um den
Projektor 5 Sekunden lang zu aktivieren.
3. Bei Verwendung des Netzadapters ist die
Projektorfunktion ständig aktiviert.
4. Wenn der Alarm aktiviert ist, wird das Alarmsymbol
“
” ebenfalls projiziert.
5. Drücken Sie auf “
180 FLIP
”, um das projizierte Bild
um 180 ° zu drehen.
BATTERIEWECHSEL
Wenn der Indikator für die schwache Batterie “
”
neben der Uhrzeit angezeigt wird, ist die Ladekapazität
der Batterien der Basiseinheit zu gering; Sie sollten
diese daher umgehend durch 2 neue Batterien des
Typs AA ersetzen.
HINWEIS
Achtung! Entsorgen Sie Gebrauchtgeräte oder Batterien
bitte auf ökologisch unbedenkliche Weise.
TECHNISCHE DATEN
TYP
BESCHREIBUNG
BASISEINHEIT
L x B x H
149 x 57 x 100 mm
Gewicht
176g
Stromversorgung
2 Batterien AA 1,5 V or
4.5V DC
HINWEIS
Es wird empfohlen, dass Sie für dieses Produkt Alkaline-
Batterien bei längerem Gebrauch und Lithium-Batterien
bei Temperaturen unter dem Gefrierpunkt verwenden
VORSICHTSMASSNAHMEN
•
Setzen Sie das Gerät keiner übermäßigen
Gewalteinwirkung und keinen Stößen aus und halten
Sie es von Staub, Temperaturschwankungen und
Feuchtigkeit fern.
•
Blockieren Sie die Belüftungsöffnungen nicht mit
Gegenständen, wie z.B. Zeitungen, Vorhänge, usw.
•
Tauchen Sie das Gerät niemals ins Wasser. Falls
Sie Flüssigkeiten darauf verschütten, trocknen Sie
es umgehend mit einem weichen, faserfreien Tuch.
•
Reinigen Sie das Gerät nicht mit scheuernden oder
ätzenden Mitteln.
•
Nehmen Sie keine Änderungen an den internen
Komponenten des Geräts vor. Dies würde zu einem
Erlöschen der Garantieansprüche führen.
•
Verwenden Sie ausschließlich neue Batterien.
Verwenden Sie keinesfalls neue und alte Batterien
gemeinsam.
•
Die in dieser Anleitung angezeigten Bildern können
sich vom Original unterscheiden.
•
Achten Sie bei der Entsorgung des Produkts
darauf, dass es speziellen Sammelstellen zur
ordnungsgemäßen Abfallaufbereitung zugeführt
und nicht in den normalen Hausmüll geworfen wird.
•
Wenn dieses Produkt auf bestimmte Holzflächen
gestellt wird, kann die Oberfläche beschädigt
werden. Oregon Scientific
TM
ist nicht haftbar für
solche Beschädigungen.
•
Entsprechende Hinweise entnehmen Sie bitte der
Pflegeanleitung Ihres Möbelherstellers.
•
Der Inhalt dieser Anleitung darf ohne Genehmigung
des Herstellers nicht vervielfältigt werden.
•
Sie dürfen alte Batterien nicht in den normalen
Hausmüll werfen.
•
Eine getrennte Entsorgung dieser Abfallart zur
speziellen Aufbereitung ist unbedingt erforderlich.
•
Beachten Sie, dass einige Gerät mit einem
Batterieschutzstreifen ausgestattet sind.
Entfernen Sie diesen Streifen vor der erstmaligen
Inbetriebnahme aus dem Batteriefach.
HINWEIS Die technischen Daten für dieses Produkt
und der Inhalt der Bedienungsanleitung können ohne
Benachrichtigung geändert werden.
ÜBER OREGON SCIENTIFIC
Per avere maggiori informazioni sui nuovi prodotti Oregon Scientific visita il nostro sito internet info@oregonscientific.
com, dove potrai trovare tutte le informazioni di cui hai bisogno. Per ricerche di tipo internazionale puoi visitare invece
il sito
http://corporate.oregonscientific.com/afterSales_contactUs.asp
.
7.
1.
4.
8.
2.
5
.
3.
6.
13.
16.
10.
14.
11.
15
.
9.
12.
2.
1.
3.
Reloj proyector que brilla en la oscuridad
Modelo: TW221
MANUAL DE USUARIO
RESUMEN
1. Proyector
2. Pantalla LCD
3. Botón
SNOOZE / LUZ
• En modo de hora normal, púlselo una vez para
activar la retroiluminación durante 5 segundos.
4. botón
• púlselo para incrementar los valores de ajuste.
5.
botón
• púlselo para reducir los valores de ajuste.
6. Botón
SET CLOCK
7. Botón
SET ALARM
8. Botón
ALARM ON / OFF
9. Clavija de CC
10. Compartimiento para pilas tamaño AA
11. Botón
RESET
12. Interruptor deslizable
PROJECTION ON / OFF
• Deslícelo para activar/desactivar el proyector.
13. Botón de
giro de 180°
• Púlselo para girar la imagen 180°.
14. Botón
RCC
• En modo de hora normal, púlselo una vez
para recibir la señal RCC y hacer una prueba de
recepción.
15. Interruptor deslizable BEEP/NATURE
16. COMPARTIMIENTO PARA PILAS
PANTALLA LCD
1. Indicador de pila gastada
2. Hora
3. Hora de alarma y fecha
COMPARTIMIENTO PARA LAS PILAS
1. Retire la tapa del compartimiento para pilas.
2. Introduzca 2 pilas AA nuevas siguiendo las
indicaciones de polaridad del compartimiento para
pilas.
3. Pulse el botón “
RESET
” para reiniciar el reloj.
4. Vuelva a colocar la tapa del compartimiento para
pilas.
RECEPCIÓN DE SEÑAL DE LA HORA CONTROLADA POR RADIO
La hora y el calendario están controlados por
radio. La hora actual y el calendario se sincronizan
automáticamente con la señal horaria emitida desde
Alemania.
La primera vez que lo utilice (después de introducir pilas
nuevas o pulsar el botón “
RESET
”), el reloj empezará a
recibir señales horarias y el indicador de recepción de
señal parpadeará durante 5 minutos.
INDICADOR DE RECEPCIÓN DE SEÑAL
El icono de la ola parpadea para indicar que se están
recibiendo señales horarias. La calidad de la señal se
puede clasificar en 3 tipos:
No se recibe
señal
Señal débil
Señal
excelente
NOTA
1. La unidad buscará automáticamente señales
horarias todos los días a las 2:00 (si no encuentra
señal, puede buscar a las 3:00 o las 4:00), 8:00,
14:00 y 20:00.
2. Coloque la unidad siempre alejada de fuentes de
interferencia como televisores, ordenadores, etc.
3. No coloque la unidad sobre superficies metálicas
ni al lado de planchas de metal.
CONFIGURACIÓN MANUAL DE HORA Y CALENDARIO
1. En el modo de hora normal, pulse el botón “
SET
CLOCK
” una vez para acceder al modo de
configuración de la hora.
2. Pulse “
” o “
” para cambiar los ajustes.
3. Pulse “
SET CLOCK
” para confirmar. La secuencia
de configuración es: formato de 12 ó 24 horas, +/- 23
horas de diferencia horaria, año, formato día / mes
y día.
4. Pulse el botón “
SET CLOCK
” para guardar y salir
del modo de configuración.
CONFIGURACIÓN DE LA HORA DE LA ALARMA
1. En el modo de hora normal, pulse “SET ALARM”
una vez para acceder al modo de configuración de
la alarma.
2. Pulse “
” o “
” para configurar hora / minuto.
3. Pulse el botón “SET ALARM” para guardar y salir del
modo de configuración. “ ” indica que la alarma
está activada.
NOTA
1. La alarma se activará automáticamente cuando
configure la hora de la alarma.
USO DE LA FUNCIÓN DE ALARMA
1. Configure la hora de la alarma siguiendo los pasos indicados más arriba.
2. En el modo de hora normal, pulse “
ALARM ON / OFF
” una vez para acceder al modo de configuración de la
alarma.
3. Púlselo de nuevo para encender/apagar la alarma.
CÓMO SILENCIAR LA ALARMA
1. Pulse “
SNOOZE/LIGHT
” para silenciar la alarma durante 8 minutos. El icono “ ” parpadeará.
2. Pulse cualquier otro botón para silenciar la alarma y que se active de nuevo pasadas 24 horas.
3. Si no se pulsa ningún botón en 120 segundos, la alarma se desactivará y se volverá a activar transcurridas 24
horas.
CÓMO SELECCIONAR PITIDO O ALARMA CON SONIDO CALMANTE
1. Deslice el interruptor a Beep/Nature para seleccionar pitido o alarma con sonido calmante.
CÓMO UTILIZAR EL PROYECTOR
Deslice el interruptor “
PROJECTION ON/OFF
” para
activar/desactivar el proyector, y enfóquelo hacia un
fondo oscuro situado a entre 1 y 4 metros para que la
hora aparezca como se muestra a continuación:
NOTA
1. Deslice el interruptor “
PROJECTION ON/OFF
” para
activar la función de proyección.
2. Pulse “
SNOOZE/LIGHT
” para encender el proyector
durante 5 segundos.
3. Si utiliza un adaptador de corriente CC, el proyector
estará activado continuamente.
4. Si la alarma está activada, también se proyectará
el icono de alarma“
” .
5. Pulse “
180 FLIP
” para girar 180° la imagen
proyectada.
CÓMO CAMBIAR LAS PILAS
Si el indicador de pila agotada “
” aparece al lado
de la hora, significa que las pilas de la unidad principal
no son suficientes y debería reemplazarlas enseguida
con 2 pilas AA nuevas.
NOTA
Atención: Por favor, elimine la unidad y las pilas gastadas
de un modo ecológico.
FICHA TÉCNICA
TIPO
DESCRIPCIÓN
UNIDAD PRINCIPAL
L x A x A
149 x 57 x 100 mm
(5,87 x 2,24 x 3,94 pulgadas)
Peso
176g
Potencia
2 pilas AA de 1,5 V or 4.5V DC
NOTA
Recomendamos utilizar pilas alcalinas con este producto
para que funcione durante más tiempo, y el uso de pilas
de litio en temperaturas bajo cero.
PRECAUCIONES
•
No exponga la unidad a fuerza excesiva, descargas,
polvo, temperatura ni humedad.
•
No cubra los orificios de ventilación con objetos
como periódicos, cortinas, etc.
•
No sumerja el dispositivo en agua. Si se vertiera
líquido en la unidad, límpiela con un paño suave y
sin electricidad estática.
•
No limpie la unidad con materiales abrasivos o
corrosivos.
•
No manipule los componentes internos. De hacerlo,
se invalidaría la garantía.
•
Use siempre pilas nuevas. No mezcle pilas nuevas
y viejas.
•
Las imágenes de esta guía para el usuario pueden
ser distintas al producto en sí.
•
Cuando elimine este producto, asegúrese de
que no vaya a parar a la basura general, sino
separadamente para recibir un tratamiento especial.
•
La colocación de este producto encima de ciertos
tipos de madera puede provocar daños a sus
acabados. Oregon Scientific
TM
no se responsabilizará
de dichos daños.
•
Consulte las instrucciones de cuidado del fabricante
del mueble para disponer de más información.
•
Los contenidos de este manual no pueden
reproducirse sin permiso del fabricante.
•
No elimine las pilas gastadas con la basura normal.
•
Es necesario desecharlo separadamente para poder
tratarlo.
•
Tenga en cuenta que algunas unidades disponen
de una cinta de seguridad para las pilas. retírela
del compartimiento para pilas antes de utilizar la
unidad por primera vez.
NOTA La ficha técnica de este producto y los contenidos
de este manual de usuario pueden cambiarse sin aviso.
ACERCA DE OREGON SCIENTIFIC
Visite nuestra página web (www.oregonscientific.com) para conocer más sobre los productos de Oregon
Scientific.
Para consultas internacionales, por favor visite http://corporate.oregonscientific.com/afterSales_contactUs.asp
.
7.
1.
4.
8.
2.
5
.
3.
6.
13.
16.
10.
14.
11.
15
.
9.
12.
2.
1.
3.
E
NGLISH
IT
ALIANO
FRAN
ç
AIS
D
EUTSCH
ESP
AÑOL
560mm(L) x 500mm(H)
DICHIARAZIONE DI CONFORMITÀ EU
Con la presente, Oregon Scientific dichiara che questo Orologio con proiezione che si illumina al buio
(Modello: TW221) è conforme con la Direttiva R&TTE99 / 5. Una copia della Dichiarazione di Conformità
completa di data e firma è disponibile su richiesta attraverso il nostro servizio clienti Oregon Scientific.
DÉCLARATION DE CONFORMITÉ U.E.
Oregon Scientific déclare par la présente que cette Horloge à Projection Brille dans le Noir (Modèle : TW221)
est en conformité avec la directive R&TTE99 / 5. Une copie de la Déclaration de Conformité signée et datée
est disponible sur demande auprès de notre Service Clients d’Oregon Scientific.
EU-KONFORMITÄTSERKLÄRUNG
Hiermit erklärt Oregon Scientific, dass diese funkgesteuerte Projektionsuhr “Glow in Dark” (Modell: TW221)
mit der Richtlinie R&TTE99 / 5 übereinstimmt. Eine Kopie der unterschriebenen und mit Datum versehenen
Konformitätserklärung erhalten Sie auf Anfrage über unseren Oregon Scientific Kundendienst.
DECLARACIÓN DE CONFORMIDAD DE LA UE
Oregon Scientific declara por la presente que este Reloj proyector que brilla en la oscuridad (Modelo:
TW221) cumple la norma R&TTE99 / 5. Puede solicitar una copia firmada y fechada de la Declaración de
conformidad mediante nuestro servicio de atención al cliente de Oregon Scientific.
Tutti I Paesi UE, Svizzera
e Norvegia
PAESI CONFORMI ALLA DIRETTIVA R&TTE
Tous les pays Européens, la Suisse
et la Norvège
PAYS CONCERNÉS RTT&E
Alle Länder der EU, Schweiz
und Norwegen
KONFORM IN FOLGENDEN LÄNDERN
Todos los países de la UE, Suiza
y Noruega
PAÍSES BAJO LA DIRECTIVA RTTE
4
.


