background image

Eno360

ECE 0+/1/2/3, 0-36 kg

EN

FR

IT

NL

PL

CZ

DE

ES

SK

Summary of Contents for Eno 360

Page 1: ...Eno360 ECE 0 1 2 3 0 36 kg EN FR IT NL PL CZ DE ES SK ...

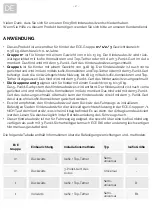
Page 2: ...Gurtsystem des Kinderautositzes wird entfernt Der Kinderautositz ist nach vorne gerichtet und wird mittels Isofix Konnektoren im Auto montiert Das Kind wird mit dem 3 Punkt Gurt des Autos angeschnallt Alternativ kann der Kinderautositz direkt mit dem 3 Punkt Gurt des Autos ohne Isofix Konnektoren gesichert werden Es wird empfohlen den Kinderautositz auf dem Rücksitz des Fahrzeugs zu installieren B...

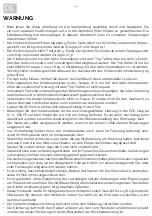
Page 3: ...at versehenen 3 Punkt Sicher heitsgurten die der UN ECE Regelung Nr 16 oder einer vergleichbaren Norm entsprechen Im Zweifelsfall kann der Hersteller der Rückhalteeinrichtung für Kinder oder der Einzelhändler befragt werden Einbau mit Isofix Konnektoren Top Tether ECE Gruppe 0 1 0 18 kg oder Isofix Konnek toren 3 Punkt Gurt ECE Gruppe 2 3 15 36 kg Dies ist ein semi universales Kinderrückhaltesyste...

Page 4: ...pe 0 1 NICHT auf dem Vordersitz wo sich ein Airbag befindet Es sei denn der Airbag kann deaktiviert werden Lesen Sie diesbezüglich in der Betriebsanleitung des Fahrzeugs nach Der Kindersitz sollte ausgetauscht werden wenn er bei einem Unfall starken Belastungen ausgesetzt war Aus Sicherheitsgründen muss der Kinderautositz auch dann im Fahrzeug befestigt sein wenn Ihr Kind gerade nicht im Kinderaut...

Page 5: ...urteinstellung Einstellband Drehhebel Erweiterung Isofix Konnektor Sitzschale Schulterposter Gurtschloss Schlosspolster Hebel zur Winkeleinstellung Isofix Station Einstellung Kopfstütze Top Tether Babyeinlage unterhalb Komforteinlage Schultergurt Gurtbügel Isofix Konnektor Gurtführung Gruppe 2 3 Seitenaufprallschutz ...

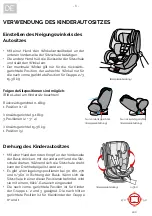
Page 6: ...g 3 Positionen 2 3 4 Vorwärtsgerichtet 15 36 kg 1 Position 5 Drehung des Kinderautositzes Mit einer Hand den roten Knopf an der Vorderseite der Basis drücken mit der anderen Hand die Sitz schale drehen Während sich die Sitzschale dreht kann der Drehhebel gelöst werden Es gibt 4 Verriegelungspositionen bei 90 180 270 und 0 360 in Richtung der Basis Wenn sich die Sitzschale in einer dieser Positione...

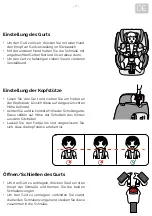
Page 7: ...e am Hebel an der Kopfstütze bis sich diese auf der gewünschten Höhe befindet Achten Sie auf die korrekte Höhe der Schultergurte Diese sollten auf Höhe der Schultern des Kindes aus dem Sitz treten Lassen Sie den Hebel los und vergewissern Sie sich dass die Kopfstütze arretiert ist Öffnen Schließen des Gurts Um den Gurt zu entriegeln drücken Sie den roten Knopf der Schnalle und trennen Sie die beid...

Page 8: ...n Sie den Gurt zusammen sodass er hinter dem Bezug in der Mulde an der Rücken lehne aufbewahrt werden kann Abb B UmdasGurtschlosszuentfernen bringenSiezunächstdenSitzindiemaximaleLiegeposition Rotieren Sie dann den Sitz in die 90 Position Entfernen Sie die Abdeckung und legen Sie diese zur Seite Abb C Fädeln Sie nun die Metallklammer des Gurtschlosses durch die Öffnung und bringen Sie danach die A...

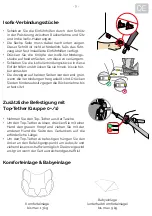
Page 9: ...sten Die Anzeigen auf beiden Seiten werden erst grün wenn die Verbindungen hergestellt sind Drücken Sie den Kinderautositz gegen die Rückenlehne bis er fest sitzt Komforteinlage bis max 13 kg Babyeinlage unterhalb Komforteinlage bis max 9 kg Komforteinlage Babyeinlage Zusätzliche Befestigung mit Top Tether Gruppe 0 1 Nehmen Sie den Top Tether aus der Tasche Um den Top Tether zu lösen drücken Sie m...

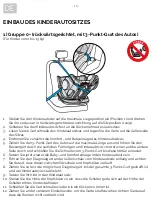
Page 10: ...rungen am Kinderautositz von der einen auf die andere Seite durch und schließen Sie die Schnalle vom 3 Punkt Gurt bis diese hörbar einrastet 6 Setzen Sie jetzt wieder die Baby und Komforteinlage in den Kinderautositz ein 7 Führen Sie den Diagonalgurt an der Außenschale vom Kinderautositz entlang und achten Sie darauf dass dieser zwischen Sitzschale und Kopfstütze verläuft 8 Ziehen Sie so fest wie ...

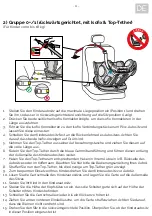
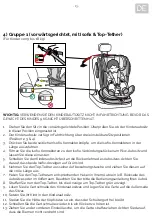
Page 11: ...diesen entlang der Außenseite des Kinderautositzes weiter 7 Haken Sie den Top Tether am entsprechenden Haken in Ihrem Auto ein z B Rückseite des Autositzes oder im Kofferraum Beachten Sie hier bitte die Bedienungsanleitung Ihres Autos 8 Straffen Sie nun den Top Tether bis die Anzeige am Top Tether grün anzeigt 9 Zum bequemen Einsetzen Ihres Kindes drehen Sie den Kinderautositz zur Autotür 10 Lösen...

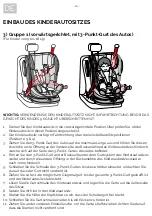
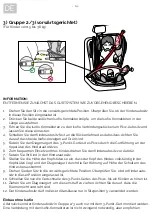
Page 12: ...hren Sie den 3 Punkt Gurt an der Rückseite unter dem Gurtsystem des Kinderautositzes weiter und durch die andere Öffnung in der Rückenlehne des Kinderautositzes wieder nach vorne hindurch 5 Schließen Sie die Schnalle des 3 Punkt Gurtes bis diese hörbar einrastet und achten Sie darauf dass der Gurt nicht verdreht ist 6 Ziehen Sie so fest wie möglich am Diagonalgurt bis der gesamte 3 Punkt Gurt gest...

Page 13: ...sitz fest an die Rückenlehne des Autositzes Achten Sie darauf dass beide Isofix Anzeigen auf Grün sind 6 Nehmen Sie den Top Tether aus seiner Aufbewahrungstasche und ziehen Sie diesen auf die volle Länge aus 7 Haken Sie den Top Tether am entsprechenden Haken in Ihrem Auto ein z B Rückseite des Autositzes oder im Kofferraum Beachten Sie hier bitte die Bedienungsanleitung Ihres Autos 8 Straffen Sie ...

Page 14: ... 6 Zum bequemen Einsetzen Ihres Kindes drehen Sie den Kinderautositz zur Autotür 7 Setzen Sie Ihr Kind in den Kinderautositz 8 Stellen Sie die Höhe der Kopfstütze so ein dass der Kopf des Kindes vollständig in der Kopfstütze liegt und der Diagonalgurt durch die Gurtführung auf Höhe der Schultern des Kindes herauskommt 9 Drehen Sie den Sitz in die vorwärtsgerichtete Position Überprüfen Sie ob der K...

Page 15: ...oder aggressive Reinigungsmittel Überprüfen Sie nach jedem Waschgang die Beständigkeit des Stoffes und der Nähte Beim Waschen des Stoffes sind die Anweisungen auf dem Etikett siehe unten sorgfältig zu befolgen INSTANDHALTUNG Überprüfen Sie regelmäßig den Zustand des Produkts auf mögliche Schäden Im Schadensfall nicht verwenden und außerhalb der Reichweite von Kindern aufbewahren Bei Problemen wend...

Page 16: ...r seat is removed The child car seat is forward facing and is fitted in the car using Isofix connectors The child is strapped in with the 3 point car seatbelt Alternatively the child car seat can be secured directly with the 3 point car seatbelt without Isofix connectors We recommend installing the child car seat on the rear seat of the vehicle Do NOT secure the child car seat on the front seat in...

Page 17: ...tion with Isofix connectors top tether ECE Group 0 1 0 18 kg or Isofix connectors 3 point belt ECE Group 2 3 15 36 kg This is a semi universal child restraint system It has been approved for general use in vehicles with Isofix anchorage systems in accordance with UN ECE Regulation No 44 04 The child restraint system fits in vehicles with seats that are marked as Isofix positions for details see ca...

Page 18: ...n airbag for rear facing use in ECE Group 0 1 It may be used on the front seat if the airbag can be deactivated Please refer to the vehicle manual The child seat should be replaced if it is exposed to heavy impact in an accident For safety reasons the child car seat must be secured in the vehicle even when your child is not sitting in the child car seat Always make sure that all belts that hold th...

Page 19: ...nsert Belt adjustment Adjusting belt Rotary lever Isofix connector extension Seat bucket Shoulder pad Belt buckle buckle pad Angle adjustment lever Isofix station Headrest adjustment Top tether Baby insert under comfort insert Shoulder belt Belt clip Isofix connector Belt guide Group 2 3 Side impact protection ...

Page 20: ... 9 18 kg 3 positions 2 3 4 Forward facing 15 36 kg 1 position 5 Turning the child car seat Use one hand to press the red button on the front of the base and use your other hand to turn the seat bucket The twist lever can be released while the seat bucket is being turned There are 4 locking positions at 90 180 270 and 0 360 in the direction of the base When the seat bucket is in one of these positi...

Page 21: ...elt and pull the lever on the head support until it is set to the desired height Pay attention to the correct height of the shoulder belts These should come out of the seat level with your child s shoulders Release the lever and ensure that the headrest is locked in place Opening closing the belt To unlock the belt press the red button of the buckle and separate the two tongues of the buckle To lo...

Page 22: ... Fold the belt up so that it can be stored in the hollow in the backrest behind the cover Fig B To remove the belt buckle first move the seat into its maximum reclining position Then rotate the seat into the 90 position Remove the cover and put it aside Fig C Now bring the metal clip of the belt buckle through the opening and affix the cover again Fig D Ensure that you retain all the parts that ar...

Page 23: ...on both sides turn green only when the connections are made correctly Press the child car seat against the backrest until it is securely in position Comfort insert up to max 13 kg Baby insert under comfort insert up to max 9 kg Comfort insert and baby insert Additional fastening with top tether Group 0 1 Remove the top tether from the pocket To release the top tether press the grey button with one...

Page 24: ...through the side guides on the child car seat from one side to the other then fasten the buckle of the 3 point belt so that it clicks in place audibly 6 Now replace the baby and comfort inserts in the child car seat 7 Position the diagonal belt over the outer shell of the child car seat and ensure that it runs between the seat shell and the headrest 8 Pull as tightly as possible on the diagonal be...

Page 25: ...bber band guide and extend it along the outside of the child car seat 7 Clip the top tether onto the hook provided in your car e g on the back of the car seat or in the boot Please consult your car manual for this 8 Tighten the top tether until the display on the top tether turns green 9 When placing your child in the child car seat turn the car seat towards the car door for convenience 10 Unfaste...

Page 26: ...nue to feed the 3 point seatbelt under the belt system at the back of the child car seat and through the other opening in the backrest of the child car seat and back towards the front again 5 Fasten the buckle of the 3 point seatbelt until it locks in place audibly and ensure that the belt is not twisted 6 Pull as tightly as possible on the diagonal belt until the whole of the 3 point belt is taut...

Page 27: ...sition 5 Push the child car seat in until it rests securely against the backrest of the car seat Ensure that both Isofix indicators are showing green 6 Take the top tether from its storage pocket and extend it to the maximum length 7 Clip the top tether onto the hook provided in your car e g on the back of the car seat or in the boot Please consult your car manual for this 8 Tighten the top tether...

Page 28: ...eat 6 When placing your child in the child car seat turn the car seat towards the car door for convenience 7 Put your child in the child car seat 8 Adjust the height of the head support so that the child s head is fully in the head support and the diagonal belt exits the belt guide at the child s shoulder height 9 Turn the seat into the forward facing position Check that the child car seat is lock...

Page 29: ...ve cleaning agents Check the stability of the fabric and of the seams after each wash When washing the fabric the instructions on the label see below must be followed carefully MAINTENANCE Regularly check the condition of the product for any damage In the event of damage do not use the product and keep it out of the reach of children In case of any issues please contact Osann Customer Service on 4...

Page 30: ...compris entre 15 à 36 kg Le système de ceinture 5 points du siège auto pour enfant est retiré Le siège auto pour enfant est orienté vers l avant et monté dans la voiture via les connecteurs Isofix L enfant est attaché par la ceinture à 3 points de la voiture Comme alternative le siège auto pour enfant peut être sécurisé directement par la ceinture à 3 points de la voiture sans les connecteurs Isof...

Page 31: ...rquage Il convient uniquement aux véhicules équipés de ceintures de sécurité 3 points fixes ou automatiques conformes au règlement n 16 de la CEE ONU ou équivalent En cas de doute consultez le fabricant ou le revendeur du dispositif de retenue pour enfants Installation avec connecteurs Isofix Top Tether groupe ECE 0 1 0 18 kg ou connecteurs Isofix et ceinture 3 points groupe ECE 2 3 15 36 kg Ce pr...

Page 32: ...e siège passager avant où se trouve un airbag Sauf si vous désactivez l airbag Lisez attentivement le manuel d utilisation du véhicule à ce sujet Le siège pour enfant doit être remplacé lorsqu il a été soumis à des contraintes intenses lors d un accident Pour des raisons de sécurité le siège auto pour enfant doit également être fixé dans le véhicule même lorsque votre enfant ne s y trouve pas Assu...

Page 33: ... Bande de réglage Levier rotatif Extension Connecteur Isofix Coque du siège Épaulette Fermoir de ceinture protège fermeture Levier pour réglage de l inclinaison Base Isofix Réglage de l appuie tête Top Tether Support bébé sous les pads confort Sangle d épaule Arceau de ceinture Connecteur Isofix Guidage de ceinture Groupe 2 3 Protection latérale contre les chocs ...

Page 34: ...position 1 A Face à la route 9 18 kg 3 Positions 2 3 4 Face à la route 15 36 kg 1 position 5 Rotation du siège auto pour enfant Avec une main appuyez sur le bouton rouge à l avant de la base et avec l autre main tournez la coque du siège Lorsque la coque du siège est en rotation vous pouvez relâcher le levier La base compte 4 positions de verrouillage à 90 180 270 et 0 360 Si la coque du siège est...

Page 35: ...t de l appuie tête jusqu à ce que l appuie tête soit à la hauteur souhaitée Veillez à ce que les sangles d épaule soient à la bonne hauteur Celles ci doivent sortir du siège à la hauteur des épaules de l enfant Relâchez le levier et assurez vous que l appuie tête est bien verrouillé Ouverture fermeture de la ceinture Pour déverrouiller la ceinture appuyez sur le bouton rouge de la boucle et sépare...

Page 36: ...einture Repliez la ceinture de telle sorte qu elle puisse être rangée derrière la housse dans la cavité sur le dossier Fig B Afinderetirerlaboucledeceinture amenezd abordlesiègedanslapositionallongéemaximale Puis faites tourner le siège dans la position à 90 Retirez le capot et mettez les de côté Fig C Passez maintenant les supports métalliques de la bouche de ceinture à travers l ouverture et rem...

Page 37: ...ôtés deviennent verts uniquement lorsque les connexions sont réalisées Appuyez le siège auto pour enfant contre le dossier jusqu à ce qu il soit en position sécurisée Pads de confort jusqu à 13 kg max Support bébé sous les pads de confort jusqu à 9 kg max Pads de confort et support bébé Fixation supplémentaire avec Top Tether Groupe 0 1 Sortez le Top Tether de la pochette Pour relâcher le Top Teth...

Page 38: ...uvertures latérales du siège auto pour enfant d un côté à l autre et verrouillez la boucle de la ceinture 3 points jusqu à ce que vous entendiez qu elle s enclenche 6 Remettez maintenant les pads de confort et le support bébé du siège auto pour enfant 7 Faites passer la ceinture diagonale le long de la coque extérieure du siège auto pour enfant et assurez vous qu elle se trouve entre la coque du s...

Page 39: ... l extérieur du siège auto pour enfant 7 Accrochez le Top Tether au crochet correspondant dans votre voiture p ex à l arrière du siège ou dans le coffre Veuillez consulter ici la notice d utilisation de votre voiture 8 Tendez maintenant le Top Tether jusqu à ce que l affichage sur le Top Tether soit vert 9 Pour asseoir confortablement votre enfant tournez le siège auto pour enfant vers la portière...

Page 40: ...inture 3 points à l arrière sous le système de ceinture du siège auto pour enfant et par l autre ouverture dans le dossier du siège auto pour enfant et repassez vers l avant 5 Insérez la boucle de la ceinture 3 points jusqu à entendre un clic et veillez à ce que la boucle ne soit pas entortillée 6 Tirez au maximum sur la ceinture diagonale jusqu à ce que toute la ceinture 3 points soit tendue et q...

Page 41: ...iège auto pour enfant fermement contre le dossier du siège auto Veillez à ce que les deux affichages Isofix soient verts 6 Sortez le Top Tether de son sac de rangement et tirez le jusqu à la longueur maximale 7 Accrochez le Top Tether au crochet correspondant dans votre voiture p ex à l arrière du siège ou dans le coffre Veuillez consulter ici la notice d utilisation de votre voiture 8 Tendez main...

Page 42: ...e la ceinture à 3 points de la voiture dans le guide de ceinture sur l appuie tête du siège auto pour enfant 6 Pour asseoir confortablement votre enfant tournez le siège auto pour enfant vers la portière de la voiture 7 Asseyez votre enfant dans le siège auto pour enfant 8 Réglez la hauteur de l appuie tête de manière à ce que la tête de l enfant soit entièrement dans l appuie tête et que la sangl...

Page 43: ...ssu suivez attentivement les instructions sur l étiquette voir ci dessous ENTRETIEN Vérifiez régulièrement l état du produit pour déceler d éventuels dommages En cas de dommage n utilisez pas le produit et conservez le hors de portée des enfants En cas de problème veuillez contacter le service client Osann au 49 0 7731 970077 NE PAS utiliser d eau de javel Sèche linge à basse température Lavage à ...

Page 44: ...a 5 punti del seggiolino auto per bambini viene rimosso Il seggiolino auto per bambini è orientato in avanti ed è montato sull auto per mezzo dei connettori Isofix Il bambino deve essere legato per mezzo della cintura a 3 punti dell auto In alternativa il seggiolino auto per bambini può essere fissato direttamente con la cintura a 3 punti dell auto senza i connettori Isofix Si consiglia di install...

Page 45: ...sofix e cinghia Top Tether gruppo ECE 0 1 0 18 kg o connettori Isofix e cintura a 3 punti gruppo ECE 2 3 15 36 kg Questo è un sistema di ritenuta per bambini semi universale Conformemente al regolamento UN ECE n 44 04 è omologato per l uso generico in veicoli con sistemi di ancoraggio Isofix Il sistema di ritenuta per bambini è idoneo per i veicoli con sedili contrassegnati come posizioni Isofix p...

Page 46: ...eriore dove si trova un airbag a meno che non si disattivi l airbag A tale scopo leggere le istruzioni d uso del veicolo Il seggiolino per bambini va sostituito nel caso in cui sia stato sottoposto a forti sollecitazioni a causa di un incidente Per motivi di sicurezza il seggiolino auto per bambini deve essere fissato nel veicolo anche quando il bambino non è seduto nel seggiolino auto per bambini...

Page 47: ...nghia di regolazione Leva girevole Estensione connettore Isofix Guscio del seggiolino Spallina Fibbia e imbottitura della fibbia Leva per la regolazione dell angolo Stazione Isofix Regolazione del poggiatesta Top Tether Inserto per bebè sotto l inserto comfort Cintura di ritenuta spalle Staffa della cintura Connettore Isofix Guida della cintura Gruppo 2 3 Protezione antiurto laterale ...

Page 48: ...nti 9 18 kg 3 posizioni 2 3 4 Orientato in avanti 15 36 kg 1 posizione 5 Rotazione del seggiolino auto per bambini Premere con una mano il pulsante rosso nella parte anteriore della base e con l altra mano ruotare il gu scio del seggiolino Mentre il guscio del seggiolino ruota la leva girevole può essere rilasciata Ci sono 4 posizioni di blocco a 90 180 270 e 0 360 in direzione della base Se il gu...

Page 49: ...are la cintura e tirare la leva del poggiatesta finché non si trova all altezza desiderata Prestare attenzione all altezza corretta delle cinture di ritenuta spalle che dovrebbe corrisponde all al tezza delle spalle del bambino sul seggiolino Rilasciare la leva e assicurarsi che il poggiatesta sia bloccato Apertura chiusura della cintura Per sbloccare la cintura premere il pulsante rosso sulla fib...

Page 50: ...tura in modo che possa essere riposta dietro la fodera nella depressione dello schienale Fig B Per rimuovere la fibbia della cintura innanzitutto spostare il seggiolino nella posizione reclinata massima Dopodiché ruotare il seggiolino nella posizione a 90 Rimuovere la copertura e metterla da parte Fig C Far passare il morsetto metallico della fibbia attraverso l apertura e in seguito riapplicare l...

Page 51: ... lati diventano verdi solo quando vengono stabiliti i collegamenti Premere il seggiolino auto per bambini contro lo schienale finché non si trova saldamente in posizione Inserto comfort max 13 kg Inserto per bebè sotto l inserto comfort max 9 kg Inserto comfort e inserto per bebè Fissaggio supplementare con Top Tether Gruppo 0 1 Rimuovere la cinghia Top Tether dal suo involucro Per sbloccare la ci...

Page 52: ...ddominale attraverso le guide laterali del seggiolino auto per bambini da un lato all altro e chiudere la fibbia della cintura a 3 punti finché non si sente lo scatto in posizione 6 Quindi reinserire l inserto comfort e l inserto per bebè nel seggiolino 7 Guidare la cintura diagonale lungo il guscio esterno del seggiolino e assicurarsi che passi tra il guscio del seggiolino e il poggiatesta 8 Tira...

Page 53: ...accompagnarla lungo il lato esterno del seggiolino 7 Agganciare la cinghia Top Tether al gancio corrispondente della propria auto ad es sul retro del sedile dell auto Fare riferimento al manuale d uso della propria auto 8 Stringere quindi la cinghia Top Tether finché l indicatore sulla cinghia Top Tether non diventi verde 9 Per posizionare il bambino in maniera più agevole ruotare il seggiolino au...

Page 54: ...ntura a 3 punti sul retro sotto il sistema cintura del seggiolino auto per bambini e attraverso l altra apertura nello schienale del seggiolino per riportarla indietro fino alla parte anteriore 5 Chiudere la fibbia della cintura a 3 punti finché non si sente lo scatto in posizione e assicurarsi che la cintura non sia attorcigliata 6 Tirare il più a fondo possibile il segmento diagonale della cintu...

Page 55: ...finché non aderisca saldamente allo schienale del sedile auto Assicurarsi che entrambi gli indicatori Isofix siano di colore verde 6 Estrarre la cinghia Top Tether dalla sua custodia protettiva e tirarla fino a raggiungere la sua lunghezza massima 7 Agganciare la cinghia Top Tether al gancio corrispondente della propria auto ad es sul retro del sedile dell auto Fare riferimento al manuale d uso de...

Page 56: ...re il bambino in maniera più agevole ruotare il seggiolino auto per bambini verso lo sportello dell auto 7 Collocare il bambino sul seggiolino auto per bambini 8 Regolare l altezza del poggiatesta in modo che la testa del bambino poggi completamente contro il poggiatesta e il segmento diagonale fuoriesca dalla guida della cintura all altezza delle spalle del bambino 9 Ruotare il seggiolino nella p...

Page 57: ...asivi o aggressivi Dopo ogni lavaggio controllare la tenuta del tessuto e delle cuciture Per il lavaggio del tessuto seguire attentamente le istruzioni riportate sull etichetta vedi sotto MANUTENZIONE Controllare regolarmente lo stato del prodotto per individuare eventuali danni In caso di danni non utilizzare il prodotto e tenerlo fuori dalla portata dei bambini In caso di problemi contattare il ...

Page 58: ...l se retira El asiento infantil para automóvil se coloca orientado hacia delante y se monta en el coche mediante conectores Isofix Se sujeta al niño con el cinturón de 3 puntos del automóvil abrochado Alternativamente el asiento infantil para automóvil puede fijarse directamente con el cinturón de 3 puntos del coche sin necesidad de conectores Isofix Se recomienda instalar el asiento infantil en e...

Page 59: ...ECE 0 1 0 18 kg o conectores Isofix y cinturón de 3 puntos grupo ECE 2 3 15 36 kg Este es un sistema de retención infantil semiuniversal Está homologado de acuerdo con el Reglamento CEPE ONU n º 44 04 para su uso general en vehículos con sistemas de anclaje Isofix El sistema de retención infantil se adapta a los vehículos con asientos marcados como posiciones Isofix consulte el manual del propieta...

Page 60: ...ás en el asiento delantero donde haya un airbag a menos que el airbag se pueda desactivar Para más información consulte el manual de instrucciones del vehículo El asiento infantil debe sustituirse si ha sido sometido a cargas pesadas en caso de un accidente Por razones de seguridad el asiento infantil debe fijarse al vehículo incluso si su hijo no está sentado en el asiento Asegúrese siempre de qu...

Page 61: ...ca giratoria Amplicación del conector Isofix Carcasa del asiento Almohadilla del hombro Cierre del cinturón y almohadilla de cierre Palanca para el ajuste del ángulo Estación Isofix Ajuste del reposacabezas Anclaje superior Inserto para bebé debajo del inserto de confort Cinturón del hombro Abrazadera del cinturón Conector Isofix Guía del cinturón Grupo 2 3 Protección lateral frente a impactos ...

Page 62: ...1 posición 1 A Orientado hacia delante 9 18 kg 3 posiciones 2 3 4 Orientado hacia delante 15 36 kg 1 posición 5 Rotación del asiento infantil Con una mano presione el botón rojo de la parte delantera de la base y con la otra mano gire la car casa del asiento Mientras la carcasa del asiento se esté girando la palanca puede soltarse Hay 4 posiciones de bloqueo 90 180 270 y 0 360 en dirección a la ba...

Page 63: ...a palanca situada en el reposacabezas hasta que el reposacabezas esté a la altura deseada Preste atención a la altura correcta de los cinturones para hombros Estos deberían pasar a la altura de los hombros del niño Suelte la palanca y asegúrese de que el reposaca bezas esté bloqueado Abrochar desabrochar el cinturón Para desbloquear el cinturón presione el botón rojo de la hebilla y separe las dos...

Page 64: ...urón Pliegue el cinturón de manera que se pueda guardar detrás de la funda en el hueco del respaldo Fig B Para quitar la hebilla del cinturón primero mueva el asiento a la posición de reposo máxima A continuación gire el asiento a la posición de 90 Retire la tapa y póngala a un lado Fig C Pase la abrazadera metálica de la hebilla del cinturón a través de la abertura y luego vuelva a colocar la tap...

Page 65: ...de si se realizan las conexiones correctamente Presione el asiento infantil contra el respaldo hasta que esté firmemente asentado Inserto de confort hasta un máximo de 13 kg Inserto para bebés debajo del inserto de confort hasta un máximo de 9 kg Inserto de confort y para bebés Fijación adicional con anclaje superior grupo 0 1 Saque el anclaje superior del bolsillo Para soltar el anclaje superior ...

Page 66: ...laterales del asiento infantil para automóvil de un lado a otro y cierre la hebilla del cinturón de 3 puntos hasta que encaje de forma audible 6 Ahora vuelva a colocar el inserto de confort para bebé en el asiento infantil para automóvil 7 Pase el cinturón diagonal a lo largo de la carcasa exterior del asiento infantil para automóvil y asegúrese de que pasa entre la carcasa del asiento y el reposa...

Page 67: ...asiento infantil para automóvil 7 Enganche el anclaje superior del gancho correspondiente del automóvil por ejemplo en la parte trasera del asiento del automóvil o en el maletero Tenga en cuenta el manual de instrucciones de su vehículo 8 Abroche el anclaje superior hasta que el indicador del anclaje superior esté en verde 9 Para sentar cómodamente a su hijo gire el asiento infantil hacia la puert...

Page 68: ...os de la parte posterior por debajo del sistema de cinturones del asiento infantil para automóvil y por la otra abertura del respaldo del asiento infantil para automóvil hacia la parte delantera 5 Cierre la hebilla del cinturón de 3 puntos hasta que encaje de forma audible y asegúrese de que el cinturón no esté retorcido 6 Tire todo lo que pueda del cinturón diagonal hasta que todo el cinturón de ...

Page 69: ...tra el respaldo del asiento de coche Asegúrese de que ambos indicadores Isofix estén en verde 6 Saque el anclaje superior de la bolsa de almacenamiento y extiéndalo por completo 7 Enganche el anclaje superior del gancho correspondiente del automóvil por ejemplo en la parte trasera del asiento del automóvil o en el maletero Tenga en cuenta el manual de instrucciones de su vehículo 8 Abroche el ancl...

Page 70: ... sentar cómodamente a su hijo gire el asiento infantil hacia la puerta del automóvil 7 Coloque al niño en el asiento infantil 8 Ajuste la altura del reposacabezas de modo que la cabeza del niño esté completamente colocada en el reposacabezas y el cinturón diagonal salga a través de la guía del cinturón a la altura de los hombros del niño 9 Gire el asiento a la posición orientada hacia delante Comp...

Page 71: ...Compruebe la resistencia del tejido y de las costuras después de cada lavado Cuando lave la tela siga cuidadosamente las instrucciones de la etiqueta véase a continuación MANTENIMIENTO Compruebe regularmente el estado del producto para comprobar si está dañado No utilizar en caso de daños y mantener fuera del alcance de los niños Si tiene algún problema póngase en contacto con el Servicio de atenc...

Page 72: ...eem van het autostoeltje wordt verwijderd Het autostoeltje wordt voorwaarts gericht en met Isofix connectoren in de auto bevestigd Het kind wordt vastgezet met de 3 puntsgordel van de auto Desgewenst kan het autostoeltje direct met de 3 puntsgordel van de auto en zonder Isofix connectoren worden bevestigd Aanbevolen wordt om het autostoeltje op de achterbank van het voertuig te plaatsen Bevestig h...

Page 73: ...te of automatische gordels met 3 punts veiligheidsgordels die voldoen aan de verordening UN ECE nr 16 of een vergelijkbare norm Raadpleeg in geval van twijfel de fabrikant van het kinderzitje of de verkoper Installatie met Isofix connectoren Top Tether ECE groep 0 1 0 18 kg of Isofix con nectoren 3 puntsgordel ECE groep 2 3 15 36 kg Dit is een semi universeel kinderbeveiligingssysteem Het is confo...

Page 74: ...dien u het autostoeltje achterwaarts gericht gebruikt voor ECE groep 0 1 Tenzij de airbag kan worden uitgeschakeld Lees dit na in de handleiding van het voertuig Het autostoeltje moet worden vervangen als het bij een ongeval is blootgesteld aan sterke belastingen Om veiligheidsredenen moet het autostoeltje ook in de auto zijn bevestigd als uw kind niet op het autostoeltje zit Zorg er altijd voor d...

Page 75: ...egstuk Gordelaanpassing Instelband Draaihendel Uitbreiding Isofix connector Zitschaal Schouderkussen Gordelslot kussen gordelslot Hendel voor hoekinstelling Isofix basis Instelling hoofdsteun Top Tether Baby inlegstuk onder comfort inlegstuk Schoudergordel Riembeugel Isofix connector Gordelgeleiding groep 2 3 Stootbescherming zijkant ...

Page 76: ...itie 1 A Voorwaarts gericht 9 18 kg 3 posities 2 3 4 Voorwaarts gericht 15 36 kg 1 positie 5 Autostoeltje draaien Druk met uw hand op de rode knop aan de voor kant van de basis en gebruik uw andere hand om de zitschaal te draaien U kunt de draaihendel loslaten wanneer u de zitschaal draait Er zijn 4 vergrendelposities op 90 180 270 en 0 360 in de richting van de basis Wanneer de zitschaal zich in ...

Page 77: ...Maak de gordel los en trek aan de hendel van de hoofdsteun totdat deze op de gewenste hoogte is Let op de correcte hoogte van de schoudergordels Deze moeten ter hoogte van de schouders van het kind uit het stoeltje komen Laat de hendel los en controleer of de hoofdsteun is vergrendeld Gordel openen sluiten Om de gordel te ontgrendelen drukt u op de rode knop van de gesp en trekt u beide gesptongen...

Page 78: ...e gordel samen zodat hij achter in de inkeping van de rugleuning kan worden opgeborgen afb B Zet vervolgens het autostoeltje in de maximale ligpositie om het gordelslot te verwijderen Draai het autostoeltje daarna in de 90 positie Verwijder het deksel en leg dit apart afb C afb C Haal nu de metalen klem van het gordelslot door de opening en breng vervolgens de bekleding weer aan afb D Berg alle ve...

Page 79: ...n beide kanten worden alleen groen als de verbindingen tot stand zijn gebracht Druk het autostoeltje tegen de rugleuning tot het stabiel staat Comfort inlegstuk tot max 13 kg Baby inlegstuk onder comfort inlegstuk tot max 9 kg Comfort inlegstuk en baby inlegstuk Extra bevestiging met Top Tether groep 0 1 Haal de Top Tether uit de tas Om de Top Tether los te maken drukt u met een hand op de grijze ...

Page 80: ...oor de geleiders aan de zijkant het autostoeltje van de ene naar de andere kant door en sluit de gesp van de 3 puntsgordel tot deze hoorbaar vastklikt 6 Plaats nu het baby en comfort inlegstuk weer in het autostoeltje 7 Trek de diagonale gordel langs de buitenschaal van het autostoeltje heen en zorg dat deze tussen de zitschaal en de hoofdsteun loopt 8 Trek zo stevig mogelijk aan de diagonale gord...

Page 81: ...itenkant van het autostoeltje 7 Bevestig de Top Tether aan de overeenkomstige haak in uw auto bijv achterkant van de autostoel of in de kofferruimte Neem hierbij de gebruiksaanwijzing van uw auto in acht 8 Span de Top Tether nu tot de indicatie op de Top Tether groen is 9 Om uw kind comfortabel in het zitje te plaatsen draait u het autostoeltje in de richting van de autodeur 10 Maak de gordelgesp ...

Page 82: ...ordel van de auto 4 Trek de 3 puntsgordel aan de achterkant verder onder het gordelsysteem van het auto stoeltje en door de andere opening in de rugleuning van het autostoeltje weer naar voren 5 Sluit de gesp van de 3 puntsgordel tot deze hoorbaar vastklikt en let erop dat de gordel niet verdraaid is 6 Trek zo stevig mogelijk aan de diagonale gordel tot de volledige 3 puntsgordel strak gespannen i...

Page 83: ...uto en laat ze vastklikken 5 Duw het autostoeltje stevig tegen de rugleuning van de stoel Zorg ervoor dat beide Isofix indicatoren groen zijn 6 Neem de Top Tether uit de bewaartas en trek deze volledig uit 7 Bevestig de Top Tether aan de overeenkomstige haak in uw auto bijv achterkant van de autostoel of in de kofferruimte Neem hierbij de gebruiksaanwijzing van uw auto in acht 8 Span de Top Tether...

Page 84: ...kind comfortabel in het zitje te plaatsen draait u het autostoeltje in de richting van de autodeur 7 Plaats uw kind in het autostoeltje 8 Stel de hoogte van de hoofdsteun zo in dat het hoofd van het kind volledig in de hoofdsteun rust en de diagonale gordel door de gordelgeleiding ter hoogte van de schouders van het kind naar buiten komt 9 Draai het autostoeltje naar de voorwaarts gerichte positie...

Page 85: ...f agressieve reinigingsmiddelen gebruiken Controleer na elke wasbeurt de bestendigheid van de stof en de naden Bij het wassen van de stof moeten de aanwijzingen op het etiket zie hier onder worden opgevolgd ONDERHOUD Controleer het product regelmatig op mogelijke schade Niet gebruiken bij schade en buiten bereik van kinderen bewaren Neem bij problemen contact op met de Osann klantenservice via 49 ...

Page 86: ...amochodowego zostaje zdjęty Fotelik dziecięcy jest skierowany do przodu i jest montowany w samochodzie za pomocą zaczepów Isofix Dziecko zapinane jest 3 punktowym pasem samochodowym Alternatywnie dziecięcy fotelik samochodowy można zabezpieczyć bezpośrednio za pomocą 3 punktowego pasa samochodowego bez zaczepów Isofix Zaleca się zainstalowanie fotelika dziecięcego na tylnym siedzeniu pojazdu W prz...

Page 87: ...o pojazdów ze stałymi lub automatycznymi 3 punktowymi pasami bezpie czeństwa odpowiadającymi regulaminowi EKG ONZ nr 16 lub równoważnym W razie wątpliwości należy pytać producenta urządzenia przytrzymującego dla dzieci lub sprzedawcy Montaż z zaczepami Isofix i górnym pasem mocującym grupa ECE 0 1 0 18 kg lub zaczepami Isofix i 3 punktowym pasem samochodowym grupa ECE 2 3 15 36 kg Niniejszy produk...

Page 88: ... grupie ECE 0 1 NIE mocować fotelika na przednim siedzeniu gdzie znajduje się poduszka powietrzna Chyba że można dezaktywować poduszkę powietrzną W tej kwestii należy zapoznać się z informacjami zawartymi w instrukcji eksploatacji pojazdu Fotelik dziecięcy powinien zostać wymieniony jeśli w razie wypadku został poddany dużym obciążeniom Ze względów bezpieczeństwa fotelik dziecięcy musi być zamocow...

Page 89: ...regulacyjna Dźwignia do obracania Rozszerzenie zaczep Isofix Poduszka siedzenia Poduszka naramienna Klamra zapięcia pasów i osłona klamry Dźwignia do regulacji kąta Stacja Isofix Ustawienie zagłówka Górny pas mocujący Podkładka dziecięca pod wkładką kom fortową Pas naramienny Sprzączka pasa Zaczep Isofix Prowadnica pasa grupa 2 3 Ochrona przed uderzeniem bocznym ...

Page 90: ...4 Skierowany przodem do kierunku jazdy 15 36 kg 1 pozycja 5 Obracanie fotelika dziecięcego Jedną ręką nacisnąć czerwony przycisk z przodu podstawy a drugą obrócić poduszkę siedzenia Gdy poduszka siedzenia się obraca dźwignię do obracania można zwolnić Istnieją 4 pozycje blokowania przy 90 180 270 i 0 360 w kierunku podstawy Gdy poduszka siedze nia znajdzie się w jednym z tych położeń zostaje zablo...

Page 91: ...gnąć za dźwignię na zagłów ku aż znajdzie się na żądanej wysokości Upewnić się czy pasy naramienne znajdują się na odpowiedniej wysokości Powinny wychodzić z fotelika na wysokości ramion dziecka Zwolnić dźwignię i upewnić się że zagłówek jest zablokowany Otwieranie zamykanie pasa Aby odblokować pas należy nacisnąć czerwony przycisk na zatrzasku i oddzielić dwa języczki klamry Aby zablokować pas na...

Page 92: ... Złożyć pas tak aby można go było przechować za pokryciem w korytku na oparciu Rys B Abyzdjąćklamręzapięciapasów najpierwprzesunąćsiedzeniedomaksymalnejpozycjileżącej Następnie obrócić siedzenie do pozycji 90 Zdjąć pokrywę i odłożyć ją na bok Rys C Teraz przełożyć metalową klamrę zapięcia pasów przez otwór a następnie ponownie założyć pokrywę Rys D Wszystkie usunięte części starannie przechowywać ...

Page 93: ...ąć fo telik dziecięcy do oparcia fotela aż znajdzie się on w bezpiecznej pozycji Wkładka komfortowa do maks 13 kg Podkładka dziecięca pod wkładką komfortową do maks 9 kg Wkładka komfortowa i podkładka dziecięca Dodatkowe mocowanie przy pomocy górnego pasu mocującego Grupa 0 1 Wyjąć górny pas mocujący z kieszeni Aby poluzować górny pas mocujący należy jedną ręką nacisnąć szary przycisk a drugą ręką...

Page 94: ...przez boczne prowadnice w foteliku z jednej strony na drugą i zamknąć klamrę 3 punkto wego pasa samochodowego aż będzie słyszalny odgłos kliknięcia 6 Teraz należy ponownie włożyć do fotelika podkładkę dziecięcą i wkładkę komfortową 7 Przeprowadzić pas barkowy wzdłuż zewnętrznej skorupy fotelika zwracając przy tym uwagę aby pas przebiegał między poduszką siedzenia a zagłówkiem 8 Dociągnąć maksymaln...

Page 95: ...uż zewnętrznej części fotelika 7 Zahaczyć górny pas mocujący o odpowiednie haczyki w samochodzie np tył siedzenia w samochodzie lub w bagażniku Należy przy tym przestrzegać instrukcji obsługi samochodu 8 Następnie napiąć górny pas mocujący aż pojawi się na nim zielony wskaźnik 9 W celu wygodnego wkładania dziecka obrócić fotelik dziecięcy w kierunku drzwi samochodu 10 Poluzować zapięcie pasa fotel...

Page 96: ...owego pasa samochodowego 4 Przeprowadzić 3 punktowy pas samochodowy z tyłu pod systemem pasów fotelika dziecięcego i do przodu przez kolejny otwór w oparciu fotelika 5 Zamknąć klamrę 3 punktowego pasa aż do usłyszenia kliknięcia Zwrócić przy tym uwagę aby pas bezpieczeństwa nie był skręcony 6 Dociągnąć maksymalnie pas barkowy aż do napięcia 3 punktowego pasa samochodowego i uzyskania stabilnej poz...

Page 97: ... 5 Dosunąć fotelik dziecięcy do oparcia fotelu samochodowego Sprawdzić czy oba wskaźni ki Isofix mają kolor zielony 6 Chwycić górny pas mocujący i wyciągnąć go na maksymalną długość 7 Zahaczyć górny pas mocujący o odpowiednie haczyki w samochodzie np tył siedzenia w samochodzie lub w bagażniku Należy przy tym przestrzegać instrukcji obsługi samochodu 8 Następnie napiąć górny pas mocujący aż pojawi...

Page 98: ...ania dziecka obrócić fotelik dziecięcy w kierunku drzwi samochodu 7 Posadzić dziecko w foteliku dziecięcym 8 Wyregulować wysokość zagłówka w taki sposób aby głowa dziecka znajdowała się w całości w zagłówku i pas przekątny wychodził przez prowadnicę pasa na wysokości barku dziecka 9 Obrócić siedzisko do pozycji przodem do kierunku jazdy Sprawdzić czy fotelik dziecięcy jest zablokowany w tej pozycj...

Page 99: ...ięcego Po każdym praniu sprawdzać trwałość tkaniny i szwów Podczas prania tkaniny należy postępować zgodnie z in strukcjami podanymi na etykiecie patrz poniżej UTRZYMANIE W DOBRYM STANIE Regularnie sprawdzać stan produktu pod kątem ewentualnych uszkodzeń Nie używać w przypadku uszkodzenia i przechowywać w miejscu niedostępnym dla dzieci W razie problemów prosimy o kontakt z działem obsługi klienta...

Page 100: ... dětské autosedačky se odstraní Dětská autosedačka se umisťuje po směru jízdy a montuje se v autě pomocí konektorů Isofix Dítě se připoutává 3bodovým pásem auta Alternativně lze dětskou autosedačku také zajistit přímo 3bodovým pásem auta bez konektorů Isofix Doporučuje se instalovat dětskou autosedačku na zadním sedadle vozidla NEPŘIPEVŇUJTE dětskou autosedačku proti směru jízdy ve skupině ECE 0 1...

Page 101: ...opatřenými automatickým navíjením podle předpisu EHK OSN č 16 nebo rovnocenného předpisu V případě pochybností se obraťte na výrobce nebo prodejce dětského zádržného zařízení Instalace pomocí konektorů Isofix a pásu Top Tether ECE skupina 0 1 0 18 kg nebo pomocí konektorů Isofix a 3bodového pásu ECE skupina 2 3 15 36 kg Jednáseopolouniverzálnídětskýzádržnýsystém PodleevropskébezpečnostnínormyEHKOS...

Page 102: ...y v ECE skupině 0 1 na předním sedadle kde se nachází airbag Výjimku tvoří situace kdy lze airbag deaktivovat Přečtěte si prosím v této souvislosti návod k obsluze vozidla Dětskou sedačku byste měli vyměnit pokud byla při nehodě vystavena silnému zatížení Z bezpečnostních důvodů musí být dětská autosedačka ve vozidle připevněna také tehdy když vaše dítě v dětské autosedačce právě nesedí Vždy se uj...

Page 103: ...astavení pásů Nastavovací pás Otočná páčka Rozšíření konektoru Isofix Skořepina sedačky Ramenní polštářek Zámek pásu a polštářek zámku Páčka pro nastavení úhlu Stanice Isofix Nastavení opěrky hlavy Top Tether Dětská vložka pod komfortní vložkou Ramenní pás Držadlo pásu Konektor Isofix Vedení pásu skupina 2 3 Ochrana před nárazem ze strany ...

Page 104: ...směru jízdy 9 18 kg 3 pozice 2 3 4 Orientace po směru jízdy 15 36 kg 1 pozice 5 Otočení dětské autosedačky Jednou rukou stiskněte červené tlačítko na přední straně základny druhou rukou otáčejte skořepinu sedačky Při otáčení skořepiny sedačky lze uvolnit otočnou páčku Jsou k dispozici 4 uzamykací polohy při 90 180 270 a 0 360 ve směru základny Když se skořepina sedačky nachází v jedné z těchto pol...

Page 105: ...stavení opěrky hlavy Uvolněte pás a zatáhněte za páku u opěrky hlavy dokud není v požadované výšce Dbejte na správnou výšku ramenních pásů Ty by měly ze sedačky vést ve výšce ramen dítěte Uvolněte páku a ujistěte se že je opěrka hlavy zajištěna Otevření uzavření pásu Chcete li uvolnit pás stiskněte červené tlačítko přezky a rozpojte oba jazýčky přezky Chcete li uzamknout pás nejprve spojte oba ja ...

Page 106: ...tářky a přezky z pásu Složte pás tak aby mohl být uložen za potahem v žlabu na opěrce zad obr B K odstranění zámku pásu nejdříve posuňte sedadlo do polohy maximálního sklonu Potom otočte sedačku do polohy 90 Odstraňte kryt a odložte jej stranou obr C Nyní provlékněte kovovou svorku zámku pásu přes otvor a pak znovu nasaďte kryt obr D Všechny odstraněné části dobře uschovejte A B C D ilustrační obr...

Page 107: ...anách jsou zelené pouze tehdy když se vytvořilo spojení Zatlačte dětskou autosedačku proti opěrce zad tak aby byla pevně usazena Komfortní vložka do max 13 kg Vložka pro novorozence pod komfortní vložku do max 9 kg Komfortní vložka a vložka pro novorozence Dodatečné připevnění pomocí pásu Top Tether skupina 0 1 Vyjměte Top Tether z kapsy Chcete li uvolnit Top Tether stiskněte jednou rukou šedé tla...

Page 108: ...ás přes boční vedení na dětské autosedačce z jedné strany na druhou a poté uzavřete přezku 3bodového pásu Měli byste slyšet že zacvakla 6 Poté do dětské autosedačky vložte zpět komfortní vložku a vložku pro novorozence 7 Šikmý pás veďte podél vnější skořepiny dětské autosedačky a dbejte přitom na to aby procházel mezi skořepinou sedačky a opěrkou hlavy 8 Zatáhněte co možná nejsilněji za diagonální...

Page 109: ...edení a veďte jej podél vnější strany dětské autosedačky 7 Pás Top Tether zahákněte za příslušný háček ve vozidle např na zadní straně sedadla automobilu nebo v zavazadlovém prostoru Řiďte se přitom prosím instrukcemi z návodu na obsluhu svého auta 8 Napněte Top Tether tak aby ukazatel na pásu Top Tether ukazoval zelenou barvu 9 Pro pohodlné usazení dítěte otočte dětskou autosedačku ke dveřím auta...

Page 110: ...pásu auta 4 Provlékněte 3bodový pás na zadní straně pod pásovým systémem dětské autosedačky a přes další otvor v opěrce zad dětské autosedačky opět dopředu 5 Uzavřete přezku 3bodového pásu Měli byste slyšet že zacvakla Dbejte na to aby pás nebyl překroucený 6 Zatáhněte co možná nejsilněji za diagonální pás tak aby byl celý 3bodový pás natažený a dětská autosedačka byla stabilně usazená 7 Uvolněte ...

Page 111: ... natlačte dětskou autosedačku na opěrku zad sedadla Ujistěte se že jsou oba indikátory Isofix zelené 6 Vyndejte pás Top Tether z úložné kapsy a natáhněte jej na plnou délku 7 Pás Top Tether zahákněte za příslušný háček ve vozidle např na zadní straně sedadla automobilu nebo v zavazadlovém prostoru Řiďte se přitom prosím instrukcemi z návodu na obsluhu svého auta 8 Napněte Top Tether tak aby ukazat...

Page 112: ...autosedačky 6 Pro pohodlné usazení dítěte otočte dětskou autosedačku ke dveřím auta 7 Posaďte své dítě do dětské autosedačky 8 Nastavte výšku opěrky hlavy tak aby hlava dítěte ležela zcela v opěrce hlavy a diagonální pás vycházel vedením pásu ve výšce ramen dítěte 9 Otočte sedačku do polohy po směru jízdy Zkontrolujte zda je dětská autosedačka zajiš těna v této poloze 10 Nyní zavřete přezku 3bodov...

Page 113: ...razivní nebo agresivní čisticí prostředky Po každém praní zkontrolujte stabilnost látky a švů Při praní látky postupujte opatrně podle pokynů na štítku viz níže ÚDRŽBA Pravidelně kontrolujte stav výrobku z hlediska možného poškození V případě poškození výrobek nepoužívejte a uchovávejte mimo dosah dětí V případě problémů kontaktujte prosím zákaznický servis společnosti Osann na 49 0 7731 970077 NE...

Page 114: ...ový systém det skej autosedačky sa odstráni Detská autosedačka je orientovaná dopredu a v aute sa montuje pomocou konektorov Isofix Dieťa sa pripútava 3 bodovým pásom auta Alternatívne možno detskú autosedačku zaistiť priamo pomocou 3 bodového pásu auta bez konektorov Isofix Odporúčame nainštalovať detskú autosedačku na zadnom sedadle vozidla Detskú autosedač ku na použitie s orientáciou smerom do...

Page 115: ...zpečnostnými pásmi ktoré zodpovedajú usmerneniu UN ECE č 16 alebo porovnateľnej norme V prípade pochybností sa obráťte na výrobcu alebo predajcu detského zadržiavacieho za riadenia Inštalácia s konektormi Isofix a pásom Top Tether skupina ECE 0 1 0 18 kg alebo s konektormi Isofix a 3 bodovým pásom skupina 2 3 15 36 kg Toto je polouniverzálny detský zadržiavací systém V súlade s usmernením UN ECE č...

Page 116: ...0 1 NEUPEV ŇUJTE na prednom sedadle kde sa nachádza airbag Môžete tak urobiť len vtedy ak airbag možno deaktivovať Prečítajte si preto v súvislosti s tým návod na prevádzku vozidla Ak bola detská sedačka pri nehode vystavená silnému zaťaženiu mali by ste ju vymeniť za novú Z bezpečnostných dôvodov musí byť detská autosedačka vo vozidle pripevnená aj vtedy keď v nej práve nesedí dieťa Musíte vždy z...

Page 117: ...enie pásov Nastavovací pás Otočná páka Rozšírenie konektora Isofix Sedacie vajíčko Čalúnenie oblasti pliec Zámok pásu a čalúnenie zámku Páka na nastavenie uhla Stanica Isofix Nastavenie opierky hlavy Top Tether Vložka pre bábätká pod komfortnú vložku Pás na plecia Strmeň pásu Konektor Isofix Vedenie pásu skupina 2 3 Ochrana pred nárazom z boku ...

Page 118: ...a dopredu 9 18 kg 3 pozície 2 3 4 Orientácia dopredu 15 36 kg 1 pozícia 5 Otáčanie detskej autosedačky Jednou rukou stlačte červené tlačidlo na prednej strane základne druhou rukou otáčajte sedacie vajíčko Počas toho ako sa sedacie vajíčko otáča môžete otočnú páčku povoliť V smere základne existujú 4 blokovacie pozície 90 180 270 a 0 360 Keď sa sedacie vajíčko nachádza v jednej z týchto pozícií za...

Page 119: ...e opierky hlavy Uvoľnite pás a ťahajte za páku na opierke hlavy kým nie je v požadovanej výške Uistite sa že sú pásy na plecia v správnej výške Mali by vychádzať zo sedačky vo výške ramien dieťaťa Pustite páčku a uistite sa že je opierka hlavy za istená Otvorenie zatvorenie pásu Ak chcete pás odblokovať stlačte červené tlačidlo spony a oddeľte oba jej jazýčky Ak chcete pás zablokovať spojte najprv...

Page 120: ...iky na plecia a sponu pásu Pás zložte tak aby ste ho mohli uschovať za poťahom v priehlbine na opierke chrbta obr B Na odstránenie zámku pásu najskôr posuňte sedadlo do polohy maximálneho sklonu Potom otočte sedačku do polohy 90 Odstráňte kryt a odložte ho nabok obr C Teraz prevlečte kovovú svorku zámku pásu cez otvor a potom znovu nasaďte kryt obr D Všetky odstránené diely dobre uschovajte A B C ...

Page 121: ... Indikátory na oboch stranách ukazujú zelenú farbu až vtedy keď došlo k vytvoreniu spojení Detskú autosedačku zatlačte proti opierke chrbta tak aby pevne sedela Komfortná vložka do max 13 kg Vložka pre bábätká pod komfortnú vložku do max 9 kg Komfortná vložka a vložka pre bábätká Dodatočné upevnenie pomocou Top Tether skupina 0 1 Top Tether vyberte z vrecka Ak chcete pás Top Tether uvoľniť stlačte...

Page 122: ...denia na detskej autosedačke z jednej strany na druhú a potom uzavrite sponu 3 bodo vého pásu auta tak aby ste počuli jej zapadnutie 6 Teraz znovu vložte komfortnú vložku a vložku pre bábätká do detskej autosedačky 7 Diagonálny pás veďte pozdĺž vonkajšej časti vajíčka detskej autosedačky a dbajte pritom na to aby prebiehal medzi sedacím vajíčkom a opierkou hlavy 8 Zatiahnite za diagonálny pás čo n...

Page 123: ...né vedenie a veďte ho ďalej pozdĺž vonkajšej strany detskej autosedačky 7 Pás Top Tether pomocou príslušného háčika zafixujte v aute napr o zadnú stranu sedadla auta alebo v batožinovom priestore Riaďte sa pritom návodom na obsluhu svojho auta 8 Teraz napnite Top Tether tak až začne ukazovateľ na páse Top Tether ukazovať zelenú 9 Pre pohodlné usadenie dieťaťa otočte detskú autosedačku smerom k dve...

Page 124: ...rane 3 bodového pásu auta 4 Prevlečte 3 bodový pás na zadnej strane popod pásový systém detskej autosedačky ďalej a cez iný otvor v opierke chrbta detskej autosedačky opäť smerom dopredu 5 Zatvorte sponu 3 bodového pásu Musíte pritom počuť že zaklapla Dbajte na to aby sa pás nepretočil 6 Zatiahnite za diagonálny pás čo najsilnejšie tak aby bol celý 3 bodový pás napnutý a detská autosedačka stabiln...

Page 125: ...5 Detskú autosedačku zasuňte pevne na opierku chrbta sedadla auta Dbajte na to aby oba indikátory Isofix ukazovali zelenú farbu 6 Vezmite pás Top Tether z úložného vrecka a vytiahnite ho na maximálnu dĺžku 7 Pás Top Tether pomocou príslušného háčika zafixujte v aute napr o zadnú stranu sedadla auta alebo v batožinovom priestore Riaďte sa pritom návodom na obsluhu svojho auta 8 Teraz napnite Top Te...

Page 126: ... na opierke hlavy detskej autosedačky 6 Pre pohodlné usadenie dieťaťa otočte detskú autosedačku smerom k dverám auta 7 Posaďte dieťa do detskej autosedačky 8 Výšku opierky hlavy nastavte tak aby hlava dieťaťa kompletne spočívala v opierke hlavy a diagonálny pás vychádzal cez vedenie pásu vo výške pliec dieťaťa 9 Sedačku otočte do polohy orientovanej smerom dopredu Skontrolujte či detská autose dač...

Page 127: ...ajte rozpúšťadla abrazívne ani agresívne čistiace prostriedky Po každom praní skontrolujte stav látky a švov Pri praní látky sa musíte dôsledne riadiť pokynmi na etikete pozri na spodku ÚDRŽBA Pravidelne kontrolujte stav výrobku v súvislosti s možným poškodením V prípade poškodenia ho nepoužívajte a uschovajte mimo dosahu detí Pri problémoch sa obráťte na zákaznícku službu Osann na 49 0 7731 97007...

Page 128: ...www osann de Version C 22 07 2021 Osann GmbH Gewerbestr 22 D 78244 Gottmadingen Tel 49 0 7731 970077 Fax 49 0 7731 970055 E Mail info osann de ...

Reviews: