background image

CONNECTING UP YOUR TV RECORDER

PACE  Micro Technology plc
115-230V ~50/60Hz 36W max.

Made in France

Aerial

Ch21-69 TV

Composite
Video

S Video

TV

TV2/VCR

DIGITAL AUDIO OUT

SERIAL INTERFACE

L

R

A
U
D

I

O

TV

CAUTION

RISK OF ELECTRIC SHOCK

DO NOT OPEN

WARNING: TO PREVENT FIRE OR ELECTRICAL SHOCK HAZARD,
DO NOT EXPOSE THIS PRODUCT TO RAIN OR MOISTURE, 
OR REMOVE COVER. NO USER SERVICEABLE PARTS INSIDE.
REFER SERVICING TO QUALIFIED SERVICE PERSONNEL.

IN

IN

OUT

VCR

TV

TV Recorder

Mains lead

RF lead

RF lead

SCART lead

SCART lead

RF lead

Aerial

Quick Start Guide


WARNING


Before you connect or disconnect your TV Recorder to/from any other equipment, 
make sure you disconnect all the equipment from the mains supply. Also refer to 
the safety and electrical information in your TV Recorder’s User Guide.


The diagram, above, shows how to connect your TV Recorder to a TV and video recorder 
(VCR).

Connect the RF and SCART leads as shown (an RF lead and a SCART lead are supplied with 
your TV Recorder).

When you have made all the above connections, connect all equipment to the mains supply.

NEED FURTHER HELP?


If you should experience any difficulty with your TV Recorder, check the troubleshooting table 
in your User Guide – this may provide the answer you are looking for.

If you still have problems after consulting the table, contact the Technical Helpdesk* on


0870 120 0986


 (national call rate) or e-mail 


twins@pace.co.uk


* Calls to the Helpdesk may be monitored or recorded for training purposes.


Copyright © 2003 Pace Micro Technology plc. All rights reserved.

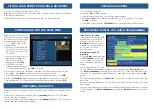
PLAYING BACK RECORDINGS


The 


Recording library


 is a list of 

existing recordings, in time and 
date order.

To display the 


Recording library


press the 


Library


 button on your 

remote control.

Use the arrow buttons 

 to 

highlight a recording. To play 
back a highlighted recording, at 
full screen, press 


OK


.

When playback is taking place 
from your TV Recorder’s disk, a 
green dot shows on the front-
panel display.

To remove the 


Recording library


from the screen and return to the 
channel you were watching before, press the 


Exit


 button, or press the 


Library


 button again.

Pace Micro Technology plc

Victoria Road  Saltaire  Shipley

West Yorkshire  BD18 3LF  England

www.pace.co.uk

Pace

®

 and          

®  

are trademarks and/or registered trademarks of Pace Micro Technology plc.

X150-081-IE01

®

Summary of Contents for Twin

Page 1: ...pment to the mains supply NEED FURTHER HELP If you should experience any difficulty with your TV Recorder check the troubleshooting table in your User Guide this may provide the answer you are looking...

Page 2: ...pressing the List button then the arrow buttons to go through the current list then OK to change selecting a channel from the TV Schedule see your User Guide for further details CHANGING CHANNEL RECOR...

Page 3: ...pressing the List button then the arrow buttons to go through the current list then OK to change selecting a channel from the TV Schedule see your User Guide for further details CHANGING CHANNEL RECOR...

Page 4: ...pment to the mains supply NEED FURTHER HELP If you should experience any difficulty with your TV Recorder check the troubleshooting table in your User Guide this may provide the answer you are looking...

Page 5: ...Pace Micro Technology plc Victoria Road Saltaire Shipley West Yorkshire BD18 3LF England www pace co uk Pace and are trademarks of Pace Micro Technology plc X150 067 IE01...

Page 6: ...nt press the Return button To display the Recording library press the Library button on your remote control Editing recording information To edit the title and other information associated with the hi...

Page 7: ...USE 11 ELECTRONIC PROGRAMME GUIDE 13 RECORDING DIGITAL TV 15 PAUSING LIVE TV 19 PLAYING BACK RECORDINGS 20 ARCHIVING RECORDINGS 23 MAIN MENU 24 FAVOURITES LISTS 25 ALL CHANNELS LIST 27 PARENTAL LOCK 2...

Page 8: ...mperature Maintenance To clean your TV Recorder dust with either a clean dry cloth or one that has been slightly dampened with distilled water Never use detergents of any kind Before cleaning always d...

Page 9: ...nt from your TV Recorder Never push anything into holes slots or other openings in the case except a viewing card into the slot provided and only when you are requested to do so CAUTION Do not use or...

Page 10: ...exist if this were to be plugged into a mains socket Fit an appropriate mains plug on the lead If this plug contains a fuse it should be as described above If you are using a non fused plug an externa...

Page 11: ...ights when playing back a recording from the hard disk Record indicator lights when recording a programme to the hard disk Clock channel number display shows the current time when switched off in stan...

Page 12: ...B S video lead to a VCR or TV mini DIN connector C Right and left stereo audio leads to a VCR TV or hi fi amplifier phono connectors D Optical digital audio lead to a home cinema amplifier These outp...

Page 13: ...er of Channels found displays and the word Done displays at the bottom of the screen Press the OK button to save all the found channels Note If you press the Return button your TV Recorder will not sa...

Page 14: ...the current programme displaying the Electronic Programme Guide EPG for current channel information and the TV Schedule Recording programmes Pausing live TV Playing back programmes Copying recordings...

Page 15: ...ay the Main menu To display the Event list Colour buttons To perform special functions These will be explained on the screen when they are required To remove a screen without saving any changes and re...

Page 16: ...ack or resume playback if paused To fast forward play forwards at high speed To rewind play in reverse at high speed To skip forwards to the next bookmark To skip backwards to the previous bookmark or...

Page 17: ...splays in the information banner You then use the buttons to change channel up and down that list When you first use your TV Recorder there is only one list available All channels Once you have create...

Page 18: ...umber channel name and current list name While you are viewing this screen you can affect the output from the TV2 VCR SCART as follows display the on screen list by pressing the List button Use the bu...

Page 19: ...than the space allows use the buttons to display all the information Use the buttons to switch between the current now and next programme You can also use the Ch and Ch buttons to change channel If yo...

Page 20: ...the Info button To remove this information press the Info button again To remove the TV Schedule and change channel highlight a programme and press the OK button Your TV Recorder changes to the chann...

Page 21: ...the Record M button when the programme s full details are visible in the Now Next information banner A red line appears in the progress bar to indicate that the programme is scheduled for recording T...

Page 22: ...Disk as the target Note You cannot record more than one event at the same time on your TV Recorder s hard disk See Conflicting Events on page 18 to change the start duration and end times and the dat...

Page 23: ...annel you were watching before press the Return button Editing events To view details of or edit a highlighted event except a current event press the OK button The Event confirmation window appears If...

Page 24: ...9 If a conflict does occur when you add a new event a message similar to the one shown below will appear on your TV screen When a recording to disk except a live pause recording is in progress the TV2...

Page 25: ...speed will be resumed The available recording time disk space using this feature is limited to a pre set period you can change this using the menus While you are playing back the recording the progra...

Page 26: ...u can use when playing back recordings see page 21 Editing recording information To edit the title and or the descriptive text associated with the highlighted recording press the Green button The Even...

Page 27: ...high speed to skip forwards to the next bookmark to skip backwards to the previous bookmark or to the start of the recording if there is no previous bookmark to stop playback of a recording or to exit...

Page 28: ...mation appears see page 16 but with the above editing options only To hide the Recording information banner or screen press Return These are exact points at the times you choose within a recording whi...

Page 29: ...r VCR is turned on and ready to record To confirm that you want to start the copying process press the Red button or to cancel press the Return button Note If the copying process would cause a conflic...

Page 30: ...m a selection or display the next menu screen and you use the Return button to return to the previous menu screen without saving any changes You use the Exit button to remove the menu and redisplay th...

Page 31: ...ample each person in your household could have their own named Favourites list Press the Menu button to display the Main menu Highlight Your TV lists then press the button to display the Your TV lists...

Page 32: ...tton Changing the channel order There are two different ways you can change the order of the channels in the list 1 To move a channel up or down the list use the buttons to highlight the channel then...

Page 33: ...ing channels To lock or unlock a channel highlight the channel then press the Yellow button Locked channels have a padlock symbol to the right of the channel name If you then activate the Parental loc...

Page 34: ...recorded for training purposes To de activate Parental lock press the Menu button then enter the Parental code to display the Main menu Select Parental unlock from the menu then press the Red button...

Page 35: ...n TV CHANGING THE TV SETTINGS Item Available settings Comments TV screen format Normal 4 3 Widescreen 16 9 If you have a widescreen TV set this to Widescreen 16 9 otherwise set it to Normal 4 3 16 9 P...

Page 36: ...descreen TV set this to Widescreen 16 9 otherwise set it to Normal 4 3 16 9 Picture handling You cannot select this item if you set Widescreen 16 9 for the TV screen format Automatic Letterbox True 16...

Page 37: ...ments Local time GMT 12 to 13 There is normally no need to adjust this setting as it is set automatically when your TV Recorder is first switched on Phono audio volume Fixed Variable This setting appl...

Page 38: ...SETTINGS Item Available settings Comments Audio First language Second language English Welsh Gaelic Choose your first choice and second choice for the audio language If a TV programme is transmitted a...

Page 39: ...a new free digital channel has been launched You may also need to scan for channels if you move your TV Recorder to a new location for example if you move house To scan for channels press the Menu but...

Page 40: ...functions Check if you want your TV Recorder to check the disk for errors press the Green button Initialise if you want your TV Recorder to initialise the disk press the Red button Note If you choose...

Page 41: ...again then your TV Recorder will carry out its scan for channels Note All the settings you have changed for example the Parental code will be reset to the factory setting and any Favourites lists you...

Page 42: ...h your TV Recorder off while it is storing new software regardless of how the upgrade procedure is initiated Setting your TV Recorder to be upgraded later on To set your TV Recorder to be upgraded lat...

Page 43: ...ol need replacing i Press the Standby S button on your remote control ii Check that nothing is blocking the path iii Replace both batteries in your remote control Please remember that used alkaline ba...

Page 44: ...transmitted with the programme The volume on digital terrestrial channels does not match the volume on the existing analogue channels or your VCR The volume of your TV Recorder needs adjusting Use the...

Page 45: ...tems in your home i Try connecting your aerial directly to your TV recorder If this stops the picture breaking up then there is not enough signal strength to use additional devices Consider improving...

Page 46: ...nsions W x H x D 355mm x 65mm x 270mm Operating temperature range 0 C to 40 C Storage temperature range 6 C to 50 C UHF Channel Channel 21 69 75 to 20dBm Bandwidth 8MHz DVB compatible ETS 300 744 Deco...

Page 47: ...audio out Optical digital audio socket RS 232 DB 9 male data communications equipment DCE EIA TIA 232 E ITU TV 28 115 2kbit s max Note The RS 232 port is for service use only Do not plug anything into...

Page 48: ...are provided hereunder is copyrighted and licensed not sold Pace especially does not transfer title or any ownership rights in the Software to you The Software provided hereunder may contain or be der...

Page 49: ...damage including loss of profits business interruption loss of data or the cost of procurement of substitute goods technology or services arising out of the use or the inability to use the Software s...

Page 50: ...ther room However you cannot see any menus or programme information etc on this output To change the output channel you would normally use the TV2 Ch and TV2 Ch buttons on your TV Recorder s remote co...

Page 51: ...Pace Micro Technology plc Victoria Road Saltaire Shipley West Yorkshire BD18 3LF England www pace co uk Pace and are trademarks of Pace Micro Technology plc X150 067 IE01...

Reviews: