background image

280514-24 SUPER-SD1  5055.201

INSTALLATION 
A N D   O P E R AT I N G 
INSTRUCTIONS

SAFETY NOTICE

If this stove is not properly installed, a 
house fi re may result.  For your safety, 
follow the installation instructions.  Contact 
local building or fire officials about 
restrictions and installation inspection 
requirements in your area.

TESTED and LISTED to CAN/ULC S627 
AND UL 1482
Meets the Environmental Protection 
Agency's July 1990 Particulate Emission 
Standards

IMPORTANT:

THESE INSTRUCTIONS ARE TO 
REMAIN WITH THE HOMEOWNER
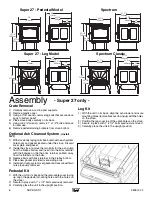
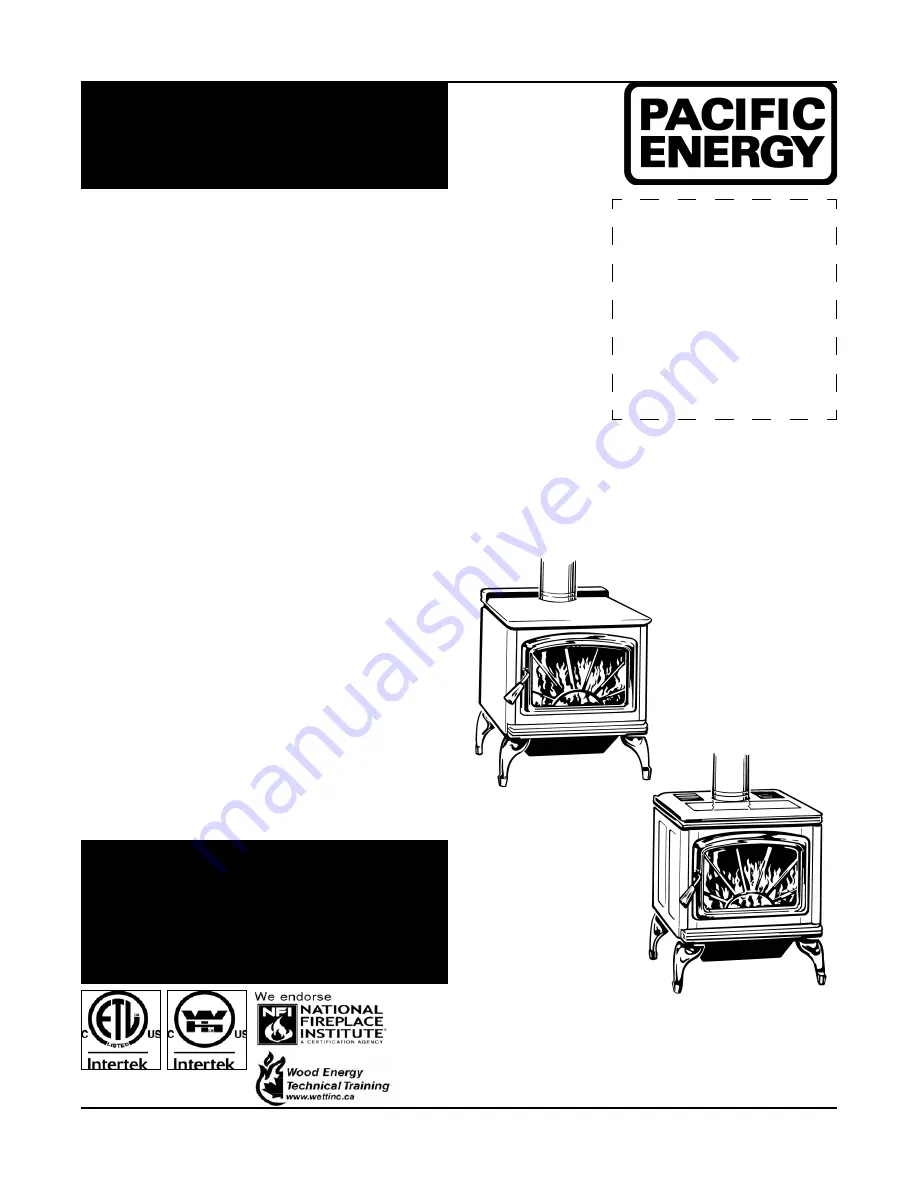
MODEL - SUPER 27
SPECTRUM
SPECTRUM CLASSIC
DESIGN-D

SERIAL #

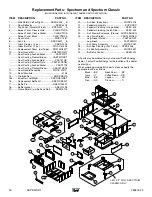
Summary of Contents for SPECTRUM

Page 1: ...tioninstructions Contact local building or fire officials about restrictions and installation inspection requirements in your area TESTED and LISTED to CAN ULC S627 AND UL 1482 Meets the Environmental...

Page 2: ...ce 3 Maintenance Checks 4 Creosote 5 Formation and Need for Removal 5 Chimney Fires 5 In Case of a Chimney Fire 5 Avoiding a Chimney Fire 5 Assembly 6 Crate Removal 6 Optional Ash Cleanout System Inst...

Page 3: ...tained in good condition Periodically inspect seals and replace if neces sary Follow instructions included in the DR31 WDGKIT kit obtainable from your nearest Pacific Energy dealer 5 DOOR GLASS Do not...

Page 4: ...himney System Top baffle board blanket Baffle Top heat shield and mounting bolt Baffle Gasket Brick Rails Manifold Blower The blower should be cleaned out a minimum every six months by using a vacumn...

Page 5: ...nd must be lived with Regular inspection and cleaning is the solution The use of dry seasoned wood and ample combustion air will help to minimize the buildup Chimney Fires The result of excessive creo...

Page 6: ...at secure stove body to bottom pallet 4 Place stove body carefully on its back 5 Using two 3 4 wrench remove 1 x 1 2 bolts and save for later use 6 Remove pallet retaining brackets from stove bottom O...

Page 7: ...leaks 6 Install connector as per manufacturer s instructions 7 Attach stove to flooring using two 1 4 x 2 or longer lag screws Mobile Home Installation Warning Undernocircumstancesisthisheatertobeins...

Page 8: ...ney Support 56 1422 mm Minimum Minimum 7 2 1m Ceiling Height Attachment to floor for mobile homes Non combustible floor protector 48 1219 mm 3 914 mm Minimum Hooded vent or 90 elbow turned down The ch...

Page 9: ...ffect stove performance Chimney flue exit is to be 3 feet 1 m above roof and two feet 0 6 m above highest projection within 10 feet 3 m The installation must meet all local codes Do not connect this u...

Page 10: ...equires the unit to be secured to the structure to prevent dislodging of the air duct To draw outside air from behind the stove an outside air adaptor may be required see Optional Blower section Cut o...

Page 11: ...for the first 2 3 times it is very important that the room be well ventilated Open all windows and doors Smoke and fumes caused by the curing process may cause discomfort to some individuals Lighting...

Page 12: ...Overnight Burns 1 Open door and rake hot embers towards the front of the heater Add a couple of dry split logs on top of embers close door 2 Adjust air control to high and in just a few minutes logs...

Page 13: ...perate as follows Air control set to L low operate blower speed control on Low Air control set between L and H low and high oper ate blower speed control at desired setting Automatic To operate the bl...

Page 14: ...latch Excessive Creosote Buildup See 1 2 3 above Low Heat Output 1 Wood is wet Use dry wood 2 Fire too small Build a larger fire 3 Draft too low Chimney plugged or restricted inspect and clean Won t B...

Page 15: ...Door Handle Assembly WODC 4147C 11 Boost Manifold 4105 12 Firebrick Set BRIC SSERA 13a Brick Rail Left Right SSER RAILSET 14 Replacement Baffle Kit SSER DBAKIT 15 Baffle Pin SSER 125001 16 Baffle Gas...

Page 16: ...kel CAST 31NI Door Casting Radiant Nickel CAST 31RSNI 12 Door Handle Assembly WODC 4147C 13 Boost Manifold 4105 14 Firebrick Set BRIC SSERA 15a Brick Rail Left Right SSER RAILSET 16 Replacement Baffle...

Page 17: ...ng the basic functions of this design Traditional wood stoves had a basic combustion system which allowed a considerable amount of heat energy to escape up the chimney as unburned gases and particulat...

Page 18: ...ts back 5 Using a 3 4 wrench remove 1 x 1 2 bolts and save for later use 6 Remove pallet retaining brackets from stove bottom Pedestal Kit 1 With the unit on its back and the removable cover facing up...

Page 19: ...either A B C as shown below if you are installing the optional ash cleanout system or 1 full brick in place of A B if you are not installing the ash cleanout system Next install the side firebricks 4...

Page 20: ...20 SUPER SD1 280514 24...

Page 21: ...280514 24 SUPER SD1 21...

Page 22: ...22 SUPER SD1 280514 24...

Page 23: ...07 INSTALLEZ ET UTILISEZ SELON LES INSTRUCTIONS D INSTALLATION ET D OP RATION FOURNI AVEC L APPAREIL CONTACTEZ LES OFFICIELS DE LA CONSTRUCTION OU DE SERVICE D INCENDIE POUR DES INFORMATIONS QUANT AUX...

Page 24: ...PACIFIC ENERGY FIREPLACE PRODUCTS LTD 2975 Allenby Rd Duncan B C V9L 6V8 Phone 250 748 1184 Web site http www pacificenergy net Printed in Canada...

Reviews: