


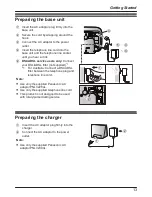
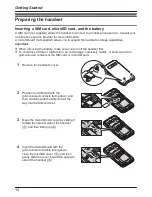
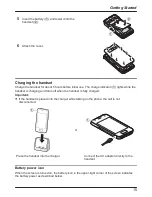
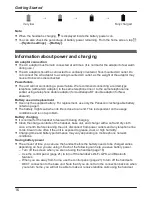

Operating Instructions
Premium Design Phone with Touchscreen
Model No.
KX-PRX150AZ
Thank you for purchasing a Panasonic product.
Please read this document and save it for future reference.
To use this unit in your country, first change the unit’s region setting to match
your country (page 45).
Please access our online customer survey:
http://panasonic.net/pcc/tel/q


