background image

Summary of Contents for OmniVision PV-M2776

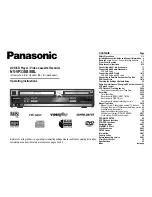
Page 1: ...R MODEL PV M2776 Operating Instructions Before attempting to connect operate or adjust this product and save this manual please read these instructions completely Spanish Quick Use Guide is included G...

Page 2: ...concerning the operation and maintenance of this unit has been included Therefore it should be read carefully in order to avoid any problems J Table of Contents Important Safeguards and Precautions 3...

Page 3: ...NEC NATIONAL _ ELECTRICAL CODE GROUND_p OWE R SERVICE _ _ ANTENNA Z_ AND CABLE CONNECTIONS q EAD _N If an outside antenna or cable WIRE system is connected to the _cGANTENNA equipment be sure the DIS...

Page 4: ...batteries Also never mix alkaline with manganese batteries Product Features All Channel Auto Set 181 CH TV CATV Tuner 6 Auto Clock Set 6 7 Auto Daylight Saving Time 28 Auto Operation Functions Auto P...

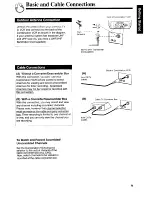
Page 5: ...d channels for timer recording Scrambled channels may not be viewed or recorded with this connection B With a Converter Descrambler Box With this connection you may record and view any channel includi...

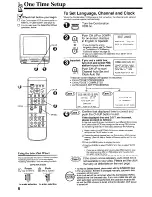
Page 6: ...e on screen displays will appear in sequence CH AUTO SET PROCEEDING CH AUTO SET COMPLETED AUTO CLOCK SET PROCEEDING 5 12 25 1996 WED 12 00PM DST ON SETTING CH 10 AUTO CLOCK SET COMPLETED END PUSH CH U...

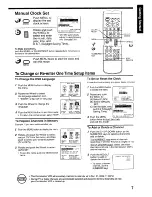
Page 7: ...t your antenna system TV or CATV 3 Rotate and push the Wheel to select AUTO SET To exit this mode pushthe MENU button twice MAIN MENU CH CLOCK EXIT SELECT ROTATE WHEEL SET PUSH WHEEL SET UP CHANNEL L...

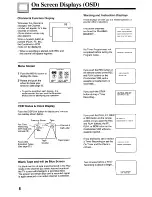
Page 8: ...and PLAY buttons on the Combination VCR and a cassette is inserted with no record tab If you push the STOP button during a Timer Recording CHECK CASSE _E RECORD TAB TO CANCEL TIMER REC HOLD DOWN STOP...

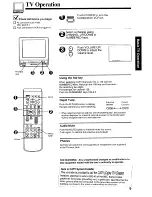
Page 9: ...nnel Channel CH08_ _CH10 When selecting channels with the CH UP DOWN button the channels must be displayed for at least 4 seconds in order for the Combination VCR to recognize them as a new selection...

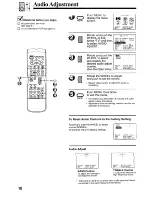
Page 10: ...U KEY Rotate the WHEEL to adjust and push to set the control Repeat steps 3 and 4 to adjust the audio as necessary MENU Push MENU three times to exit this mode If no button is pushed within 5 minutes...

Page 11: ...the video adjust overlay disappears Adjustment scale and setting indicator number are displayed to assist you To Reset Picture Controls to the Factory Setting Rotate and push the WHEEL to select and...

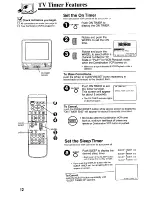
Page 12: ...sh ON TIMER to set On Timer function This screen will appear for about 5 seconds The ON TIMER indicator lights on the front panel ON TIMER SET CANCEL PUSH CLEAR KEY To Cancel push the CLEAR RESET butt...

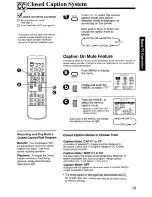
Page 13: ...C C button on the remote control _ I JII e _l e _i _Ill l RI_ I Jlrd Each push of the WHEEL will change the display as shown at right SET UP TV INPUT SELECT TUNER VIDEO ADJUST AUDIO ADJUST SPEAKER ON...

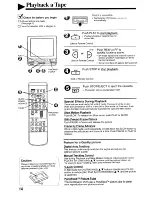
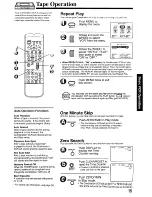
Page 14: ...he sound will be muted After the Combination VCR is in the Still or Slow mode for 3 minutes it will go into the Stop mode automatically to protect the tape and video head Slow Motion Playback Push SLO...

Page 15: ...en a tape is inserted the power comes on Auto If the record tab is removed playback begins Auto Auto Rewind After a tape reaches its end during playback or fast forward the Combination VCR will rewind...

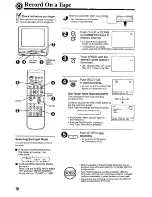
Page 16: ...UT SELECT Finally choose TUNER or LINE o PushREO I f REC TIMEto start recording REC 02 Or push the PLAY and REC TIME buttons on Combination VCR TO SET SPECIFIC REC TIME One Touch Timer Recording OTR P...

Page 17: ...cording unit see Selecting the Input Mode section on page 16 Push PLAY on the playing VCR Then push PAUSE when the tape reaches the point you want to start copying Push REC and PLAY at the same time o...

Page 18: ...aining Items to be set START time STOP time CH annel number or LINE for outside source recording Speed SP LP SLP To Make Corrections Repeatedly push the Wheel to move forward or the CLEAR RESET button...

Page 19: ...SP I 4 SU 9 00plO OOp L SLP I SELECT 1 8 ROTATE WHEEL i ENTER PUSH WHEEL l END PUSH PROG KEY Push the PROG button to exit this mode and return to the normal TV screen Timer Recording i Using Unit But...

Page 20: ...or 7 seconds again during Stop or Power OFF mode VCR LOCK ACTIVATED VCR LOCK OFF VCR Lock mode is cancelled automatically after 24 hours when the clock is set This feature cannot be activated or cance...

Page 21: ...MENU CH CLOCK EX I T SELECT ROTATE WHEEL SET PUSH WHEEL Rotate the WHEEL to select SPEAKER and push to turn the speaker off or on SET UP TV CAPTION ON MUTE CAP Cl INPUT SELECT TUNER VIDEO ADJUST _HEEL...

Page 22: ...SAP MONO SAP broadcast Second Audio Program second language broadcast is being received Select SAP audio mode for the second language MONO broadcast Normal monaural sound broadcast is being received...

Page 23: ...een appears when push the SAP Hi Fi button during playback _ Playback the tape _I_ i See the Playback a Tape section on page 14 Spatializer Feature This feature allows you to enchance the stereo sound...

Page 24: ...and push the WHEEL to select CH MAIN MENU CH CLOCK EX IT SELECT ROTATE WHEEL SET PUSH WHEEL Rotate and push _ the WHEEL to select CABLE BOX SET UP I SET UP CHANNEL ANTENNA SYSTEM CATV A_ _o SET j VCR...

Page 25: ...middle column fill in each station s assigned Guide VCR Plus number found in TV Guide newspapers etc 3 In the right column fill in the channel number that your TV receives the station on from your ch...

Page 26: ...L PUSH CLEAR If you use A connection on page 24 the channel shown in the on screen display in this step will always be the cable box output channel number Use normal Timer Recording steps if the PlusC...

Page 27: ...36 Unika 01 29 44 88 91 Universal 42 43 44 52 63 88 Viewstar 13 20 22 26 40 58 62 98 Videoway 07 23 50 Zenith 07 23 50 The Remote Control may be set up to control some of the functions on your Cable B...

Page 28: ...e Back 1 Lpl DrUr irng oP_ Y bt keC _ Clogged Video Blue Back Head Picture Screen Clogged Video Heads While your Combination VCR will not normally require head cleaning however the heads may become cl...

Page 29: ...rectional antenna Make sure that the channel being received is in the Combination VCRs memory P 6 Make sure your antenna u_cable system IS cu_Lected to the Combination VCR P 5 Make sure that the recor...

Page 30: ...See page 14 CHANNEL UP DOWN TRACKING UP DOWN See pages 6 7 9 14 16 VOLUME UP DOWN See page 9 CATV POWER See page 27 SELECT SET WHEEL See pages 6 8 10 13 15 16 18 20 21 24 25 CLEAR RESET See pages 7 12...

Page 31: ...sumes 7W of electric power in OFF condition _ I_lllllllllll IIIIIIIIIIIIIIIIIIIII IIIIIIIIIIIIIIIIIIIII IIIIIIII1_ 0 IIIIIIIIIIII IIIIIIIII IIIIIIIIIIII IIIIIIIII IIIIIIIII IIIIIIIII IIIIIIIII IIIIIII...

Reviews: