background image

Summary of Contents for Omnivsion PV-4515S

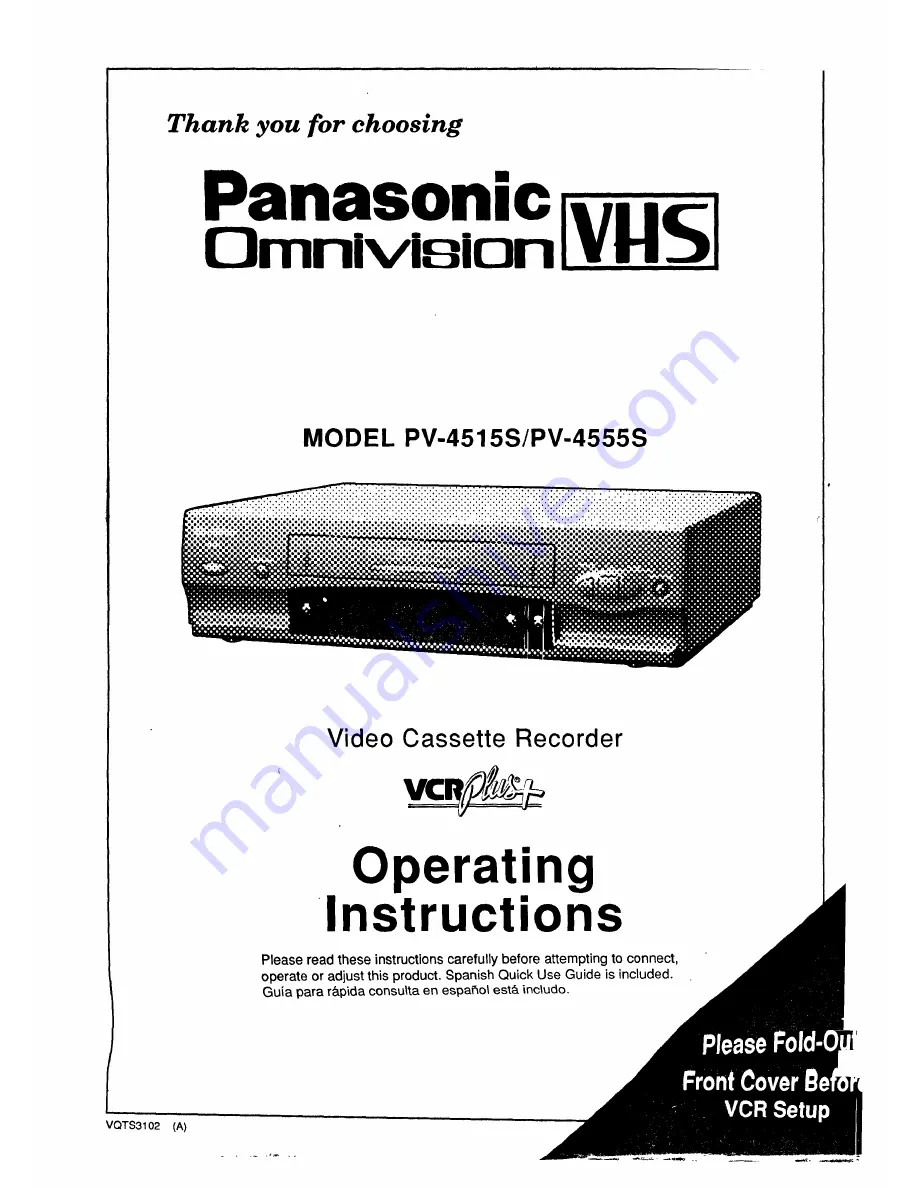
Page 1: ...4515S PV 4555S Video Cassette Recorder Operating Instructions Please read these instructions carefully before attempting to connect operate or adjust this product Spanish Quick Use Guide is included Guia para r pida consulta en espaf_ol est includo VQTS3102 A ...

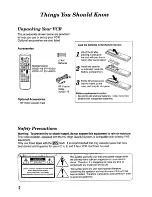
Page 2: ... hazard do not expose this equipment to rain or moisture This video recorder equipped with the HQ High Quality System is compatible with existing VHS equipment Only use those tapes with the _ mark It is recommended that only cassette tapes that have been tested and inspected for use in 2 4 6 and 8 hour VCR machines be used _ _ _ _ _ _ _ _ Yhis symbol Warns ti_euser that uninsuiated voltage within ...

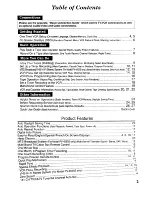
Page 3: ...nctions 17 Set a Timer Recording at the VCR 18 Multi Brand Control Feature 19 VCR and Cassette Information RecordTab Tape Speeds Head Cleaner Tape Cleaning Specifications 20 21 22 Helpful Notes on Operations Basic functions Reset VCR Memory Daylight Saving Time 23 Before Requesting Service Self check items 24 25 Spanish Quick Use Guide Guia para r_ pida consulta 26 27 Quick Use Guide Basic functio...

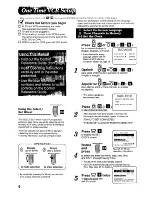
Page 4: ...ontrol for many VCR tasks please take time to familiarize yourself with its simple operation There are basically two types of Wheel operation Selecting items from an on screen display Entering information such as setting the clock OPERATION Rotate Press 0 up or down _ like a button ROTATE TO SELECT ROTATE TO SELECT PUSH TO PUSH TO SET SET to make selection to enter selection By repeatedly pressing...

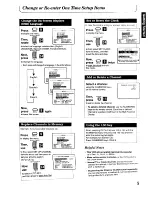
Page 5: ...exit this mode Select a channel using the NUMBERED keys on the remote control Then ADD DLT press _ _lJ to add or delete the channel CHANNEL 08 DELETED 20_ ADDED To select a deleted channel use the NUMBERED keys on the remote control Each time a deleted channel is selected it will flash in the Multi Function Display Example if you have cable installed etc Press MENU D MENU 1 SET UP VCR IDIOMNLANGUE...

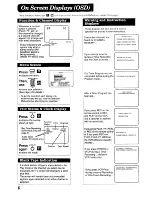
Page 6: ...the Play mode or the channel you select has no broadcast the TV screen will change to a solid blue field The screen will remain blue until a recorded signal is again detected or an active channel is selected 6 These displays will alert you to a missed operation or provide further instructions If no active channels are found for CHANNEL MEMORY NO CH FOUND PLEASE CHECK ANTENNA CABLE CONNECTION THEN ...

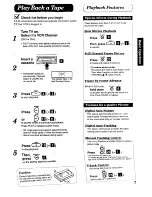
Page 7: ...the still picture one frame at a time Press PAUSE to release 4 5 Press _ B r _ FF _ or _ _ ora to quickly locate a scene during playback Press PLAY to release search mode SP mode tapes have a search speed of 9 times and SLP mode tapes 27 times the normal speed Some noise bars will appear during search _TOP Press I_ _J org to stop playback press _ Ii on the VCR to eject the cassette l aution lease ...

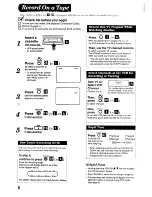
Page 8: ...Turn TV on I _ VCR D Select VCR Channel This indicator lights in the Multi Channel 3 or 4 Function D_splay If not press the VCR TV selector to turn it on VCR en 0i press _ or H to select channels Now vc_rv press 0 N or r_ to turn the VCR indicator off or simply turn the VCR off to select channels with the TV controls 5 Press __J or to stoo recording You can set up the VGR to turn itself off at a p...

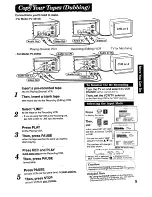
Page 9: ...h VCRs at the same time_ to _ __P2 tD YJ_ Then press STOP on both VCRs to _ 19JLC g _ _g Press MENU D to display the menu ROTATE TO SELECT Then _1_ to first select SET UP VCR and then to choose TUNER You can also select LINE t using the VCR CH A V key The numbers will change in the order shown I M ENU END PUSH MENU KEY SET CLOCK SET UP CHANNEL IDIOMA LANGUE ENGLISH SELECT ROTATE WHEEL SET PUSH WHE...

Page 10: ...his page Then continue with programming __L__ BY ROTATING WHEEL PUSH WHEEL TO END PUSH PROG KEY J AT_ TART STOP CH _1_1 _ UNJ_ _ __ _L_P 11 H I_llT q 11 lT _l I 1 ROTATING WHEEL PUSH WHEEL_ O END PUSH PROG KEY Tomakecorrections Press the Wheel or CLEAR button repeatedly to move back or forward to the desired item Then re enter it 3 Press _ _ _ to finish the program 3 P OT START STOP CHSPD 2 3 4 SE...

Page 11: ... _ _ lllRII0 _p _lII m p_IB_ _ II J 3 10 8 00P 9 00P 10 SP 4 SU 9 00P 10 00P L SLP SELECT 1 8 ROTATE WHEEL ENTER PUSH WHEEL CANCEL PUSH CLEAR KEY END PUSH PROG KEY I_ _ 1 START STOP OH 1 i ieX l mP HeII mP_I BY ROTATING WHEEL fll PUSH CLEAR PUSH WHEEL E TO END PUSH PROG KEY J ress 1 to display all programs ROTATE TO SELECT Then _ rotate FJ_lJ PUSH TO SET to select the desired program number press ...

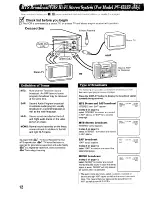
Page 12: ...sed by 11_ Technology Licensing The following are possible combinations of broadcasts with their accompanying on screen displays Press the DISPLAY button to display the broadcast signal currently being received MTS Stereo and SAP broadcast STEREO and SAP appear In step 3 on page 13 select STEREO to monitor and record in Hi Fi stereo or SAP for a second language MTS Stereo broadcast STEREO only app...

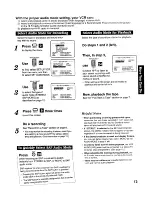
Page 13: ...ft as is Now playback the tape See the Play Back a Tape section on page 7 4 5 Press _ _ three times to exit this screen Do a recording See Record On a Tape section on page 8 You may monitor the recording in stereo even if you are watching amono sound TV by using a stereo amp and speakers See connection on page 12 when receiving an SAP broadcast to switch instantly from STEREO to SAP or MONO to SAP...

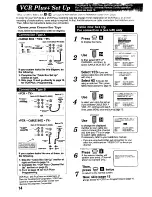
Page 14: ...ment Corporation 14 1 2 3 4 Press _ _1 to display the menu I_ATE r_ IIEt_CT Use _ _ _J PUSH TO SET to first select SET UP CHANNEL and then to select CABLE BOX SET UP MENU SET UP VCR SET CLOCK IDIOMA LANGU E ENGLISH SELECT ROTATE WHEEL SET PUSH WHEEL END PUSH MENU KEY SET UP CHANNEL ANTENNA SYSTEM CATV AUTO SET l e VCR Plus CH SET UP 1 SELECT ROTATE WHEEL SET PUSH WHEEL END PUSH MENU KEY Select YES...

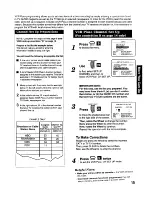
Page 15: ... channel number that your TV receives the station on from your channel line up EXAMPLE ONLY Assigned Channel no Broadcast or Cable Guide yourTV Station Name VCRPlus receives the channel no station on HBO 33 15 Nickelodeon 38 20 CBS 04 04 FOX 11 1 2 3 Press to display the menu MENU SET UP VCR SET CLOCK IDIOMA LANGUE ENGLISH SELECT ROTATE WHEEL SET PUSH WHEEL END PUSH MENU KEY Ill0TATE roIsELECT T f...

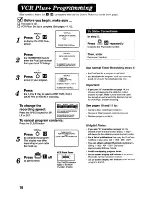
Page 16: ...play may differ depending on your cable box hook up TURN VCR OFF FOR TIMER RECORDING AND LEAVE CABLE BOX POWER ON _ iCR Front Panel I Press 17 11 off to set The TIMER indicator the timer lightsin the Mutti Function Display Then enter the correct number Use normal Timer Recording steps if the PlusCodefora programis not listed youanticipatethe program suchas a sport ng event to run overthe scheduled...

Page 17: ...AY OFF Then press MENU to exit Notes When REPEAT PLAY ON is selected the VCR will playto the endof a tape or untilit reachesa blankportion30 secondsor more Erasedportions of tape are notconsideredblank Then the VCR will automatically rewind thetape andplay it again andagain untilyoucancelrepeatplay Allfunctionbuttons HEW FF etc are operational duringRepeatPlay With this feature you can skip over c...

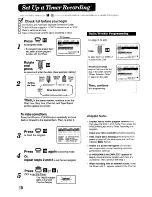
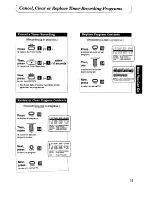
Page 18: ...errecording _ _ 1 z SET CLOCK I DS ON BY SELECT VKEY NEXT PUSH SET KEY OR TO END PUSH PROG KEY Helpful Notes It is not possible to clear a timer program using the VCR buttons Please use the Remote Control Press SET FF repeatedly to move to a particular item for setting or correction Once the VCR is in the Program mode the PLAY REC FF and REW buttons on the VCR are non functional _ Press _ forup or...

Page 19: ...u replace the remote s batteries The remote control is designed to control the brands listed However it will not operate artTVs or Cable Boxes made by these manufacturers If you get no results your particular product brand cannot be controlled by this remote Archer 01 29 44 88 91 Cableview 4 30 42 44 52 63 85 88 Citizen 4 30 42 44 52 63 85 88 Curtis 08 09 56 61 87 90 Diamond 01 29 44 88 91 Drake 3...

Page 20: ... shown above during playback the heads probably require cleaning Cleaning the Heads It is recommended that head cleaning be performed by a qualified service technician Please contact your nearest Panasonic Service Center An alternate solution is to obtain a head cleaning cassette Be sure to follow the cleaning instructions carefully Excessive use of a cleaning cassette could shorten head life Use ...

Page 21: ...ns 14 3 16 W X 3 1 2 H X 11 1 4 D 360 W X 89 H X 285 D mm Note Designsand specifications are subjectto changewithoutnotice VCR Indicator Appears when the VCR TV selector is set to VCR Power Indicator m This indicator lights when power is turned on Hi Fi Indicator When Hi Fi audio is monitored or played back this indicator appears Model PV 4555S only VCR Hi Fi Timer Indicator This indicator lights ...

Page 22: ...is not used for regular TV broadcasting in your area to use your TV as a screen for your VCR For Model PV 4555S Audio Input Connector L R For audio input connection from a camcorder another VCR or the output connector of another audio source VHF UHF Antenna Input Terminal In from your Antenna or Cable OUT IN VHF UHF Antenna Output Terminal Connect to the VHF UHF Input Terminal of your TV Audio Out...

Page 23: ...eep in mind that any part of a scheduled timer recording which falls between these two times will not be performed Examples A recording set to begin at 1 30AM and end at 2 30AM will actually record for 30 minutes A recording set to begin at 1 30AM and end at 3 30AM will actually record for I hour and so on 1 00 2 00 _ 3 00 4 00 I I Autumn Last Sunday in October plus 1 hour The clock automatically ...

Page 24: ...ecording start stop times correctly P 10 Make sure that the POWER button is set to off P IO Timer recording may not be performed or continued if a power interruption of more than 1 minute occurs before or during Timer Recording even if power resumes thereafter Select the same channel on your TV as that of the Channel 3 4 switch located on the rear panel of the VCR Separate Connection Guide Set the...

Page 25: ...he VCR Refer to Control Reference Guide Avoid all obstacles which may interfere with the signal path Inspect or replace the batteries P 2 Set the VCR TV selector to qV P b Insert the cassette with the window side up aa_dthe record tab facing you Check that the power plug is completely connected to an AC outlet Make sure the record tab on the back of the cassette is still intact P 20 To enable the ...

Page 26: ...primeramente y luego fijar la hora y la fecha Ahora oprimir _ El dos veces para hacer funcionar el relo y salir de este modo MENU PREPARAR VCR FIJAR CANAL LANGUE LANGUAGE ESPANOL ELEGIR GIRE LA RUEDA FIJAR PULSE LA RUEDA TERMINAR PULSE MENU _ I FUAR RELOJ GIRANDO LA RUEDA mCLEAR PULSE LA RUEDAE PARA INICIAR PULSE MENU Encenderel televisor Elegirel canalde la videograbadora canal 3 o 4 El canal de ...

Page 27: ... 1 Oprimir _ para el modo de programaci6n Si ya existe una programaci6n elegir un n6mero sin programaciSn con la Girar y oprimir Pantalta del TV INICIO PARADA CA SLP I I O GIRANDO LA RUEDA PULSE LA RUEDAB3 PARA TERMINAR PULSE PROG a ROTATE TO SELECT PUSH TO SET para elegir y fijar cada paso de la programaci6n fecha hora de inicio etc como aparece en la pantalla F i rara rueda hacia h y rueda hacia...

Page 28: ...yback Stop playback Eject tape Turn TV on Select VCR Channel 3 4 with Record Tab m m VCR SLP L LJ Select channel Select speed Start recording Stop recording BY ROTATING WHEEL SELECT 1 8 ROTATE WHEEL PUSH WHEEL ENTER PUSH WHEEL L TO END PUSH PROG KEY J CANCEL PUSNCLEAR KEY L END PUSH PROG KEY J Enter the Enter timer Once to finish the Turn VCR off Program mode information program twice to to _t the...

Page 29: ... CATV POWER _IMENU PROGRAM _ DISPLAY VCR Plus II_INUMBERED KEYS ADD DELETE ZERO tMIN I_COUNTER RESET SPEEO m FAST FORWARD SEARCH STOP_ RECORDFFIME PAUSE I1TV CHANNEL UP DOWN TV VOLUME UP DOWN _JTV POWER WHEEL CLEAR VCR CHANNEL TRACKING _ _ UP DOWN RAPID TUNE SAP PV 4555S only Note Model PV 4555S remote control is shown here The numbers and letters above correspond with those used in the operating ...

Page 30: ...family years of enjoyment Please take time to fill in the information below The serial number is on the tag located on the back of your VCR You ll want to keep this manual handy as your convenient VCR information source Date of Purchase Dealer Purchased From Dealer Address Dealer Phone No Model No Serial No J Open this flap to reveal the Control Reference Guide ...

Reviews: