background image

LSQT0864 A

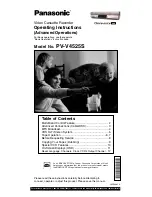
Video Cassette Recorder

Operating Instructions

(Basic Operations)

For advanced operations, see the separate
“Advanced Operations” instruction book.

Model No.

 PV-V4525S

Please read these instructions carefully before attempting to
connect, operate or adjust this product. Please save this manual.
Spanish Quick Use Guide is included.
(Guía para rápida consulta en español está incluida.)

Table of Contents

Important Safeguards and Precautions ........................... 2
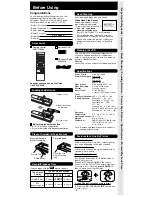
Before Using ................................................................... 3
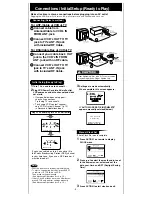
Connections and Initial Setup (Ready to Play) ................ 4
Playback / Record on a Tape .......................................... 5
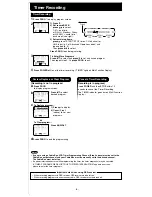
Timer Recording .............................................................. 6
Location of Controls ..................................................... 7, 8
Reset All VCR Memory Functions ................................... 8
Spanish (Español) Quick Use Guide .................... 9, 10, 11
Limited Warranty / Customer Services Directory ........... 12

For assistance, please call : 1-800-211-PANA(7262) or, contact us via the web at:http://www.panasonic.com/contactinfo

As an 

E

NERGY

S

TAR

®

 Partner, Panasonic Corporation of North

America has determined that this product or product model meets
the

E

NERGY

S

TAR

®

 guidelines for energy efficiency.

Summary of Contents for PV-V4525S

Page 1: ...ble of Contents Important Safeguards and Precautions 2 Before Using 3 Connections and Initial Setup Ready to Play 4 Playback Record on a Tape 5 Timer Recording 6 Location of Controls 7 8 Reset All VCR Memory Functions 8 Spanish Español Quick Use Guide 9 10 11 Limited Warranty Customer Services Directory 12 For assistance please call 1 800 211 PANA 7262 or contact us via the web at http www panason...

Page 2: ... hazardous voltages and contact can cause electric shock or fire hazard Avoid placing the unit directly above or below your TV set as this may cause electrical interference Keep all magnets away from electronic equipment 5 USING ACCESSORIES Use only accessories recommended by the manufacturer to avoid risk of fire shock or other hazards 6 CLEANING THE UNIT Unplug the unit Then use a clean dry chem...

Page 3: ...Hours 40 Minutes 2 Hours 6 Hours 8 Hours SLP Super Long Play Type of Video Cassette Tape Speed Setting T180 T160 T120 3 Hours 9 Hours Digital Auto Picture Automatically controls the video output signal for less noise depending on the tape condition Digital Auto Tracking Continuously analyzes the signal and adjusts for optimum picture quality Manual Tracking Control to reduce picture noise Use duri...

Page 4: ...he Public Broadcasting Station PBS channel in your time zone If you use a DSS receiver it must be turned off Initial Setup Ready to Play 3 Settings are made automatically When complete this screen appears If AUTO CLOCK SET IS INCOMPLETE appears manually set clock below Manual Clock Set If Auto Clock Set was incomplete 1 Press ACTION on remote to display CLOCK menu 2 Press to select the month and t...

Page 5: ...ord on aTape Auto Play Insert a tape Power comes on Play starts if there is no record tab see p 3 Auto Rewind Play Fast Forward Play Auto Eject Repeat Play must be off Play Tape end Rewind Stop Tape ejects if there is no record tab Auto Operation Functions Notes Tape end Rewind Stop 2 Press CH or NUMBER keys to select the channel If channel number is over 100 first press 100 key then the other 2 d...

Page 6: ...be left on If a power interruption occurs while programming the timer the timer program s may be canceled If TIMER PROGRAMS WERE LOST DUE TO POWER INTERRUPTION appears on screen please re enter the timer programs Important notes when using DSS receiver When recording programs via DSS receiver DSS receiver must be left on When recording programs via an antenna or cable DSS receiver must be turned o...

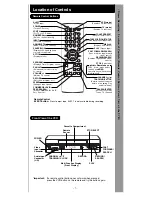
Page 7: ...CORD Records a program etc TV mode Enables TV functions RemoteControl EJECTbutton Press to eject tape EJECT is not available during recording INPUT For LINE or channel NUMBERKeys Selects channel directly ADD DELETE Adds or deletes a channel TAPEPOSITION STATUS Locates tape position tape status DISPLAY Displays VCR status PLAY Plays a tape FASTFORWARD SEARCH Fast forwards tape forward visual search...

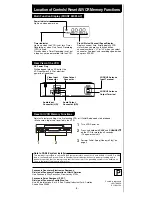
Page 8: ...ols Reset AllVCR Memory Functions 8 Note to CABLE system installer This reminder is provided to call the CABLE system installer s attention to Article 820 40 of the NEC in USA and to the Canadian Electrical Code in Canada that provides guidelines for proper grounding and in particular specifies that the cable ground shall be connected to the grounding system of the building as close to the point o...

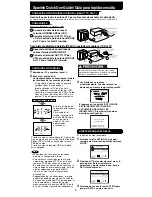
Page 9: ...te Cuando termina las fijaciones aparecerá la siguiente pantalla Si aparece en la pantalla AUTO CLOCK SET IS INCOMPLETE FIJACION AUTOMATICA DEL RELOJ ES INCOMPLETO Ajuste el reloj como se describe a continuación AJUSTE MANUAL DEL RELOJ Si la fijación ha sido incompleta 1 Presione la tecla ACTION en el control remoto para visualizar la pantalla del menú CLOCK 2 Presione para seleccionar el mes y pa...

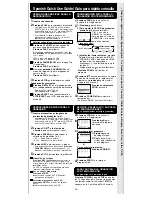
Page 10: ...ausa y al presionar nuevamente continua la grabación 5 Presione STOP para detener la grabación Ver un canal y grabar otro Presione VCR TV Seleccione canales de TV Mientras permanece grabando Seleccione los canales en el VCR Presione VCR TV en el modo de parada o pausa Seleccione canales en su VCR PARA CANCELAR LA GRABACIÓN CON TEMPORIZADOR la grabación está teniendo lugar Presione POWER y luego ST...

Page 11: ... la unidad No deje caer ni introduzca ningún objeto por las aberturas de la unidad Algunas piezas internas tienen un voltaje peligroso y el contacto con ellas puede producir sacudidas eléctricas o incendios Evite colocar la unidad directamente encima o debajo del televisor ya que esto prodría causar interferencias eléctricas Mantenga cualquier tipo de imán alejados de equipos electrónicos 5 UTILIZ...

Page 12: ...umidity or liquids commercial use such as hotel office restaurant or other business or rental use of the product or service by anyone other than a Factory Servicenter or other Authorized Servicer or damage that is attributable to acts of God THERE ARE NO EXPRESS WARRANTIES EXCEPT AS LISTED UNDER LIMITED WARRANTY COVERAGE THE WARRANTOR IS NOT LIABLE FOR INCIDENTAL OR CONSEQUENTIAL DAMAGES RESULTING...

Page 13: ...nstructions Advanced Operations For Basic operations see the separate Basic Operations instruction book Model No PV V4525S LSQT0865 A Please read these instructions carefully before attempting to connect operate or adjust this product Please save this manual For assistance please call 1 800 211 PANA 7262 or contact us via the web at http www panasonic com contactinfo As an ENERGY STAR Partner Pana...

Page 14: ... products listed If your product is not listed then the remote is not compatible with that product Multi Brand Control Setup 1 Find your TV Brand Code Number from those shown below 2 Set up for TV control 3 Confirm code entry press POWER to turn your TV on or off See table below for controllable functions in each mode Using Multi Brand Control Panasonic 01 02 Quasar 01 02 RCA 03 GE 03 Sharp 06 TV ...

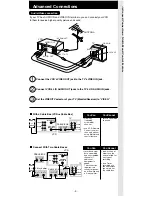
Page 15: ... IN VIDEO AUDIO R L OUT TV IN 2 IN 1 CABLE BOX OUT IN OUT 2 OUT 1 2 Way Splitter CABLE BOX OUT A B Switch VCR IN VHF UHF Connect With Two Cable Boxes VCR CABLE BOX OUT IN IN R L OUT TV VIDEO AUDIO VHF UHF With a Cable Box VCR Cable Box ANT or CATV You Cannot You Can record scrambled channels view any including scrambled channel use VCR Remote Control to select channels without using Multi brand co...

Page 16: ...n screen displays The signal being received is indicated with a mark while the selected audio mode is indicated with an arrow To display the broadcast signal being received press DISPLAY Equipped with TV Noise Reduction for true MTS reproduction TV Noise Reduction is required for good stereo separation and audio fidelity is a registered trademark and is licensed by Technology Licensing Make the Au...

Page 17: ...ten to stereo recordings in stereo sound Select NORMAL for monaural sound Press SAP Hi Fi repeatedly to select desired mode Press SAP Hi Fi repeatedly to select desired mode Audio Mode for Recording 1 Press SAP Hi Fi to display audio mode Display disappears after 5 seconds 2 3 Make a recording See p 5 of Basic Operations Instruction book Audio Mode for Playback 1 Start playback See p 5 of Basic Op...

Page 18: ...H FF REVERSE SEARCH REW To quickly return to a specified tape location Unit will go into FF or REW mode and stop at the last point the Counter was set to 0 00 00 Press COUNTER RESET on remote at desired position to reset to 0 00 00 Press CM ZERO in Stop mode to start ZERO SEARCH Zero Search 1 Press DISPLAY during play to display Counter 2 3 Continue to record playback etc 4 Press STOP 5 PLAY 12 00...

Page 19: ...3rd Press 1 min Skip 2 min Skip 3 min Skip Commercial Skip 1 Press CM ZERO in Play mode Select your tape length so the tape position and amount of tape remaining are properly displayed See Tape Position and Tape Status Display section below 1 Press ACTION to display menu 4 Press ACTION to return to normal screen Press to select TAPE SELECT and press to set T 120 T 160 or T 180 3 Press to select SE...

Page 20: ... BO p 6 Timer recording may not be performed or continued if a power interruption occurs before or during a Timer Recording even after power is restored Select channel 3 or 4 on TV to match VCR output channel 3 or 4 BO p 4 or select LINE Set VCR TV selector to VCR Adjust TRACKING control in either direction BO p 3 Try Head Cleaning BO p 3 Set TV s Vertical Hold Control to MANUAL then adjust Make s...

Page 21: ...on Display about 4 sec when LINE1 or LINE2 is selected LINE1 For rear audio video connection LINE2 For front audio video connection Press STOP to stop dubbing Press PLAY then PAUSE SLOW immediately to enter PLAY PAUSE mode Connection Playing Source VCR Recording Editing VCR 1 2 3 4 5 Caution Unauthorized exchanging and or copying of copyrighted recordings may be copyright infringement 9 Rear conne...

Page 22: ...al is weak or non existent Selecting ON has no effect on connected equipment with blue back feature Press to select WEAK SIGNAL DISPLAY and press to set ON or OFF Weak Signal Display ON OFF Feature 1 Press ACTION to display MENU 2 4 Press ACTION to return to normal screen SELECT SET EXIT ACT I ON ANTENNA CABLE AUTO SET WEAK SIGNAL D I SPLAY OFF SET UP CHANNEL SELECT EXIT ACTION SET MENU SET UP VCR...

Page 23: ...CK CASSETTE RECORD TAB NO CASSETTE TURN VCR OFF FOR TIMER RECORDING If you press POWER or STOP during a Timer Recording visible in VCR mode only TO CANCEL TIMER REC PRESS POWER THEN STOP KEY VIDEO HEADS MAY NEED CLEANING PLEASE INSERT HEAD CLEANING CASSETTE OR REFER TO MANUAL END PLAY VCR LOCK ACTIVATED If head cleaning becomes necessary while playing back a tape If you press a function button oth...

Page 24: ...ock ahead one hour Autumn Last Sunday in October DST ON Turns clock back one hour If your area does not observe Daylight Saving Time select DST OFF Keep these time changes in mind when programming VCR for timer recordings 1 Press to select VCR S OUTPUT CH 3 Press ACTION 2 Press 12 SELECT EXIT ACTION SET MENU SET UP VCR SET UP CLOCK SET UP CHANNEL IDIOMA LANGUE ENGLISH VCR S OUTPUT CH 3 SELECT SET ...

Reviews: