


Video Cassette Recorder
Operating Instructions
(Basic Operations)
For advanced operations, see the separate
“Advanced Operations” instruction book.
Models
No.
PV-453-K
Table of Contents
Important Safeguards and Precautions .................... 2
Before Using ............................................................ 3
Connections and Initial Setup (Ready to Play) ......... 4
Playback / Record on a Tape ................................... 5
Timer Recording ................................................... 6, 7
Location of Controls ........................................... 9, 10
Reset All VCR Memory Functions .......................... 10
Reset Language, Channels, Clock,
VCR’s Output Channel .......................................... 11
Limited Warranty .................................................... 12
• Limited
W
a
rranty • Reset Language, Channels,
Clock,
VCR’
s Output Channel • DST
Limited Warranty
- 12 -
Note
Accessory Purchases:
- 11 -
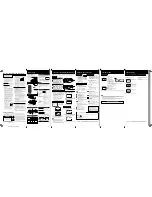
Reset Language, Channels, Clock, VCR’s Output Channel
Location of Controls / Reset All VCR Memory Functions
• Location of Contr
ols (Remote Contr
ol Buttons, Multi Function Display
, Fr
ont & Rear
V
iew of the
VCR )
• Reset
All
VCR Memory F
unctions
- 10 -
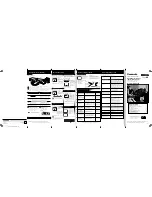
Location of Controls
- 9 -
Hi-Fi Indicator
Lights up when Hi-Fi audio is
monitored in Playback Mode.
VCR Indicator
Lights up when the
VCR/TV selector is
set to VCR.
Power Indicator
Lights up when power is on.
Clock/ Status/ Channel/ Speed Display
Displays the current time. Briefly displays VCR
status when a function button is pressed.
Briefly displays the channel number, or “L1” or “L2”
when a channel or line input is selected.
Briefly displays the recording speed when SPEED is
pressed.
Timer Indicator
Lights up when the VCR is set for a Timer
Recording, or when One Touch Recording
(OTR) is used.
Flashes when a Timer Recording is set, but a
tape has not been inserted into the VCR.
- 8 -
LSQT0648A
Please read these instructions carefully before attempting to connect,
operate or adjust this product. Please save this manual.
Panasonic Canada Inc.
5770 Ambler Drive, Mississauga, Ontario L4W 2T3
PANASONIC PRODUCT – LIMITED WARRANTY
Panasonic Canada Inc. warrants this product to be free from defects in
material and workmanship and agrees to remedy any such defect for a
period as stated below from the date of original purchase.
VHS Video Cassette Recorder – One (1) year, parts and labour
LIMITATIONS AND EXCLUSIONS
This warranty does not apply to products purchased outside Canada or to
any product which has been improperly installed, subjected to usage for
which the product was not designed, misused or abused, damaged during
shipping, or which has been altered or repaired in any way that affects the
reliability or detracts from the performance, nor does it cover any product
which is used commercially. Dry cell batteries are also excluded from
coverage under this warranty.
This warranty is extended to the original end user purchaser only.
A purchase receipt or other proof of date of original purchase is required
before warranty service is performed.
THIS EXPRESS, LIMITED WARRANTY IS IN LIEU OF ALL OTHER
WARRANTIES, EXPRESS OR IMPLIED, EXCLUDING ANY IMPLIED
WARRANTIES OF MERCHANTABILITY OR FITNESS FOR A
PARTICULAR PURPOSE.
IN NO EVENT WILL PANASONIC CANADA INC. BE LIABLE FOR ANY
SPECIAL, INDIRECT OR CONSEQUENTIAL DAMAGES.
In certain instances, some jurisdictions do not allow the exclusion or
limitation of incidental or consequential damages, or the exclusion of implied
warranties, so the above limitations and exclusions may not be applicable.
WARRANTY SERVICE
For product operation and information assistance
, please contact your
Dealer or our Customer Care Centre at:
For product repairs
, please contact one of the following:
• Your Dealer who will inform you of an authorized Servicentre nearest you.
• Our Customer Care Centre at (905) 624-5505 or www.panasonic.ca
• A Panasonic Factory Servicentre listed below:
IF YOU SHIP THE PRODUCT TO A SERVICENTRE
Carefully pack and send prepaid, adequately insured and preferably in the
original carton. Include details of the defect claimed, and proof of date of original
purchase.
Telephone #:
(905) 624-5505
Fax #:
(905) 238-2360
Web:
www.panasonic.ca
Richmond, British Columbia
Panasonic Canada Inc.
12111 Riverside Way
Richmond, BC V6W 1K8
Tel: (604) 278-4211
Fax: (604) 278-5627
Calgary, Alberta
Panasonic Canada Inc.
6835-8
th
St. N. E.
Calgary, AB T2E 7H7
Tel: (403) 295-3955
Fax: (403) 274-5493
Mississauga, Ontario
Panasonic Canada Inc.
5770 Ambler Dr.
Mississauga, ON L4W 2T3
Tel: (905) 624-8447
Fax: (905) 238-2418
Lachine, Québec
Panasonic Canada Inc.
3075, rue Louis A. Amos
Lachine, QC H8T 1C4
Tel: (514) 633-8684
Fax: (514) 633-8020
Press ACTION*
to display MENU.
Language
1)
Press
to select
language item.
For Spanish
For French
For English
Channels
2)
Press
to select
“ANTENNA,” then
press
to set
your antenna system
(“TV” or “CABLE.”)
• After Channel Auto
Set is finished, Auto
Clock Set will be
performed.
3)
Press
to select
“AUTO SET,” then
press
.
• If you use Cable
Box, set it to the
PBS channel in your
time zone.
Clock
2)
Press
to select
“MANUAL,” and
press
. (For Auto Clock Set,
select “AUTO CLOCK
SET.”)
(“TIME ZONE ADJUST”
appears only when
auto clock is set.)
3)
Press
and
to select and set
the date, time, and
DST (Daylight
Saving Time).
4)
Press ACTION
to
start the Clock and
exit this mode.
and
press
to
subtract or add
hour(s) as necessary.
• “TIME ZONE
ADJUST” returns to
“0” if clock is set
manually.
VCR’s Output Channel
After 3 seconds
• To Make Corrections,
repeat steps 1) ~ 3).
2)
Press
repeatedly.
3)
Press
ACTION
to exit.
1)
Press
to select
CHANNEL.
1)
Press
to select
CLOCK.
Time Zone
Adjust
1)
Press
to select
CLOCK.
(Only when Auto Clock
is set.)
2)
Press
to select
“TIME ZONE
ADJUST”
3)
Press ACTION
.
Add or Delete a Channel
To add channel:
Select channel with
NUMBER keys
and
press ADD/DLT
.
To delete channel:
Select channel with
CH
/
or
NUMBER
keys
and
press ADD/DLT
.
DST (Daylight Saving Time)
VCR auto adjusts clock for DST.
Spring (First Sunday in April)
DST:ON
➛
Sets clock ahead one hour.
Autumn (Last Sunday in October)
DST:ON
➛
Turns clock back one hour.
• If your area does not observe Daylight
Saving Time, select DST:OFF.
• Keep these time changes in mind when
programming VCR for timer recordings.
1)
Press
to select
“VCR’S OUTPUT CH.”
3)
Press ACTION
.
2)
Press
.
Montréal:
3075 Louis A. Amos, Lachine, Québec H8T 1C4 (514) 633-8684
Toronto:
5770 Ambler Drive, Mississauga, Ontario L4W 2T3 (905) 624-8447
Calgary:
6835 8th Street N.E., Calgary, Alberta T2E 7H7 (403) 295-3955
Vancouver:
12111 Riverside Way, Richmond, BC V6W 1K8 (604) 278-4211
Panasonic Canada Inc.
5770 Ambler Drive,
Mississauga, Ontario L4W 2T3
(905) 624-5010
www.panasonic.ca
Printed in Indonesia
LSQT0648A
S0203-0
K
SELECT :
EXIT : ACT I ON
ANTENNA : CABLE
AUTO SET
WEAK SIGNAL DISPLAY : OFF
VCR CLOCK CHANNEL
VCR CLOCK CHANNEL
ANTENNA : CABLE
AUTO SET
WEAK SIGNAL DISPLAY : OFF
SELECT : SET :
EXIT : ACT I ON
VCR CLOCK CHANNEL
CH AUTO SET PROCEEDING
CANCEL : STOP
VCR CLOCK CHANNEL
AUTO CLOCK SET
MANUAL
TIME ZONE ADJUST : 0
SELECT :
EXIT : ACT I ON
VCR CLOCK CHANNEL
AUTO CLOCK SET
MANUAL
TIME ZONE ADJUST : 0
SELECT : SET :
EXIT : ACT I ON
VCR CLOCK CHANNEL
AUTO CLOCK SET
MANUAL
TIME ZONE ADJUST : 0
SELECT : SET :
EXIT : ACT I ON
VCR CLOCK CHANNEL
SELECT : SET :
EXIT : ACT I ON
REPEAT PLAY
: OFF
REMOTE WARNING
: ON
AUTO SHUT- OFF
: OFF
AUTO VCR/TV
: ON
IDIOMA/LANGUE : ENGLISH
VCR’ S OUTPUT CH : 3
VCR CLOCK CHANNEL
SELECT : SET :
EXIT : ACT I ON
REPEAT PLAY
: OFF
REMOTE WARNING
: ON
AUTO SHUT- OFF
: OFF
AUTO VCR/TV
: ON
IDIOMA/LANGUE : ENGLISH
VCR’ S OUTPUT CH : 4
VCR CLOCK CHANNEL
IF YOU PRESS ACTION
KEY, VCR ’ S OUTPUT CH
SWITCHES TO CH 4.
VCR CLOCK CHANNEL
PLEASE TUNE YOUR TV TO
CH 4.
CHANNEL 08 ADDED
CHANNEL 08 DELE TED
VCR CLOCK CHANNEL
AUTO CLOCK SET
MANUAL
TIME ZONE ADJUST : 0
SELECT :
EXIT : ACT I ON
COMMERCIAL SKIP/
ZERO SEARCH
(
Starts COMMERCIAL SKIP/ Zero Search)
INPUT
(For LINE or channel)
POWER
(Turns VCR off/on)
PLAY
(Plays a tape)/
FAST FORWARD/SEARCH
(Fast forwards tape/ forward visual
search)
REWIND/SEARCH
(Rewinds tape/ reverse visual
search)
STOP
(Stops tape)
CHANNEL /
TRACKING/ V-LOCK
(Selects channel/ reduces
picture noise during Play and
Slow mode)
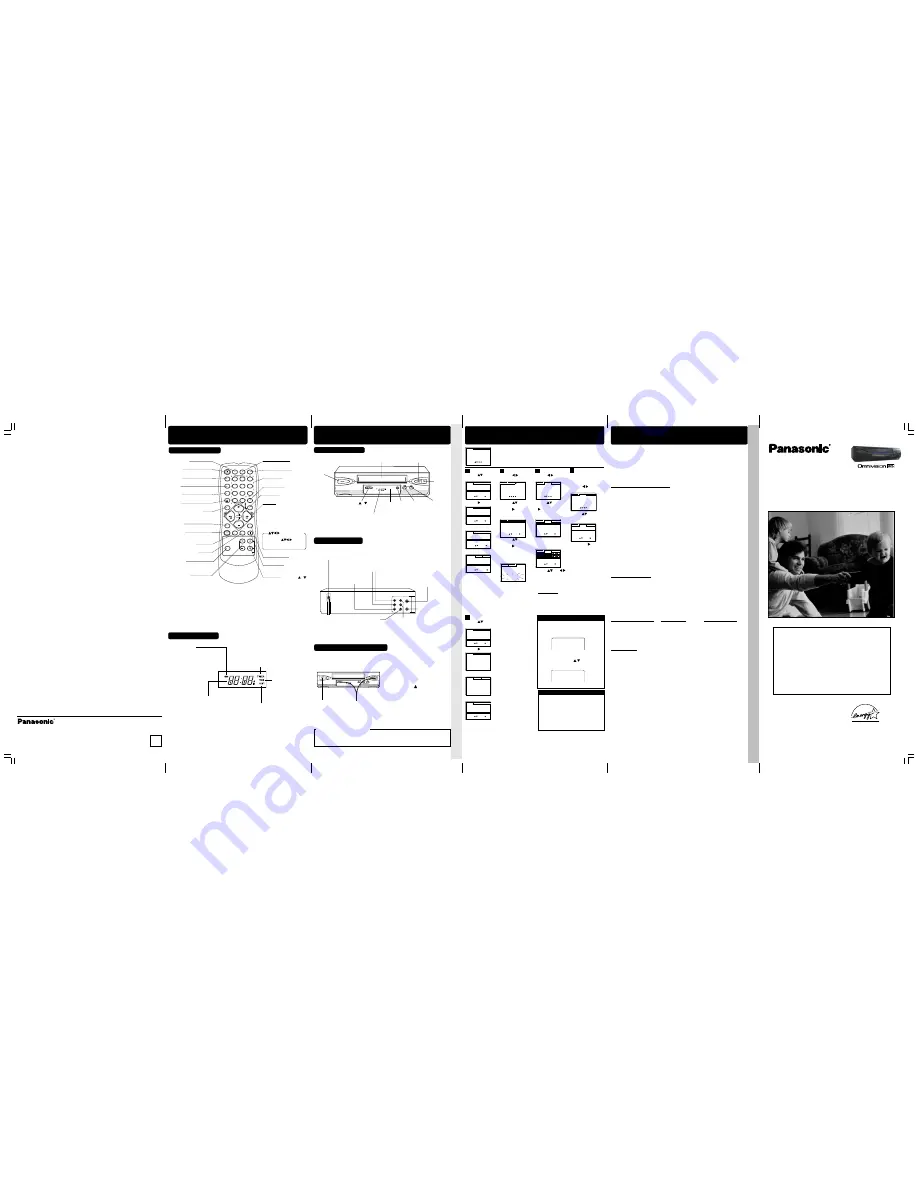
Remote Control Buttons
VCR/TV
(For TV or VCR mode)
SPEED
(Changes tape speed)
SEARCH/ ENTER
(Set search system /Tunes TV channel)
NUMBER Keys
(Selects channel directly)
TV (mode)
(Enables TV functions)
TAPE POSITION
(Locates tape position)
EJECT
(Ejects tape)
ACTION
(Displays menu)
PAUSE/SLOW
(Displays still, frame by frame,
or slow motion picture)
COUNTER RESET
(Resets counter to zero)
RECORD
(Records a program, etc.)
ADD/DELETE
(Adds or deletes a channel)
VCR (mode)
(Enables VCR functions)
/-
(Adjusts TV volume)
DISPLAY
(Displays VCR status)
COUNTER
RESET
TAPE
POSITION
PAUSE/SLOW
ACTION
SEARCH
TRACKING
EJECT
VCR/TV
INPUT
DISPLAY
CM/ZERO
VOL
CH
REC
POWER
1
2
3
4
5
6
7
8
9
100
0
ADD/DLT
REW
PLAY
STOP
FF
VCR
TV
SELECT
SPEED
SAP/Hi-Fi
PROG
PROGRAM
(Displays Timer Program screen)
Remote Control
EJECT button:
Press to eject tape. EJECT is not available during recording.
PLAY, STOP, REW, and FF
function as
operation keys when menus
are displayed.
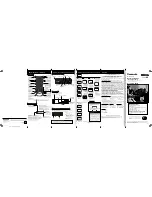
Remote keys
Front View of the VCR
Note to CABLE system installer
This reminder is provided to call the CABLE system installer’s attention to Article 820-40 of the
NEC in USA (and to the Canadian Electrical Code in Canada) that provides guidelines for
proper grounding and, in particular, specifies that the cable ground shall be connected to the
grounding system of the building, as close to the point of cable entry as practical.
*
Important:
If a remote control button does not work when pressed,
press the VCR button on the remote and try the button again.
Multi Function Display
VCR CLOCK CHANNEL
SELECT HOUR
DST:ON
6 /
0
8 / 20 0 3
SUN
SUN 2 : --PM
SELECT : SET :
EXIT : ACT I ON
SELECT :
EXIT : ACT I ON
REPEAT PLAY
: OFF
REMOTE WARNING
: ON
AUTO SHUT- OFF
: OFF
AUTO VCR/TV
: ON
IDIOMA/LANGUE : ENGLISH
VCR’ S OUTPUT CH : 3
VCR CLOCK CHANNEL
SEL. : REGLER:
QUITTER : ACT I ON
MAGNETO. HORL. CANAL
REPRISE LECTURE
: NON
MESSAGE D’ ERREUR : OUI
COUPURE AUTO
: NON
MAGNETO. /TELE AUTO : OUI
LANGUAGE/IDIOMA : FRANÇAIS
CA SORTIE : 3
ELEGIR : FIJAR :
SAL I R : ACT I ON
VCR RELOJ CANAL
REPETICION
:INACT
AVISO/CONT.REMOTO
:ACT
APAGADO AUTOMATICO :INACT
VCR/TV AUTO
:ACT
LANGUE/LANGUAGE:ESPAÑOL
CANAL DE SALIDA :3
VCR CLOCK CHANNEL
SELECT : SET :
EXIT : ACT I ON
REPEAT PLAY
: OFF
REMOTE WARNING
: ON
AUTO SHUT- OFF
: OFF
AUTO VCR/TV
: ON
IDIOMA/LANGUE : ENGLISH
VCR’ S OUTPUT CH : 3
VCR CLOCK CHANNEL
SELECT : SET :
EXIT : ACT I ON
REPEAT PLAY
: OFF
REMOTE WARNING
: ON
AUTO SHUT- OFF
: OFF
AUTO VCR/TV
: ON
IDIOMA/LANGUE : ENGLISH
VCR’ S OUTPUT CH : 3
SAP/Hi-Fi
(Selects audio mode for play
or record)
As an
ENERGY STAR
®
Participant,
Panasonic has determined that this product or
product model meets the
ENERGY STAR
®
guidelines for energy efficiency.
RECORD
STOP/EJECT
Cassette Compartment
POWER
REWIND/
SEARCH
PLAY
CHANNEL /
TRACKING/ V-LOCK
Remote
Sensor
FAST
FORWARD/
SEARCH
Multi Function Display
Rear View of the VCR
AC Power Plug
While plugged into an AC outlet, the VCR consumes 3.0 W
of electrical power in off condition.
OUT
IN 1
OUT TO TV
VIDEO
AUDIO
IN FROM ANT.
VHF/UHF
R
L
VHF/UHF Antenna
Input Terminal
VHF/UHF Antenna
Output Terminal
Video Output
Connector
Audio Output
Connector (L/R)
Audio Input Connector
(L/R)
Video Input Connector
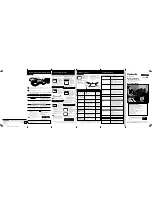
Reset All VCR Memory Functions
Use when moving VCR to new location, or if a mistake was made in the Initial Setup
section (return to Factory Setting).
• Make sure a tape is not inserted in the VCR.
2
1
Press and hold both
PLAY
and
CHANNEL
on the VCR for more
than 5 seconds.
• The power shuts off.
Turn VCR Power on.
3
Do “Initial Setup (Ready to Play)”
on page 4.
2
1
PV-453-K Ba-1 (E) (030206).p65
2003/02/13, 11:04
1
PV-453-K(E) LSQT0648A FRONT


