background image

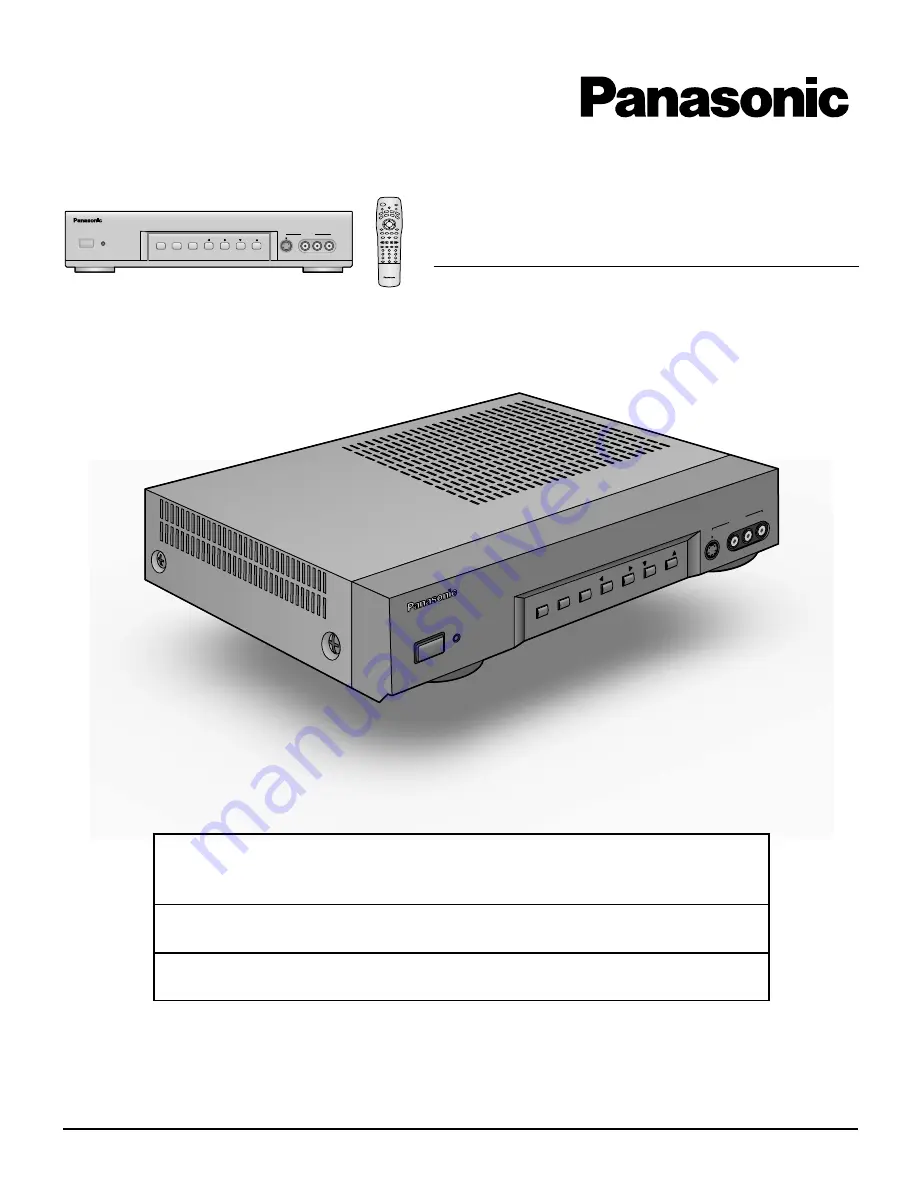
CONTROLLER / TUNER

Operating Instructions

TU-PTA500U

Model No.

TQBC0216

®

For assistance, please call : 1-888-VIEW-PTV (843-9788)

or send e-mail to : consumerproducts@panasonic.com

or visit us at www.panasonic.co.jp/global/                         (U.S.A)

For assistance, please call : 787-750-4300

              (Puerto Rico)

For assistance, please call : 1-800-561-5505

or visit us at www.panasonic.co.jp/global/                     (Canada)

Before connecting, operating or adjusting this product, please read these instructions completely. Save this manual for
future reference.

S-VIDEO

MENU

POWER

R-STAND  BY
G-POWER  ON

ACTION INPUT

VOLUME

CHANNEL

VIDEO

INPUT  3

L-AUDIO-R

S-V

IDE

O

VID

EO

INPUT

  3

L-A

UD

IO-

R

PO

WE

R

R-ST

AND  BY

G-PO

WER

  ON

MEN

U

AC

TIO

N

IMPUT

VOLUME

CHANNEL

Summary of Contents for TU-PTA500U

Page 1: ...all 787 750 4300 Puerto Rico For assistance please call 1 800 561 5505 or visit us at www panasonic co jp global Canada Before connecting operating or adjusting this product please read these instruct...

Page 2: ...o ensure reliable operation of the product and to protect it from overheating and these openings must not be blocked or covered There shall be at least 4 inches 10 cm of space from those opening The o...

Page 3: ...hock Object and Liquid Entry Never push objects of any kind into this product through openings as they may touch dangerous voltage points or short out parts that could result in a fire or electric sho...

Page 4: ...quency energy and if not installed an used in accordance with the instructions may cause harmful interference to radio communications However there is no guarantee that interferernce will not occur in...

Page 5: ...Main menu 18 Tuning channels Automatic channel programming 20 Tuning channels Manual channel programming 21 ASPECT Controls 22 VHF UHF and CATV 24 Cable TV 25 Selection input signal 26 Recall 27 Adju...

Page 6: ...partment 3 Replace the cover and slide in reverse until the lock snaps Installation Two AA size Helpful Hint For frequent remote control users replace old battery with Alkaline batteries for longer li...

Page 7: ...Input 3 terminals Video camera cable terminal Controls and terminals on the CONTROLLER TUNER ANT DISPLAY OUT AUDIO OUT OUTPUT INPUT COMPONENT VIDEO INPUT AUDIO R L AUDIO R L PR PB Y VIDEO VIDEO S VIDE...

Page 8: ...ting the antenna cable to the RF In Terminal Antenna Connection For proper reception of VHF UHF channels an external antenna is required For best reception an outdoor antenna is recommended Antenna Mo...

Page 9: ...HE BACK OF THIS UNIT VCR CABLE BOX TERMINAL ON BACK OF CABLE BOX Incoming Cable from Antenna or Cable TV System ANT OUTPUT INPUT TO VCR Connect the cable from the antenna or cable system to the Input...

Page 10: ...R PB CB B Y G L R L R AUDIO AUDIO AUDIO SERIAL TUNER IN PC IN COMPONENT RGB IN R STANDBY G POWER ON INPUT VOL POWER Installation Back view of Wide Plasma Display Display cable Supplied Notes Install...

Page 11: ...tput terminal How to connect the AUDIO OUT Terminals Used for connecting external amplifiers AUDIO L R AUDIO OUT COMPONENT VIDEO INPUT 1 2 AUDIO R L PR PB Y VIDEO AUDIO R L Amplifier to speaker system...

Page 12: ...t Select the desired VIDEO input position by pushing the TV VIDEO button See page 26 3 When connecting video cables priority is given to the S Video cable when the S Video input terminal and the video...

Page 13: ...essed from its own circuit and combined on the screen creating a natural picture 2 RCA audio cable AUDIO OUT COMPONENT VIDEO INPUT 1 COMPONENT VIDEO INPUT 1 2 AUDIO R L PR PB Y VIDEO AUDIO R L PR PB Y...

Page 14: ...ect a Macintosh computer to the set 5 There is no need to use an adapter for computers with DOS V compatible D sub 15P terminal 6 The computer shown in the illustration is for example purposes only 7...

Page 15: ...V Connect the plug to the Wall Outlet Push the POWER switch on this unit to turn the set on POWER ON Power Indicator Green Example The screen below is displayed for a while after this unit is turned o...

Page 16: ...0 VCR Mode Selection for Remote Control Digital Video Disk Mode Selection for Remote Control Aux Mode Selection for Remote Control TV Mode Selection for Remote Control Digital Broadcasting Satellite f...

Page 17: ...e item in MENU VCR Record button GUIDE button for DBS Reduces volume Moves cursor to the left during menu mode Displays menu Press the Menu button to display the Menu screen Changes to the next channe...

Page 18: ...ENU screen Select MENU desired by pushing Right button or Left button The Right button and Left buttons on the unit can also be used to select items on the MENU screen MENU ADJUST PICTURE AUDIO PICTUR...

Page 19: ...e 33 see page 52 TO AUDIO MODE selection screen see page 45 MENU ACTION INPUT VOLUME CHANNEL 1 2 PICTURE ADJ SELECT ADJUST PICTURE MENU PICTURE BRIGHTNESS COLOR TINT SHARPNESS COLOR TEMP NORMALIZE STA...

Page 20: ...is not possible Press the MENU button to display the MENU screen and select SETUP CH VOL VOL CH ACTION Press to display the PROGRAM CHANNELS CH VOL VOL CH ACTION Press to select MODE 5 Press to select...

Page 21: ...the PROGRAM CHANNELS CH VOL VOL CH ACTION Press to select TV or CABLE CH VOL VOL CH ACTION Press to display the MANUAL PROGRAM screen 4 MENU ADJUST SET UP LANGUAGE PROGRAM CHANNELS LOCK CLOSED CAPTIO...

Page 22: ...ASPECT button The aspect mode changes each time the ASPECT button is pressed When the ASPECT button is pressed the screen mode switches to Panasonic AUTO regardless of the mode the screen is set to N...

Page 23: ...4 ZOOM 4 3 16 9 FULL 4 3 16 9 JUST 4 3 9 16 Picture The display will automatically become enlarged depending on the picture source allowing you to view the picture at its maximum size Notes 1 Panasoni...

Page 24: ...level are set even after this unit is turned off Power consumption and howling of sound can be reduced if the volume level is lowered CH VOL VOL CH ACTION CH VOL VOL CH ACTION LIGHT MUTE TV VIDEO R T...

Page 25: ...F THIS UNIT CABLE BOX To antenna Input Incoming Cable from Antenna or Cable TV System When the antenna cable is connected to the TV antenna terminal via a cable box or VCR set the TV channel to CH3 or...

Page 26: ...nected equipment VIDEO 3 S VIDEO E CHANNEL VIDEO INPUT 3 L AUDIO R A video camera uses the Video Input 3 terminal on the front of this unit Video camera VCR Laser Disk Player DVD Player This equipment...

Page 27: ...8 9 0 NORMAL EXIT VCR REC GUIDE PLAY SURROUND OFF TIMER PC REW STOP FF TV VCR PAUSE VCR DBS CHANNEL CH VOL VOL CH ACTION MENU ASPECT MUTE INFO RECALL STEREO SAP MONO NORMAL CH123 CH123 channel number...

Page 28: ...riginal image intended by the producer For 1080i 720p and 480p input images screen position and size cannot be adjusted The adjusted setting will be kept even when this unit is turned off The signals...

Page 29: ...For ZOOM and JUST modes Press to move image upwards CH VOL VOL CH ACTION CH VOL VOL CH ACTION CH VOL VOL CH ACTION Press to narrow SIZE 1 Press to shrink image horizontally SIZE 1 Press to shrink imag...

Page 30: ...ORMAL EXIT VCR REC GUIDE PLAY INFO RECALL SURROUND OFF TIMER PC REW STOP FF TV VCR PAUSE VCR DBS CHANNEL ASPECT CH VOL VOL CH ACTION MENU MENU PC MENU SELECT PICTURE PICTURE POS SIZE SOUND SIGNAL EXIT...

Page 31: ...djustment Note Adjustment details of each input signal frequency for PC input signal modes are memorized separately Helpful Hint NORMAL NORMALIZE Normalization While the PICTURE POS SIZE display is ac...

Page 32: ...u to adjust each item Press the MENU button to display the MENU screen and select ADJUST Select SOUND ADJUST of ADJUST from the MENU screen Press to SOUND ADJUST screen is displayed Select the desired...

Page 33: ...DARD PC MENU SELECT PICTURE PICTURE POS SIZE SOUND SIGNAL EXIT SOUND NORMALIZE AUDIO MENU BASS TREBLE STANDARD ON 0 0 0 BALACE SURROUND NORMAL SELECT ADJUST EXIT Press MENU button To end adjustments M...

Page 34: ...ht button to switch between modes Press the left or right button to switch between modes Select the desired level by looking at the picture behind the menu CH VOL VOL CH ACTION CH VOL VOL CH ACTION ME...

Page 35: ...when PICTURE is increased with a bright picture or reduced with a dark picture To adjust each item Press the up and down button and make adjustments using the left and right buttons Select NORMALIZE w...

Page 36: ...TANDARD Displays unaltered image DYNAMIC Displays a clear screen with contrast of light and dark Press to select the menu to adjust Press the left or right button to switch between modes Press the lef...

Page 37: ...each time the SURROUND button is pressed ON OFF Note The surround settings are memorized separately for each SOUND mode AUTO STANDARD LIGHT TV VIDEO POWER R TUNE PROG VCR DVD AUX RCVR DBS TV DTV CBL S...

Page 38: ...r CC ON MUTE is valid only when the CC MODE is OFF CC MODE set to ON will override CC ON MUTE This menu cannot be selected when the picture is displaying a COMPONENT VIDEO INPUT of 480i or more When a...

Page 39: ...her mode which displays information and blanks out a large portion of the picture on the television screen Another mode used for video related information Another mode used for video related informati...

Page 40: ...AL EXIT VCR REC GUIDE PLAY INFO RECALL SURROUND OFF TIMER PC REW STOP FF TV VCR PAUSE VCR DBS CHANNEL ASPECT CH VOL VOL CH ACTION MENU 1 2 3 4 5 6 7 8 9 0 ENTER CODE FIRST Note The V CHIP used in this...

Page 41: ...nlocking the ratings selected above Lock Feature CH VOL VOL CH ACTION CH VOL VOL CH ACTION CH VOL VOL CH ACTION Rating turns red when on G General audience PG Parental guidance suggested PG 13 Parenta...

Page 42: ...G the menu following TV PARENTAL STATUS Setting the TV PARENTAL PROGRAMS screen VIEW NR PROGRAMS NO Cannot view programs with NR signals YES Can view programs with NR signal SETTING BASIC The up and d...

Page 43: ...ABEL CH VOL VOL CH ACTION Press to display the VIDEO INPUT LABEL screen MENU ADJUST SET UP ACTION SELECT PAGE LANGUAGE PROGRAM CHANNELS LOCK CLOSED CAPTION VIDEO EXIT SELECT CHANGE PAGE 1 3 VIDEO NR N...

Page 44: ...ollows Press to end Press to select VIDEO INPUT to change VIDEO 2 VCR LD BLANK HD VCR DTV DVD Customizing the VIDEO INPUT labels CH VOL VOL CH ACTION CH VOL VOL CH ACTION This button rotates in revers...

Page 45: ...LECT PAGE SET UP AUDIO MODE AUDIO MODE SAP MONO CHANGE STEREO EXIT CH VOL VOL CH ACTION Using the OFF TIMER 1 OFF TIMER Press the OFF TIMER button to display the OFF TIMER screen OFF TIMER 90 Notes Wh...

Page 46: ...ures may appear awkward Switch to NORMAL The VIDEO screen consists of 3 pages Use the up and down buttons to change pages Press the MENU button to display the MENU screen and select SETUP Except in PC...

Page 47: ...lect SETUP Except in PC input mode Press to end 1 2 Press to display the VIDEO screen MENU ADJUST SET UP ACTION SELECT PAGE LANGUAGE PROGRAM CHANNELS LOCK CLOSED CAPTION VIDEO EXIT SELECT CHANGE PAGE...

Page 48: ...en ID 1 is detected and screen size is changed FULL or WIDE will be display Use the up and down buttons to change pages Press to end 2 Press to set Press the MENU button to display the MENU screen and...

Page 49: ...Displays NORMAL screen for 4 3 images Displays JUST screen for 4 3 images Press to end Press to select VIDEO CH VOL VOL CH ACTION CH VOL VOL CH ACTION MENU ADJUST SET UP ACTION SELECT PAGE LANGUAGE PR...

Page 50: ...Note The VIDEO screen consists of 3 pages Use the up and down buttons to change pages 480p COLOR MATRIX does not need to be set when using Hi Definition equipment or 480i output equipment Press to en...

Page 51: ...splay the MENU screen and select SETUP Except in PC input mode Press to select LANGUAGE CH VOL VOL CH ACTION CH VOL VOL CH ACTION Press to display the LANGUAGE screen MENU MENU ADJUST SET UP ACTION SE...

Page 52: ...PUT H V The H and V sync signals are input from the HD VD connector ON G Uses a synchronized signal on the Video G signal which is input from the G connector PULL IN RANGE Displays the H horizontal V...

Page 53: ...Panasonic Code Panasonic Code Technics Code Technics Cassette Players Code Panasonic DVD Code Panasonic Code 1 Setting up the remote using the numerical keys When code known Press and hold the POWER a...

Page 54: ...et mode works in the reverse direction using the VOL key Operating peripheral equipment using the remote control LIGHT ASPECT MUTE TV VIDEO R TUNE PROG SLOW OPEN CLOSE STILL NORMAL EXIT VCR REC GUIDE...

Page 55: ...5 006 005 141 006 300 130 137 250 001 130 240 010 011 300 250 136 080 003 135 243 081 005 008 009 007 137 136 081 170 300 130 220 512 006 125 300 000 130 125 240 240 010 011 190 240 010 006 011 137 00...

Page 56: ...0 730 731 900 560 702 544 005 005 122 130 131 005 001 005 121 544 005 001 005 810 700 701 004 544 531 522 544 006 541 542 280 000 000 Maker List CBL Maker CARVER DENON FISHER HARMAN KARON JVC KENWOOD...

Page 57: ...ONIC PHILIPS PIONEER QUASAR RCA SANSUI SHARP SONY SOUNDE SIGH TEAC TECHNICS VICTOR YAMAHA Set Up No 003 162 171 170 101 100 130 150 030 032 101 100 130 003 030 162 171 170 003 053 320 200 203 140 220...

Page 58: ...nd Off Select Components Mutes TV Sound Mutes Cable Sound Mutes TV RCVR Sound Mutes Audio RCVR Mute TV Mode Selection for Remote Control Cable Mode Selection for Remote Control DBS Mode Selection for...

Page 59: ...RCVR Volume Up Down Selects Previously Tuned Channel Selects Previously Tuned Channel Selects Previously Tuned Channel Selects Previously Title Selects Next Disc Side A B Prev Ch Selects Tape Cassett...

Page 60: ...Tape Pause TV VCR Switch Open Close Tape Open Close TV Aspect DBS Aspect STB Aspect VCR Channel Up TV Channel Up DBS Channel Up Slow Repeat LD Side A Center VCR Channel Down TV Channel Down DBS Chann...

Page 61: ...d properly When using a VCR and selecting channels on this unit is the TV VIDEO mode for the VCR set to this unit Is the antenna facing the right direction Is the antenna receiving any signals reflect...

Page 62: ...62...

Page 63: ...l Capability 181 VIDEO Pin Jack Type 1 0 Vp p 75 S VIDEO MINI DIN 4 pin Y 1 Vp p 75 C 0 286 Vp p 75 AUDIO L R Pin Jack Type 2 0 5 Vrms Y 1 0 Vp p including synchronization PB PR 0 35 Vp p AUDIO L R Pi...

Page 64: ...of theft or loss and for Warranty Service purposes Model Number TU PTA500U Serial Number Panasonic Consumer Electronics Company Division of Matsushita Electric Corporation of America One Panasonic Way...

Reviews: