background image

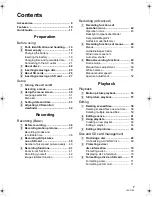
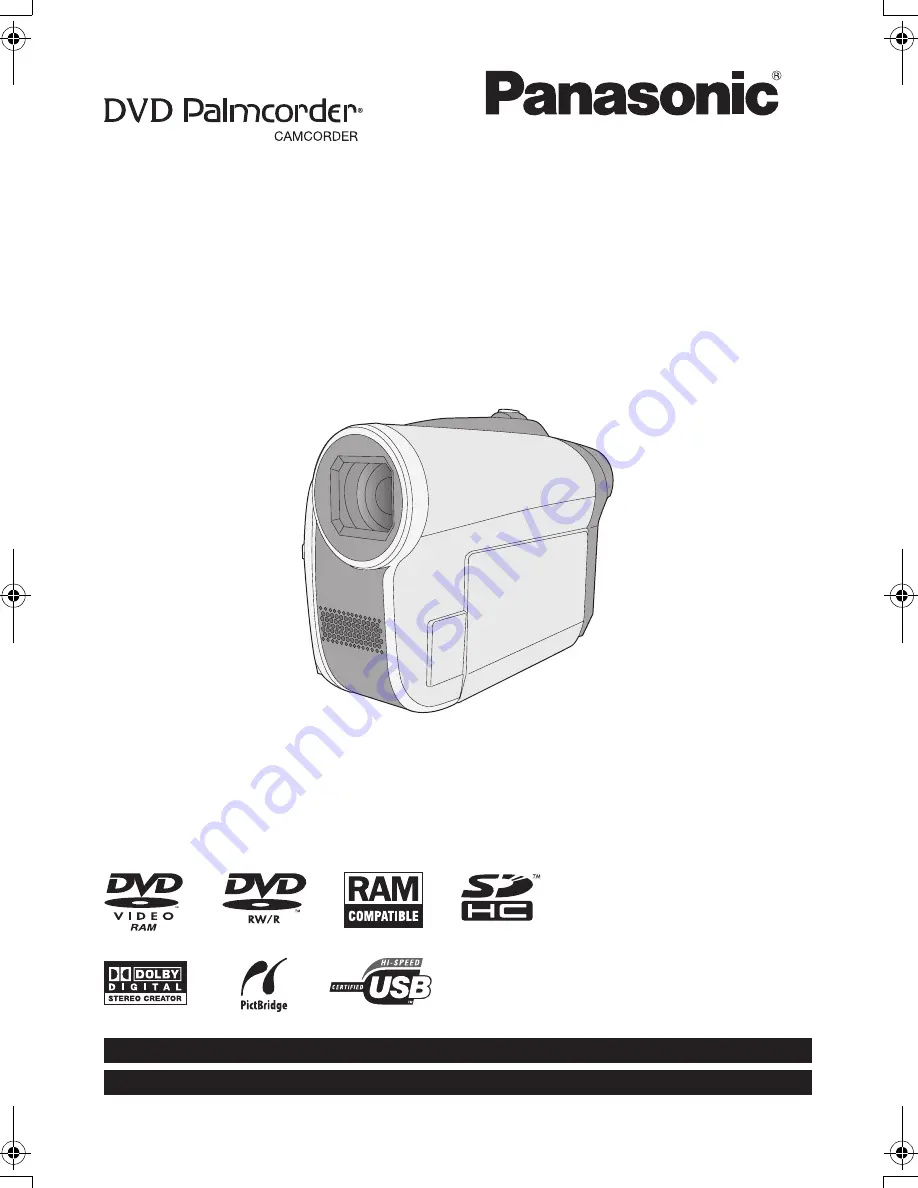
Operating Instructions

DVD Video Camera

Model No.

VDR-D50P/PC

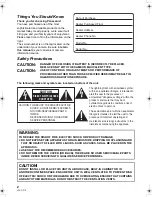
Before connecting, operating or adjusting this product, please read the instructions completely.
Spanish Quick Use Guide is included.
Guía para rápida consulta en español está incluida.

LSQT1319 A

For USA assistance, please call: 1-800-211-PANA(7262) or, contact us via the web at: http://www.panasonic.com/contactinfo

For Canadian assistance, please call: 1-800-561-5505 or visit us at www.panasonic.ca

VDR-D50P&PC-LSQT1319_eng.book  1 ページ  2007年11月14日 水曜日 午後5時21分

Summary of Contents for VDR-D50

Page 1: ...ad the instructions completely Spanish Quick Use Guide is included Guía para rápida consulta en español está incluida LSQT1319 A For USA assistance please call 1 800 211 PANA 7262 or contact us via the web at http www panasonic com contactinfo For Canadian assistance please call 1 800 561 5505 or visit us at www panasonic ca ...

Page 2: ...S USE ONLY THE RECOMMENDED ACCESSORIES DO NOT REMOVE THE COVER OR BACK THERE ARE NO USER SERVICEABLE PARTS INSIDE REFER SERVICING TO QUALIFIED SERVICE PERSONNEL CAUTION DO NOT INSTALL OR PLACE THIS UNIT IN A BOOKCASE BUILT IN CABINET OR IN ANOTHER CONFINED SPACE ENSURE THE UNIT IS WELL VENTILATED TO PREVENT RISK OF ELECTRIC SHOCK OR FIRE HAZARD DUE TO OVERHEATING ENSURE THAT CURTAINS AND ANY OTHER...

Page 3: ...e equipment off and on the user is encouraged to try to correct the interference by one or more of the following measures Reorient or relocate the receiving antenna Increase the separation between the equipment and receiver Connect the equipment into an outlet on a circuit different from that to which the receiver is connected Consult the dealer or an experienced radio TV technician for help FCC C...

Page 4: ...d grounding prong The wide blade or the third prong are provided for your safety If the provided plug does not fit into your outlet consult an electrician for replacement of the obsolete outlet 10 Protect the power cord from being walked on or pinched particularly at plugs convenience receptacles and the point where they exit from the apparatus 11 Only use attachments accessories specified by the ...

Page 5: ...re may form on the disc and inside the unit DO NOT LEAVE YOUR CAMERA OR THE POWER SUPPLY TURNED ON WHEN NOT IN USE STORAGE OF YOUR CAMERA Store and handle your camera in a manner that will not subject it to unnecessary movement avoid shaking and striking Your camera contains a sensitive pick up device which could be damaged by improper handling or storage CARE TO CLEAN YOUR CAMERA Do not use stron...

Page 6: ...e of the U S A or Canada use a plug adaptor to suit the AC outlet configuration When connecting to a supply of greater than AC 125 V ensure the cord you use is suited to the voltage of the AC supply and the rated current of the AC adaptor Contact an electrical parts distributor for assistance in selecting a suitable AC plug adaptor or AC cord set The socket outlet shall be installed near the equip...

Page 7: ...ourself 42 Image stabilizer function 43 Recording Advanced 1 Recording functions of operation icons 44 Operation icons 45 Backlight compensation Fade Help mode MagicPix Soft skin mode Self timer 2 Recording functions of menus 48 Menus 48 Guideline Aspect ratio Wind noise reduction Auto slow shutter 3 Manual recording functions 49 Scene mode 50 Manual focus adjustment 50 White balance 51 Manual shu...

Page 8: ...USB cable safely 86 Using software 1 Starting VideoCam Suite 87 Reading the operating instructions of the software 87 Using a Macintosh 1 If using a Macintosh 88 Others Indications 1 Indications 90 2 Messages 92 Helpful hints 1 Functions that cannot be used simultaneously 94 2 Frequently asked questions 95 3 Troubleshooting 96 Cautions for use 101 Explanation of terms 104 Specifications 106 Number...

Page 9: ...ssories Check the accessories before using this unit Battery pack VW VBG070A AV cable K2KZ9CB00002 AC adaptor VSK0697 USB cable K1HA05CD0017 AC cable K2CA2CA00029 or K2CA2CA00025 CD ROM LSFT0761 DC cable K2GJ2DC00015 ...

Page 10: ... DVD player recorder l 73 Just insert the disc into a DVD player recorder compatible with 8 cm 3z discs to play back the scenes recorded with this unit If you have a DVD recorder with hard disk you can copy dub scenes recorded on a disc with this unit to the hard disk Using a PC to edit your recordings l 78 You can edit scenes with the software on the supplied CD ROM and create DVD Video discs ...

Page 11: ...TERY lever slide the battery down How to turn on the power While pressing the lock release button A set the mode dial to or Align with the status indicator B To turn off the power set the mode dial to OFF Inserting a disc 1 Slide the DISC EJECT lever up and release it 2 Open the cover of the disc compartment and insert the disc 3 Push the section marked PUSH CLOSE to close the cover Inserting an S...

Page 12: ...ng start stop button Playback Rotate the mode dial to select or 1 Select the scene file to be played back then press the joystick 2 Select the playback operation with the joystick Motion picture playback 1 Playback Pause Skip playback backward 9 Skip playback forward Stops the playback and shows the thumbnails Still picture playback 1 Slide show start pause 2 Plays back the previous picture 1 Play...

Page 13: ...13 LSQT1319 Preparation Recording Playback With a PC Others 14 Before using 28 Setup ...

Page 14: ...8 9 1 2 14 15 16 12 11 13 10 3 5 6 7 4 Due to limitations in LCD production technology there may be some tiny bright or dark spots on the LCD monitor screen However this is not a malfunction and does not affect the recorded picture LCD monitor Pull the LCD monitor out in the direction of the arrow with your fingers It can open up to 90o It can rotate up to 180o A towards the lens or 90o B towards ...

Page 15: ...ch 19 Microphone built in stereo 20 White balance sensor l 51 Due to limitations in LCD production technology there may be some tiny bright or dark spots on the viewfinder screen However this is not a malfunction and does not affect the recorded picture Viewfinder Pull out the viewfinder Close the LCD monitor when using the viewfinder The brightness of the viewfinder and the field of view can be a...

Page 16: ...nd playback operations and to operate the menu screen Move the joystick up down left or right to select a setting or scene and then press the joystick to set it 1 Select by moving up down left or right 2 Set by pressing the center Menu screen operations l 30 To select the recording functions l 44 To adjust manually l 49 Playback operations l 54 57 1 2 Grip belt Adjust the belt length and the pad p...

Page 17: ...17 LSQT1319 31 Tripod receptacle 32 Battery release lever BATTERY l 19 Tripod receptacle This is a hole for attaching the unit to the optional tripod 31 32 ...

Page 18: ...or accidents caused by non genuine Panasonic batteries including those that have been certified by Panasonic Exercise care when purchasing batteries Many fake or imitation batteries have been found among those sold at unusually low prices and those which customers cannot check for themselves before purchasing When this unit is purchased the battery is not charged Charge the battery before using th...

Page 19: ...indows closed Charging time Temperature 25 oC 77 oF humidity 60 If the temperature is higher or lower than 25 oC 77 oF the charging time will become longer Inserting the battery Removing the battery While sliding the BATTERY lever slide the battery to remove it Hold the battery with your hand so that it does not fall CAUTION Danger of explosion if battery is incorrectly replaced Replace only with ...

Page 20: ...o heat up while being used This is not a malfunction Battery model number Voltage capacity Recording mode Maximum continuously recordable time Actual recordable time Supplied battery 7 2 V 770 mAh XP 1 h 5 min 1 h 40 min 35 min SP 1 h 15 min 1 h 10 min 40 min 40 min LP 1 h 20 min 1 h 15 min 40 min 40 min VW VBG130 optional 7 2 V 1320 mAh XP 1 h 55 min 1 h 45 min 1 h 10 min 1 h 5 min SP 2 h 10 min ...

Page 21: ...C adaptor 3 Connect the DC cable to this unit Do not use the AC cable with any other equipment as it is designed only for this unit Do not use the AC cable from other equipment with this unit Battery capacity indication The display changes to the following indications step by step as the battery capacity decreases If the battery discharges then will flash Connecting to the AC outlet 3 2 1 ...

Page 22: ...ided DVD RW 8 cm 3z Single sided double sided DVD R 8 cm 3z Single sided double sided DVD R DL 8 cm 3z Dual layer on single side Recording format VR format VR format Video format Video format Video format Display on the screen Indication in these instructions RAM RW VR RW V R R DL About format types What is the VR format DVD Video Recording format This is a format for recording on DVD discs which ...

Page 23: ... standard for quality and performance If you use one of these discs you may not be able to record or playback normally The message RECOMMENDED TO USE PANASONIC DISC appears Refer to the following support site for information about discs that have been confirmed as compatible by Panasonic http panasonic jp support global cs e_cam This website is in English only Discs recorded on this unit may not b...

Page 24: ...r played back normally and the following phenomena may occur jRecording or playback becomes impossible jPlayback image stops momentarily or sound is interrupted during playback jBlock noise appears on playback images If there is dirt on the disc wipe with a damp cloth and then wipe dry Do not attach labels or stickers to discs Do not use ballpoint pens or other hard writing implements to write on ...

Page 25: ...Push the section marked PUSH CLOSE to close the cover Do not remove the battery pack or disconnect the AC adaptor while removing the disc If the cover is open the power will not turn off even if the mode dial is set to OFF Do not touch the pickup lens or the recording playback side of the disc Be sure not to touch the area around the pickup lens for it becomes extremely hot A B A Set the recording...

Page 26: ...SD Cards in the dedicated card adaptor before use Inserting a card in this unit without the adaptor may damage the unit or the card Do not insert an empty card adaptor in this unit Do not leave the adaptor in this unit while inserting or removing miniSD Cards This may cause the unit to malfunction Do not touch the terminals on the back of the SD card Do not expose the terminals of the SD card to w...

Page 27: ... card slot cover 3 Insert remove the SD card Press the SD card straight in as far as it will go Press the center of the SD card and then pull it straight out 4 Securely close the SD card slot cover A 2 B 1 A Label side SD card access lamp ACCESS CARD B When this unit is processing data the lamp lights up When lamp is on do not sRemove the SD card sOperate the mode dial sRemove the battery or disco...

Page 28: ...de dial to OFF The status indicator goes off and the power turns off B A Rotate the mode dial while at the same time pressing in the lock release button A if changing from OFF to another mode Align with the status indicator B Video recording mode l 37 Video playback mode l 54 Picture recording mode l 39 Picture playback mode l 57 OFF To start recording immediately Use the following steps to make t...

Page 29: ...viewfinder To turn on Open the LCD monitor or extend the viewfinder The status indicator lights To turn off Close the LCD monitor and retract the viewfinder The status indicator goes off How to turn the power on and off with the LCD monitor viewfinder Set the mode dial to OFF when this unit is not being used ...

Page 30: ...submenu item then move the joystick right or press the joystick 4 Select the desired setting then press the joystick to enter the selection To get back to the previous screen Move the joystick left To exit the menu screen Press the MENU button Do not switch the mode dial when the menu is displayed The menu screen does not appear during recording or playing You cannot start other operations while t...

Page 31: ...tration below OFF ON NOV 15 2008 0h00m00s R 30min SP NOV 15 2008 AUTO OFF 5 MINUTES OFF The power saving function is not activated 5 MINUTES When about 5 minutes have passed without any operation this unit automatically turns off to save battery life To use this unit turn it on again When using the AC adaptor connecting the unit to a PC or a printer via the USB cable the power saving function will...

Page 32: ...P LOCK SET l 66 DPOF SET l 67 DELETE l 59 SETUP FORMAT CARD l 71 TV ASPECT l 72 For other items refer to the motion picture recording menus LANGUAGE l 31 YES NO When there is a menu that cannot be selected due to another function or mode being activated set to YES for changing the menu settings back to the default condition The language setting cannot be changed back to the default condition OFF O...

Page 33: ...ode Select the menu l 30 SETUP DATE TIME desired display style Changing the date format Select the menu l 30 SETUP DATE FORMAT desired display style The date and time function are driven by a built in lithium battery If the time display becomes the built in lithium battery needs to be charged Use the following steps to charge the battery Complete the following steps to charge the battery and then ...

Page 34: ...ness of the LCD monitor COLOR Color level of the LCD monitor EVF SET To adjust the brightness of the viewfinder extend the viewfinder and close the LCD monitor to activate the viewfinder BRIGHTNESS Brightness of the viewfinder Adjust the focus by sliding the eyepiece corrector knob Adjusting the brightness and color level SETUP LCD SET or EVF SET YES Adjusting the viewfinder field of view 0h00m00s...

Page 35: ...35 LSQT1319 Preparation Recording Playback With a PC Others 36 Recording Basic 44 Recording Advanced ...

Page 36: ...maximum of 1 250 Color balance and focus may not be adjusted automatically depending on light sources or scenes If so manually adjust these settings l 49 Basic camera positioning 2 3 1 1 Hold the camera with both hands Put your hand through the grip belt Do not cover the microphones or sensor with your hands 2 Keep your arms near your body 3 Separate your legs for better balance When you are outdo...

Page 37: ...s off to save battery life To use this unit turn it on again This power save feature can also be set to OFF l 31 POWER SAVE Screen indications A Recording mode B Remaining time left for recording When the remaining time is less than 1 minute R 0min flashes red C Recording time elapsed Each time the unit enters the recording pause mode the counter display will be reset to 0h00m00s Maximum number of...

Page 38: ...may appear on a playback image in the following cases jWhen there is a complicated pattern in the background jWhen the unit is moved too fast jWhen a subject with sharp movements has been recorded Particularly if it has been recorded in LP mode While WRITING CONTROL DATA TO THE DISC DO NOT SHAKE THE UNIT is displayed or while the ACCESS DISC PC lamp lights the disc is rotating and disc information...

Page 39: ...ons A Remaining number of still pictures Flashes in red when R 0 appears B Size of still pictures C Quality of still pictures To record still pictures clearly When zooming in on the subject with a magnification of 4k or higher it is difficult to reduce the slight shaking from holding this unit by hand We recommend decreasing the zoom magnification and approaching the subject when recording When re...

Page 40: ...igh picture quality are recorded Priority is given to the number of still pictures recorded Still pictures are recorded in normal picture quality If the PICT QUALITY is set to mosaic pattern noise may appear on a playback image depending on the picture content Recording with a shutter sound effect ADVANCED SHTR EFFECT ON Number of pixels and picture quality BASIC PICTURE SIZE desired setting Icon ...

Page 41: ... zoom lever is moved If you take your finger off the zoom lever during zoom operation the operation sound may be recorded When returning the zoom lever to the original position move it quietly When distant subjects are brought closer they are focused at about 1 3 m 4 3 feet or more When the zoom magnification is 1k this unit can focus on a subject approx 2 cm 0 8z away from the lens Macro function...

Page 42: ...the mode dial to select Select the menu l 30 RAM RW VR RW V R R DL SD Rotate the mode dial to select or Rotate the LCD monitor towards the lens side If the viewfinder is extended the LCD monitor and the viewfinder simultaneously light The image is horizontally flipped as if you see a mirror image However the image recorded is the same as a normal recording When the recording aspect is 16 9 the ima...

Page 43: ...tton The image stabilizer icon appears To cancel the image stabilizer function Press the O I S button again The default setting is on In the following cases the image stabilizer function may not work effectively jWhen the digital zoom is used jWhen the unit is shaken greatly jWhen you record a moving subject while tracking it Image stabilizer function O I S ...

Page 44: ...ded images Rotate the mode dial to select or 1 Press the joystick and icons will be displayed on the screen The indication changes each time the joystick is moved down The indication disappears when the center of the joystick is pressed again 2 Select an icon with the joystick To cancel the function Select the icon again 1 2 1 2NEXT NEXT 1 2NEXT 1 2 1 2NEXT NEXT 1 2NEXT ...

Page 45: ...you turn off the power the self timer function is canceled Operation icons Backlight compensation Fade Help mode MagicPix Soft skin mode Self timer Backlight compensation Fade Help mode MagicPix Soft skin mode Backlight compensation Ø Self timer Help mode Soft skin mode 1 2 1 2NEXT NEXT 1 2NEXT 1 2 1 2NEXT NEXT 1 2NEXT 1 2 1 2NEXT NEXT 1 2NEXT 1 2 1 2NEXT NEXT 1 2NEXT 2 2 2 2NEXT NEXT 2 2NEXT 2 2 ...

Page 46: ...xplains the recording functions Only for icons that can be selected in auto mode Select the desired icon with the joystick to display an explanation on the screen To exit the help mode Press the MENU button or select EXIT MagicPix RAM RW VR RW V R R DL This allows you to record color subjects in dark locations to stand out against the background Minimum required illumination approx 2 lx Attach thi...

Page 47: ...e screen may become washed out for a while Soft skin mode If the background or anything else in the scene has colors similar to the skin color they will also be smoothed If the brightness is insufficient the effect may not be clear You may not be able to see the face clearly when recording a distant person In this case cancel soft skin mode or zoom in on the face Ø Self timer SD This is for record...

Page 48: ...y not be focused in on Menus Guideline Aspect ratio Wind noise reduction Auto slow shutter Function Effect Setting method Guideline function RAM RW VR RW V R R DL SD You can check if the image is level while recording by using the guidelines displayed on the screen Select the menu l 30 BASIC GUIDE LINES ON To cancel the function select OFF Aspect ratio RAM RW VR RW V R R DL This allows you to reco...

Page 49: ...XT NEXT 4 4NEXT MNL MNL 3 3 3 3NEXT NEXT 3 3NEXT 1 2 Each time you press the MANUAL AF MF button 1 Manual mode The icon shown in the illustration appears White balance Aperture adjustment Shutter speed 2 Manual focus mode The manual focus indication MF and the icon shown in the illustration appear Manual focus adjustment 3 3 3 3NEXT NEXT 3 3NEXT 4 4 4 4NEXT NEXT 4 4NEXT ...

Page 50: ...s the screen may flicker If so change the scene mode setting to OFF Low light mode Extremely dark scenes may not be able to be recorded finely Spotlight mode If the recording subject is extremely bright the subject may become washed out and the periphery extremely darkened Surf snow mode If the subject is extremely bright the recorded image may become washed out If auto focusing is difficult due t...

Page 51: ...ensor A The white balance sensor detects the type of light source during recording Do not cover the white balance sensor during recording or it may not function properly When the unit is turned on with the lens cover closed the automatic white balance adjustment may not function properly Please turn the unit on after opening the lens cover When the display flashes the manual white balance previous...

Page 52: ... AUTO button When setting both the shutter speed and the iris gain value set the shutter speed and then set the iris gain value Manual shutter speed adjustment Avoid recording under fluorescent light mercury light or sodium light because the color and brightness of the playback image may change If you increase the shutter speed manually the noise on the screen may increase You may see vertical lin...

Page 53: ...53 LSQT1319 Preparation Recording Playback With a PC Others 54 Playback 59 Editing 68 Disc and SD card management 72 With other products ...

Page 54: ... on the screen 3 Select the playback operation with the joystick 1 Playback Pause Skip playback backward 9 Skip playback forward Stops the playback and shows the thumbnails A Selecting pages Select and then press the joystick If you move and hold the joystick left or right you can fast forward or fast rewind the pages The screen will not change at this time but the scene or page numbers will chang...

Page 55: ...e displayed may be different from the recording time and it may take time to display the thumbnail display when playing back motion pictures recorded on another product The recording time may not display on the screen during playback of scenes recorded on other products Normal playback is restored when you move the joystick up Fast forward rewind playback Move and hold the joystick left or right d...

Page 56: ...L then press the joystick Even if scenes are recorded on the same day they are grouped separately in the following cases jWhen the number of scenes exceeds 99 RAM RW VR RW V R R DL jWhen the disc is removed RW V R R DL jWhen the ASPECT setting is changed RW V R R DL jWhen the disc is repaired RW V R R DL jWhen the layers switch R DL Creating a new playlist l 63 RAM RW VR 1 Select PLAYLIST then pre...

Page 57: ...hen is selected The method for selecting pages is the same as for motion picture playback The selected file is played back and the operation icon is automatically displayed on the screen 3 Select the playback operation with the joystick 1 Slide show start pause 2 Plays back the previous picture 1 Plays back the next picture Stops the playback and shows the thumbnails A ...

Page 58: ...product may degrade or not play back data recorded on this unit While this unit accesses the SD card the ACCESS CARD lamp is lit do not remove the SD card Do not operate the mode dial during the slide show It takes time to display the file and how long it will take depends on the number of pixels of the file When a file is displayed as on the thumbnail display playback is not possible The time dis...

Page 59: ...e divide the scene first and then delete the unnecessary part l 61 1 Press the button during playback 2 When the confirmation message appears Select YES then press the joystick 1 Press the button in the thumbnail display 2 Select SELECT or ALL and press the joystick When ALL is selected the following scenes files will be deleted Proceed to step 5 jAll the scenes on the disc When a date is selected...

Page 60: ...lete scenes files by the menu Select EDIT SCENE or PICT SETUP DELETE In case of ALL the deletion may take time if there are many scenes files Notes for deleting scenes files Do not turn off this unit while deleting When you delete scenes files use a battery with sufficient battery power or use the AC adaptor It may not be possible to delete scenes that have been divided to approximately 1 second o...

Page 61: ...S 2 Select the scene to be divided then press the joystick 3 When you reach the area where you want to divide the scene Select with the joystick Move the joystick left or right to fast forward rewind playback Using slow motion playback or frame by frame playback makes it easy to search for the point where you want to divide the scene l 55 4 When the confirmation message appears Select YES then pre...

Page 62: ...ent recording dates first create a playlist and then combine the scenes on the playlist l 63 65 1 Select the menu l 30 EDIT SCENE COMBINE YES 2 Select the first scene of the two consecutive scenes to be combined then press the joystick 3 When the confirmation message appears Select YES then press the joystick To continue combining other scenes Repeat steps 2 to 3 To complete editing Press the MENU...

Page 63: ...s on a playlist will not affect the original scenes The maximum number of playlists on one side of a disc 99 The maximum number of playlist scenes on one side of a disc 999 If original scenes are deleted the portion of playlists created with these scenes is also deleted Rotate the mode dial to select 1 Select PLAYLIST then press the joystick 2 Select CREATE then press the joystick 3 Select the sce...

Page 64: ...unction Operating method Deleting scenes The method for deleting playlist scenes is the same as for Deleting scenes files l 59 If you delete scenes on a playlist it will not affect the original scenes When ALL is selected the selected playlist will be deleted You can also delete playlist scenes by the menu Select EDIT DELETE Deleting scenes on a playlist will not increase the remaining capacity fo...

Page 65: ...ct the position to insert the scene then press the joystick To continue moving other scenes in the playlist Repeat steps 2 to 3 To complete editing Press the MENU button Dividing a scene This is for dividing a scene into two Select the menu l 30 EDIT DIVIDE YES The following steps are the same as step 2 to 4 in Dividing a scene for Editing scenes l 61 Combining scenes This function is only for com...

Page 66: ...istake However even if you lock some files on an SD card formatting the card will delete all the files 1 Select the menu l 30 PICT SETUP LOCK SET YES 2 Select the file to be protected then press the joystick appears and the selected file is locked Press the joystick again to release the lock setting You can also select multiple files in succession To complete the settings Press the MENU button ...

Page 67: ...time 1 Select the menu l 30 PICT SETUP DPOF SET SET 2 Select the file to be set then press the joystick 3 Select the number of prints then press the joystick To cancel the setting set the number of prints to 0 You can also select multiple files in succession To complete the settings Press the MENU button To cancel all DPOF settings Select PICT SETUP DPOF SET CANCEL ALL The DPOF setting can be esta...

Page 68: ... finalize each side The top menu created when finalizing does not appear on this unit It appears when the disc is played back on other devices The time it takes to finalize a disc varies The shorter the recording content on the disc the longer it will take to finalize the disc Do not shake bump or expose this unit to heat while finalizing the finalization will fail and the disc may become unplayab...

Page 69: ...When the confirmation message appears Select YES then press the joystick When un finalizing is complete press the MENU button to exit the message screen Discs other than DVD RW Video format discs cannot be un finalized When you un finalize the disc use a battery with sufficient battery power or the AC adaptor Un finalizing a DVD RW disc DISC SETUP UN FINALIZE YES ...

Page 70: ... disc protection Select DISC SETUP DISC PROTECT again If the disc has been protected on another device it may not be possible to release the protection on this unit In this case release the protection on the device that you used to protect it RAM RW VR RW V R R DL Information such as the number of recorded scenes the remaining space and whether or not the disc is finalized or protected is displaye...

Page 71: ...scs on this unit If formatting on a PC use the supplied software For more details refer to the operating instructions of the software Formatting a DVD RW disc Format on this unit SD This is for initializing SD cards Please be aware that if an SD card is formatted then all the data recorded on the card will be erased Back up important data on a PC etc Rotate the mode dial to select or 1 Select the ...

Page 72: ...io on a regular TV 4 3 If the images are squeezed horizontally on a TV with a 4 3 aspect ratio change the menu setting to play back the pictures in the original aspect ratio If the images are not displayed correctly on a wide screen TV adjust the aspect setting on the TV Refer to the operating instructions of the TV for details Select the menu l 30 Example of images with a 16 9 aspect ratio on a r...

Page 73: ...z DVD Video but playback on all DVD players is not guaranteed RW V R If you want to record dub a disc that the DVD recorder is not compatible with connect this unit and the DVD recorder with the AV cable and then record dub the disc l 74 1 For a DVD RW or a DVD R DVD R DL disc Finalize the disc on this unit l 68 2 Insert the disc in the DVD recorder then copy dub the contents onto the hard disk Fo...

Page 74: ...wn 1 Connect this unit and a video device 2 Turn on this unit then rotate the mode dial to select 3 Start playback on this unit Then start recording on the connected device To stop recording dubbing Stop recording on the connected device Then stop playback on this unit VIDEO IN AUDIO IN 1 A 2 A AV cable supplied Insert the plugs as far as they will go Do not use any other AV cables except the supp...

Page 75: ...o be printed then press the joystick 4 Select the desired number of prints then press the joystick You can set up to 9 prints To cancel the setting set the number of prints to 0 Up to 8 files can be selected to be printed 5 Press the MENU button to display the PictBridge menus 6 Select the date print setting on DATE PRINT then press the joystick If the printer is not capable of date printing this ...

Page 76: ... appears If YES is selected the number of prints set is canceled and the screen returns to step 3 If NO is selected all the settings are kept and the screen returns to step 3 Avoid the following operations during printing These operations disable proper printing jDisconnecting the USB cable jRemoving the SD card jSwitching the mode dial jTurning off the power Check the settings for the paper size ...

Page 77: ...77 LSQT1319 Preparation Recording Playback With a PC Others 78 Before using 82 Setup 87 Using software 88 Using a Macintosh ...

Page 78: ...r To view the installed operating instructions Adobe Reader Adobe Acrobat Reader 5 0 or later is required If the Adobe Reader Adobe Acrobat Reader is not already installed on your PC you can install it from the CD ROM Click the Adobe Reader in Setup Menu and follow the on screen messages to install The following system requirements are necessary in order to install Adobe Reader from the supplied C...

Page 79: ...sktop resolution of 1024k768 pixels or more Video card supporting DirectX 9 0c supports overlay of DirectDraw Free hard disk space DMA transfer effective at Ultra DMA 33 or more Ultra DMA 100 or higher recommended For installing the application 150 MB or more When creating discs DVD Video 5 GB or more for the work folder 10 GB or more in the case of dual layer discs If compression setting is enabl...

Page 80: ...nnot be guaranteed on all DVD drives DVD discs authored with this software are not guaranteed to play in all DVD players Depending upon the environment of your PC if it does not support Hi Speed USB USB 2 0 for example frame dropout may occur the audio may be intermittent or the software may run slowly when you play back recorded images If your PC does not satisfy the above system requirements an ...

Page 81: ...ing or Disassembly Licensee may not reverse engineer decompile or disassemble the Software except to the extent either of them is permitted under law or regulation of the country where Licensee resides Matsushita or its distributors or dealers will not be responsible for any defects in the Software or damage to Licensee caused by Licensee s reverse engineering decompiling or disassembly of the Sof...

Page 82: ...ol dialog appears click Continue 1 Insert the CD ROM into the PC The Setup Menu screen will appear If the Setup Menu screen does not appear double click the CD ROM drive icon in My Computer Computer 2 Click VideoCam Suite 3 Click Next 4 Select where the application is to be installed then click Next 5 Select Yes or No to create shortcut 6 Select the country or region where you live then click Next...

Page 83: ...atible contact the PC manufacturer Follow the steps below to uninstall the software if it is no longer required For Windows Vista 1 Select Start Control Panel Uninstall a program 2 Select VideoCam Suite 1 0 then click Uninstall For Windows XP 1 Select start Control Panel Add or Remove Programs 2 Select VideoCam Suite 1 0 then click Remove For Windows 2000 1 Select Start Settings Control Panel Add ...

Page 84: ... PC its power cannot be turned off Disconnect the USB cable before turning this unit off l 86 If the unit is connected to a PC when the USB function is set to PC CONNECT DISC no image will appear on the LCD monitor or the viewfinder When this unit is connected to a PC you cannot use this unit s DISC EJECT lever to remove a disc Use Windows Explorer to right click the drive icon for this unit and s...

Page 85: ...Up to 999 files can be recorded in the 100CDPFP or other such folder D The DPOF setting files are stored Copying still pictures on PC SD card reader function mass storage When the unit is connected to a PC and the SD card can be used as an external drive still pictures on the card can be copied to the PC with Windows Explorer or other programs 1 Double click the folder that contains the files on t...

Page 86: ...ing on your PC s settings this icon may not be displayed 2 Select USB Mass Storage Device and click Stop 3 Verify MATSHITA DVD RAM CAM DD4 USB Device or MATSHITA DVD CAM SD USB Device is selected and click OK Click Close and you can safely disconnect the cable To disconnect USB cable safely ...

Page 87: ...r the software cannot be used Select start All Programs Programs Panasonic VideoCam Suite 1 0 VideoCam Suite Refer to the operating instructions of the software PDF file for details on how to use it When using VideoCam Suite data can only be written to a DVD RAM disc using this unit This unit is only capable of reading other types of discs You will need Adobe Reader to read the PDF operating instr...

Page 88: ...res on PC 1 Connect this unit to a PC via the supplied USB cable The USB function selection screen will appear 2 Select PC CONNECT CARD then press the joystick 3 Double click NO NAME icon displayed on the desktop Files are stored in 100CDPFP folder etc in the DCIM folder 4 Drag and drop the files onto the destination folder on the PC hard disk To disconnect USB cable safely Drag NO NAME icon to th...

Page 89: ...89 LSQT1319 Preparation Recording Playback With a PC Others 90 Indications 94 Helpful hints ...

Page 90: ...WB 1 100 OPEN 0dB MNL AWB MNL R 100 0 2 NOV 15 2008 12 34 PM 1 100 OPEN 0dB WIDE AUTO MNL Fade White Fade Black l 46 MagicPix function l 46 Zoom microphone l 42 Wind noise reduction l 48 Motion picture recording mode l 38 5 Scene mode l 50 Sports mode Portrait mode Low light mode Spotlight mode Surf snow mode White balance l 51 Auto white balance Indoor mode recording under incandescent lamp Outdo...

Page 91: ... protected on another device Locked still pictures l 66 100 0001 Still picture folder file number display XP SP LP When a printer compatible with PictBridge is connected l 75 Accessing the SD card When connected to a PC 1 DPOF already set to more than 1 l 67 Number of recording pixels for still pictures l 40 640k480 640k360 The picture size is not displayed for still pictures recorded with other p...

Page 92: ...at or DVD R DVD R DL disc has been inserted After finalizing the discs become play only and cannot record If you un finalize a DVD RW Video format disc it can be used for recording l 69 FINALIZE THE DISC TO ENABLE PLAYBACK ON OTHER DEVICES If you insert a DVD RW or a DVD R DVD R DL disc recorded in this unit that has not been finalized into another device such as DVD recorder PC etc the disc may b...

Page 93: ...y cause the loss of data or the disc PUSH THE RESET SWITCH CHECK THE DISC AFTER PUSHING THE RESET SWITCH TO REPAIR THE DATA An irregularity in the unit has been detected Press the RESET button to restart the unit l 99 EXIT THE MENU THEN CHANGE TO MANUAL MODE CANCEL MAGICPIX MODE You are attempting to use a function that cannot be used simultaneously CANNOT SET With DVD RW Video format and DVD R DV...

Page 94: ... In picture recording mode Fade MagicPix While recording to a disc Cannot set or cancel In picture recording mode Backlight compensation When the MagicPix function is used When the iris gain is set Soft skin mode Set and cancel While recording to a disc Help mode Scene mode In auto mode When the MagicPix function is used Change of white balance When digital zoom is used When the MagicPix function ...

Page 95: ... from one side of the disc to the other on a double sided disc You cannot record continuously from one side of the disc to the other The recording time indicated on the disc package is the total time for both sides You will need to eject the disc and turn it over to record on both sides Is playback possible on a DVD player By finalizing a DVD RW VR format Video format or a DVD R DVD R DL disc in t...

Page 96: ...ery life To resume recording turn the power back on The power will not turn off automatically when the power save function l 31 is set to OFF This unit cannot be operated though it is turned on This unit does not operate normally The unit cannot be operated unless you open the LCD monitor or extend the viewfinder Press the RESET button l 99 If normal conditions are not restored yet remove the batt...

Page 97: ...mat disc was protected on another device use the same device to release the protection Data cannot be recorded to finalized DVD RW Video format and DVD R DVD R DL discs If you un finalize a DVD RW Video format disc it can be used for recording l 69 No recording is possible while the SD card s write protect switch is set to LOCK l 26 If the disc or SD card has no more available memory free up some ...

Page 98: ...atch the aspect ratio of the TV l 72 Scenes or files cannot be deleted or edited Release the protection l 70 If the disc or the contents on the disc have been protected on another device release the protection on the same device It may not be possible to delete scenes that have been divided Combine the divided scenes and then delete them l 62 It may not be possible to delete scenes that are displa...

Page 99: ... the battery or AC adaptor and then reattach it Turn on the power again If normal operation is still not restored detach the power connected and contact consumer support l 113 114 PUSH THE RESET SWITCH or CHECK THE DISC AFTER PUSHING THE RESET SWITCH TO REPAIR THE DATA is displayed After using the following method to restart the unit eject the disc and clean it l 24 If there are scratches on the d...

Page 100: ...SB terminal on the PC Check the operating environment l 79 Disconnect the USB cable turn the unit off then on and then reconnect the USB cable When the USB cable is disconnected an error message will appear on the PC To disconnect the USB cable safely double click the icon in the task tray and follow the instructions on the screen Problem Check points ...

Page 101: ...e marred and the surface finish may peel off Do not leave rubber or plastic products in contact with the unit for a long time When you use the unit in a sandy or dusty place such as a beach do not let sand or fine dust get into the body and terminals of the unit Also keep the unit away from sea water Sand or dust may damage the unit Care should be taken when inserting and removing a disc or an SD ...

Page 102: ...r recording Prepare batteries for use up to 3 to 4 times the period you are planning to record for Cold places such as a ski resort can shorter the period which you can record for If you drop the battery accidentally check to see if the terminals are damaged Attaching a battery with damaged terminals can damage the unit or AC adaptor Do not throw old battery into fire Heating a battery or throwing...

Page 103: ...thorized by Macrovision Reverse engineering or disassembly is prohibited Manufactured under license from Dolby Laboratories Dolby and the double D symbol are trademarks of Dolby Laboratories Microsoft Windows Windows Vista DirectDraw DirectSound DirectX and Internet Explorer are either registered trademarks or trademarks of the Microsoft Corporation in the United States and or other countries Micr...

Page 104: ...matic white balance adjustment range use the manual white balance adjustment mode White balance adjustment White balance adjustment determines the white color under different light sources By recognizing which is the white color under sunlight and which is the white color under a fluorescent light the unit can adjust the balance among the other colors Since the white color is the reference for all...

Page 105: ...ng subjects at the beach at night or in scenes involving fireworks or special lights Recording a subject in dark surroundings The unit cannot focus correctly because the light information that comes through the lens decreases considerably Recording a fast moving subject As the focus lens inside moves mechanically it cannot keep up with a fast moving subject When for example recording a sports even...

Page 106: ...m Monitor 2 7z wide LCD monitor approx 123 K pixels Viewfinder Color electric viewfinder approx 113 K pixels Microphone Stereo with a zoom function Speaker 1 round speaker 20 mm Standard illumination 1 400 lx Minimum required illumination 6 lx approx 2 lx with the MagicPix function Video output level 1 0 Vp p 75 Audio output level Line 316 mV 600 USB Card reader writer function No copyright protec...

Page 107: ... 2 5 Mbps VBR Approx 75 min recordable time on a single sided DVD RAM Audio compression Dolby Digital 16 bit 48 kHz 2 ch Recording media SD Memory Card 8 MB 16 MB 32 MB 64 MB 128 MB 256 MB 512 MB 1 GB 2 GB FAT12 and FAT16 format corresponding SDHC Memory Card 4 GB 8 GB FAT32 format corresponding Compression JPEG Design rule for Camera File system based on Exif 2 2 standard DPOF corresponding Pictu...

Page 108: ...copyright protection and management and the capacity which can be used on the unit a PC etc Number of recordable pictures on an SD card Picture size 640k480 640k360 Picture quality 8 MB 42 86 42 86 16 MB 97 195 97 195 32 MB 210 420 210 420 64 MB 430 870 430 870 128 MB 820 1650 820 1650 256 MB 1710 3430 1710 3430 512 MB 3400 6790 3400 6790 1 GB 6800 13600 6800 13600 2 GB 13830 27660 13830 27660 4 G...

Page 109: ...z DVD R double sided LM RF55LV 8 cm 3z DVD R DL dual layer on single side VW AD21PP K AC adaptor with AC Cable and DC Cables VW VBG130 1 1320 mAh Rechargeable Lithium Ion Battery Pack VW VBG260 1 2640 mAh Rechargeable Lithium Ion Battery Pack VW VBG6 1 2 5800 mAh Rechargeable Lithium Ion Battery Pack VW VH04 Battery Pack Holder Kit RP SDR01GU1A RP SDR512U1A RP SDR256U1A Class 2 1 GB SD Memory Card...

Page 110: ...0421 84th Avenue South Kent WA 98032 Ship To Mr Mrs Ms First Last Street Address City State Zip Phone Day Night 4 Shipping information UPS delivery requires complete street address Please photocopy this form when placing an order 3 Method of payment check one Check of Money Order enclosed NO C O D SHIPMENTS VISA MasterCard Make Check or Money Order Payable to PANASONIC ACCESSORIES Please do not se...

Page 111: ...t needs service Please include your proof of purchase Failure to do so will delay your repair To further speed your repair please provide an explanation of what is wrong with the unit and any symptom it is exhibiting Mail this completed form and your Proof of Purchase along with your unit to Panasonic Camera and Digital Service Center 1590 Touhy Ave Elk Grove Village IL 60007 ...

Page 112: ...or non expanded standard 4 3 pictures on wide screen TV s or onscreen data in a stationary and fixed location The warranty ALSO DOES NOT COVER damages which occurred in shipment or failures which are caused by products not supplied by the warrantor or failures which result from accidents misuse abuse neglect bug infestation mishandling misapplication alteration faulty installation set up adjustmen...

Page 113: ...al Park Carolina Puerto Rico 00985 Phone 787 750 4300 Fax 787 768 2910 For hearing or speech impaired TTY users TTY 1 866 605 1277 Purchase Parts Accessories and Instruction Books online for all Panasonic Products by visiting our Web Site at http www pstc panasonic com or send your request by E mail to npcparts us panasonic com You may also contact us directly at 1 800 332 5368 Phone 1 800 237 908...

Page 114: ...rchase receipt or other proof of date of original purchase is required before warranty service is performed THIS EXPRESS LIMITED WARRANTY IS IN LIEU OF ALL OTHER WARRANTIES EXPRESS OR IMPLIED INCLUDING ANY IMPLIED WARRANTIES OF MERCHANTABILITY AND FITNESS FOR A PARTICULAR PURPOSE IN NO EVENT WILL PANASONIC CANADA INC BE LIABLE FOR ANY SPECIAL INDIRECT OR CONSEQUENTIAL DAMAGES In certain instances ...

Page 115: ...enu 30 Motion picture playback 54 Motion picture recording 37 N Number of recordable pictures 108 O Operation icons 44 P Pickup lens 25 PictBridge 75 Picture quality 40 Picture size 40 Playing back motion pictures by date 56 Playlist 63 Power save 31 Protect Disc 70 R Recording mode 38 Recording time elapsed 37 Recovery Disc 93 Remaining number of still pictures 39 Remaining time 37 Resume playbac...

Page 116: ...ATTERY deslice la batería Cómo encender la cámara Mientras pulsa el botón de desbloqueo A ajuste el selector de modo a o Alinee con el indicador de estado B Para apagar la cámara ajuste el selector de modo a OFF Inserción de un disco 1 Deslice la palanca DISC EJECT hacia arriba y suéltela 2 Abra la tapa del compartimiento del disco e inserte el disco 3 Apriete la sección marcada con PUSH CLOSE par...

Page 117: ...de la grabación Reproducción Gire el selector de modo para seleccionar o 1 Seleccione la escena fichero a reproducir y a continuación pulse el joystick 2 Seleccione la operación de reproducción con el joystick Reproducción de imágenes en movimiento 1 Reproducción Pausa Salto reproducción hacia atrás 9 Salto reproducción hacia delante Detiene la reproducción y muestra las miniaturas Reproducción de...

Page 118: ...118 LSQT1319 ...

Page 119: ...119 LSQT1319 ...

Page 120: ...Company Division of Panasonic Corporation of North America One Panasonic Way Secaucus NJ 07094 Panasonic Puerto Rico Inc Ave 65 de Infantería Km 9 5 San Gabriel Industrial Park Carolina Puerto Rico 00985 Panasonic Canada Inc 5770 Ambler Drive Mississauga Ontario L4W 2T3 P ...

Reviews: