background image


PANORAMA 

BASIC, PLUS


Wide Format Monochrome Scanner 


Operator’s Guide 


Summary of Contents for plus

Page 1: ...PANORAMA BASIC PLUS Wide Format Monochrome Scanner Operator s Guide...

Page 2: ...ed in any form or by any means electronic mechanical photocopying recording or otherwise without the prior written permission of the publisher Contex A S reserves the right to modify the information g...

Page 3: ...software and JETimage copy software Both are available in WINDOWS 98 2000 and WINDOWS NT4 0 editions for PC workstations This guide explains how to operate and maintain the PANORAMA 50 Wide Format Mo...

Page 4: ...2 5 Original s Insertion Slot 5 1 5 1 Rulers 5 1 5 2 Scanning Thick Media 5 3 5 3 Removing the Original Pressure Platen 5 6 6 Installation 6 1 6 1 Set up the scan station 6 1 6 2 Smart Card 6 1 6 3 In...

Page 5: ...III 9 1 FCC Regulations 9 1 9 2 EC Regulations 9 2 10 Appendix C Program License Agreement 10 1 11 Appendix D Important Safety Instructions 11 1 12 Appendix E Index 12 1...

Page 6: ...nners meet all your wide format monochrome scanning needs in high quality grayscale and crisp black and white A PANORAMA scanner together with a large format printer forms a high quality B W large for...

Page 7: ...th many types of scanning applications Reproduction Large Format Black White Copying The PANORAMA Monochrome Scanner together with a large format printer is the perfect large format digital copier han...

Page 8: ...ome Scanner up to 800 dpi scan resolution at all original sizes in graytone and raster modes Features Common to Both Models Hardware Embedded Advanced Digital Image Processing The PANORAMA scanners in...

Page 9: ...7900 pixel CCDs Scanning area sized from A5 up to larger than landscape A0 E Size 50 wide 1270mm Media width 6 to 51 5 152 to 1310 mm Media length not limited Media thickness up to 0 6 inch 15mm suppo...

Page 10: ...er via the PC Available in two editions JETimage BASE and JETimage PRO JETimage is available in touch screen and traditional mouse keyboard configuration versions Easy and fast copying can be achieved...

Page 11: ...er and just select the application through Photoshop s File menu WIDEcapture imports images from the scanner into the Photoshop image editor You can then use Photoshop s wide range of image manipulati...

Page 12: ...inting LARGE FORMAT PRINTER Contex Copy and Scanning System Copy Application B W JETimage BASE Straightforward User Interface Standard Copy Presets On Screen WYSIWYG Previewing Brightness Contrast Col...

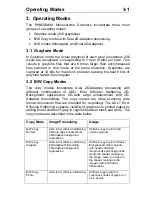
Page 13: ...Auto edge enhancement and 2D Adaptive thresholding The copy modes are ideal scanning wide format documents that are intended for re printing The ADL Error Diffusion Halftoning supports visibility of...

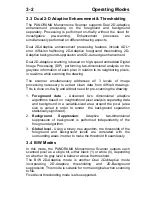
Page 14: ...lt drawings This is done on the fly and without need for pre scanning the drawing 1 Foreground data Advanced two dimensional adaptive algorithms based on neighborhood pixel analysis separating data an...

Page 15: ...trated areas of graytones sharpening will make unwanted noise to appear in the scanned image By using the sharpen filter together with the blur filter you can obtain the desired sharpened edges withou...

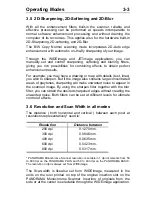
Page 16: ...ne resulting from various combinations of resolution and scan width on the side aligned ruler Resolution Scan Width 600 dpi 400 dpi 300 dpi 200 dpi 11 8 50 0 30 000 20 000 15 000 10 000 8 0 34 0 20 35...

Page 17: ...sitioned Now press the Feed Forward key A and the drawing moves into the start of scan position if auto load is selected in WIDEimage loading will take place automatically The Ready indicator stays ON...

Page 18: ...has been suspended for about two hours This may happen when operating the scanner in Extended Thickness mode over an longer period of time In these cases the Original Pressure Platen should be return...

Page 19: ...Operator Panel and Indicators 4 3 C A D E F B Figure 4 1 Operator Panel...

Page 20: ...ruler corresponds to right side aligned original feeding Below the ruler are marked common original sizes for guidance with optional centered feeding Insertion alignment of originals right side align...

Page 21: ...ze and approx A2 17 0 430mm 5 2 D Size 22 22 0 560mm 5 5 A1 594mm 23 3 592mm 6 0 Approx A1 and approx D Size 25 4 646mm 7 8 A0 Portrait 841 mm 33 1 840mm 8 0 E Size and approx A0 34 0 862mm 11 2 E Siz...

Page 22: ...m 0 to 6 in steps so you can fit the insertion slot to the thickness of the current original The flexible insertion slot for thick media scanning adds an extra dimension to your scanning possibilities...

Page 23: ...ly reduced Heavy cardboard foamboard etc require lower scanning speeds to omit start stops caused by the media s low flexibility Thick stiff originals will rest on top of the scanner rollers and thus...

Page 24: ...r the trailing edge leaves the entry rollers To omit this the leading and trailing edges are by default skipped when in one of the extended media thickness positions Leading trailing edge skipping can...

Page 25: ...d media thickness adjustment sliders fully towards the middle of the platen This allows you to fully disengage them from the scanner and lift out the original pressure platen fixture To reinsert the o...

Page 26: ...t register You should not place the scanner in a built in installation unless proper ventilation is provided 6 2 Smart Card Check that the scanner Smart Card is correctly installed contact side downwa...

Page 27: ...kit contains detailed documentation for installing the SCSI host adapter board and the SCSI driver Note If your PC already has a built in SCSI board you might be able to use that instead However for...

Page 28: ...driver documentation that came with your interface kit 6 4 3 Step 3 Connect the scanner to the PC 1 Be sure to disconnect the power cable from the scanner If power runs through the scanner at this po...

Page 29: ...ing performance is obtained with only one device on the SCSI bus However if your configuration requires more than one device on the bus you may need to change the DIL switch settings The factory defau...

Page 30: ...nd remove the Smart Card Important Remember to reinsert the Smart Card when finished setting the DIL switches and before turning power on 1 2 3 4 5 8 7 ON OFF 6 SCSI Device Address SCAN SCSI 0 A 0 B T...

Page 31: ...o 1 OFF ON ON SCSI device no 2 ON OFF ON SCSI device no 3 OFF OFF ON SCSI device no 4 ON ON OFF SCSI device no 5 OFF ON OFF SCSI device no 6 ON OFF OFF SCSI device no 7 OFF OFF OFF Factory Default SCS...

Page 32: ...ON Host Computer SCSI CD ROM SCSI C The Scanner is not the last device on the SCSI bus SCANNER Switch 4 must be OFF Host Computer SCSI CD ROM SCSI Must be terminated Note If the scanner is connected t...

Page 33: ...scanner is inaccessible Important For normal scanning make sure that none of the troubleshooting and test control switches are on 6 5 Installation Verification Turn on the power to the computer and th...

Page 34: ...it is important that you run your first maintenance session before working with the scanner Shipping and transportation of your scanner from the factory may have affected the camera positions and it w...

Page 35: ...ion of the PANORAMA reduces noise in the dynamic area and ensures stable and clean scans Calibration reduces the unwanted effects caused by dust particles when scanning at high resolutions The tools f...

Page 36: ...do not use abrasives acetone benzene or fluids that contain these chemicals Do not spray liquids directly onto the scanner glass plate or anywhere else in the scanner 4 Clean the white platen The whi...

Page 37: ...down on the metal safety buttons to let the two sliders move back and lock the platen into place Close the scanner cover 6 Keep out dust and reduce maintenance time Cover your scanner with the plastic...

Page 38: ...nner on and the warm up time will ensure that light conditions and camera heights have stabilized 1 Remove the front streamer The camera alignment holes are behind the front streamer Lift the end and...

Page 39: ...point arrow with the scanner s midpoint arrow and feed the chart into the scanner 5 Load the alignment status for Camera A The scanner will immediately start scanning the chart and display the alignme...

Page 40: ...a is aligned when the arrow turns to a green checkmark 7 Move on to the next camera Select Next in the wizard and repeat the step above to align the cameras The Wizard will take you through each of th...

Page 41: ...be warm Make sure that the scanner has been turned on for at least one hour prior to calibrating Slight light intensity changes and camera shifting can occur just after turning the scanner on and the...

Page 42: ...ou when Calibration is complete and instruct you to remove the Maintenance Sheet 4 Wrapping up Calibration completes the maintenance process Remove the Maintenance Sheet from the scanner Return the sh...

Page 43: ...pening and Softening 2D Adaptive Thresholding 2D Edge enhancement 2D Graytone blur filter HW Image processing feature embedded in the scanner s hardware SW Image processing feature emulated in WIDEima...

Page 44: ...inst harmful interference when the equipment is operated in a commercial environment This equipment generates uses and can radiate radio frequency energy and if not installed and used in accordance wi...

Page 45: ...9 2 B Regulations 9 2 EC Regulations...

Page 46: ...ulations 9 3 Supplementary Information Warning This is a class A product I a domestic environment this product may cause radio interference in which case the user may be required to take adequate meas...

Page 47: ...ns in any form Limited Warranty This program is provided as is without warranty of any kind either stated or implied including but not limited to the implied warranties of merchantability and fitness...

Page 48: ...am except as expressly provided in this Agreement Any attempt otherwise to sublicense assign or transfer any of the rights duties or obligations hereunder is void This Agreement will be governed by th...

Page 49: ...ything to rest on the power cord Do not locate the scanner where persons will walk on the cord F If an extension cord is used with the scanner make sure that the total of the ampere ratings of the pro...

Page 50: ...has been spilled into the scanner If the scanner has been exposed to rain or water If the scanner does not operate normally when operating instructions are followed then adjust only those controls tha...

Page 51: ...ht adjustment 7 3 7 6 Installation 6 1 Installation verification 6 3 Liquid cleaners 12 1 Operating Modes 3 1 Operator Panel 4 1 Original Scanning Area 7 1 Paper Feed Forward Key 4 1 Power On indicato...

Reviews: