background image

EM-200
User Manual

Summary of Contents for EM-200

Page 1: ...EM 200 User Manual...

Page 2: ......

Page 3: ...d used in accordance with the instructions may cause harmful interference to radio communications However there is no guarantee that interference will not occur in a particular installation If this eq...

Page 4: ...carefully SAR compliance for body worn operations is restricted which provide at least 2 cm separation between the device and the user s body Do not place the unit on an unstable surface cart or stan...

Page 5: ...iii Revision history Version 1 0 August 2009...

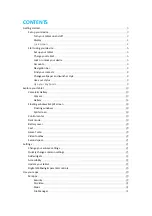
Page 6: ...OS Navigation Keys 12 Using BIOS 13 Main Menu 14 Advanced Menu 15 Boot Configuration 16 IDE Configuration 17 Channel 1 Master 18 Security Menu 19 Boot Menu 20 Boot Device Priority 21 Boot Type Order 2...

Page 7: ...ying components on page 3 Installing the battery pack on page 8 Charging the battery pack on page 9 Powering on on page 10 Unpacking the machine The machine and cable accessories are packed in a cardb...

Page 8: ...you unpack the device check that the following items are included If any item is missing or appears damaged contact your dealer immediately AC adapter Driver CD with drivers and the user manual PDF f...

Page 9: ...t view 1 2 3 4 5 6 7 9 8 Figure 1 2 Front view Component Description 1 Power indicator 2 Battery charging indicator 3 HDD status indicator 4 WiFi On Off indicator 5 Bluetooth On Off indicator 6 3 5G L...

Page 10: ...H A P T E R 1 G E T T I N G S TA R T E D Left view 1 Figure 1 3 Left view Component Description 1 5 in 1 media card slot 2 Express card 34 slot 3 USB port 4 Power button 5 RJ45 LAN jack 6 DC IN 3 2 4...

Page 11: ...5 Right view Figure 1 4 Right view 1 2 3 4 5 Component Description 1 VGA port 2 USB port 3 Ventilation hole 4 Headphone jack 5 Microphone jack...

Page 12: ...ear view 1 3 3 2 1 Component Description 1 Speaker 2 Battery pack 3 Charger pin connect to a cradle for charging the battery Do not short circuit the 3 charger pins A short circuit may cause damage to...

Page 13: ...m view 1 2 1 3 4 5 6 7 Component Description 1 Mounting hole 2 Camera optional 3 Battery lock switch 4 Memory WiFi module Bluetooth module and 3 5G LAN module optional slots 5 Battery pack 6 HDD compa...

Page 14: ...you as shown in the right Slide the battery release latch to the unlock position 2 Align EM200 battery compartment pins to the battery connector Slightly slide and press the battery pack into the com...

Page 15: ...ot charge it for 24 hours or longer at a time NOTE Charge the battery within a temperature range 0 C to 45 C Please make sure to perform 3 complete full charge and discharge cycles to get optimal batt...

Page 16: ...P T E R 1 G E T T I N G S TA R T E D Powering on The power button located on the left side of the EM200 press the power button the turn it on To force power off long press the power button for 4 5 sec...

Page 17: ...up Utility The BIOS Setup Utility enables you to configure the following items Hard drives diskette drives and peripherals Password protection from unauthorized use Power management features Boot devi...

Page 18: ...lues F9 Loads the setup default values F10 Saves the current configuration and exits Setup Enter Selects or enters submenu InsydelH2O Setup Utility System BIOS Version GA D1USB28 F04 Processor Type In...

Page 19: ...tion is highlighted execute the option by pressing Enter Some options lead to pop up dialog boxes that prompt you to verify that you wish to execute that option Other options lead to dialog boxes that...

Page 20: ...ted by the system during boot System Time Date The Time and Date items show the current date and time held by the machine These will be automatically updated whenever you make changes to the Windows D...

Page 21: ...n seconds Keyboard Language This item is used to select the keyboard language of external USB keyboard Figure 2 3 Advanced menu InsydelH2O Setup Utility Boot Configuration IDE Configuration Advanced S...

Page 22: ...menu InsydelH2O Setup Utility Boot Configuration Numlock Off Item Specific Help F1 Help Select Item F7 F8 Change Values F9 Setup Default ESC Exit Select Menu Enter Select Sub Menu F10 Save and Exit M...

Page 23: ...on Select the item and press Enter to open the following menu InsydelH2O Setup Utility IDE Configuration HDC Configure as SATA Only ATA IDE Mode Native Channel 1 Master WDC WD1600BEV1 222CT Item Speci...

Page 24: ...hard disk in block mode Transfer Mode displays the data transfer mode S M A R T when enabled allows the system to support S M A R T Self Monitoring Analysis and Reporting Technology for hard disk devi...

Page 25: ...The Set Supervisor User Password item differentiates between upper and lower case characters Press Enter after you have typed in the password To confirm the password type the password again and press...

Page 26: ...following screen InsydelH2O Setup Utility Quiet Boot Enabled Boot Type Item Specific Help F1 Help Select Item F7 F8 Change Values F9 Setup Default ESC Exit Select Menu Enter Select Sub Menu F10 Save a...

Page 27: ...ve USB CD DVD ROM Driver USB Memory Others Item Specific Help F1 Help Select Item F7 F8 Change Values F9 Setup Default ESC Exit Select Menu Enter Select Sub Menu F10 Save and Exit Boot Boot Device Pri...

Page 28: ...lowing message is prompted when user presses Enter on the item Exit Discarding Changes Yes No Load Optimal Defaults Allows the user to load the default value in CMOS Setup The following message is pro...

Page 29: ...lic parts or metal flakes can cause electrical shorts If the LCD breaks and fluid gets onto your hands or into your eyes immediately wash with water and seek medical attention WARNING CAUTION Only qua...

Page 30: ...tools can prevent you from accidentally damaging the internal components Most of the electrical and mechanical connections can be disconnected by using your fingers It is recommended that you do not...

Page 31: ...g to remove and replace the hard drive 1 Turn off the EM 200 2 Disconnect the AC adapter cable 3 Overturn the EM200 4 Remove the two screws as shown in the right 5 Open and remove the hard drive compa...

Page 32: ...C H A P T E R 3 U P G R A D I N G C O M P O N E N T S 7 Remove the hard drive 8 Remove the four screws then remove the hard drive out from the tray To replace the hard drive reverse the above procedu...

Page 33: ...remove and replace the memory 1 Turn off the EM 200 2 Disconnect the AC adapter cable 3 Overturn the EM200 4 Remove the two screws as shown in the right 5 Open and remove the memory module compartmen...

Page 34: ...module with thumb and forefinger and then gently remove it To replace the memory module reverse the above procedure Upgrading the Mini PCIE card Refer to the following to remove and replace the PCIE c...

Page 35: ...te the Mini PCIE card as shown in the right 7 Remove the screw on the Mini PCIE card Mini PCIE will pop up 45 degree 8 When it pops up gently remove it To replace the Mini PCIE card reverse the above...

Page 36: ...30 C H A P T E R 3 U P G R A D I N G C O M P O N E N T S...

Page 37: ...y the steps in the order suggested This may help you to solve the problem more quickly Try to pin point the problem and thus avoid replacing non defective parts For example if you replace batteries an...

Page 38: ...nd mode An incorrect date and time are displayed Set the date and time in BIOS or Operation System Cannot be turned off after crash Long press the power button for 4 seconds to force shutdown Cannot b...

Page 39: ...serviced Pack the terminal in the original carton See Unpacking the EM 200 on page 1 Include a description of the problem and a checklist of the steps you took when trying to fix the problem The info...

Page 40: ...iFi Ethernet 10 100 Base T IEEE 802 11b g n Interface I O Port 5 in 1 Media Card Slot x 1 Mini PCIe Slot x 2 Internal Express Card 34 Slot x 1 USB Port x 3 Audio Jack x 2 Mic in and Headphone out VGA...

Reviews: