Rev. 06/05/18
© 2018 Pella Corporation
Page 1 of 3
Part Number: 80FT0002
1B
If a Designer Series replacement panel is ordered without a replacement HGP,
See Supporting Document–
Hinged
Glass Panel Replacement
–PERL,
for HGP removal from original panel and reinstallation procedure on
replacement panel. Otherwise, ensure the HGP is closed and latched before proceeding with vent
panel removal.
CAUTION:
DO NOT detach or cut the white cord that limits the opening of the Hinged Glass Panel (HGP). Doing so may cause
serious damage, including glass breakage, to your Pella product. The cord should only be detached by a qualified
service technician when performing service related procedures.
Two or more people may be required for the following instruction.
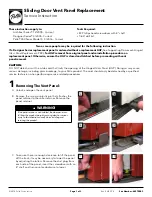
A. Unlock and open the vent panel.
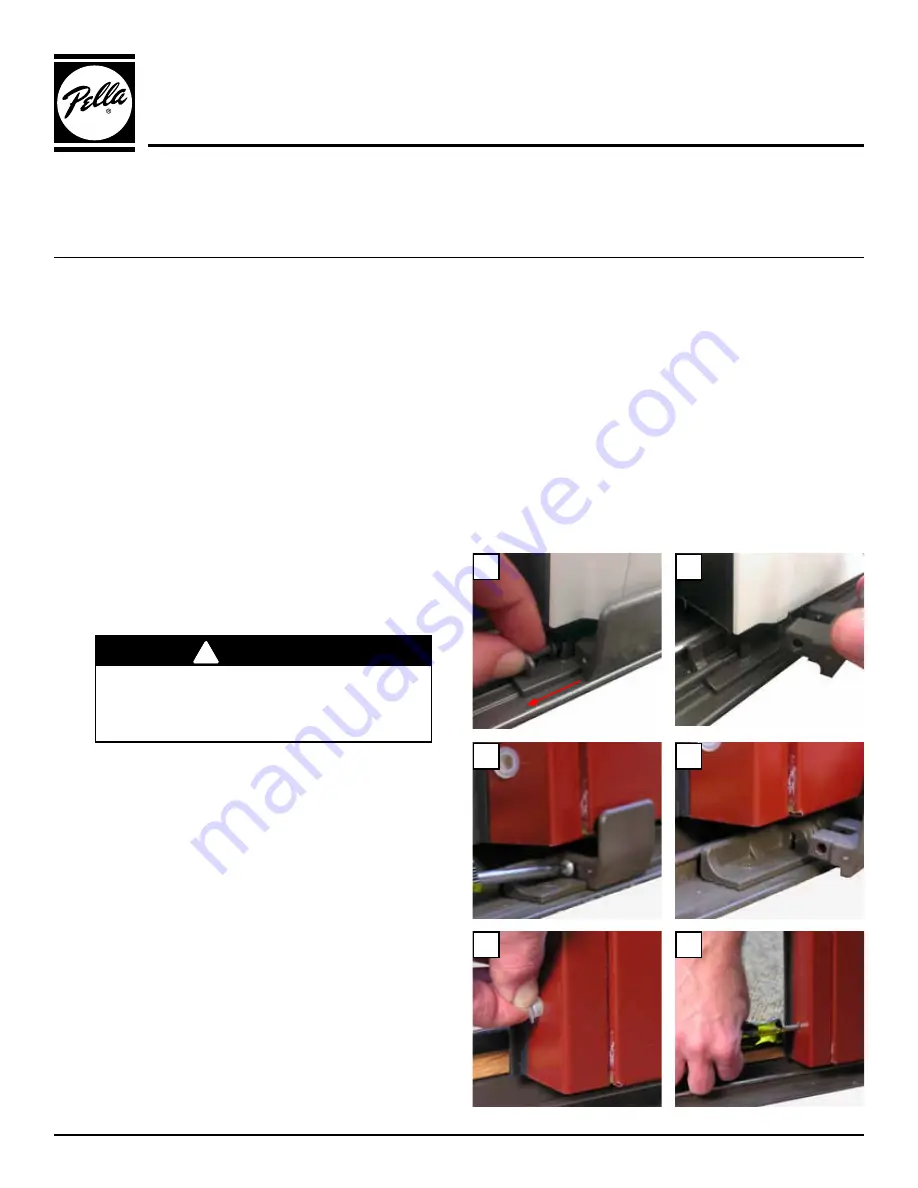
B. Remove the screw or plastic pin that attaches the
panel retainer to the roller retainer. Remove the
panel retainer.
1B
1B
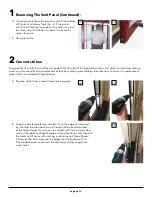
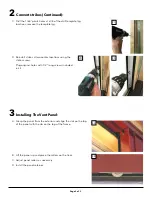
C. To ensure there is enough clearance to lift the panel
off the track, it may be necessary to lower the panel
by adjusting the rollers. Remove the dust plug from
each side of the panel, insert the screwdriver with an
8" shaft and turn counter-clockwise to lower.
1C
1C
1B
!
WARNING!
If the panel retainer is not installed, the door panel can
fall from the product, possibly causing death or serious
injury. Follow directions closely when installing and
servicing the product.
1
Removing The Vent Panel:
These instructions apply to:
Architect Series® 12/2005 - Current
Designer Series® 3/2005 - Current
Pella® 450 Series Model 4 5/2016 - Current
Tools Required:
• #2 Phillips head screwdriver with 8" shaft
• 1/64" drill bit
Sliding Door Vent Panel Replacement
Service Instruction

