
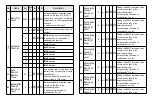
Z-Wave Remote PSR03-A/B/C
PSR03-A PSR03-B PSR03-C
The Remote PSR03 is a simple control can control AV device through Z-
Wave-to-IR extender, and it can also controls 8 lighting groups ON/OFF
via basic set, based on Z-Wave
TM
technology.
It is the Z-Wave
TM
plus product, it support the security, OTA... Those
newest features of the Z-Wave
TM
technology. Z-Wave
TM
is a wireless
communication protocol designed for home automation, specifically to
remotely control applications in residential and light commercial
environments. The technology uses a low-power RF radio embedded or
retrofitted into home electronics devices and systems, such as lighting,
home access control, entertainment systems and household appliances.
This product can be included and operated in any Z-Wave
TM
network
with other Z-Wave
TM
certified devices from other manufacturers and/or
other applications. All non-battery operated nodes within the network
will act as repeaters regardless of vendor to increase reliability of the
network.
The device adopts the Z-Wave
TM
500 series chip, when your Z-Wave
TM
network system is all made by Z-Wave
TM
500 series devices. The
network system will have the advantages as below.
•
Concurrent multi-channel support reduces external interference.
•
Better RF range, improve about 10 meters in indoor.
•
Support 100 Kbps transmit speed, speed up communication.
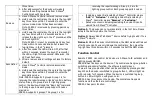
Function Compare A/B/C
Group
Control
AV Control
Panic
PSR03-A
V
V
V
PSR03-B
V
V
V
PSR03-C
V
Adding to Z-Wave
TM
Network
In the first time, activate the device through micro USB, then it can be
added into the Z-Wave
TM
network. First, make sure the primary
controller is in the add mode. And then power on the device. The
device will auto start the NWI (Network Wide Inclusion) mode. And it
should be added in 5 seconds. You will see the LED light ON one
second.
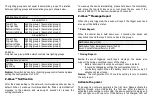
Function
Description
Add
1. Have Z-Wave
TM
Controller entered add mode.
2. Hold down the central key, then press the top-right
key three times within 1.5 seconds to enter the add
mode.
Note: PSR03-C is added by pressing panic key


