


Table of contents
1
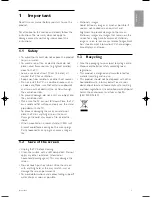
Important 3
1.1
Safety 3
1.2
Care of the screen 3
1.3
Recycling 3
2
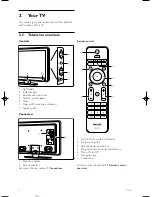
Your TV 4
2.1
Television overview 4
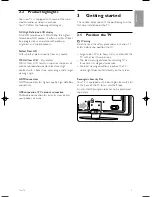
2.2
Product highlights 5
3
Getting started 5
3.1
Position the TV 5
3.2
Wall mounting - VESA 6
3.3
Remote control batteries 7
3.4
Antenna cable 7
3.5
Connect the mains 7
3.6
First time installation 7
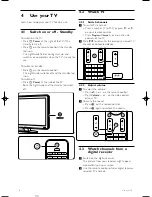
4
Use your TV 8
4.1
Switch on or off - Standby 8
4.2
Watch TV 8
4.3
Watch channels from a digital receiver 8
4.4
Watch connected devices 9
4.5
Watch a DVD 9
4.6
Select a Teletext page 9
5
Use more of your TV 10
5.1
Remote Control 10
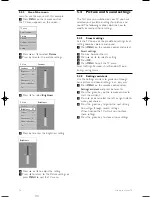
5.2
LightGuide brightness 11
5.3
TV menus 11
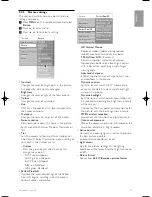
5.4
Picture and sound settings 12
5.5
Teletext 15
5.6
Create favourite channel lists 17
5.7
Timers and locks 18
5.8
Subtitles 19
5.9
Watch and play photos, MP3... 19
5.10 Software update 22
6
Channel installation 24
6.1
Automatic channel installation 24
6.2
Manual channel installation 25
6.3
Rearrange stored channels 26
6.4
Factory settings 26
7
Connections (DVD, receiver, ...) 27
7.
1
Connections overview 27
7.2
About connections 28
7.3
Connect your devices with the
Connection assistant 29
7.4
Connect your devices without the
Connection assistant 29
7.5
Connection setup 35
7.6
PC network 36
8
Technical data 37
9
Troubleshooting 39
10
Index 41
Remote control setup codes at the end of this
book.
Register your product and get support at
www.philips.com/welcome.
Table of contents
1
ENGLISH
VE08_AP EN.qxd 10-03-2008 14:27 Pagina 1