Philips Signage Solutions BDL4250EL, User Manual
The Philips Signage Solutions BDL4250EL user manual is available for free download at 88.208.23.73:8080. This comprehensive manual provides step-by-step instructions and helpful information to maximize your experience with this product. Get all the essential details and learn how to optimize the features of your BDL4250EL display with our user manual.
Share
Download


Reviews:
No comments
Related manuals for Signage Solutions BDL4250EL

TSID-72-6
Brand: True Pages: 2

MDPW-476
Brand: Barco Pages: 2
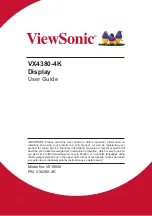
VX4380-4K
Brand: ViewSonic Pages: 62

Infineum
Brand: Data Display Pages: 35

Mr. Sign
Brand: Data Display Pages: 40

GB-64*120-UBR
Brand: Data Display Pages: 43

VA903B - 19" LCD Monitor
Brand: ViewSonic Pages: 2

VA903B - 19" LCD Monitor
Brand: ViewSonic Pages: 25
Flymaster NAV SD
Brand: NAV SD Pages: 72

Great Hills
Brand: Data Display Pages: 43

FDU-268
Brand: Barco Pages: 2

IDU-680
Brand: Genesys Pages: 584


