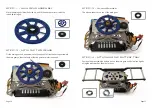
PhotoHigher AV130 360 PAN KIT MR, Assembly Instructions Manual
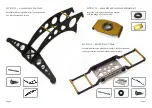
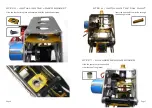
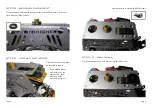
The "PhotoHigher AV130 360 PAN KIT MR" brings high-quality aerial photography to new heights. With its innovative design and advanced technology, capturing breathtaking 360-degree images has never been easier. To get started, simply download the Assembly Instructions Manual for free from our website, allowing you to effortlessly set up and enjoy this incredible product.
Share
Download


Reviews:
No comments
Related manuals for AV130 360 PAN KIT MR

868 GEN2
Brand: GE Pages: 2

G5
Brand: Xplova Pages: 13

projectorsleeve
Brand: 3M Pages: 14

PUNKS
Brand: 3LeggedThing Pages: 9

ECO
Brand: Garland Pages: 36

RockaRoo
Brand: 4MOMS Pages: 20

GE Series
Brand: Wallenstein Pages: 48

IR3-1
Brand: Napoleon Pages: 2

Document WorkCentre 450c
Brand: Xerox Pages: 2

Phaser 6300
Brand: Xerox Pages: 4

64102
Brand: Thunderbolt Magnum Solar Pages: 4

SOT-1311 ROLL
Brand: Tessera4x4 Pages: 20

AE-31
Brand: Kodak Pages: 2

AROMA ZEN
Brand: Lanaform Pages: 84

30 FOOT (9 Meter) TOWER KIT for WHISPER 500
Brand: Southwest Windpower Pages: 44

LK-168A
Brand: U & Me Brothers Pages: 6

FREE PowerBank
Brand: Urban Factory Pages: 2

11230
Brand: EUFAB Pages: 4


