background image


Assembly Instructions  

&  

Parts List 

for 

Roll Top Hardcover Units 


PAK945 – 8 Drum Roll Top Hardcover 
PAK948 – 12 Drum Roll Top Hardcover 
PAK946 – Add-on-Roll Top Hardcover 


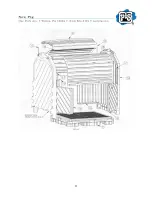
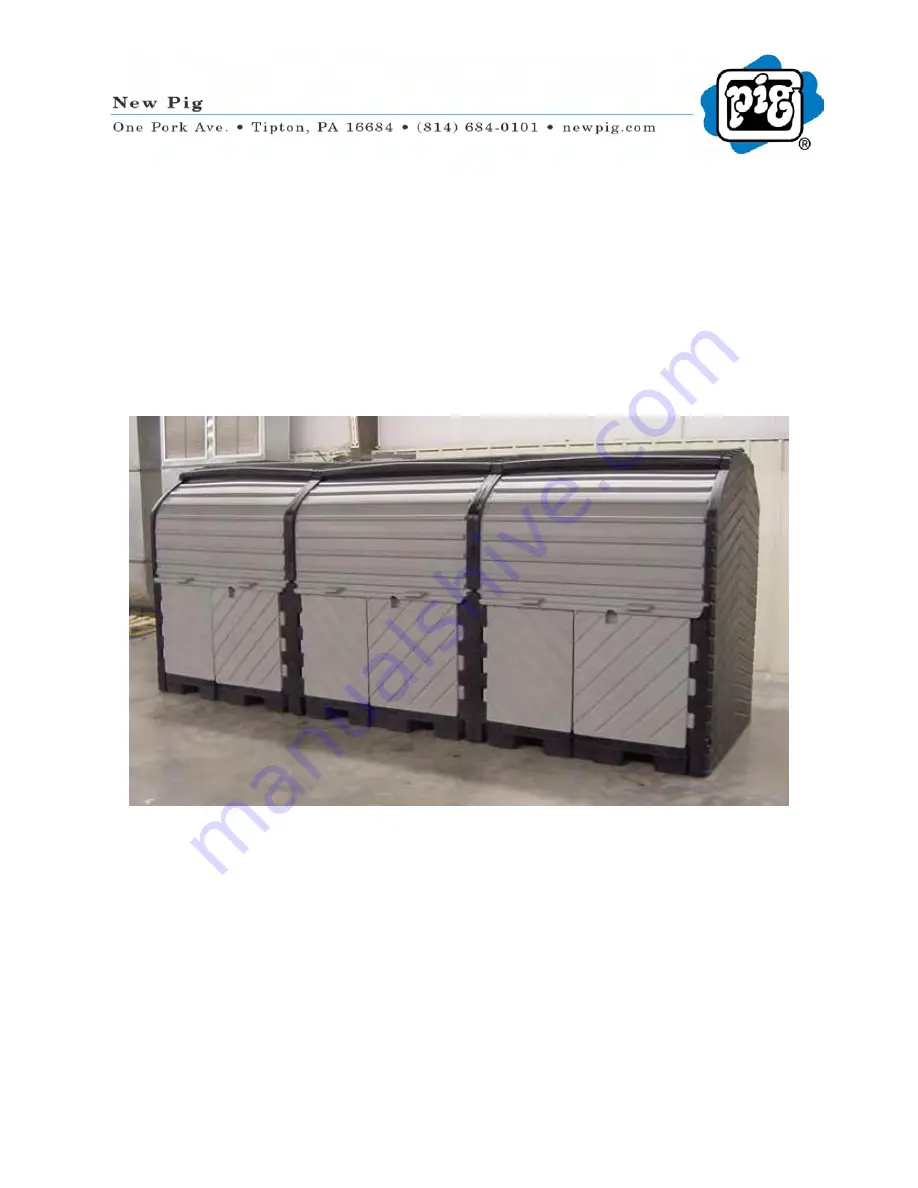
Shown: PAK948 – 12 Drum Roll Top Hardcover assembled 


*Note:  2 people will be required to assemble any of the roll top configurations 


Tools required: 

·


9/16” Deep Well Socket & Ratchet  

·


2 - 9/16” Wrenches 

·


Caulking Gun 

·


Hammer or Mallet 

 
03/17/04 
Rev.#1 


Summary of Contents for PAK945

Page 1: ...AK948 12 Drum Roll Top Hardcover PAK946 Add on Roll Top Hardcover Shown PAK948 12 Drum Roll Top Hardcover assembled Note 2 people will be required to assemble any of the roll top configurations Tools required 9 16 Deep Well Socket Ratchet 2 9 16 Wrenches Caulking Gun Hammer or Mallet 03 17 04 Rev 1 ...

Page 2: ...bly Part 1 Page 7 8 Parts List for the 12 Drum Roll Top Hardcover Sub Assembly Part 1 Page 9 Exploded Views for the 12 Drum Roll Top Hardcover Sub Assembly Part 2 Page 10 11 Parts List for the 12 Drum Roll Top Hardcover Sub Assembly Part 2 Page 12 Exploded Views for the Add on Roll Top Hardcover Assembly Page 13 14 Parts List for the Add on Roll Top Hardcover Assembly Page 15 Assembly Instructions...

Page 3: ...bly instructions starting with Step 13 on page 21 when adding the End Wall unit to complete the assembly PAK946 Add on Roll Top Hardcover Unit This unit comes unassembled It is used to add on to any 8 12 16 20 etc existing assembly Please refer to the Figure 7 8 and parts list on Pages 13 15 Follow the assembly instructions starting with 1 Step 1 on page 16 if assembling an Add on Roll Top Hardcov...

Page 4: ...4 ...

Page 5: ...5 ...

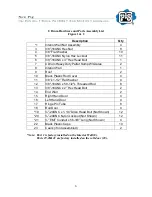
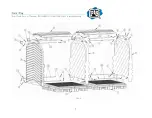
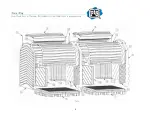
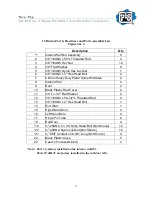
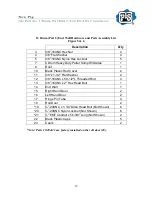
Page 6: ...ic Rod Cover 4 11 3 8 x 1 1 2 Flat Washer 4 12 3 8 16UNC x 59 1 2 L Threaded Rod 8 13 3 8 16UNC x 2 Hex Head Bolt 2 14 End Wall 2 15 Right Hand Door 4 16 Left Hand Door 4 17 Hinge Pin Tube 8 18 Roll Door 4 19 20UNC x 1 1 4 Allen Head Bolt Not Shown 12 20 20UNC Nylon Locknut Not Shown 12 21 EMT Conduit x 56 3 8 Long Not Shown 4 22 Black Plastic Caps 10 23 Caulk if not assembled 2 Note Part 1 is fac...

Page 7: ...7 ...

Page 8: ...8 ...

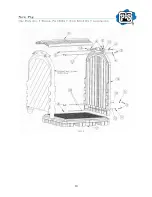
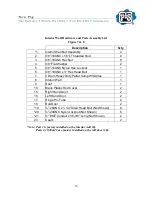
Page 9: ...Roof 2 10 Black Plastic Rod Cover 4 11 3 8 x 1 1 2 Flat Washer 2 12 3 8 16UNC x 59 1 2 L Threaded Rod 4 13 3 8 16UNC x 2 Hex Head Bolt 1 14 End Wall 1 15 Right Hand Door 4 16 Left Hand Door 4 17 Hinge Pin Tube 8 18 Roll Door 4 19 20UNC x 1 1 4 Allen Head Bolt Not Shown 12 20 20UNC Nylon Locknut Not Shown 12 21 EMT Conduit x 56 3 8 Long Not Shown 4 22 Black Plastic Caps 5 23 Caulk if not assembled ...

Page 10: ...10 ...

Page 11: ...11 ...

Page 12: ...astic Rod Cover 2 11 3 8 x 1 1 2 Flat Washer 2 12 3 8 16UNC x 59 1 2 L Threaded Rod 4 13 3 8 16UNC x 2 Hex Head Bolt 1 14 End Wall 1 15 Right Hand Door 2 16 Left Hand Door 2 17 Hinge Pin Tube 4 18 Roll Door 2 19 20UNC x 1 1 4 Allen Head Bolt Not Shown 6 20 20UNC Nylon Locknut Not Shown 6 21 EMT Conduit x 56 3 8 Long Not Shown 2 22 Black Plastic Caps 5 23 Caulk 2 Note Parts 19 20 21 are factory ins...

Page 13: ...13 ...

Page 14: ...14 ...

Page 15: ...x Head Bolt 1 7 4 Drum Heavy Duty Pallet Sump W Grates 1 8 Interior Wall 1 9 Roof 1 10 Black Plastic Rod Cover 2 15 Right Hand Door 2 16 Left Hand Door 2 17 Hinge Pin Tube 4 18 Roll Door 2 19 20UNC x 1 1 4 Allen Head Bolt Not Shown 6 20 20UNC Nylon Locknut Not Shown 6 21 EMT Conduit x 56 3 8 Long Not Shown 2 23 Caulk 2 Note Part 1 is factory installed on the interior wall 8 Parts 1 19 20 21 are fa...

Page 16: ...t comes out the whole way Repeat for the opposite side Take a pair of channel locks or pliers and pull out the hinge pin tube 17 from the hinged door 15 or 16 Repeat for the other three doors Step 2 Remove the top two bolts 6 13 that fasten the roof to the walls See Figure 1 Make sure to save this hardware It will be needed later in the assembly ...

Page 17: ...se rods and hardware for Step 14 Step 4 Once the end wall 14 is removed clean the caulking out of the grooves of both walls and off the tongues of the roof Also slide the pallet 7 away from the unit Step 5 Install the four threaded rods 2 into the interior wall nut assembly 1 on the existing interior wall 8 threading them in about Make sure the jam nut 3 is backed off about 1 The black covered thr...

Page 18: ...e bottom two interior wall nut assemblies 1 onto the black covered threaded rods with jam nuts 2 3 10 about Do not start the top rods at this time Step 7 Thoroughly caulk 23 the interior track of the center walls 8 the full length and depth of the groove that mates with the roof tongue Caulk as shown in the photograph ...

Page 19: ... are in the grooves of the walls Repeat for the other interior wall nut assembly 1 Tighten the four jam nuts 3 to the interior wall nut assemblies 1 on the top two threaded rods 2 Step 9 Insert hex head bolt 6 with the washer 4 through the interior wall and roofs Do not insert a hex bolt 6 on the outer interior wall unit until the next unit is added on Place a 3 8 washer 4 and a locknut 5 on the e...

Page 20: ... closed position Repeat this step for the opposite side Step 11 Align the right door 15 hinge with the mating hinge on the sidewall Align the door hinge pin holes with the hinge pin holes in the sidewall Slide the hinge pin tube 17 into the aligned holes Note It may be necessary to move the door and tap the hinge pin tube with a hammer until the hinge pin tube is fully seated all the way through t...

Page 21: ... through 12 if adding another add on unit 2 If this is the last 4 drum roll top to be added use the existing sidewall and follow the remaining steps to do so Step 13 Install the two bottom threaded rods 12 into the interior wall nut assemblies 1 about Make sure that the black covers 10 are on the threaded rods 12 and that there are jam nuts 3 on the end that is being installed Note If this is an e...

Page 22: ... locknut 5 onto the 2 bottom threaded rods 12 and tighten until the wall is secure and won t fall Then slide the top two threaded rods 12 through the end wall with the washer 4 and locknut 5 attached to the end Step 15 Thoroughly caulk 23 both the center wall 8 and sidewall 14 the full length and depth of the groove that mates with the roof tongue Caulk as shown in the photograph ...

Page 23: ... walls Repeat this for the other threaded rod Tighten the jams nut 3 against the interior wall nut assemblies 1 on the interior wall 8 Step 17 Insert hex head bolts 6 13 with the washers 4 through the walls and roof Place a 3 8 washer 4 and a locknut 5 on the end of the bolt Tighten bolts securely to draw the sidewalls and roof together there should not be a gap between the roof and walls in this ...

Page 24: ... closed position Repeat this step for the opposite side Step 19 Align the right door 15 hinge with the mating hinge on the sidewall Align the door hinge pin holes with the hinge pin holes in the sidewall Slide the hinge pin tube 17 into the aligned holes Note It may be necessary to move the door and tap the hinge pin tube with a hammer until the hinge pin tube is fully seated all the way through t...

Page 25: ...ior wall nut assembly 1 from turning These thread rods 12 will be tightened until the hinged doors are eveningly gapped about Then tighten the jam nuts 3 to the interior wall nut assembly 1 Step 21 Place the black plastic caps 22 on the outside exposed threads ...

Reviews: