background image

Summary of Contents for CT-W606DR - Dual Cassette Deck

Page 1: ...closed war rarity card and keep it in a secure area This is for your security CAUTION This product satisfies FCC regulations when shielded cables and connectors are usedlo connect the unit to other equipment To prevent electromagnetic interference with electric appliances such as radios and televisions use shielded cables and connectors for connections Thisproduct complies with the Low Voltage Dir...

Page 2: ...nding type plug e plug having a third grounding pin it willooly fit into a grounding typa power outlet This laa sofety feature If you are unable to insert the plug into the outlet contact your electrleisn to replace your obsolete outlet Do not defeat the safety purpose of the grounding type plug POWER CORD PROTECTION Power supply cords should be routed so that they are not likely to be walked on o...

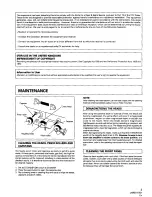
Page 3: ...uite easily If these parts particularly the heads get dirty the high fre quency components of e recording will not be reproduced and the stereo balance will be impaired resulting in a deterioration of the playback sound It is therefore recommended that the head section be cleaned regularly 1 Set the STANDBY ON switch to STANDBY 2 Press the eject button to open the cassette door 3 Dip a cleaning sw...

Page 4: ...l heat and humidity If cassette tapes are irregularly wound the tape may get jammed in the rollers This can cause damage to both the tape and the deck If you are not certain whether the tape is wound evenly fast forward or rewind the tape from beginning to end to make sure that the tape is properly wound I CHECK CASSETrE BEFORE USE Check the following items before loading a cassette tape Is the ta...

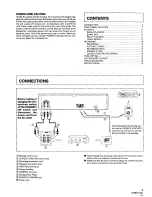
Page 5: ...1 MUSIC SEARCH 12 RECORDING 13 RECORDING 13 AUTO BLE TUNING 13 RECORDING MUTE 14 ERASING A TAPE 14 CD DECK SYNCHRO RECORDING 14 TAPE COPYING 15 LAST MEMORY FEATURE 15 TROUBLESHOOIING 16 SPECIFICATIONS 18 CONNECTIONS Before making or changing the con _ nections switch I _ _1 off the STANDBY IIrt ON switch and L LI J J_ disconnect the _ _ _ power cord from _ W W the AC outlet _ L_ Concerning about t...

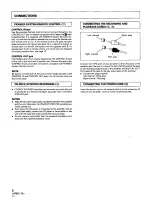
Page 6: ... CD DECK SYNCHRO RECORDING _ CD DECK SYNCHRO recording can be carried out when this unit is connected to a Pioneer CD player equipped with a CD DECK SYNCHRO jack NOTES Keep the input and output jacks connected between the amplifier and this unit otherwise the CDoDECK SYNCHRO recording can not be carried out Even when the CDplayer is connected to the amplifier with an optical fiber cable connect th...

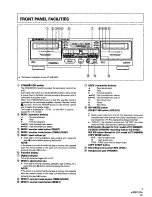
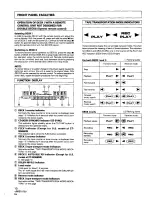
Page 7: ... the eject button 1_ Function display _ Digital Indicator Turns off while the DigitaI NR is OFF _ DECK I eject button If the tape is moving recording playback tape winding etc press the stop I button before pressing this button NOTE If the power is turned off while the tape is moving the cassette door may remain locked In this case turn the power on before pressing the eject A button _ DECK I coun...

Page 8: ...evel and equalization BLE this system checks the tape s recording capability by using relatively high level high range test signals During recording AUTO BLE XD controls the bias to maximize the tape s recording capability This makes possible a more faithful recording of sources having a wide dynamic range in the high range You can switch between AUTO BLE and AUTO BLE XD Refer to page 13 for the s...

Page 9: ... type NR system reduces noise in the treble range cutting tape hiss and expanding the dynamic range The Dolby C type NR system is even more effective in reducing noise as it re duces noise from the mid range on NOTE When a tape has been recorded using the Dolby B type or C type NR system the same DOLBY NR system selected for recording must be selected for playback Repeat mode _ _ position RELAYPLA...

Page 10: ...utton is pressed and the operation starts _ FLEX Indicator Except for U S model of CT W606DRI This indicator lights when the FLEX button is pressed _ DECK 1 counter indicator Normally the tape counter or time counter is displayed see page 11 It flashes for 4 seconds after the power cord is con nected to the power supply _ DECK I tape transport mode indicators See table entitled TAPE TRANSPORTATION...

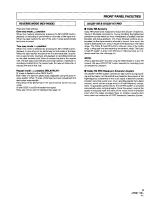
Page 11: ...d a prerecorded tape in DECK or 1 2 Select the Dolby NR mode with the OOLBY NR button Always set the same Dolby NR system that was used for re cording 3 Select the reverse mode with the REV MODE button see page 9 4 Set the stereo amplifier for tape playback 5 Press the playbeck _ er button of either DECK I er rl To improve high frequency sound during playback In tapes with poor recordings Except f...

Page 12: ... press the mH_button once To return to a previously played song press the button as many times as the number of songs to be skipped plus one From the stop mode Press the playback 1_ or button to set the playback mode then press the P_ or _ button to perform music search as mentioned above If the button is pressed more times than the number of selection To stop playback temporarily DECK 11 only Pre...

Page 13: ...ry differently during recording and play is is due to differences in tape sensitiv t AUTO BLE XD TUNING Except for U S I model of CT W606DR See page 8 AUTO BLE XD 1 Load a tape for recording in DECK l The AUTO BLE XD does not work when the erasure preven tion tabs of the loaded cassette tape have been broken off 2 Press the BLE XD button The BLE XD indicator will flash for about 50 seconds after w...

Page 14: ...01 1540 PIONEER ELECTRONICS OF CANADA INC 300 AltstateParkway Markham OntarioL3R 0P2 Canada PIOI_EER ELECTRONIC EUROPIE N V Haven1087 Keetberglaan1 9120 Melsele BelgiurnTEL 03 570 05 11 PIONEER ELECTRONICS AUSTRALIA PTY LTD 178 184 Boundar Road Braeside Victoria3195 Australia TEL 03 95866300 PIONEER ELECTRONICS DE MEXICO S A DE C V SanLorenzoNumlOO93erplsoDesp 302CoI DelValle MexicoD F C P 03100 T...

Reviews: