TIVO UPGRADE INSTRUCTIONS
(c) 2001-2003, Adberg Consulting LLC. All rights reserved.
Pioneer DVD/TiVo Upgrade Instructions
DVR-810H / DVR-57H
These instructions are also available in COLOR at http://www.weaknees.com/upgrade_instructions.php
WORDS OF CAUTION:
Please be aware that upgrading presents a few physical hazards. As with most consumer electronics devices, components in the TiVo may still carry
a lethal charge, even after disconnecting from your power supply. Be aware of this while working inside your TiVo. Allow sufficient time for
discharging of components and avoid contact as much as possible with potential hazards. While we have done everything we can to provide accurate,
easy-to-follow instructions, we cannot be responsible for any damage done to your TiVo or to yourself as a result of your upgrade. Please be VERY
careful when upgrading. NEVER open the TiVo while the unit is plugged in and NEVER operate the TiVo if the lid is not securely fastened. Please
Note: Opening the TiVo
voids the warranty
.
This Kit Includes
(1) Upgrade hard drive
(1) Set of upgrade instructions
1.
PREPARE FOR THE UPGRADE
Before you remove the cables from the back of your TiVo, you
may want to label each cable so that you'll know exactly how to
re-attach your TiVo when you are finished with your upgrade.
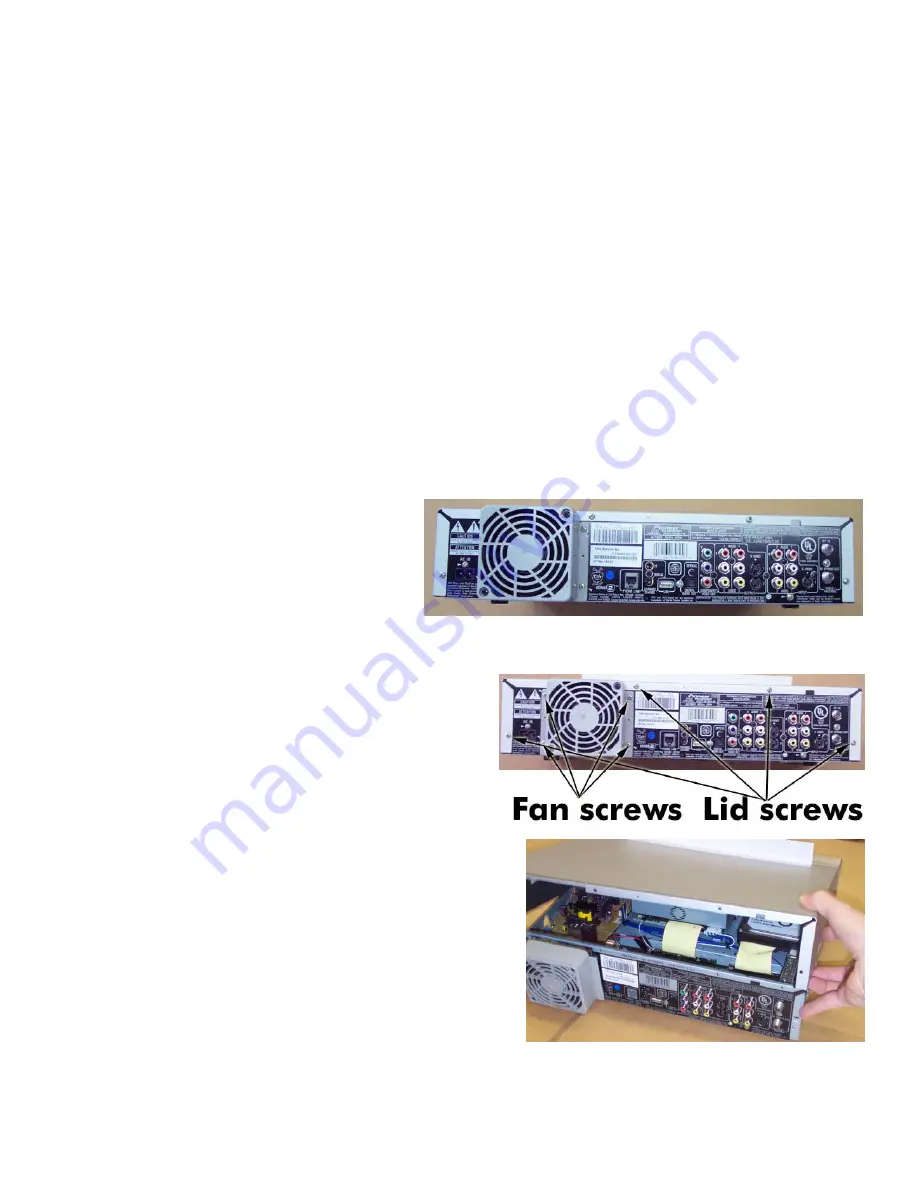
Pictured at the right is the back of the TiVo, without any cables
attached.
2.
OPEN THE TIVO
After unplugging the power cord from the TiVo, wait five minutes for the
TiVo to discharge. Do not plug the TiVo back in until you are completely
finished. Do not perform this upgrade on carpet, and be careful of static
electricity.
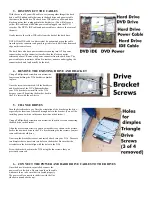
Using a Phillips-head screwdriver, remove (a) the four screws connecting the
TiVo’s lid to the case, (b) the four screws connecting the fan to the TiVo, and
(c) the two screws on each side of the TiVo (not shown in the picture). Set
these twelve screws aside. Do not confuse the four silver screws from the sides
of the TiVo with the other screws that you removed from the back.
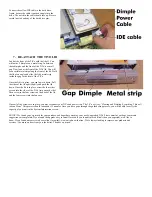
Once these screws have been removed, you will be able to remove the lid. To
do this, first situate yourself at the back of the TiVo. Then, lean the fan back
slightly from the rear of the unit (do not pull the fan hard, as it is connected to
the inside of the TiVo – you only need to move it about a half inch back). Once
the fan case has been separated from the back of the TiVo, reach under the
back bottom corner of the TiVo and unclip the lid on each side by pulling the
side of the lid out away from the base of the TiVo. Once you have the lid
unclipped, rotate the lid up a bit and then slide it toward you.


