background image

RCS-LX60D

SX-LX60D
SSP-LX60D
DVR-LX60D

Audio Multi-channel Receiver Subwoofer

Speaker System

HDD/DVD Recorder

Operating Instructions

Discover the benefits of registering your product online at 

http://www.pioneer.co.uk


(or 

http://www.pioneer.eu

)

®

®

RCS-LX60D_WV.book 1 ページ 2007年4月24日 火曜日 午後7時57分

Summary of Contents for DVR-LX60D

Page 1: ... SSP LX60D DVR LX60D Audio Multi channel Receiver Subwoofer Speaker System HDD DVD Recorder Operating Instructions Discover the benefits of registering your product online at http www pioneer co uk or http www pioneer eu ...

Page 2: ...CAUTION RISK OF ELECTRIC SHOCK DO NOT OPEN IMPORTANT WARNING This equipment is not waterproof To prevent a fire or shock hazard do not place any container filed with liquid near this equipment such as a vase or flower pot or expose it to dripping splashing rain or moisture D3 4 2 1 3_A_En Operating Environment Operating environment temperature and humidity 5 ºC to 35 ºC 41 ºF to 95 ºF less than 85...

Page 3: ...u will ensure that your disposed product undergoes the necessary treatment recovery and recycling and thus prevent potential negative effects on the environment and human health K058_En Replacement and mounting of an AC plug on the power supply cord of this unit should be performed only by qualified service personnel D3 4 2 1 2 2_B_En If the AC plug of this unit does not match the AC outlet you wa...

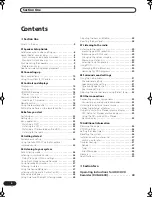
Page 4: ...iever 27 Listening with Acoustic Calibration EQ 28 Enhancing dialogue 28 Using Quiet and Midnight listening modes 28 Adjusting the bass and treble 28 Boosting the bass level 28 07 Listening to the radio Listening to the radio 29 Improving poor FM reception 29 Improving poor AM sound 29 Changing the noise cut mode 29 Memorizing stations 30 Listening to station presets 30 Using RDS 30 Displaying RDS...

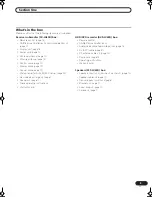
Page 5: ...page 10 Microphone for Auto MCACC setup page 24 Non skid pads large x4 page 7 Spacers x2 page 11 These operating instructions Warranty card HDD DVD recorder DVR LX60D box Remote control AA R6P dry cell batteries x 2 Audio video cable red white yellow page 14 G LINK cable page 51 RF antenna cable x 2 page 14 Power cord page 14 Operating instructions Warranty card Speakers SSP LX60D box Speakers fro...

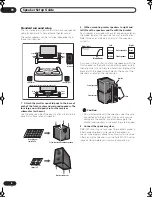
Page 6: ...oneer s proprietary New Front Surround technology and Dual Center Speakers using only two speaker positions to right and left of television as shown in the illustration in order to provide full home theater sound while greatly simplifying the issue of speaker placement Front surround setup recommended This recommended method places the surround speakers in front to simplify the issue of speaker pl...

Page 7: ...e center speakers independently stack the front speaker on the bottom and the surround speaker on top then align the 1st and 3rd screw holes from the top of the bracket with the upper screw holes on the back of the speakers and fasten the two securely Caution Do not attempt to carry the speakers when they are connected with the bracket Doing so may cause damage to the bracket or worsen damage to t...

Page 8: ... then align the 1st and 3rd screw holes from the top of the bracket with the upper screw holes on the back of the speakers and fasten the two securely Caution Do not attempt to carry the speakers when they are connected with the bracket Doing so may cause damage to the bracket or worsen damage to the bracket and speakers in the event they are dropped 3 Connect the speaker system Refer to Connectin...

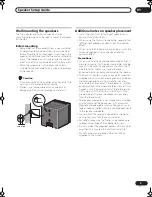
Page 9: ... for optimum effect Precautions When installing the center speaker on top of the TV be sure to secure it with tape or some other suitable means Otherwise the speaker may fall from the TV due to external shocks such as earthquakes endangering those nearby or damaging the speaker The front x2 center x2 and surround x2 speakers supplied with this system are magnetically shielded However depending on ...

Page 10: ...sembly or installation insufficient mounting strength of walls mounting fixtures or other building fixtures misuse or natural disasters AC IN DIGITAL AUDIOOUT COAXIAL HDMIOUT CONTROL G LINK IN AV1 RGB ñ TV AV2 INPUT1 DECODER S VIDEO VIDEO AUDIO L R INPUT3 COMPONENTVIDEOOUT Y PB PR ANTENNA IN OUT ANTENNA DIGITAL IN OUT 5V 30mA OUTPUT MCACC SETUP MIC SYSTEM CONNECTOR AC IN CONTROL IN CONTROL USE ONL...

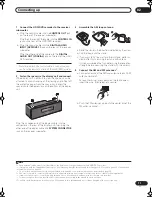
Page 11: ...ing the stand with screws It is recommended that you determine the reception strength before securing the stand with the screws 4 Connect the AM and FM antennas1 a Connect one wire of the AM loop antenna to each AM antenna terminal2 For each terminal press down on the tab to open insert the wire then release to secure b Push the FM antenna3 plug onto the center pin of the FM antenna socket Note th...

Page 12: ...rs in the same way Connect the other end to the color coded speaker terminals on the rear of the receiver subwoofer Make sure to insert completely The small lug at the wire end of the speaker plug should face up or down depending on whether it s being plugged into one of the upper or lower speaker terminals Please make sure to connect correctly MCACC SETUP MIC SYSTEM CONNECTOR AC IN CONTROL IN USE...

Page 13: ...necting cable Plug this into the SUBWOOFER SPEAKER terminal Caution These speaker terminals carry HAZARDOUS LIVE voltage To prevent the risk of electric shock when connecting or disconnecting the speaker cables disconnect the power cord before touching any uninsulated parts Do not connect any speakers other than those supplied to this system Do not connect the supplied speakers to any amplifier ot...

Page 14: ...acks on the receiver subwoofer Use the red white stereo audio cable not supplied for this connection Make sure you match the left and right outputs with their corresponding inputs for correct stereo sound You can use the ANALOG AUDIO INPUT jacks for any analog source you want such as a tape deck etc AC IN DIGITAL AUDIOOUT COAXIAL HDMIOUT CONTROL G LINK IN AV1 RGB ñ TV AV2 INPUT1 DECODER S VIDEO VI...

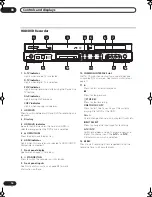
Page 15: ...tening modes is selected page 27 SURR Lights when one of the Advanced Surround listening modes is selected page 27 3 SOUND Lights when Sound Retriever is active page 27 4 Tuner indicators Lights when a broadcast is being received Lights when a stereo FM broadcast is being received in auto stereo mode Lights when FM mono reception is selected Lights when in one of the RDS display or search modes 5 ...

Page 16: ...to standby 9 Front panel inputs See Front panel connections on page 49 for more information on these 10 COMMON INTERFACE slot Slot for CA module and smart card used to decode scrambled D TV channels See Common Interface on page 17 11 Press to start or restart playback Press to stop playback STOP REC Press to stop recording ONE TOUCH COPY Press to start One Touch Copy of the currently playing title...

Page 17: ...when the recording mode is set to EP extended play or SEP super extended play MN Lights when the recording mode is set to MN manual recording level mode 6 Character display 7 R RW Lights when a recordable DVD R or DVD RW disc is loaded 8 PL page 105 Lights when a VR mode disc is loaded and the recorder is in Play List mode 2 3 page 145 Shows the remote control mode if nothing is displayed the remo...

Page 18: ...rding Press repeatedly to set the recording time in blocks of 30 mins When the red action button is visible in a GUIDE Plus screen use for One Button Record STOP REC Press to stop recording 7 INFO While watching D TV press to display information banner Press to see additional information highlighted item in the EPG 8 HELP Press for help on how to use the current GUI screen RECORDER RECEIVER SOUND ...

Page 19: ...layed use to display the previous next page 16 VOLUME Use to adjust the volume 17 GUIDE Plus Action buttons Use when an EPG screen is displayed or when tuned to a data channel of a digital broadcast The function of each button will be described on screen and changes depending on the screen being displayed AUDIO page 82 98 99 Press to change the audio language or channel When the recorder is stoppe...

Page 20: ... start the MHEG application display UK only if available during digital broadcasts TV DVD Press to switch between TV mode in which you get the picture and sound from the TV s tuner and DVD mode in which you get picture and sound from the system s tuner or an external input 28 DISPLAY page 99 Displays changes the on screen information displays RDS DISP Changes RDS displays page 30 29 MAIN SUB Chang...

Page 21: ...ther although they may look similar different batteries may have different voltages Make sure that the plus and minus ends of each battery match the indications in the battery compartment Remove batteries from equipment that isn t going to be used for a month or more When disposing of used batteries please comply with governmental regulations or environmental public instruction s rules that apply ...

Page 22: ...ch off the display demo mode page 24 Complete the Auto MCACC setup to optimize the surround sound page 24 OPEN HDD DVD DivX COPY HDMI OPEN CLOSE ST ANDBY ON USB DV IN CH INPUT SELECT STOP REC ONE TOUCH COPY INPUT 2 VIDEO S VIDEO L MONO R AUDIO REC A TV D TV COMMON INTERFACE PLTV D TV A TV HDD DVD Recorder DVR LX60D Display Unit RECORDER RECEIVER SOUND RETRIEVER AUDIO IN HDD DVD PAUSE PLAY STOP INF...

Page 23: ...ning to a CD 1 Switch on the display unit receiver subwoofer 2 Switch on the HDD DVD recorder 3 Press HDD DVD to select DVD 4 Load a CD and start playback page 93 5 Adjust the volume 6 Adjust the sound using the surround effects page 26 Watching a title recorded on the HDD 1 Switch on the display unit receiver subwoofer 2 Switch on the HDD DVD recorder 3 Switch on your TV 4 Press HDD DVD to select...

Page 24: ...settings and equalization Acoustic Calibration EQ for your particular room 1 Important The test tones used for Auto MCACC setup are loud however do not turn the volume down during setup as this may result in a sub optimal setup Make sure the microphone and speakers are not moved during the MCACC setup MCACC ANGLE SUBTITLE AUDIO RECMODE PAUSELIVETV ONETOUCHCOPY TIMERREC SETUP F S SURR TESTTONE SOUN...

Page 25: ...e the volume level returns to normal COMPLETE3 shows in the display and Acoustic Calibration EQ is activated 4 Note 1 If the room environment is not optimal for the Auto MCACC setup too much ambient noise echo off the walls obstacles blocking the speak ers from the microphone the final settings may be incorrect Check for household appliances air conditioner fridge fan etc that may be affecting the...

Page 26: ...MOVIE Dolby Pro Logic II Movie 5 1 channel surround sound especially suited to movie sources for use with any two channel source MUSIC Dolby Pro Logic II Music 5 1 channel surround sound especially suited to music sources for use with any two channel source see Dolby Pro Logic II Music settings below STEREO See Listening in stereo on page 27 Dolby Pro Logic II Music settings When listening in Dolb...

Page 27: ...bwoofer and front speakers X STEREO Powerful surround sound for stereo music sources Listening in stereo You can listen to any source stereo or multichannel in stereo When playing a multichannel source all channels are downmixed to the front left right speakers and the subwoofer Press SURROUND repeatedly until STEREO shows in the display You can also use the SURROUND button on the display unit to ...

Page 28: ...istening feature reduces excessive bass or treble in a sound source The Midnight listening feature allows you to hear effective surround sound of movies at low volume levels 1 Press SOUND 2 Use the buttons to select TONE then press ENTER 3 Use the buttons to select QUIET or MIDNIGHT then press ENTER to confirm To cancel the Quiet or Midnight listening modes select BASS TRE Adjusting the bass and t...

Page 29: ...UP 2 Use the buttons to choose FM MODE then press ENTER 3 Use the buttons to select FM MONO then press ENTER The mono indicator lights when the tuner is in mono reception mode Select FM AUTO above to switch back to auto stereo mode the stereo indicator lights when receiving a stereo broadcast Improving poor AM sound The simplest way to improve the sound quality of AM radio is to make sure that the...

Page 30: ... one searching stops for five sec 5 If you want to keep listening to the station press ENTER within the five seconds If you don t press ENTER searching resumes NEWS News AFFAIRS Current Affairs INFO General Information SPORT Sport EDUCATE Educational DRAMA Radio plays etc CULTURE National or regional culture theater etc SCIENCE Science and technology VARIED Usually talk based material such as quiz...

Page 31: ...l by 10 dB If the system is in Stereo or Virtual mode or a stereo source is playing in Auto mode you will not be able to adjust the center or surround channels 5 Press ENTER when you re finished If you use the Auto MCACC feature again it will overwrite the settings you have made here Speaker distance setting The Auto MCACC feature see page 24 should give you the best surround sound setup However y...

Page 32: ...te that the channel level settings for stereo sources are independent of the settings for surround sound sources 1 Press SURROUND to select the Auto listening mode If you want to set the channel levels for stereo two channel playback select the STEREO listening mode 2 Press TEST TONE The test tone is output from each speaker in turn 3 While a test tone is playing use the buttons to adjust that cha...

Page 33: ...dio component can be connected Listening to an external audio source You can connect both analog and digital external audio sources to this system Digital audio sources include digital satellite receivers CD recorders etc Analog sources include your TV See also Using this system for TV audio on page 14 and Connecting auxiliary components above 1 If the system isn t already on press RECEIVER to swi...

Page 34: ...or Pioneer plasma displays on page 35 MCACC SETUP MIC SYSTEM CONNECTOR AC IN CONTROL IN CONTROL USE ONLYWITH DISPLAY UNIT SEE INSTRUCTION MANUAL OUT SUBWOOFER CENTER FRONT SURROUND DVD DVR1 COAXIAL DVD DVR2 OPTICAL DIGITAL OPTICAL SPEAKERS DIGITAL AUDIO INPUT ANALOG R L R L R L AM LOOP ANTENNA ANTENNA FMUNBAL75 AM LOOP ANTENNA ANTENNA FMUNBAL75 Outdoor antenna external FM antenna external AM anten...

Page 35: ...ction of the receiver subwoofer to DV1 to watch your HDD DVD recorder the plasma display will automatically switch to input 2 For each receiver subwoofer input function DV1 DVD DVR1 DV2 DVD DVR2 DIG DIGITAL ANA ANALOG you can select NONE does not switch the plasma display input PDP1 to PDP7 switches the plasma display input to one of the numbered inputs Note that the number displayed may vary depe...

Page 36: ...p without worrying about it 2 1 Press the SLEEP button to select an option Choose between the following options SLP ON Switches off after about an hour SLP OFF Cancels the sleep timer After selecting SLP ON you can press SLEEP again to check how much time is left Each line indicates approximately 12 minutes remaining Resetting the system Use this procedure to reset all system settings to the facto...

Page 37: ...sert again to return to normal operating conditions If there is no sound or no multichannel sound from the DVR LX60D HDD DVD recorder try setting the recorder s audio related settings back to their defaults see The Initial Setup menu on page 137 General Problem Remedy The power does not turn on or switches off suddenly an error message may be displayed at startup Leave the unit plugged in wait for...

Page 38: ...ully extend the FM wire antenna position for best reception and secure to a wall You may also connect an outdoor FM antenna see Connecting external antennas on page 34 Turn off other equipment that may be causing the noise or move it further away Auto tuning does not pick up some stations The radio signal is weak Auto tuning will only detect radio stations with a good signal For more sensitive tun...

Page 39: ... Warranty card 1 This operating instructions SSP LX60D Speaker system Front speakers x2 surround speakers x2 center speakers x2 Front surround speakers Enclosure Closed box bookshelf type magnetically shielded System 7 7 cm 1 way system Speakers 7 7 cm cone type Nominal impedance 4 Ω Frequency range 80 Hz to 20 kHz Maximum input power 100 W Dimensions 100 mm W x 100 mm H x 102 5 mm D Weight 0 55 k...

Page 40: ... Section Two HDD DVD Recorder DVR LX60D ...

Page 41: ...3 Pause Live TV 84 About timer recordings 86 Timer recording FAQ 87 Simultaneous recording and playback Chase Play 87 Recording from an external component 88 Playing your recordings on other DVD players 88 Initializing recordable DVD discs 89 DVD RW Auto Initialize 90 07 Playback Introduction 91 Basic playback 91 Using the Disc Navigator to browse the contents of a disc 94 Scanning discs 95 Playin...

Page 42: ... Software Update Digital tuner 147 16 Additional information Setting up the remote to control your TV 148 TV Preset code list 149 Minimum copying times 150 Manual recording modes 151 Troubleshooting 152 If the picture freezes and the front panel and remote control buttons stop working 155 On screen displays 156 Front panel displays 158 Language code list 158 Country Area code list 159 Screen sizes...

Page 43: ... disc If you want to share DVD RW discs between this recorder and an older recorder writer we recommend using ver 1 1 discs The following table shows older Pioneer DVD recorders limited compatibility with DVD RW ver 1 2 discs 1 Discs should be finalized in this recorder before playing Unfinalized VR mode and Video mode discs may not play 2 Cannot read the CPRM information will show in the display ...

Page 44: ... does not increase the available recording time nor increase the number of recordable titles left 15 Must be compatible with DVD R playback 16 Depending on the disc it may have to be initialized before it can be recorded page 132 In this case initialization will take about an hour is a trademark of DVD Format Logo Licensing Corporation Using DVD R DL DVD R DL discs DVD R DL Dual Layer and DVD R DL...

Page 45: ... playback Yes except CD Audio and Video CD Super VCD Unfinalized disc playback CD Audio only Compressed audio compatibility Compatible media DVD ROM DVD R RW DVD R RW DVD RAM CD ROM CD R CD RW USB Compatible formats MPEG 1 Audio Layer 3 MP3 Windows Media Audio WMA Sampling rates 32 kHz 44 1 kHz or 48 kHz Bit rates Any 128 kbps or higher recommended Variable bit rate VBR MP3 playback Yes VBR WMA pl...

Page 46: ... remaining plays the message Rental Expired is displayed If your DivX VOD content allows an unlimited number of plays then you may load the disc into your recorder and play the content as often as you like and no message will be displayed Important DivX VOD content is protected by a DRM system This restricts playback of content to specific registered devices If you load a disc that contains DivX V...

Page 47: ...ailure Do not move the recorder while it is on this includes during EPG download when the display shows EPG Install and use the recorder on a stable level surface Do not block the rear vent cooling fan Do not use the recorder in excessively hot or humid places or in places that may be subject to sudden changes in temperature Sudden changes in temperature can cause condensation to form inside the r...

Page 48: ...V or monitor with a component video input 7 OUTPUT Stereo analog audio video and S video outputs for connection to a TV or AV amplifier receiver 8 AV1 RGB TV AV connector Audio video output SCART type AV connector for connecting to a TV or other equipment with a SCART connector The video output is switchable between video S video and RGB See AV1 Out on page 140 for how to set this up 9 G LINK Use ...

Page 49: ...e antenna outlet on your wall use a divider Do not connect a component that can receive analog signals to the ANTENNA DIGITAL OUT If your area is not yet served with terrestrial digital services connect your antenna s output to the ANTENNA IN RF IN connector using one of the supplied RF antenna cables Next connect the recorder to your TV from the ANTENNA OUT connector We strongly recommend using a...

Page 50: ...programme from the built in TV tuner in this recorder while watching a video playing on your VCR To use this feature when the recorder is in standby Power Save must be set to Off see Power Save on page 137 Using the S video or component video output If you can t use the SCART AV connector to connect your TV to this recorder there are standard audio video output jacks as well as an S video and comp...

Page 51: ...1 Connect RF antenna cables as shown See Connecting a TV antenna on page 49 for more on RF antenna connections including from this recorder to your TV 2 Use a SCART cable not supplied to connect the AV1 RGB TV AV connector to a SCART AV connector on your TV This enables you to watch discs 3 Use another SCART cable to connect the AV2 INPUT 1 DECODER AV connector to a SCART AV connector on your cabl...

Page 52: ...tenna cable TV outlet to the antenna input on your VCR satellite receiver cable box 2 Use a SCART cable not supplied to connect your decoder to your VCR satellite receiver cable box See the manual for your decoder box for more detailed instructions 3 Use a SCART cable to connect your VCR satellite receiver cable box to the AV2 INPUT 1 DECODER AV connector on this recorder 4 Use a SCART cable to co...

Page 53: ...ge them or connect a new HDMI component Important An HDMI connection can only be made with DVI equipped components compatible with both DVI and High bandwidth Digital Content Protection HDCP If you choose to connect to a DVI connector you will need a DVI to HDMI adaptor cable A DVI to HDCP connection however does not support audio Consult your local audio dealer for more information The HDMI conne...

Page 54: ...ection Alternatively you can use the AV2 INPUT 1 DECODER SCART connector for audio video input and output with just one SCART cable 2 Connect a set of audio and video outputs of your VCR or camcorder to a set of inputs on this recorder This enables you to record tapes from your VCR or camcorder You can use standard video or S video cables for the video connection The front panel connections make c...

Page 55: ...ndently powered hub bus powered hubs may not work reliably In the event of unreliable operation with the hub we recommend plugging the device directly into the recorder s USB port Operation may become unreliable if too many devices are connected to the hub In this case try unplugging some devices If the power delivered through a hub is insufficient for the devices connected communication can becom...

Page 56: ...ed aerial whether the recorder is on or in standby Auto power is only supplied when this recorder is on Off power is never supplied to the aerial 6 Select Auto Scan to start scanning for D TV channels Select Do not set if you want to skip D TV channel setup because they have already been set up for example then skip to step 8 below 7 Select your country The recorder starts scanning for new channel...

Page 57: ...t while to set the time After you see that it s set select Next to proceed If the time could not be set automatically press RETURN EXIT to go back to the previous screen and select Manual Manual clock setting If no stations in your area are broadcasting time signals you can set the clock manually Use the buttons to set your time zone You can set this by selecting a city or a time relative to GMT P...

Page 58: ... on page 139 For users receiving digital broadcast services This unit can set its internal clock automatically from digital broadcasts However depending on the broadcaster the clock information received may not be accurate Use the following procedure while the recorder is not recording to set the clock manually 1 Press HOME MENU 2 Select Initial Setup Basic Clock Setting 3 Highlight the time setti...

Page 59: ...of these things are not yet set please run the Setup Navigator first see Switching on and setting up on page 56 TV listings information is received via host channels In order to receive the correct TV listings information for your country or region you need to set up the GUIDE Plus system and download the TV listings information The initial download can take up to 24 hours but once this is done al...

Page 60: ...s FAQ and troubleshooting on page 71 5 Identify the host channel for your country The TV listings information available in the GUIDE Plus system is distributed throughout Europe by selected broadcasters called host channels It is important that the host analog channel for your country is correctly identified in order to receive listings information EPG download Follow A B or C below depending on y...

Page 61: ...that are OFF are hidden Use the buttons to move down the list and turn channels ON or OFF as necessary For any channel that you turn ON the GUIDE Plus system will need to know how it is received the source and on which programme number The source may be the built in tuner of this recorder or an external receiver The programme number is the number on which the channel can be found on its receiving ...

Page 62: ...ned by or licensed to Gemstar TV Guide International Inc and or its related affiliates Legal Notice GEMSTAR TV GUIDE INTERNATIONAL INC AND OR ITS RELATED AFFILIATES ARE NOT IN ANY WAY LIABLE FOR THE ACCURACY OF THE PROGRAMME SCHEDULE INFORMATION PROVIDED BY THE GUIDE PLUS SYSTEM IN NO EVENT SHALL GEMSTAR TV GUIDE INTERNATIONAL INC AND OR ITS RELATED AFFILIATES BE LIABLE FOR ANY AMOUNTS REPRESENTIN...

Page 63: ...mains visible in the video window The date stamp above the window lets you know the channel date and time The default setting for this window is locked as indicated by a closed padlock icon above the video window When locked the video window always shows the channel you were previously watching as you move up and down through the listings grid If you prefer you can unlock the video window so that ...

Page 64: ... listings screen of the GUIDE Plus system and is the first screen that you see when you press GUIDE You can see TV listings for the next seven days starting with the current day When you highlight a programme in the Grid you can see information about it in the Information Box including title synopsis channel source time and length If there is an i symbol in the Information Box it means that there ...

Page 65: ...p in the search results 3 Start the search The search results are shown sorted by time and date If no search results are displayed it means there are no programmes for the current day that match your search criteria Using My Choice keywords for a search In addition to the standard categories you can also set your own keywords 1 Access My Choice 2 Press the YELLOW Action button to add a keyword 3 E...

Page 66: ...ries and 16 keywords 1 Select My TV from the Menu bar 2 Press the YELLOW Action button to set a profile Channels is now highlighted 3 To add a channel to your profile press the YELLOW Action button Select a channel from the mosaic of channel icons and press ENTER Repeat this step to add up to 16 channels 4 To add a category to your profile highlight Categories and press the YELLOW Action button Se...

Page 67: ...and number buttons to edit the recording date start time end time and channel Use the buttons or the number buttons to edit Press the GREEN Action button to go to continue or the RED Action button to go back 4 Enter a name for the scheduled recording Use the buttons followed by ENTER to select characters from the on screen keyboard After entering the whole name press the GREEN Action button to con...

Page 68: ... on page 142 is set to On and VPS PDC is off the recorder will adjust the recording quality to try and fit the recording on the disc If the recording will not fit onto the disc even on MN1 recording quality MN4 for DVD R RW then the Recovery Recording feature will automatically make the recording to the HDD instead If there is very little free space left on the HDD an Auto Replace Recording may no...

Page 69: ...r Follow the on screen display to do this 4 Press ENTER to confirm Setting a manual recording 1 Select Schedule from the Menu bar 2 Press the GREEN Action button Manual 3 Use the number and buttons to enter the recording date then press the GREEN Action button Next 4 In the same way enter the recording start time followed by the GREEN Action button Next to confirm 5 Enter the recording end time in...

Page 70: ...ay a channel in the Grid Area by switching the channel on or off in the Editor Area 1 Select Editor from the Menu bar 2 Highlight the left channel tile of the channel you want to switch on or off 3 Press the RED Action button to switch the channel on or off Changing the source and programme number 1 Select Editor from the Menu bar 2 Highlight the right channel tile of the channel you want to make ...

Page 71: ...connections could be wrong Make sure that the G LINK cable is connected to the G LINK connector on the recorder and the IR blaster is in front of the external receiver pointing towards the IR receiver of your external receiver See Connecting to a cable box or satellite receiver on page 51 The code that is listed under your brand could be wrong Please try other codes for your brand under satellite ...

Page 72: ... been connected for enough time to receive the TV listings data Leave the recorder in standby overnight For external receiver users only The connections and setup are OK but the external receiver was not tuned to the correct host channel Check the list of host channels see step 5 of Setting up the GUIDE Plus system on page 59 and leave the recorder in standby and the external receiver on overnight...

Page 73: ...e all relevant EPG information is displayed General Programme List 1 Appears when the schedule table can be scrolled forward or backward 2 Time schedule 3 Channel list 4 Highlights the currently selected channel 5 Indicates the programme set for recording 6 Appears when other programmes often short ones have been scheduled for the same period 7 Programme title 8 Time dividers The general programme...

Page 74: ...me to acquire EPG data 3 Press to view more information about the selected programme Detailed information appears in the schedule window If the screen contains further information More is displayed To quit the display of detailed information press INFO again or RETURN EXIT 4 Press to exit the Digital EPG screen Setting timer programmes Using the Digital EPG it s easy to set digital TV programmes f...

Page 75: ...ll adjust the recording quality to try and fit the recording on the disc If the recording will not fit onto the disc even on MN1 recording quality MN4 for DVD R RW then the Recovery Recording feature will automatically make the recording to the HDD instead If there is very little free space left on the HDD an Auto Replace Recording may not complete successfully If the HDD is being used for playbac...

Page 76: ...tering all the timer recording information highlight Store Programme and press ENTER The timer recording list screen is displayed again The timer programme you just input appears in the list The rightmost column shows various timer recording status messages OK Can be recorded Time Over Not enough space on the HDD the recording won t finish Over 12h Recording time of over 12 hours set when recordin...

Page 77: ...e If you ve set a regular daily or weekly timer programme you can set the recorder to skip the next scheduled recording 1 Press TIMER REC 2 Highlight the timer programme you want to skip 3 Press then select Cancel Once from the command menu panel In the timer programme list Cancel Once appears by the programme You can also just press PAUSE when the timer programme is highlighted Checking for alter...

Page 78: ...ithin one week to jump to 3 In the Time field select a time of the day 0 00 to 23 00 to jump to 4 Select Jump The Programme List for the specified day and time is displayed EPG Search 1 Press YELLOW when the EPG screen Programme List Detailed information or Search Result is displayed 2 In the Date field select a date within one week to search in 3 In the Time field select the time of day 0 00 to 2...

Page 79: ... the total number of recordable titles remaining may not increase Although this recorder can record PAL SECAM NTSC and PAL 60 you can t mix multiple TV line systems on one disc A disc can contain PAL and SECAM recordings or NTSC and PAL 60 See also Additional information about the TV system settings on page 146 Fingerprints dirt and small scratches on a disc can affect playback and or recording pe...

Page 80: ... Recording setting page 140 to select the A L or B R audio channel to record before recording starts In other cases both channels of a bilingual broadcast will be recorded and you can switch on playback Restrictions on video recording You cannot record copy protected video using this recorder Copy protected video includes DVD Video discs and some satellite broadcasts If copy protected material is ...

Page 81: ...nnel banner for the current channel Use the buttons to display the channel banner for other channels To switch to the displayed banner s channel press ENTER The channel banner displays the Subtitles and Teletext MHEG icon if they apply to the selected channel 4 To see more detailed channel information press INFO again 5 Use the buttons to display information about previous and following programmes...

Page 82: ... for a non NICAM bilingual broadcast When watching a recording made from an external input with Bilingual recording selected see External Audio on page 140 you can switch the audio channel between left L right R or both L R Note When recording to the HDD with HDD Recording Format set to Video Mode On to DVD R RW Video mode to DVD R RW or on the LPCM setting only one channel of a bilingual broadcas...

Page 83: ...rding time for a blank recordable disc If a recordable disc is loaded the approximate remaining recording time for that disc is also shown Note that if the On Screen Display setting see On Screen Display on page 144 is Off then this information is not displayed Basic recording from the TV Basic recording from the TV involves just setting the channel to record choosing whether to record to the HDD ...

Page 84: ...h on or CH to switch to SCART NORM loop through off Loop through is automatically reset to off after recording has finished Note that you can t switch loop through on if recording from the AV1 RGB TV connector Pause Live TV The Pause Live TV feature lets you effectively pause a TV programme you re watching When you re ready to resume watching just press the PLAY button Setting up for Pause Live TV...

Page 85: ...er button are inoperative Note that startup from standby is not possible if you have selected Recorder s Tuner in Pause Live TV on page 145 Please note that you can t record from another component VCR etc that is connected by a SCART cable to the AV2 INPUT 1 DECODER connector using the Pause Live TV feature Operation table 1 No Chase Play Warning if you change input this will stop the recording 2 ...

Page 86: ...imer recording will not start if The recorder is already recording A disc is being initialized finalized or unfinalized Timer recording will start when the operation preventing timer recording has finished When the front panel display is set to ON the timer indicator lights in the front panel display when the timer is active If the indicator is blinking it means that for a DVD timer recording ther...

Page 87: ...ncel the scheduled recording of the lesser important programme If one of the overlapping programmes is a regular timer programme for a digital broadcast you may choose Cancel Once in order to avoid having it overlap with a separately scheduled programme see Skipping a regular timer programme on page 77 Simultaneous recording and playback Chase Play Chase Play allows you to watch a recording that i...

Page 88: ...what kinds of discs it will play When you finalize a DVD R RW Video mode or DVD R disc a title menu is created from which you can select titles when you play the disc There are a number of different styles of title menu to choose from to suit the content of the disc All the title menus are navigated in the usual way pressing MENU or TOP MENU to display the menu then using the followed by ENTER to ...

Page 89: ...ch is recorded on the disc and the number of titles on the disc A disc recorded in VR mode can take up to one hour to finalize DVD R RW Video mode and DVD R RW discs can take up to 20 minutes Initializing recordable DVD discs DVD R RW discs can be initialized for either Video mode recording or VR mode recording 1 When you first load a blank DVD RW or DVD RW disc the recorder initializes it for rec...

Page 90: ...rried out when you insert a blank DVD RW You must set the desired initialization mode before inserting a disc 1 Select Disc Setup from the Home Menu 2 Select Basic DVD RW Auto Init then VR Mode or Video Mode HOME MENU ENTER Basic Initialize Finalize Optimize HDD Disc Setup VR Mode Video Mode Initialize DVD RW Start Start Start Initialize ENTER Initializing Disc 1 min left Pr 1 DVD RW HOME MENU ENT...

Page 91: ...nel Load a disc Load a disc with the label side facing up using the disc tray guide to align the disc if you re loading a double sided DVD Video disc load it with the side you want to play face down If you want to play a DTS audio CD please first read the note on page 93 3 Start playback If you re playing a DVD Video or Video CD a disc menu may appear when you start playback Use the buttons number...

Page 92: ...VD Video disc menu SETUP F S SURR ADVANCED SOUND CLEAR TEST TONE SR TUNE ENTER TUNE ST ST 1 2 3 4 5 6 7 8 0 9 ENTER CM SKIP CM BACK MENU TOP MENU DISC NAVIGATOR ENTER RETURN EXIT Press to start playback If RESUME is displayed on screen play back starts from the place last stopped Playback automatically stops after the end of a title is reached Press to stop playback You can resume playback from th...

Page 93: ...pressing PLAY Press STOP again to cancel the resume function 2 When playing in PBC mode some playback features such as search repeat and programme play are not available You can play a PBC Video CD Super VCD in non PBC mode by starting playback using the Disc Navigator see Using the Disc Navigator with playback only discs on page 95 PLAY STOP PAUSE PREV NEXT SETUP F S SURR ADVANCED SOUND CLEAR TES...

Page 94: ... back starts from the place last stopped Playback of titles DivX files proceeds in alphabetical order Press to stop playback You can resume playback from the same point by pressing PLAY Press STOP again to cancel the resume function Pauses playback or restarts playback when paused Press to start scanning Press repeatedly to increase the scanning speed Press to skip to previous next title During pl...

Page 95: ...cks or DivX titles you can switch the playback area between CD WMA MP3 and DivX This can only be done while the disc is stopped Scanning discs except WMA You can scan discs at various speeds forwards or backwards 1 1 During playback start reverse or forward scanning The scanning speed is shown on screen 2 Press repeatedly to change the scanning speed There are four scanning speeds available when p...

Page 96: ...playback from a specified point in a disc by time2 or by title chapter folder track number 1 Select Search Mode from the Play Mode menu then choose a search option The available search options depend on the type of disc 2 Enter a title chapter folder track number or a search time Time Search HDD DVD For example for 25 minutes into the current title press 2 5 0 0 For 1 hour and 15 minutes and 20 se...

Page 97: ... choose a repeat play mode To resume normal playback select Repeat Off from the Repeat Play menu or press CLEAR if no menu OSD such as the Play Mode menu is displayed Programme play This feature lets you program the play order of titles chapters3 folders tracks on a disc or the HDD 1 Select Programme from the Play Mode menu then Input Edit Programme The Input Edit Programme screen varies according...

Page 98: ... Programme List Erases the programme list and turns off programme play Displaying and switching subtitles Some DVD and DivX discs have subtitles in one or more languages the disc box will usually tell you which subtitle languages are available You can switch subtitle language during playback 1 Check the disc packaging for details of the subtitle options Select change the subtitle language The curr...

Page 99: ...143 Switch the camera angle The angle number is displayed on screen If the disc was paused playback starts again with the new angle Displaying disc information on screen You can display various on screen information about the disc loaded or the HDD Display change the on screen information Press once to show the HDD and removable disc DVD etc activity together Press again to show the status of just...

Page 100: ...ifferent frame rates of TV broadcasts versus DVD The frame number is shown next to the elapsed time display when the disc is paused Copy Once or Can t Record messages may appear in the stop or recording displays These indicate that the broadcast TV programme contains copy control information Rec Mode SP 2h00m DVD HDD Remain 10h35m Stop Remain h m Stop Hi Speed Copy HDD DVD 0h08m left DVD RW Video ...

Page 101: ...rotected using Copy Guard you will not be able to record it See Restrictions on video recording on page 80 for more details Recording from a DV camcorder The source signal must be DVC SD format You can t record date and time information from DV cassette During DV recording if a part of the tape is blank or has copy protected material on it this recorder will pause recording Recording will restart ...

Page 102: ...en using the HOME MENU or RETURN EXIT button DV Auto Copy DV Auto Copy allows you to make an exact copy of the contents of a DV source to the HDD or a DVD 1 Make sure your DV camcorder is connected to the front panel DV IN jack Also set the camcorder to VTR mode 2 Set the recording quality See Setting the picture quality recording time on page 83 for detailed information 3 From the Initial Setup m...

Page 103: ...DV cable for input of audio video data and control signals i LINK and the i LINK logo are trademarks This recorder is only compatible with DV format DVC SD camcorders Digital satellite receivers and Digital VHS video recorders are not compatible You cannot connect more than one DV camcorder at a time to this recorder You cannot control this recorder from external equipment connected via the DV IN ...

Page 104: ... mode DVD R RW DVD R RW DVD RAM VR mode Original Play List Create page 106 Play page 106 Erase page 106 Edit Title Name page 107 Edit Set Thumbnail page 108 Edit Erase Section page 108 Edit Divide page 109 Edit Chapter Edit page 109 Edit Set Genre page 110 Edit Lock page 111 Edit Move page 111 Edit Combine page 112 Genre Name page 112 Multi Mode page 113 Undo page 113 1 1 ...

Page 105: ...r you want to keep Video mode compatibility or frame accuracy Video Mode Compatible Editing or Frame Accurate Editing Frame Accurate Editing is very precise The edit point is accurate to the exact frame you choose However this accuracy is not preserved in any copy you make if you use the high speed copy function to make a DVD R RW Video mode or DVD R RW Video Mode Compatible Editing is less precis...

Page 106: ...itles or titles from a DVD R VR mode or Video mode or DVD R will not result in any more free space on the disc 1 Highlight the title you want to erase You can also use the Smart Jog to select titles 2 Select Erase from the command menu panel 3 Select Yes to confirm or No to cancel Tip You can erase a title quickly by pressing CLEAR when the title is highlighted Confirm the edit by pressing ENTER D...

Page 107: ...ing names DVD Video DVD VR DVD R DVD RW DVD RAM HDD ENTER Disc Navigator HDD 4 Titles Remain All Genres 10Titles 30h30m HDD SP Recent first 11 29 MON 7 00PM 11 29Mon 7 00PM 2ch SP 2h00m 1 0G 1 20 00 FRI 3 12 Pr 9 SP 20 00 Fri 3 12 Pr 9 SP 2h00m 1 0G 22 00 THU 2 12 Pr 7 SP 22 00 Thu 2 12 Pr 7 SP 1h00m 1 0G 19 00 MON 29 11 Pr 2 SP 19 00 Mon 29 11 Pr 2 SP 1h00m 1 0G 23 00 FRI 3 12 Pr 4 SP 23 00 Fri 3...

Page 108: ...ng accuracy on page 105 4 Highlight From then use the playback controls etc to find the start of the section to erase then press ENTER The bar at the bottom of the screen indicates the current play position in the title After pressing ENTER a marker shows the start of the section HDD DVD Video DVD VR DVD R DVD RW DVD RAM ENTER Disc Navigator HDD 4 Titles Remain All Genres 10Titles 30h30m Recent fi...

Page 109: ...de the title 5 Press to divide the title at the current playback position 6 Select Yes to confirm or No to cancel Chapter Edit When editing a VR mode DVD or video on the HDD you can edit individual chapters within a title with commands for erasing combining and dividing 1 Highlight the title that contains the chapters you want to edit You can also use the Smart Jog to select titles 2 Select Edit C...

Page 110: ...maining chapters into one Chapter Edit DVD VR mode Play List Rec time 1 1 Play 0 00 00 19 00 Mon 29 11 Pr 2 SP 1h00m Chapters 5 Exit Erase Move Combine Divide Chapter Edit DVD VR mode Play List 002 003 005 004 001 Rec time Chapter 1h00m 0h01m 19 00 Mon 29 11 Pr 2 SP Exit Erase Move Combine Divide Move Cancel Erase Chapter Edit DVD VR mode Play List 2 3 5 4 1 Rec time 19 00 Mon 29 11 Pr 2 SP 1h00m ...

Page 111: ...nres 10Titles 30h30m Recent first HDD SP 9 8 7 10 20 00 FRI 3 12 Pr 9 SP 20 00 Fri 3 12 Pr 9 SP 2h00m 1 0G 22 00 THU 2 12 Pr 7 SP 22 00 Thu 2 12 Pr 7 SP 1h00m 1 0G 19 00 MON 29 11 Pr 2 SP 19 00 Mon 29 11 Pr 2 SP 1h00m 1 0G 23 00 FRI 3 12 Pr 4 SP 23 00 Fri 3 12 Pr 4 SP 2h00m 1 0G Play Erase Edit Multi Mode Genre Name Cancel Title Name Erase Section Divide Cancel Set Thumbnail Set Genre Lock Chapter...

Page 112: ...ve Combine Chapter Edit ENTER Disc Navigator DVD 4 Titles Remain 10Titles 0h30m DVD VR Mode MENU Play List 11 29Mon 7 00PM 2ch SP 1 20 00 FRI 3 12 20 00 Fri 3 12 Pr 9 SP 2h00m 1 0G 22 00 THU 2 12 22 00 Thu 2 12 Pr 7 SP 1h00m 1 0G 19 00 MON 29 11 19 00 Mon 29 11 Pr 2 SP 1h00m 1 0G 23 00 FRI 3 12 23 00 Fri 3 12 Pr 4 SP 2h00m 1 0G 2 1 3 4 ENTER Yes OK to combine titles 1 and 3 No HDD ENTER Disc Navig...

Page 113: ...it my disc You may find that as the available recording time is reduced on a VR mode DVD R disc editing is no longer possible This is because information about your edits requires a certain amount of disc space As you edit this information builds up eventually preventing you from editing further HDD ENTER Disc Navigator HDD 4 Titles Remain All Genres 10Titles 30h30m Recent first HDD SP 11 29 MON 7...

Page 114: ...ain If you want to transfer copy once protected material from HDD to DVD you ll need to a CPRM ver 1 1 or higher VR mode DVD RW ver 2 0 or 2 1 VR mode DVD R or CPRM compatible DVD RAM disc see CPRM on page 80 for more on this Only one instance of a copy once protected title can be added to the Copy List and after it s been copied the title is erased from the HDD it is therefore not possible to cop...

Page 115: ...ver eight hours Titles recorded in MN1 to MN6 SEP SLP or EP mode cannot be copied to DVD R RW using One Touch Copy Copying to the HDD The maximum title length for copying is 12 hours Title name and chapter markers are also copied except when copying from a finalized Video mode DVD R RW Thumbnail picture markers and chapter markers for the Disc Navigator are copied but their position in the copy ma...

Page 116: ... Pr 9 SP Pr 9 THU 23 03 22 00 Thu 23 03 Pr 6 SP Pr 6 WED 22 03 20 00 Wed22 03 Pr 2 SP Pr 2 MON 20 03 13 00 Mon20 03 Pr 9 SP Pr 9 F R I 17 03 21 00 F r i 17 03 Pr 4 SP Pr 4 WED 15 03 20 00 Wed15 03 Pr 2 SP Pr 2 Back Next 20 00 Wed29 03 Pr 2 SP SP 20 00 1h00m 2 0G Pr 2 Sports HDD DVD Video mode 1 2 3 Note 1 The following titles cannot be copied at high speed for DVD R RW Titles recorded in MN1 to MN...

Page 117: ...Mode if you want to change the recording quality see Recording Mode on page 118 Select Input Disc Name if you want to change the disc name Input a name of up to 64 characters for a VR mode disc or 40 characters for a Video mode disc or DVD R RW The input method is similar to that of naming titles see Title Name on page 107 Select Finalize if you want to automatically finalize a DVD R RW Video mode...

Page 118: ...iew Check the content of a title in the Copy List Cancel Exit the menu Repeat this step for as many titles you have that need editing 7 Select Next from the command menu panel to proceed to the copy options screen Select Recording Mode if you want to change the recording quality see Recording Mode below 8 Select Start Copy to start copying Recording Mode 1 Select Recording Mode from the command me...

Page 119: ...ome Menu 2 Select a backup option There are three backup options Start new disc back up Start making a backup of a disc Resume writing data Record the backup data already on the HDD to a recordable DVD Erase back up data Erase the backup data on the HDD 3 Load the disc you want to make a backup of You can only make backup copies of finalized Video mode DVD R RW discs finalized DVD R or DVD RW disc...

Page 120: ...ever this will make the disc unusable although if you are using a DVD RW or DVD RW disc you can re initialize it in order to make it usable again see Initializing recordable DVD discs on page 89 7 After the recorder has finished recording the backup disc you can select whether to make another backup of the same data or exit Select Start to make another backup copy or Cancel to finish If you want t...

Page 121: ...cks and WMA MP3 files the part currently selected will play Copying files via USB Connecting a regular USB device You can copy WMA or MP3 files from a connected USB device such as a USB drive to the HDD 1 Connect the USB device 2 Select Jukebox from the Home Menu 3 Select Listen to Music from USB Device 4 Select Copy Album from the command menu panel 5 Select Yes to confirm or No to cancel The sel...

Page 122: ...er 10 on the PC The device settings screen appears Click Cancel Depending on the settings for Windows Media Player 10 the screen shown below may not be displayed From the PC in Windows Media Player 10 1 Click Library 2 Choose the artist album or song you would like to copy and press the right mouse button 3 Click Add to Sync list when choosing songs click Add to then Sync list 4 Click Start Sync T...

Page 123: ... Jukebox When albums are deleted in the Jukebox their file hierarchy as displayed in Windows Media Player may change File whose extensions are not supported by the Jukebox i e files that are not mp3 or wma cannot be transferred Files imported to this recorder via Connect PC cannot be exported from this recorder Note that no recording functions including timer recordings will be carried out when yo...

Page 124: ...the album Edit Jump Set1 Set a track to jump so that it doesn t play choose this command again to cancel the Jump setting Play Mode Change the playback order for albums and tracks Genre Name Enter a name of up to 12 characters for a genre See Title Name on page 107 for how to enter names HDD By number Jupiter classical MP3 8 MB 10Albums Jukebox 47 0 G Remain All Genres Play Erase Edit Play Mode Ge...

Page 125: ...ze the longer it takes the recorder to load the file You can change folders via the buttons If you encounter a disc that will not play check that the disc and file formats are compatible with this recorder see JPEG file compatibility and PC created disc compatibility on page 46 The thumbnail of files that cannot be played is displayed as the logo Note 1 Up to 999 files or 99 folders are viewable b...

Page 126: ...show you are prompted to select the Genre of music you would like to hear and when you press ENTER music of that Genre stored on the Jukebox will be played during the slideshow For more information on adding music to the HDD see Using the Jukebox on page 121 You can also select a file or folder then press PLAY to start playing the slideshow Use PREV NEXT to display the previous next picture or PAU...

Page 127: ... print them out if you ve connected a PictBridge compatible printer 1 Select the location of folders files you want to import To import a whole folder select the desired folder press and skip to step 3 below To import multiple folders use the Multi Mode see Selecting multiple files or folders on page 128 2 Select a file to import then press To import multiple files use the Multi Mode see Selecting...

Page 128: ...ded on as well as CD R RW discs cannot be used After backing up the pictures in your digital camera to DVD we recommend verifying that they have been recorded properly before deleting anything from the camera 1 Press HOME MENU and select PhotoViewer to display the PhotoViewer screen 2 Load a blank or unrecorded Video mode DVD R or DVD RW disc 3 Select Copy Files from a Digital Camera from the menu...

Page 129: ... menu 5 Select Yes to confirm or No to cancel Folder names on the disc will be number PIONR File names will be PHOT number Note that during copying any timer programmes set to start will not begin and no other operation is possible While Cancel is displayed you can press ENTER to cancel Editing files on the HDD There are a number of commands you can use to edit and organize your pictures stored on...

Page 130: ...IOR0004 006 PIOR0005 007 PIOR0006 008 PIOR0007 009 PIOR0008 010 PIOR0009 011 PIOR0010 012 PIOR0011 100 0 G Remain 1 84 PhotoViewer HDD Folder2 Folder Size 999 MB 12 Files FILE MENU Start Slideshow Start Audio Slideshow File Options Print Copy to DVD Detailed Information Multi Mode ENTER HDD File 001 PIOR0000 002 PIOR0001 003 PIOR0002 004 PIOR0003 005 PIOR0004 006 PIOR0005 007 PIOR0006 008 PIOR0007...

Page 131: ...u are using that as a source is connected to the recorder before starting 1 Select the file s you want to print To print multiple files use the Multi Mode see Selecting multiple files or folders on page 128 2 Display the command menu 3 Select Print from the menu 4 Select Start to confirm or Cancel to cancel Once printing has started you can cancel by pressing ENTER Tip Paper size and layout can be...

Page 132: ... accidental recording editing or erasing of the disc loaded If you need to unlock the disc to make edits select Off DVD RW Auto Initialize Default setting VR Mode Initialization mode is automatically carried out when you insert a blank DVD RW You must set the desired initialization mode before inserting a disc See DVD RW Auto Initialize on page 90 for detailed instructions Initialize settings You ...

Page 133: ...ord erase and edit recordings the HDD file system gradually becomes fragmented Periodically the HDD will need optimizing to clean up all the fragmented files When the HDD needs optimizing the recorder will automatically display a message recommending optimization Important Optimizing the HDD can take as long as eight hours During optimization playback and recording are not possible Cancelling opti...

Page 134: ...V LDP Creating your own set There are three user presets in which you can save your own set of picture quality settings 1 Follow Choosing a preset above and select one of the user presets Memory 1 2 or 3 2 Select Detailed Settings 3 Select the setting you want to adjust You can adjust the following settings Prog Motion Adjusts the motion and still picture quality when video output is set to progre...

Page 135: ...ing discs Choosing a preset 1 With a disc playing or paused press to display the Home Menu 2 Select Video Adjust 3 Select a setting There are six presets available TV suitable for LCD and cathode ray tube TVs PDP suitable for plasma display screens Professional suitable for professional monitors Memory1 user preset 1 Memory2 user preset 2 Memory3 user preset 3 You can press DISPLAY to see the indi...

Page 136: ...f the high frequency detailed elements in the picture Sharpness is ineffective for HDMI output Detail Adjusts how sharp edges appear White Level Adjusts the intensity of white White Level is ineffective for HDMI output Black Level Adjusts the intensity of black Black Level is ineffective for HDMI output Black Setup Corrects the standard reference black level Black Setup is ineffective for HDMI out...

Page 137: ...the input line system on page 146 for more information on this setting Power Save Mode 1 Only signals arriving at the antenna input are passed through to the antenna output when the recorder is in standby Mode 2 No input signals are passed through to the outputs when the recorder is in standby Off When the recorder is in standby all signals arriving at the SCART and antenna inputs are passed along...

Page 138: ...rd you enter becomes the parental lock password Auto Skip Off No channels are automatically skipped Radio Radio channels are skipped when selecting channels Data Data channels are skipped when selecting channels Radio Data Radio and data channels are skipped when selecting channels Signal Check Next Screen Use this screen to check the signal level and quality of digital channels Use the buttons to...

Page 139: ...reset If the currently selected channel is scrambled requiring a decoder connected to the AV2 INPUT 1 DECODER set the Decoder setting to On Channel Swapping Next Screen Proceed to the next screen to swap channel assignments of different presets so that you can group together presets that naturally go together Select two presets to swap then press ENTER Video In Out Input Colour System Next Screen ...

Page 140: ... off Check the operating instructions that came with your TV See also About NTSC on PAL TV on page 146 for related information Audio In NICAM Select NICAM Record the NICAM audio in a NICAM broadcast Regular Audio Record the non NICAM audio in a NICAM broadcast You can still switch the audio to record using the AUDIO button before recording Analog Tuner Level Normal Standard setting Compression Use...

Page 141: ...he Dolby Digital Out setting is set to Dolby Digital In this case adjust the dynamic range from the receiver subwoofer see Dynamic Range Control on page 32 Language OSD Language English Sets the language of the on screen displays to English available languages Choose from the languages displayed for the on screen displays On Screen Display and D TV Language will both reflect this setting Audio Lan...

Page 142: ...ecording On go to setup All the standard recording modes plus MN1 to MN32 LPCM and XP modes can be set Off Just the standard recording modes XP SP LP EP SLP and SEP can be set See also Manual recording modes on page 151 for detailed information on manual recording levels Optimized Rec On The recording quality of timer recordings is automatically adjusted to fit on to the selected media if it will ...

Page 143: ...ayback TV Screen Size 4 3 Letter Box Select if you have a standard 4 3 TV and prefer the letter box format presentation for widescreen material 4 3 Pan Scan Select if you have a standard 4 3 TV and prefer the pan and scan presentation for widescreen material 16 9 Select if you have a widescreen 16 9 TV Your TV settings determine how 4 3 material will look Selecting 4 3 Letter Box or 4 3 Pan Scan d...

Page 144: ... the aspect ratio Normal Select if your HDMI TV does not allow you to change the aspect ratio 4 3 video will be shown with bars on each side Colour RGB 0 255 Use if colours are weak and black appears to float on the RGB 16 235 setting RGB 16 235 Use this setting if colours appear overly rich and the black too deep on the RGB 0 255 setting YCbCr 4 2 2 The video signal is output as a 10 bit YCbCr 4 ...

Page 145: ...vice provider for more information on the functions available Software Update Next Screen The Software Update function can check for and download updated system software for the digital tuner See Using Software Update Digital tuner on page 147 Options 2 USB Restart USB Device If the connected USB device does not respond to the recorder try using this option to restart it If the device still does n...

Page 146: ... SELECT buttons as described above there is no confirmation so please use with care You can t mix recordings of different TV line systems on the same disc When you change this setting the Input Colour System setting also changes see below About NTSC on PAL TV Depending on the Input Line System setting and the NTSC on PAL TV setting the signal format output when the recorder is stopped varies as sh...

Page 147: ... the next time the recorder is powered on If for some reason the new software could not be downloaded successfully a dialog box informs you of the error Press HOME MENU to exit or RETURN EXIT to return to the previous screen Note that channel information may be erased when software update is used and that timer recording will not work during the update To cancel manual update before it has complet...

Page 148: ...r your make input the first one in the list If the maker s name of your TV doesn t appear in the table you will not be able to use this remote to control your TV 3 Point the remote towards your TV and press TV to check that the remote works with your TV If the remote is set up correctly the TV should switch off If it doesn t and there is another code given for your maker repeat step 1 with a new c...

Page 149: ... 641 644 KAPSCH 631 KENDO 642 KENNEDY 632 642 KORPEL 607 KOYODA 644 LEYCO 607 640 646 648 LIESENK TTER 607 LOEWE 607 LUXOR 632 642 643 M ELECTRONIC 631 644 645 654 656 607 636 651 MAGNADYNE 632 649 MAGNAFON 649 MAGNAVOX 607 610 603 612 629 MANESTH 639 646 MARANTZ 607 MARK 607 MATSUI 607 639 640 642 644 647 648 MCMICHAEL 634 MEDIATOR 607 MEMOREX 644 METZ 631 MINERVA 631 653 MITSUBISHI 609 610 602 6...

Page 150: ...nding on the disc the copy speed may be reduced for example although a 6x disc is used the copy may be made at 2x speed Rec mode SEP SLP EP LP SP XP DVD disc type 10 h 8 h 6 h 4 h 2 h 1 h DVD R 1x DVD RW 1x 1x 6 mins 7 5 mins 10 mins 15 mins 30 mins 60 mins DVD RW 2x DVD R DL DVD RAM 2x 2x 3 mins 4 mins 5 mins 7 5 mins 15 mins 30 mins DVD R 2 4x DVD RW 2 4x DVD R DL 2 4x 1 1 1 6 3 mins 12 5 mins 2...

Page 151: ... Level Single Layer DVD DVD R RW DVD R RW DVD RAM Dual Layer DVD DVD R DL DVD R DL Video mode Off HDD VR mode DVD R RW DVD RAM VR mode DVD R DL Video mode On HDD Video mode DVD R RW DVD R RW Video mode DVD R DL DVD R DL MN 1 3 4 802 mins 1440 mins 352 x 240 352 x 288 352 x 240 352 x 288 MN 2 3 4 720 mins 1292 mins MN 3 3 4 SEP 600 mins 1077 mins MN 4 4 SLP 480 mins 861 mins MN 5 4 420 mins 754 min...

Page 152: ... using another recorder with copy once protected recordings will not play in this recorder Can t record a disc Check that the disc is not an incompatible format disc page 44 Some DVD RAM discs are not recordable until they have been initialized page 89 This can take up to an hour Remote control does not work If you connected this recorder to the receiver subwoofer using the CONTROL IN jack point t...

Page 153: ... its aspect ratio settings This recorder s input switches into wide mode automatically according to the input signal When the unit connected is not compatible with VIDEO ID 1 widescreen signalling set the connected component to output 4 3 aspect ratio standard video Audio subtitle language cannot be changed Note that audio and subtitle languages cannot be changed during the recording of a digital ...

Page 154: ... when there is no power to the recorder After unplugging or a power failure the battery keeps all settings for a period of several minutes Reset the clock and other recorder settings to use the recorder again To have the battery replaced please ask your nearest Pioneer authorized service center or your dealer to carry out repairs Front panel display shows LOCKED when a button is pressed The Child ...

Page 155: ... switching the power of the HDMI DVI device off then back on Try switching off the HDMI DVI device and this recorder Next switch on the HDMI DVI device and leave it for around 30 seconds then switch on this recorder When you connect an HDMI compatible device make sure of the following The connected device s video input is set correctly for this recorder The cable you re using is fully HDMI complia...

Page 156: ...ter or your dealer to carry out repairs Incompatible or unreadable disc The disc loaded is a playback only disc type This display may also appear if the disc is dirty or damaged Cannot record to a disc that is not CPRM compatible Cannot record this content using Video mode recording This video cannot be recorded to DVD R RW The video source is copy once protected Use a VR mode DVD R RW disc with C...

Page 157: ...ayback to stop automatically You are not allowed to watch this Conditional Access Programme A CA module or smart card obtained from your service provider is required to watch the selected programme Insert the supplied module or card into the Common Interface card slot on the front panel of the recorder page 17 There is no DV input or the input signal is unrecordable No signal was detected at the D...

Page 158: ...0 Faroese fo 0615 Frisian fy 0625 Irish ga 0701 Scots Gaelic gd 0704 Galician gl 0712 Guarani gn 0714 Gujarati gu 0721 Hausa ha 0801 Hindi hi 0809 Croatian hr 0818 Hungarian hu 0821 Armenian hy 0825 Interlingua ia 0901 Interlingue ie 0905 Inupiak ik 0911 Indonesian in 0914 Icelandic is 0919 Hebrew iw 0923 Yiddish ji 1009 Javanese jw 1023 Georgian ka 1101 Kazakh kk 1111 Greenlandic kl 1112 Cambodia...

Page 159: ...Federation 1821 ru Singapore 1907 sg Spain 0519 es Sweden 1905 se Switzerland 0308 ch Taiwan 2023 tw Thailand 2008 th United Kingdom 0702 gb USA 2119 us When viewing on a standard TV or monitor Screen format of disc Setting Appearance 16 9 4 3 Letter Box The programme is shown in widescreen with black bars at the top and bottom of the screen 4 3 Pan Scan The sides of the programme are cropped so t...

Page 160: ... paper or put stickers onto the disc or use a pencil ball point pen or other sharp tipped writing instrument These could all damage the disc For more detailed care information see the instructions that come with discs Do not load more than one disc into the recorder Damaged discs Discs spin at high speed inside the recorder If you can see that a disc is cracked chipped warped or otherwise damaged ...

Page 161: ...interference especially if the television uses an indoor antenna Use in a kitchen or other room where the recorder may be exposed to smoke or steam Use on a thick rug or carpet or cover with cloth this may prevent proper cooling of the unit Place on an unstable surface or one that is not large enough to support all four of the unit s feet Moving the recorder If you need to move the recorder first ...

Page 162: ... 51 m Standard Play SP Approx 3 h 35 m Long Play LP Approx 7 h 11 m Extended Play EP Approx 10 h 46 m Super Long Play SLP Approx 14 h 21 m Super Extended Play SEP Approx 17 h 57 m DVD R DL only Manual Mode MN DVD R DL Approx 1 h 51 m to 24 h DVD R DL Approx 1 h 51 m to 14 h 21 m Timer Programmes 1 month 32 programmes Clock Quartz lock 24 hour digital display Tuner analog Receivable channels Tuner ...

Page 163: ...cks Input 2 Audio output AV1 Output During audio output 2 V rms Output impedance less than 1 5 kΩ Jacks AV connector AV1 RCA jacks Output Control input Mini jack Digital audio output Coaxial G LINK Mini jack Common Interface CA module DV input 4 pin front i LINK IEEE 1394 standard USB Type A front Type B front HDMI 19 pin AV Connectors 21 pin connector assignment AV connector input output 21 pin c...

Page 164: ...120 Melsele Belgium TEL 03 570 05 11 PIONEER ELECTRONICS ASIACENTRE PTE LTD 253 Alexandra Road 04 01 Singapore 159936 TEL 65 6472 7555 PIONEER ELECTRONICS AUSTRALIA PTY LTD 178 184 Boundary Road Braeside Victoria 3195 Australia TEL 03 9586 6300 PIONEER ELECTRONICS DE MEXICO S A DE C V Blvd Manuel Avila Camacho 138 10 piso Col Lomas de Chapultepec Mexico D F 11000 TEL 55 9178 4270 K002_B_En Publish...

Reviews: