background image

PB Form SV61027  Rev. D   9/04          

©2004 Pitney Bowes Inc.          

All Rights Reserved           

Printed in the USA 

Web Site: www.pb.com

Customer Support: 1-800-522-0020

Product Name: DA700, DA750

Model Number: W707, W790

For Service or Supplies 

*sv61027RevD*

Printed on recyclable paper

1 Elmcroft Road

Stamford, Connecticut 06926-0700

www.pb.com

AddressRight™ Printer 

DA700, DA750

Operator Guide

US English Version

Summary of Contents for ADDRESSRIGHT DA700

Page 1: ...AddressRight Printer DA700 DA750 Operator Guide US English Version ...

Page 2: ...ectrical equipment IECEE CB scheme These materials and the related software are the confidential and proprietary property of Pit ney Bowes Inc and may not be lent sold hired out or made available to others in any form or be disposed of by way of trade in any form without the express written consent of Pitney Bowes Inc Fourth edition September 2004 2004 Pitney Bowes Inc All rights reserved This boo...

Page 3: ...t Safety Notes 2 4 Assembling the DA700 DA750 2 5 1 Attach the Wire Frame to the Printer 2 6 2 Install the Sliding Fence 2 7 3 Position the Output Stacker Tray 2 8 4 Connect the Parallel Cable or Serial Cable 2 9 5 Connect the Power Cord 2 11 Turning On the DA700 DA750 Printer 2 11 Install the Ink Jet Cartridges Color Black 2 12 Removing the Ink Jet Cartridges 2 13 Chapter 3 DA700 DA750 Features a...

Page 4: ...ng Printer Properties 4 3 Using the Printer Properties Window 4 4 Selecting the DA700 DA750 from a Windows Application 4 14 Envelope Designer Plus 4 15 Chapter 5 Printer Maintenance Preventive Maintenance 5 2 Cleaning 5 2 Print Quality Problems 5 2 Exit Rollers 5 3 Sensor 5 3 Print Head Shaft 5 3 Floor Assembly and Top Cover 5 4 CMYK Printing 5 5 Chapter 6 Troubleshooting Problems and Solutions 6 ...

Page 5: ... A 17 6 Clear Counter A 18 7 Job Settings A 19 Using the Setup Menu A 21 Setup Menu Diagram A 22 1 Heavy Media Mode A 23 2 Test Print Head A 24 3 Purge Print Head A 24 4 Lines Per Address A 25 5 Communications A 26 6 Hex Dump Mode A 28 7 Language A 31 8 Envelope Feed Delay A 33 9 Auto Envelope Eject A 34 10 ROM Revision Number A 35 Appendix B Specifications Equipment Specifications B 2 Material Spec...

Page 6: ...iv SV61027 Rev D Table of Contents This page is intentionally blank ...

Page 7: ...ains what s in this guide and tells you how to order sup plies and where to get more information about using your DA700 DA750 In this chapter The DA700 DA750 Color Printer Overview Welcome to the DA700 DA750 Color Ink Jet Printer 1 2 Using This Guide 1 2 System Requirements 1 4 Getting Help 1 5 Printer Options 1 7 Ordering Supplies 1 7 ...

Page 8: ...ect it to your computer Define your envelope layout Print a test mail piece Send a mail job to the printer from your computer application Using This Guide Refer to this guide for information about printer setup opera tion and troubleshooting It is divided into the following chap ters Chapter 1 Introduction Contains an overview of the DA700 DA750 Operator Guide information about ordering supplies a...

Page 9: ...r Maintenance Describes how to keep the printer clean and functioning properly Chapter 6 Troubleshooting Contains a list of possible problems and their solutions Appendix A Control Panel Menus Explains the Main Menu and Setup Menu options available on the DA700 DA750 control panel Appendix B Specifications Provides hardware and material specifications Your printer will run at its best when your ma...

Page 10: ...MHZ or greater 64 or more MB RAM recom mended Operating System Windows 98 2nd Edition Windows ME Windows ME Windows 2000 Windows XP Parallel Cable A parallel cable is supplied with your printer If you choose to use another cable make sure it isn t any longer than 10 feet or Serial Cable To use the serial port a serial cable of no more 15 feet in length is required Subject to change ...

Page 11: ...es provides several information resources Below is a table of the Microsoft operating systems currently supported and the dates Pitney Bowes expects to stop pro viding support for the drivers that run on those systems System Requirements continued Source Microsoft com posted 1 12 04 Dates subject to change including any change due to Microsoft s support cessation dates or if USPS changes requireme...

Page 12: ... and their solutions If you need to call please have the following information at hand Model W707 W790 Serial number See back of unit Nature of problem What happens and when does it happen The steps you ve already taken to solve the problem and the results Getting Help continued The World Wide Web We encourage you to visit our web site at http www pb com support ...

Page 13: ...00 DA750 Envelope Designer lets you create a professional looking envelope in a matter of seconds you don t have to bother with the print driver or make manual settings The W853 Ink Dryer helps to eliminate smudging on dif ficult materials like glossy stock The W760 Power Stacker holds up to 300 10 envelopes It helps maintain a neat stack in ZIP Code order when you run long jobs Printer Options Th...

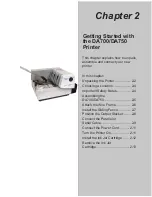
Page 14: ...1 8 SV61027 Rev D 1 DA700 DA750 Printer Overview This page is intentionally blank ...

Page 15: ...mportant Safety Notes 2 4 Assembling the DA700 DA750 2 5 Attach the Wire Frame 2 6 Install the Sliding Fence 2 7 Position the Output Stacker 2 8 Connect the Parallel or Serial Cable 2 9 Connect the Power Cord 2 11 Turn the Printer On 2 11 Install the Ink Jet Cartridge 2 12 Remove the Ink Jet Cartridge 2 13 Getting Started with the DA700 DA750 Printer ...

Page 16: ... 2 SV61027 Rev D Unpacking the Printer As you remove the DA700 DA750 contents from the box note the components of the printer labeled below H Block Separators Wire Frame Assembly Sliding Fence Control Panel LCD Display and Keypad Media Thickness Knob ...

Page 17: ...bled Sliding Fence long Sliding Fence short Power Cord Parallel Cable Printer Operating Guide Printer Driver Software Ink Jet Cartridge Black Black Color for the DA750 Operator Training Guide POSTNETTM Certificate Installation Quality Report Print Head Shipment Holder remove before turning unit on Quick Start Instructions Shipping Support remove before turning unit on Unpacking the Printer continu...

Page 18: ...roperly grounded wall outlet DO NOT use an adapter plug Use of an adapter could compromise the ground and cause a possible shock hazard or damage to the equipment in the event of a short circuit DO NOT remove the ground pin from the line cord Avoid using outlets controlled by wall switches Someone could accidently shut your printer off The power cord wall plug is the primary means of disconnecting...

Page 19: ...O NOT remove covers The machine covers serve to enclose hazardous parts If the machine has been dropped or has otherwise had the covers stressed in any way report it to your Pitney Bowes Customer Service Representative To reduce the risk of fire and or electrical shock do not attempt to disassemble this machine If service is re quired contact your Pitney Bowes Customer Service Representative Keep ...

Page 20: ...ttom edge under here Insert the metal sheet into the height adjustment slot 2 Rotate the wire frame and insert the curved metal sheet on the bottom of the frame into the height adjustment slot 3 Adjust the angle of the wire frame so it s positioned at about a 45 degree angle Turn the lock knob on the side of the slide clockwise to hold the wire frame in position You can adjust both the height and ...

Page 21: ...and a short one Use the short fence when printing material smaller than a 10 envelope Use the long fence for larger material 1 Slide the square edge of the sliding fence into the slots on the frame slide as shown below Insert Sliding Fence between Slide Guides and Feed Carriage 2 The next chapter explains how to set the fence to the width of the material you re running ...

Page 22: ...27 Rev D Position the Output Stacker Tray Printed material is deposited in the output stacker tray The tray can stack up to 150 10 envelopes Slide it into position under the back of the printer as shown below Assembling the DA700 DA750 continued Stacker Tray ...

Page 23: ...r computer or use an approved serial cable Each end of the parallel cable has a connector One end is labeled Printer and the other is labeled Computer 1 To connect the Parallel Cable supplied to the printer align the end of the cable connector labeled Printer with the parallel port located on the right side of the printer s interface panel and push the cable connector into the port The interface p...

Page 24: ...supplied to the printer align the 25 pin male connector end of the cable with the serial port on the left side of the printer s interface At tach the cable to the printer and the computer s hex jack screws using the thumb screws in the connectors 5 Initialize the printer s communications port by sending data to either the parallel or serial port To change from the serial port to the parallel port ...

Page 25: ...to a grounded outlet Please review the safety information on pages 2 4 and 2 5 Once you ve connected the cable press the printer s power switch to the ON position The switch is located next to the power cord receptacle When you turn the printer on The LCD menu displays that the printer is initializing and automatically displays ON LINE The print head carriage moves to the right and parks in the ma...

Page 26: ... Replace Print Cartridge key on the control panel to move the carriage to the middle of the printer Do not attempt to move the carriage by hand Doing so can result in damage to the carriage assembly 4 Remove the cartridge from its shipping container by peel ing the top cover off Be careful not to touch the gold con tacts Installing and Removing the Ink Jet Cartridge 5 Gently remove the tape coveri...

Page 27: ...inter 7 Push the cartridge forward away from you until it snaps in place Installing and Removing the Ink Jet Cartridge continued 6 Gently insert the cartridge color to the right black to the left DA750 only into the carriage at approximately a 20 degree angle with copper strip to the bottom and in first Press down on the cartridge until it is seated IMPORTANT When installing cartridges in the DA75...

Page 28: ...ss the Replace Print Cartridge key on the control panel This moves the carriage to the middle of the print er Do not move the cartridge by hand 4 To remove the ink jet cartridge place your thumb on the grooved surface and press down slightly then tilt towards you until it pops loose 5 Lift the print cartridge out of the cradle ...

Page 29: ... this chapter Printer Features 3 2 DA700 DA750 Throughput 3 3 Setting Up a Job 3 6 Set the Separator Gap 3 9 Center the Wire Frame 3 11 Set the Feed Angle 3 12 Set the Wire Frame Ramp 3 14 Position the Feed Fence 3 15 Load Material 3 16 Adjust Media Thickness Knob 3 17 Adjust Exit Rollers 3 19 Print a Test Piece 3 21 DA700 DA750 Features and Adjustments ...

Page 30: ...lines character size font interface barcode material size and graphics Print Qualities The printer has three selectable print qualities Draft fast est speed Letter medium speed and Executive slowest speed Internal Fonts A font is a set of characters letters numbers and symbols that use the same typeface The DA700 DA750 has thirteen plus barcode different typefaces Courier Sans Serif Ro man Baxter ...

Page 31: ...dge Removed DA750 10 Envelopes 600 x 200 dpi 14 000 letters per hour lph 600 x 300 dpi 13 000 lph 600 x 600 dpi 11 000 lph Printing Black Color Cartridge Installed DA750 only 10 Envelopes 600 x 200 dpi 11 000 letters per hour lph 600 x 300 dpi 10 000 lph 600 x 600 dpi 9 000 lph Printing Color with Color Cartridge Installed DA750 only Minimum throughputs for destination address three lines without ...

Page 32: ...ate rial sizes Width Height Thickness Maximum 15 5 15 25 399 4 mm 381 mm 6 35 mm Minimum 3 5 003 76 mm 127 mm 0762 mm For envelope addressing purposes the DA700 DA750 is compatible with any word processor or database application that can print a mailing label Approved Media Types The printer can be used with the following types of material Envelopes Postcards Booklets Self Mailers Catalog Envelope...

Page 33: ...hnology with shuttling head Interface to a standard IBM compatible computer Prints USPS POSTNET certified bar code LCD menu display available in seven languages Memory capable of storing up to eight jobs Printing virtually anywhere on an envelope Graphic printing capability Printer Features continued ...

Page 34: ...iably your printer feeds the material A good setup minimizes misfeeds and jams And your printer will perform at its best when you run material that falls within our published specifications See Appendix B for complete material specifications The figure below calls out key machine adjustments Each of these is briefly described starting on the next page In the pages that follow we explain each adjus...

Page 35: ...me Supports the material stack Adjust the feed angle to ac commodate the weight of the material you re running Adjust its side to side position so it s centered under the stack 4 Material Prop and Lock Knob The prop adds a gentle slope to the stack to help feeding Adjust so the top of the prop is even with the top of the stack Secure the prop with the lock knob 5 Wire Frame Slide and Wire Frame Sl...

Page 36: ...he DA700 DA750 print driver loaded on your computer you can easily perform these functions from within your software application 8 Stacker Tray Printed material is deposited in the stacker catch tray The tray holds about 5 of material 9 Exit Rollers Not Shown Guide the printed material as it exits the printer Adjust so that each roller overlaps the edge of the material by at least 1 4 10 Print Are...

Page 37: ... to operate Lever midpoint not adjusted to any media free floating on media not set up to operate Lever fully up locked in the up position not adjusted to any media thickness 1 Set the Separator Gap Setting Up A Job continued Setting the Proper Feed Gap 1 Loosen the lock knobs to unlock all three H Blocks 2 Lift the H Blocks to their highest position and lock in place 3 Place a sample piece of mat...

Page 38: ...te that the width of the envelope will fall completely un der the inside and middle H Blocks but only half way under the outer H Block Follow steps 2 through 4 to fix this 2 Remove the sliding fence 3 Place a second envelope next to the first under the outer H Block Place the second envelope flap down with the short edge under the outer H Block 4 Lock the separator in place NOTE If the separator g...

Page 39: ...Material This adjustment helps eliminate skewing 1 Unlock the feed carriage assembly by pushing the locking lever down 2 Adjust the feed carriage by aligning with the center of the media 3 Lock the feed carriage again by pulling the lever up Locking lever pushed down Setting Up A Job continued ...

Page 40: ... Standard material adjust to the center 45 degree angle Light material adjust to a high angle To make the adjustment 1 Unlock the knob on the wireframe slide by turning counter clockwise 2 Move the wireframe up or down as required by sliding the retaining knob 3 Turn the lock knob clockwise to secure the wireframe NOTE Center line of the knob aligns with relative number of the scale Refer to the s...

Page 41: ...ob aligns with num ber 12 for typical 8 1 2 x 11 copy pa per Note The above settings are suggested settings You can adjust the wire frame accordingly up or down until the desired feed throughput is achieved Setting Up A Job continued The center of the knob aligns with num ber 3 for a typical 10 envelope 1 2 3 4 5 6 7 8 9 10 11 12 13 14 15 16 17 18 19 20 ...

Page 42: ...p to Edge of Media Add a stack of media and adjust the ramp downward until the first piece of media is resting half way down the angle of the ramp surface as pictured be low one piece of media is shown for simplicity NOTE This picture is shown without the Slid ing Fence for ease of illustration Slide Ramp Down With the Feed Gap properly set for one piece of media slide the ramp down ...

Page 43: ...gainst the media To position the fence 1 Place a sample piece or trial stack of material in the input area 2 Slide the fence until it almost touches the stack of material 3 Check that there s about 1 16 clearance the thick ness of a dime between the fence and the stack NOTE Proper clearance is important If you push the fence tight up against the stack it could retard feeding and cause jams If the ...

Page 44: ...nimum 6 Load Material Setting Up A Job continued 3 Tamp the material on a flat surface making sure that the stack is square 4 Shingle the stack as you load it into the input area Load envelopes so the side to be printed aces up Flaps should be down and oriented away from the feed roller flaps trailing Position the right edge of the envelopes flush against the rear wall Begin with just a few envelo...

Page 45: ...ickness Knob The media thickness knob sets the distance between the printhead and the material Use it to compensate for differ ent material thicknesses and to increase clarity of the print ing 1 Estimate the thickness of the material to be run NOTE All material in a run must be the same thickness For envelopes with 0 2 inserts start with the media thick ness knob set as shown below For 1 4 thick m...

Page 46: ...ending on how absorbent the surface is as well as other qualities You ll get best results using white wove bonded stock Print ing is less sharp on Tyvek recycled and glossy material It is also possible that ink may not dry thoroughly on certain very glossy materials Always test high gloss materials for their drying qualities be fore you buy them in quantity and attempt to run a print job A dryer m...

Page 47: ...lock Must be down and latched to operate 8 Adjust the Exit Rollers Setting Up A Job continued IMPORTANT Make sure the rollers do not touch any printed area of the material If this happens the rollers will act like a printing press and imprint a faint impression at incremental distances on the material If this happens move the roller or rollers toward the nearest clear zone that is an area free of ...

Page 48: ...e it becomes necessary to remove the stack from the bin The optional W760 stacker increases capacity to 300 10 envelopes NOTE As the stack approaches the 5 limit there is a po tential for stacking misfeed pieces not neatly stacked one on top of the other This can cause envelopes to stack out of ZIP Code sequence Setting Up A Job continued ...

Page 49: ...ting Up A Job continued 3 Press the ON LINE button on the printer control panel until the LCD display reads OFF LINE 4 Press the Test Envelope button A single envelope will feed and a sample address should print 5 Check the print quality If it s not what you want adjust the media thickness knob page 3 14 as required and run another test piece When you re satisfied with your setup adjustments you r...

Page 50: ...3 22 SV61027 Rev D 3 DA700 DA750 Features and Adjustments This page is intentionally blank ...

Page 51: ...s with the printer In this chapter Printer Driver Software 4 2 Selecting Printer Properties 4 3 Using the Printer Properties Windows 4 4 Selecting the DA700 DA750 from a Windows Application 4 14 Envelope DesignerTM Plus 4 15 NOTE The DA750 is shown in this chapter the DA700 is similar The screen captures used to illustrate setup options were taken from the Windows 2000 operating system Using the D...

Page 52: ...rinter about the settings you want to use in your print job If you have not previously installed the printer driver on your computer refer to the installation instructions furnished with it The printer drivers are contained on the Envelope Designer Plus CD that comes with your printer Select printer drivers from the initial screen and follow the on screen prompts The product code is on the label s...

Page 53: ...elect available options To access the main properties window fol low these steps 1 Click the Start button in the task bar then select Set tings 2 Click Printers The Printer window displays 3 Right click the Pitney Bowes icon then left click the Properties option The Properties window opens and displays seven tabs each of which allows access to different printer options Note that the General tab wi...

Page 54: ...selected item Use of the window for each tabbed item follows starting with the General tab window Using the Printer Properties Window Use the Location area to specify where the printer resides You can use alphanumeric characters to designate the site For example if your printer is in building 27 in area C you could specify 27 C as the Location entry Selecting Printer Properties continued If the Ge...

Page 55: ...is shared the comment entered in this area displays on the computers sharing this printer NOTE The DA700 DA750 printer driver does not sup port sharing Click Printing Properties to change the printer s default settings Default options include document orientation and paper source Click Advanced in the Printing Preferences window to access other settings such as print quality and paper size Using t...

Page 56: ...ivate use choose the Not Shared option Only the user logged onto the computer will be able to use this printer The window shown here is a standard Windows driver dialog It was not developed nor is it supported by Pitney Bowes DO NOT change the settings in this tab Pitney Bowes does not support networking of its Envelope printers Using the Printer Properties Window continued ...

Page 57: ...ed port monitor and the printers that use the ports To add another port to the display list click Add Port Fol low the subsequent prompts to identify and name the new port s To delete a port select the desired port and then click De lete Port To set the transmission retry value click Configure Port enter the desired number of seconds then click OK Using the Printer Properties Window continued ...

Page 58: ...he printer for limited availability select the Available from option then enter the desired time frame NOTE If a document is sent to the printer when it is unavail able the document will be held spooled until the printer is available Use the Priority area of this window to rank the status of the document to be printed Settings range from 1 to 99 with 1 indicating the highest priority Using the Pri...

Page 59: ...d the What s This topic for more information Choose the spooling options that best suit your needs To have the document printing in the background select the Spool print documents so program finishes printing faster option To ensure that the whole document is ready at the same time for printing select the Start printing after last page is spooled option To start printing as soon as the first page ...

Page 60: ...e Keep printed documents option To make the printer s advanced features available select the Enable advanced printing features option To change the default document properties 1 Click Printing Defaults 2 Select the default options for document orientation and paper source 3 Click Advanced to access other settings such as print quality and paper size 4 Click OK to return to the Printer Properties w...

Page 61: ...tab in the Properties window To allow the system to select the best colors from the avail able profile choose the Automatic option this is the manu facturer recommended choice If you want to choose the desired colors select the Manual option Use the color profile portion of this window to Add or remove color profiles associated with this printer Change the default color profile ...

Page 62: ...th Your Computer Using the Printer Properties Window continued To display the Security window left click the Security tab in the Properties window Pitney Bowes does not support Networking Therefore adding or removing permissions should not be used ...

Page 63: ...erties Window continued To display the Device Settings window left click the Device Settings tab in the Properties window Pitney Bowes recommends that you leave the manufacturer set default as it is in this window and refer to your envelope printing application to change envelope sizes ...

Page 64: ...Start the software application that you use when printing envelopes with the DA700 DA750 printer and open the file you want to use 2 From the File menu select Print The Print dialog box ap pears 3 Click on the arrow in the Printer Name box When you click on the arrow a drop down list box appears contain ing the names of the available printers The illustration below shows a typical print dialog box ...

Page 65: ...ress return ad dress single line message barcode and graphics Enve lope Designer Plus has an extensive online help system and a Wizard that guides you through the entire design process Envelope Designer Plus virtually eliminates the need for setting up your envelope manually using either the print driver options or the printer s control panel menu options NOTE Settings created in Envelope Designer...

Page 66: ...4 16 SV61027 Rev D 4 Using the DA700 DA750 with Your Computer This page is intentionally blank ...

Page 67: ...perform on a regular basis to keep your printer run ning trouble free In this chapter Preventive Maintenance 5 2 Cleaning 5 2 Print Quality Problems 5 2 Exit Rollers 5 3 Sensor 5 3 Print Head Shaft 5 3 Floor Assembly and Top Cover 5 4 CMYK Printing Alignment DA750 Only 5 5 Chapter 5 ...

Page 68: ...y Bowes DA700 DA750 Ink Jet Printer is designed for trouble free service with a minimal amount of care You should schedule regular cleaning of the Feed Rollers Exit Rollers and Lower Guide The print head performs a self cleaning cycle periodically If print quality is unacceptable try the following Adjust the media thickness knob page 3 18 to see if print quality improves If the printhead is too hi...

Page 69: ...urfaces they can become contaminated with ink Use water to dampen a soft cloth and remove the ink from the rollers Exit Rollers A film and or dust can build up on the sensors and cause misfeeds of the material Lift the transport door and use compressed air to blow dust from the sensors Cans of compressed air are available from many computer supply houses Sensor Print Head Shaft Periodically wipe t...

Page 70: ...Rev D 5 Printer Maintenance Floor Assembly and Top Cover Periodically wipe the cover and floor assembly feed deck with a soft cotton cloth dampened with water only Sensor Print Head Shaft Print Head Shaft continued ...

Page 71: ...MY at the same time This is known as CMYK printing To ensure proper printing the black K and color cartridges CMY must be correctly aligned Perform the alignment procedure below whenever you replace any of your cartridges 1 Turn ON the DA750 When the startup completes the following screen displays 2 Press plus Replace Print Cartridge 3 Replace the ink print cartridge if you haven t already done so...

Page 72: ...RIDGES prompt displays press 6 When the prompt for horizontal color alignment displays insert an envelope into the printer and press ENTER 7 The following prompt displays and the sample shown on the next page prints on the envelope CMYK Printing Alignment DA750 ONLY ...

Page 73: ...umber that represents the best horizontal alignment of the upper and lower lines for the color and black cartridges respectively 9 Insert an envelope into the printer and press ENTER The horizontal adjustment prompt displays and the sample shown on the next page prints on the envelope CMYK Printing Alignment DA750 ONLY ...

Page 74: ...pe should now be aligned 10 Press MENU to return to the alignment choice window 11 Press or to move to the vertical alignment screens 12 Insert an envelope into the printer and press ENTER The vertical adjustment prompt displays and the sample shown on the next page prints on the envelope CMYK Printing Alignment DA750 ONLY ...

Page 75: ...e upper and lower lines for the color and black cartridges respectively 14 Insert an envelope into the printer and press ENTER The vertical adjustment prompt displays and the sample shown on the next page prints on the envelope NOTE The number you selected will be highlighted and all lines on the envelope should now be aligned CMYK Printing Alignment DA750 ONLY ...

Page 76: ...5 10 SV61027 Rev D 5 Printer Maintenance 15 Press MENU twice to return to the normal ON LINE screen CMYK Printing Alignment DA750 ONLY ...

Page 77: ...apter lists common printer problems and offers suggestions on how to fix them In this chapter Problems and Solutions 6 2 Feed Problems 6 2 Print Quality Problems 6 3 Interface Problems 6 5 Motor Problems 6 5 Barcode 6 6 Other Problems 6 7 ...

Page 78: ...wes Mul tipurpose Cleaning Kit Number 902 0 DO NOT use any other solvents or detergents They could damage the feed rollers Reason Paper dust present yellow or white residue blocking feed sensor Solution Clean sensor with compressed air see page 5 3 Reason Too much material in feeder too heavy Weight of stack must be 20 lbs or less Solution Remove some material from stack Before calling our Technic...

Page 79: ...ce setting Print Quality Problems Problem No Print Reason Ink cartridge problem Solution Purge ink cartridge see page A 24 Clean cartridge jets with soft cotton cloth and water in line with color as shown Change to a new cartridge Problem Gray or Light Print Black Ink Off Color or Low Intensity Color Ink DA750 only Reason Ink supply is low or media thickness knob is set too high Solution Check adj...

Page 80: ...em Address Smudging Reason Incorrect media thickness knob setting Also ink may not dry on very high gloss material Solution Check whether media thickness knob is adjust ed too low page 3 18 Try using less glossy material Check exit rollers Problem Unwanted Bolding Reason Escape sequence turning on bold or bold selec tion in printer s menu options is set to bold Solution Turn off bolding in softwar...

Page 81: ...F CR LF CR CR LF LF CR LF Print Quality Problems continued Interface Problems Problem No Communications Printer Does Not Respond Reason Incorrect print driver bad parallel or serial ca ble bad printer controller board Solution Use DA700 DA750 print driver replace parallel or serial cable Make sure cable connections are tight If the problem still persists call Pitney Bowes for service Clear memory ...

Page 82: ...enus Reason Missing ZIP Code Solution Insert ZIP Code Reason Invalid ZIP Code format Solution Check ZIP Code for invalid character Example Zero 0 can only be the number not the letter O Verify that there is a dash inserted between the 5 4 ZIP Code Per DMM specifica tions Reason Address too low Solution Verify the bottom of the last line of the address field is not less than 5 8 from bottom edge of...

Page 83: ...usted correctly Solution Adjust the H Blocks to the thickness of the ma terial you re running See page 3 7 Reason Paper jam obstructing paper path Solution Clear obstructed path Reason Dirty paper feed sensor Solution Clean sensor with compressed air See page 5 3 Problem Barcode Fails MERLIN Standards at USPS Reason Mail does not meet barcode address place ment or other acceptance tests of MERLIN ...

Page 84: ...rial Solution Open the print area door assembly of the print er and adjust the media thickness knob See page 3 18 Reason Lower rail shaft dirty Solution Wipe lower rail shaft clean DO NOT OIL Problem Out of Memory Reason The printer can run out of memory when down loading fonts or graphics Solution This generally means you re trying to use a graphic artwork that s too big or you have too many font...

Page 85: ... to control how your printed material looks This appendix describes each menu and its options In this appendix Using the Control Panel A 2 Using the Menus A 3 Using the Main menu A 5 Usind the Setup Menu A 21 Using the Control Panel Menus ...

Page 86: ...LINE Toggles switches between ON LINE communi cates with host and OFFLINE no communica tions with host Eject Envelope When printer is OFFLINE press to eject the last printed piece from the printer Menu Displays the options on the Main Menu and the Setup Menu The printer must be OFFLINE to ac cess the menus If you ve installed the DA700 DA750 printer driver on your computer you ll normally perform ...

Page 87: ...n correctly with your computer NOTE The printer must be OFF LINE in order to access the menu options Using the Menus The buttons on the control panel perform the following func tions This Button Does This ON LINE Toggles switches between ON LINE communi cates with host and OFFLINE no communica tions with host Eject Envelope When printer is OFFLINE press to eject the last printed piece from the pri...

Page 88: ...e appropriate menu option appears press the Enter button to display the choices associated with that option 6 Press or to scroll through the choices When an op tion has an asterisk in front of it it means that option is presently selected Upon receipt of the printer from the factory the asterisk is typically the default setting When you press the Enter button to define a new option an asterisk wil...

Page 89: ...in Menu The Main Menu options are 1 Address Layout 2 Print Quality 3 Font 4 Barcode 5 Address Recovery 6 Clear Counter 7 Job Settings NOTE The settings you define in a software application such as SmartMailer override any settings you choose in the printer menus ...

Page 90: ... D BOLD E ITALIC F OUTLINE A LOCATION B 5 DIGIT ON OFF C 9 DIGIT ON OFF A GET ADDRESS B CLEAR MEMORY A LOAD B SAVE 1 ADDRESS LAYOUT 2 PRINT QUALITY 3 FONT 4 BARCODE 5 ADDRESS RECOVERY 6 CLEAR COUNTER 7 JOB SETTINGS CLEAR ADDRESS YES NO PIECE COUNTERS Using the Main Menu continued NOTE To print a list of the Main Menu and Setup Menu settings press the test button when ROM REV is dis played in the s...

Page 91: ...of the mail piece A Distance to Right Left Margin This option sets the start of the address the left side of the address as measured from the right side of the envelope For 10 envelopes this should be about 5 5 Press the or buttons to increase or decrease the Dis tance to Right MORE or LESS defined in inches or millimeters The left margin is the distance measured from the right edge of the materia...

Page 92: ...nches Press the or buttons to increase or decrease the Dis tance to Bottom MORE or LESS defined in inches or millimeters The bottom margin is the distance between the bottom edge of the material and base of first line of the ad dress Minimum distance between the last line of the address and the bottom edge of the material is 5 8 If less than 5 8 the lower right barcode will not be printed Press th...

Page 93: ...ces are Normal and Inverted Select Normal for most applications This tells the printer that the bottom edge of the material feeds first with the right side running against the right side of the printer The Inverted option tells the printer that the top edge of the material feeds first Select this option if for example you need to feed envelopes flap first E Orientation Control The choices are Auto...

Page 94: ...on the LCD panel 4 Press the Enter button to select this option 5 Press the or buttons to scroll through the address layout options 6 Press the Enter button to select the desired option A B C D or E 7 Press the or buttons to scroll through the choices as sociated with each option 8 When you ve finished making selections press the menu button several times to back out of the menu until the printer ...

Page 95: ...the slowest speed uses the most ink and delivers the best qual ity printout Executive quality prints envelopes that require a professional appearance B Letter Quality Black 300 x 600 DPI Color 300 x 200 DPI DA750 only Letter quality is used for envelopes that require a finished polished appearance C Draft Quality 150 DPI Black 200 x 600 DPI Color 300 x 150 DPI DA750 only This is the lightest of th...

Page 96: ...splayed on the LCD panel 4 Press the Enter button to select the option you want 5 Press the or buttons to scroll through the Print Qual ity options until the desired option Executive Letter or Draft is displayed on the LCD panel 6 Press the Enter button to select the desired option 7 After you ve made your selection press the Menu but ton several times to back out of the Menu until the printer dis...

Page 97: ...ns that if you are using Windows all the fonts installed in Windows are available This also applies to any DOS applications that can download fonts The options on this menu are Name Size Width Bold Italic and Outline A Name The printer has thirteen internal fonts as described above and one barcode font B Size The font size internal or external can be set from 4 to 30 point C Width The font width i...

Page 98: ...edge of the font s shape All records printed using Outline will appear as hollow text To select the font options 1 Press the or buttons to scroll through the Main Menu options until the Font option appears on the LCD panel 2 Press the or buttons to scroll through the Font op tions until the desired option appears on the LCD panel 3 Press the Enter button to select the desired option A B C D E or F...

Page 99: ...e barcode to print Lower Right Corner Above Address Below Address or turn Barcode Off B 5 Digit On Off If a 5 digit barcode is required selecting the 5 digit barcode option 5 Digit ON lets you print either 5 digit or 11 digit barcodes as requested by the computer 1 Press the or buttons to scroll through the Main Menu options until the Barcode option appears on the LCD panel 2 Press the Enter butto...

Page 100: ...RCODE WILL PRINT 1 Press the or buttons to scroll through the Main Menu options until the BARCODE option displays on the LCD panel 2 Press the Enter button to select this option 3 Press the or buttons to scroll through the Barcode options until the desired option A Location and B 5 Digit On Off displays on the LCD panel 4 Press the Enter button to select an option Use this option to define where t...

Page 101: ...tton The first 16 characters of the first line of the last address printed will be displayed on the LCD Press the or buttons to scroll through the address es When the desired address appears press the Enter but ton to print that address plus the remaining addresses in the buffer NOTE If you are using the Windows NT operating system only cryptic characters will appear B Clear Memory Clear Memory sh...

Page 102: ...lection press the Menu button several times to back out of the Menu until the printer displays OFFLINE Then press the ON LINE button to enable the printer 5 Address Recovery continued 2 Press the or buttons to scroll through the Address Recovery options until the desired option A Get Address or B Clear Memory is displayed on the LCD panel 3 Press the Enter button to select the desired option 4 Aft...

Page 103: ...ous job setup Press for more or for less to increase or decrease the desired job number Press the Enter button to select the desired op tion B Save Use this option to save the current envelope setup ad dress position barcode position number of lines per inch and so on The printer saves the setup as a job number 1 through 8 Keep a record of these setups and the number you assigned Press MORE or LES...

Page 104: ...er button to select this option 3 Press the or buttons to select A Load or B Save 4 Press the Enter button to select the desired option 5 After you ve made your selection press the Menu button several times to back out of the menu until the printer displays OFF LINE Then press the ON LINE button to enable the printer NOTE If your printer is attached to a computer use this menu to configure your pr...

Page 105: ...printer is ON LINE press the ON LINE button once so the LCD displays OFF LINE Then press and hold the Menu button for four seconds to display the Setup Menu The Setup Menu options are 1 Heavy Media Mode 2 Test Print Head 3 Purge Print Head 4 Lines Per Address 5 Communications 6 Hex Dump Mode 7 Languages 8 Envelope Feed Delay 9 Envelope Auto Eject 10 ROM Revision and Maintenance Count ...

Page 106: ...Y MEDIA MODE 2 TEST PRINT HEAD 3 PURGE PRINT HEAD 4 LINES PER ADDRESS 5 COMMUNICATIONS 6 HEX DUMP MODE 7 LANGUAGE 8 ENVELOPE FEED DELAY 9 ENVELOPE AUTO EJECT 10 ROM REVISION AND MAINTENANCE COUNT A BAUD RATE B PARITY C WORD LENGTH D LINE TERMINATION NOTE To print a list of the main Menu and Setup Menu set tings press the test button when ROM REV is displayed ...

Page 107: ...e or buttons to select A ON or B OFF 4 Press the Enter button to select the desired option 5 After you have made your selection press the Menu button several times to back out of the Menu until the printer displays OFFLINE Then press the ON LINE but ton to enable the printer 1 Heavy Media Mode Before you select this option make sure that the material is loaded in the printer input area so you can ...

Page 108: ...essing the button YES or disabled by pressing the button NO If enabled the printer will display Please wait Ink Jets being purged 4 Press the Menu button to back out of the menu until the printer displays OFF LINE Then press the ON LINE but ton to enable the printer 2 Test Print Head continued 3 Press for Yes to print the test pattern or press for No to cancel If you press Please wait Test patern ...

Page 109: ... ap pears on the LCD panel 2 Press the Enter button to select this option 3 The LCD displays LINES ADDRESS MORE or LESS The range can be from 1 to 66 lines The range can be adjusted by pressing the button MORE or button LESS The printer can print an address which is typi cally between 3 and 8 lines 4 Press the Menu button to back out of the menu until the printer displays OFF LINE Then press the O...

Page 110: ...atch the computer settings Configure the computer to use either the XON XOFF or DTR handshaking settings to communi cate with the DA700 DA750 These sub menus are used to change the DA700 DA750 serial communications A Baud Rate B Parity C Word Length and D Line Termination NOTE For DOS systems only Enter the MODE command each time the computer is turned on or it can be put into the autoexec bat fil...

Page 111: ...al the line termination can be modified The menu choices are CR CR LF LF CR CR LF LF LF CR CR LF CR LF and CR CR LF LF CR LF To use the Communications option 1 Press the ON LINE button until the display reads OFFLINE 2 Press the Menu button for four seconds to display the Setup Menu 3 Press the or buttons to scroll through the Setup Menu options until the Communications option appears on the LCD p...

Page 112: ...r data When you enable this option instead of addresses printing a Hex dump of the data stream prints on the mate rial To use this option the printer must be attached to a com puter 1 Press the or buttons to scroll through the Setup Menu options until 6 Hex Dump Mode appears 2 Press the Enter button to select this option which config ures the printer to print raw ASCII data This is very use ful wh...

Page 113: ... SO SI DLE DC1 DC2 DC3 DC4 NAK SYN ETB CAN EM SUB ESC FS GS RS US SP 0 1 2 3 4 5 6 7 8 9 A B C D E F G H I J K L M N O P Q R S T U V W X Y Z _ a b c d e f g h i j k l m n o p q r s t u v w x y z DEL 0 1 2 3 4 5 6 7 8 9 10 11 12 13 14 15 0 1 2 3 4 5 6 7 0 16 32 48 64 80 96 112 D E C H E X MSB LSB Hex Chart 6 Hex Dump Mode continued ...

Page 114: ... address will be printed on several envelopes 3 to 5 be cause Hex codes are two digits each separated by brackets Since a capital letter A is a Hex 41 there are 4 elements printed for each character of the address When reviewing addresses printed in Hex mode start from the end of the address ZIP Code 30 s number and count backward toward the beginning of the address Count the number of CRs 0D and ...

Page 115: ...ter C Menu Language A Symbol Set The symbol set contains the International Standards Orga nization ISO character set substitution tables They include the following ISO 6 ANSI ASCII ISO 69 FRENCH ISO 21 GERMAN ISO 4 UK ISO 60 NORW DAN ISO 11 SWED FIN ISO 15 ITALIAN ISO 17 SPANISH ISO 61 NORW DAN ISO 10 SWED FIN ISO 16 PORTUGUESE ISO CHAR SET ISO 8859 Roman 8 WINDOWS LATIN PC 8 ...

Page 116: ...sh To use this option 1 Press the or buttons to scroll through the Setup Menu options until the Language option appears on the LCD panel 2 Press the Enter button to select this option 3 Press Enter to select the Language option you want to use A B or C 4 Press the button or button to view the menu languag es available Press Enter to select an option 5 When you ve finished making selections press t...

Page 117: ... this option 1 Press the or buttons to scroll through the Setup Menu options until 8 FEED DELAY appears on the LCD panel 2 Press the Enter button to select this option The time delay 0 to 30 seconds can be adjusted by pressing the button MORE or button LESS 3 When you ve finished making selections press the Menu button to back out of the menu until the printer displays OFF LINE Then press the ON LI...

Page 118: ... or buttons to scroll through the Setup Menu options until 9 AUTO ENVELOPE EJECT ap pears on the LCD panel 2 Press the Enter button to select this option 3 Press the button ON or the button OFF 4 Press the Menu button to back out of the menu until the printer displays OFF LINE Then press the ON LINE button to enable the printer 9 Auto Envelope Eject ...

Page 119: ...tal number of print cycles accumulated is also displayed This information is helpful in determining solutions to printer problems To momentarily view the ROM Revision and the Maintenance Count 1 Press the or buttons to scroll through the Setup Menu options until 10 ROM REVISION NUMBER appears on the LCD panel 2 Press the Enter button to select this option 3 Press the Menu button to back out of the...

Page 120: ...A 36 SV61027 Rev D Appendix A Control Panel Menus This page is intentionally blank ...

Page 121: ...ix B The DA700 DA750 Specifications This Appendix contains detailed hard ware and material specifications for the DA700 DA750 printer In this appendix Equipment Specifications B 2 Material Specifications B 9 ...

Page 122: ...s AC 10 Other selectable voltages 100v 220v and 240v Frequency 60 Hz 3 Hz automatic frequency selection for other voltages Fuse Type 3AG 2 Amp Slo Blo Power Consumption 126 Watts 430 BTU hr Agency Approvals UL cUL VDE GS Interface Centronics Parallel and Serial Control Language PCL5 modified Driver Compatibility Windows 98 NT ME 2000 XP Refer to the grid on the next page regarding support for the ...

Page 123: ...crosoft com posted 1 12 04 Dates subject to change including any change due to Microsoft s support cessation dates or if USPS changes requirements Should dates change they will be posted on our web site at www pb com sup port Microsoft Windows Operating System Microsoft s Not Supported Date Last Date Pitney Bowes supports drivers in stalled with MS Windows OS with AddressRight and DocuMatch Recomm...

Page 124: ...ont Enhancements Bold Expanded Outline Condensed Italic Downloadable Fonts Supports bit mapped downloadable fonts as well as bit mapped graphics logos which are downloaded as pic ture fonts Also supports PCL raster graphics Approximate memory available for downloading is 30K includes space for macros Cartridge Fonts Not Required Fonts are downloaded with addresses User Definable Parameters Font Ch...

Page 125: ... of 9 4 state bar code UK Canadian Euro Australia etc and others The printer is capable of printing 5 9 or 11 digit barcodes 5 digit barcode printing may be disabled through menu selection Delivery point barcode is generated by transmitting the three digits The printer is capable of printing planet barcode used for delivery confirmation services 2 Dimensional The printer is capable of printing an ...

Page 126: ...margin five inch 12 7 cm black only color print cartridge removed Refer to chart on page 3 3 Draft Letter Executive 14 000 13 000 11 000 NOTE Graphics affect throughput speed Stacker Capacity Input Stacker 600 10 Envelopes with Bin extension or 250 without extension in stalled Output Stacker 150 10 Envelopes FIM Facing Identification Mark The printer is capable of printing an approved FIM barcode t...

Page 127: ...arcode when it is used Equipment Specifications continued Leading Edge Bottom Dotted line illustrates the flap profile on back side of envelope Trailing Edge Top Right Feed Direction Effective Print Area The printable width is 9 4 inches measured from the right side of the mailpiece The printable height is 15 inches measured from the bottom edge of the mailpiece See the figure below Printhead InkJet...

Page 128: ...hin 3 0mm Skew within 2 1 2 degrees Environmental Limits Operating Conditions Temperature 55 to 95 F 12 to 35 C Humidity 8 to 80 Maximum Wet Bulb Temperature 80 F 27 C Storage Conditions Temperature Printer 15 to 120 F 23 6 to 35 2 C Humidity Supplies 5 to 95 Maximum Wet Bulb Temperature 85 F 29 C Shipment Conditions Temperature Printer 40 to 140 F Humidity Supplies 5 to 100 Maximum Wet Bulb Tempe...

Page 129: ...aper Card stock Brown kraft Manila Noise Level Idle Mode 6 6 Bel A Operating Mode 7 3 Bel A Operator position no more than 65 dBa referenced to 20 µpa Recommended Usage Pitney Bowes has tested this machine under many different conditions and recommends that you do not exceed the us age levels specified below Monthly usage is 250 000 pieces 86 000 pieces per month typical NOTE Usage beyond these re...

Page 130: ...ge which is covered by a flap with an adhesive seal Catalog envelopes have an opening along their short edge which is closed by a flap with an adhesive seal Postcards have no folds or bends The printable side may have a higher surface roughness than the non printable side Self mailers may be of C Z or 1 2 folded construction They may not exceed the maximum allowable thickness as specified on the p...

Page 131: ... Square 6 1 2 x 6 1 2 165 x 165 6 3 4 Commercial 3 5 8 x 6 1 2 216 x 165 8 1 2 Square 8 1 2 x 8 1 2 261 x 261 4 Baronial 3 5 8 x 5 1 8 92 x 130 5 Baronial 4 1 8 x 5 5 8 105 x 142 5 1 2 Baronial 4 3 8 x 6 3 4 110 x 171 6 Baronial 4 3 4 x 6 1 2 121 x 165 7 3 4 Official 3 7 8 x 7 1 2 98 x 190 7 Official 3 3 4 x 6 3 4 95 x 171 8 5 8 Official 3 5 8 x 8 5 8 92 x 219 9 Official 3 7 8 x 8 7 8 98 x 225 10 Offic...

Page 132: ...B 12 SV61027 Rev D Appendix B DA700 DA750 Specifications This page is intentionally blank ...

Page 133: ...Index ...

Page 134: ...5 2 Preventive Maintenance 5 2 Print Head Cartridge 5 2 Rubber Rollers 5 2 Sensor 5 3 Cleaning Printhead Cartridge 5 2 Clear Counter A 18 Clear Memory A 17 CMYK Printing Alignment DA750 5 5 Communications A 26 Baud Rate A 27 DTR handshaking A 26 Line Termination A 27 Parallel interface A 26 Parity A 27 Serial interface A 26 Word Length A 26 XON XOFF A 26 Control Language B 2 Control Panel 3 7 A 2 ...

Page 135: ...ge 2 3 Installing 2 12 Removing 2 13 Installation Quality Report 2 3 Installing Ink Jet Cartridge 2 12 2 13 Interface Centronics Parallel B 2 Interface Panel 3 7 Interface Problems 6 5 Intermittent Feed 6 2 Internal Fonts 3 2 J Jam Paper 6 7 Shuttle 6 8 Job Settings A 19 L Language A 31 Using Menus to select A 32 Letter Print Quality A 11 Light Material 3 12 Light Print 6 4 Line Spacing A 9 Lines ...

Page 136: ... 2 PostNet Certificate 2 3 Power Cord 2 3 Connecting 2 11 Receptacle Location 2 11 Preventive Maintenance 5 2 Print No printing 6 3 Print Driver Installation 4 2 Print Head Purge A 24 Test A 22 A 24 Using Menu to A 23 Print Modes Print Resolution Available B 2 Print Position Accuracy B 8 Print Qualities 3 2 Print Quality 3 18 A 11 Setting with Menu A 12 Print Quality Problems 5 2 6 3 6 4 6 5 Printe...

Page 137: ...oiding 3 15 Sliding Fence 2 3 Assembling 2 7 Smudging Address 6 4 Specifications Address Recovery B 3 Agency Approvals B 2 Approved Media B 9 Barcode Printing B 5 Cartridge Fonts B 4 Control Language B 2 Downloadable Fonts B 4 Driver Compatibility B 2 Effective Print Area B 7 Electrical B 2 Envelope Sizes B 11 Environmental Limits B 8 Fonts B 4 Interface B 2 Material Notes B 10 Material Size and Th...

Page 138: ...ing but no Feed Roller Move ment 6 5 Multifeed Feeds Doubles 6 3 No Communications Printer Does Not Respond 6 5 No Print 6 3 Out of Memory 6 8 Paper Out or Paper Jam 6 7 Shuttle Jam 6 8 Unwanted Bolding 6 4 Tyvek Print Quality 3 18 U Unpacking the Printer 2 2 2 3 Unwanted Bolding 6 4 User Definable Parameters B 4 Using the Menus A 3 A 4 A 5 A 6 Using This Guide 1 2 1 3 W Weight B 2 Wire Frame 3 12 ...

Page 139: ......

Page 140: ...ights Reserved Printed in the USA Web Site www pb com Customer Support 1 800 522 0020 Product Name DA700 DA750 Model Number W707 W790 For Service or Supplies sv61027RevD Printed on recyclable paper 1 Elmcroft Road Stamford Connecticut 06926 0700 www pb com ...

Reviews: