background image

HOME  | DUAL SHOT

OWNER’S MANUAL

Summary of Contents for Home Dual Shot

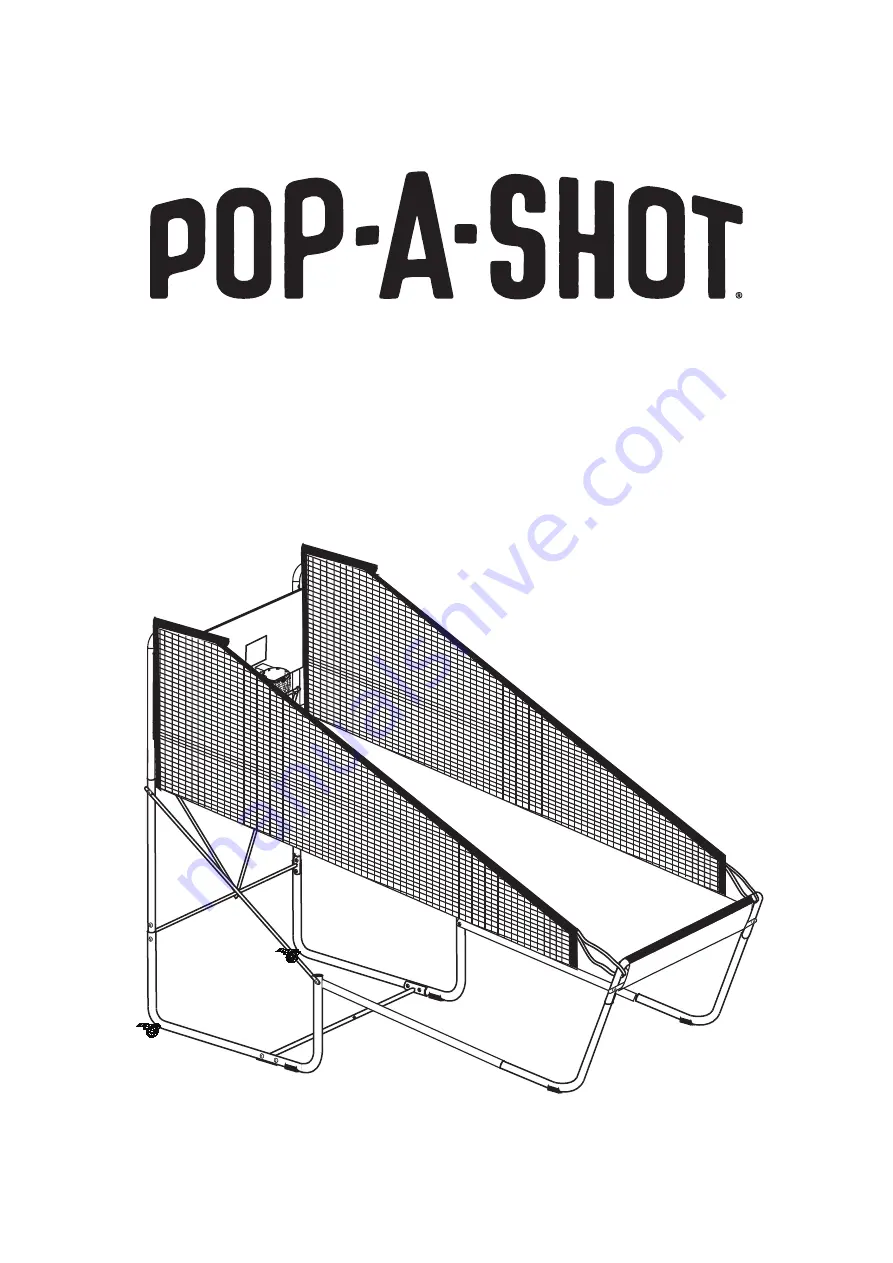
Page 1: ...HOME DUAL SHOT OWNER S MANUAL...

Page 2: ...ur Support Page at www pop a shot net support homedual There you ll find more hints and hacks to help you put together your new game We hope you love your Pop A Shot Home Dual Shot and will let your f...

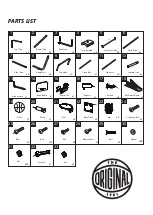
Page 3: ...d Tube Base Tube Cross Bar Side Arm Forward Tube Side Tube Allen wrench RampTube Back Board Balls Nut Bolt Bolt Bolt Medium Bolt Bolt Washer Pump Rim Back Plate Net Score Unit Adapter Screws Ball Retu...

Page 4: ...g 2A 3 Attach the Base Tubes 3 with one Connector Tube 5 using a Bolt 26 two Washers 30 and a Nut 31 Fig 1A Attach the Board Tubes 2 to the Base Tubes 3 using the spring locks Fig 2A 3 3 3 4 2 2 26 30...

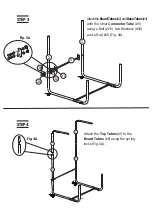
Page 5: ...oardTubes 2 andBaseTubes 3 with the other Connector Tube 5 using a Bolt 26 two Washers 30 and a Nut 31 Fig 3A Attach the Top Tubes 1 to the Board Tubes 2 using the spring locks Fig 4A 2 2 26 30 30 31...

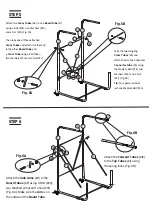
Page 6: ...s Tube using a Bolt 26 two Washers 30 and a Nut 31 Attach the Side Arms 11 to the Board Tubes 2 using a Bolt 26 two Washers 30 and a Nut 31 Fig 6A Make sure the Arm is on the outside of the Board Tube...

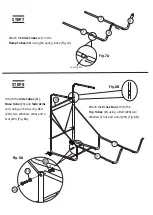
Page 7: ...s 7 to the Ramp Tubes 8 using the spring locks Fig 7A Attach the Side Tubes 7 Base Tube 3 and Side Arms 11 using an Extra Long Bolt 24 two Washers 30 and a Nut 31 Fig 8A Attach the Cross Bar 10 to the...

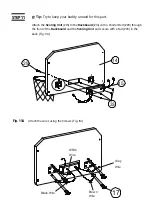
Page 8: ...3 through the Net Hooks on the Rims 21 Tip If you can grab a helper for this part Attach the Rims 21 to the Backboard 14 using a Short Bolt 27 and a Washer 30 on the front and a Back Plate 22 Washer 3...

Page 9: ...o keep your buddy around for this part Attach the Scoring Unit 15 to the Backboard 14 with a shorter Bolt 29 through the front of the Backboard and the Scoring Unit and secure with a Nut 33 in the bac...

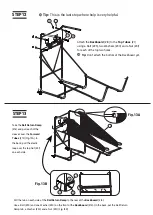
Page 10: ...the top two holes Take the Ball Return Ramp 18 and pull each of the sleeves over the Forward Tubes 12 Fig 13A In the back pull the elastic loop over the top Nut 31 on each side Pull the tab on each s...

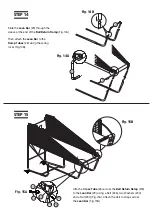
Page 11: ...4A Then attach the Lean Bar to the Ramp Tubes 8 using the spring locks Fig 14B Attach a Cross Tube 6 across the Ball Return Ramp 18 to the Lean Bar 9 using a Bolt 26 two Washers 30 and a Nut 31 Fig 15...

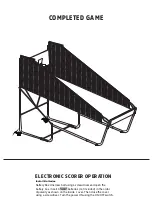
Page 12: ...sing a screwdriver and open the r e d r o e h t n i d e d u l c n i t o n s e i r e t t a b A A A 3 t r e s n I x o b y r e t t a b of polarity as shown on the inside cover Then close the cover using...

Page 13: ...ANY S LIABILITY IS LIMITED TO THE REPAIR OR REPLACEMENT AT ITS OPTION OF ANY DEFECTIVE PRODUCT AND SHALL NOT INCLUDE ANY LIABILITY FOR INDIRECT INCIDENTAL OR CONSEQUENTIAL DAMAGES OF ANY KIND THIS WAR...

Reviews: